Summary
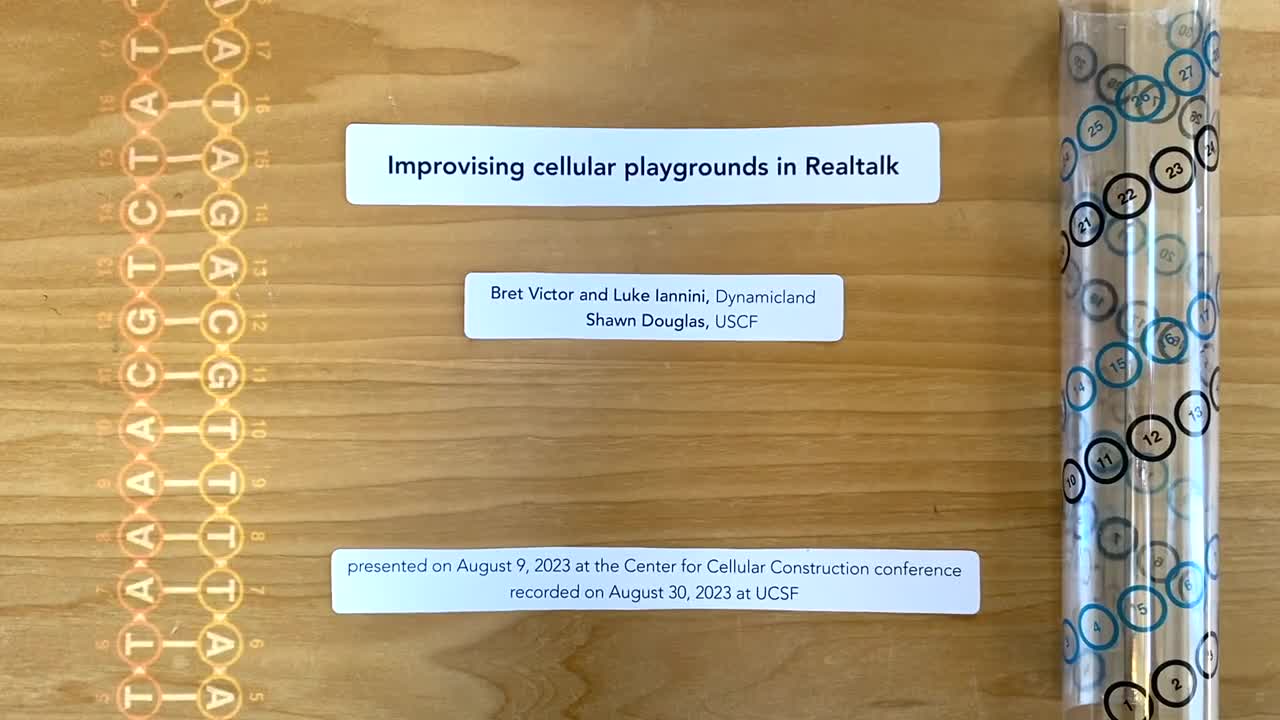
On August 9, 2023, we gave a conference presentation at a meeting of the Center for Cellular Construction. The subject of the presentation was a cellular biology experiment going on at UCSF. But the presentation itself was also a kind of experiment.
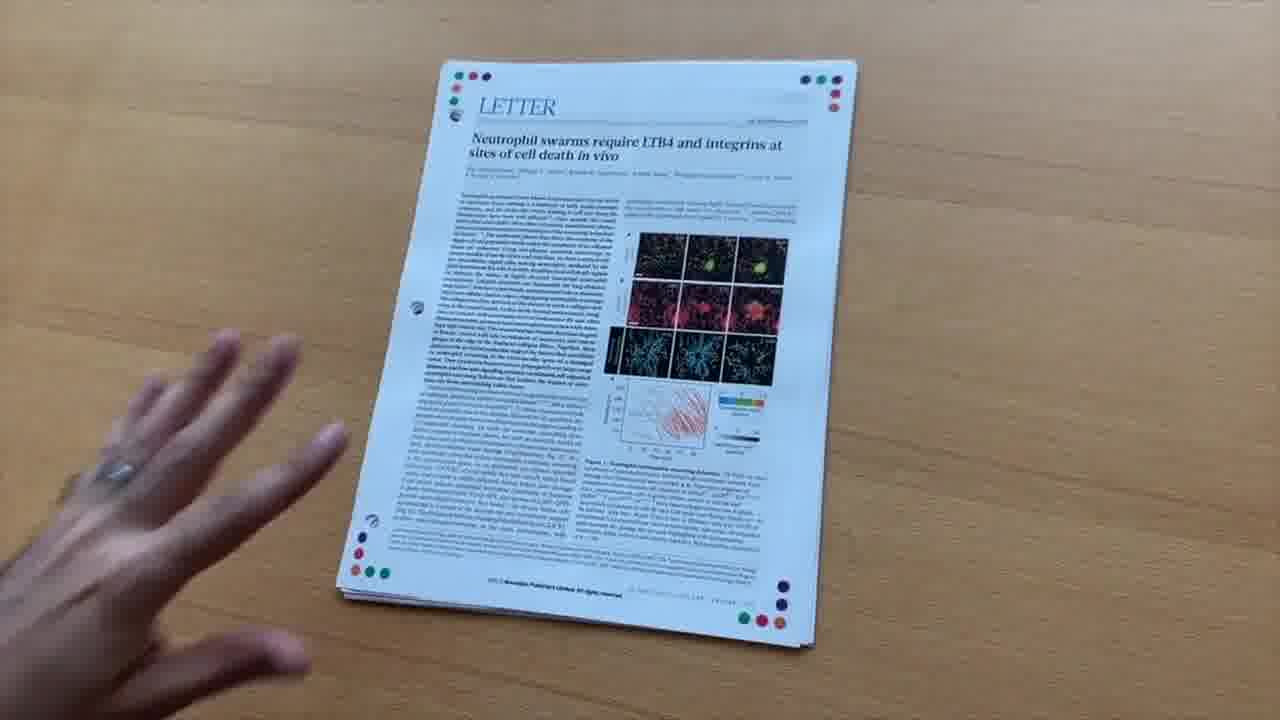
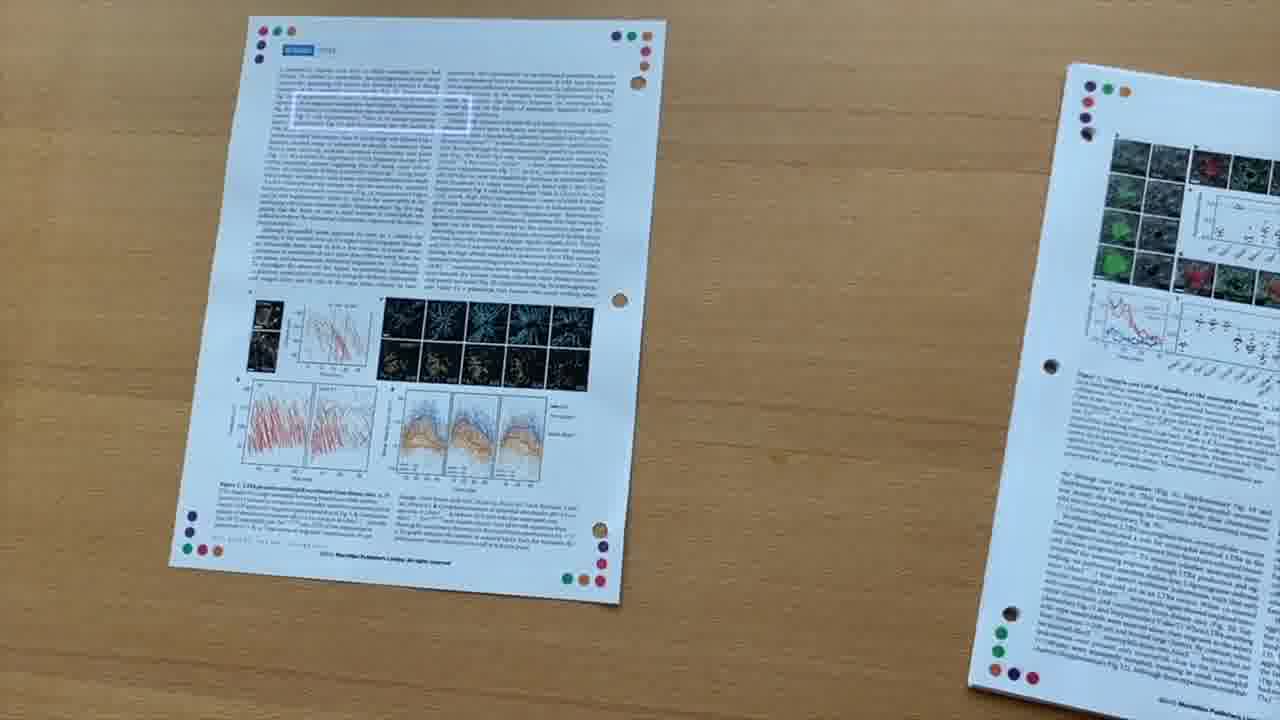
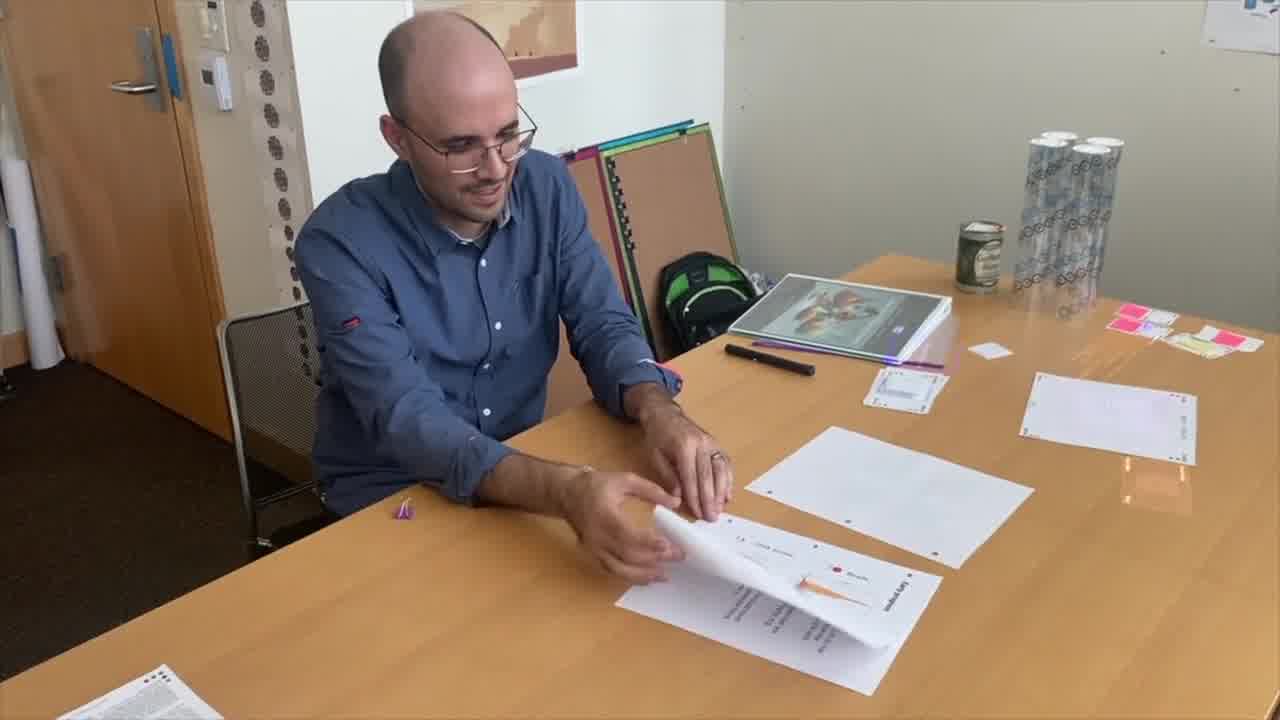
Instead of PowerPoint slides, we flipped through physical pages with our hands, including research papers with videos embedded in them.
We explained the history of the field by reconstructing seminal projects as computational models, live on the table, and kept everything in context with a persistent timeline over on the wall.
We demonstrated the current experiment also by building it live, with our actual design tools, and showed the resulting data.
After the presentation, the audience got to try these tools for themselves.
This all took place in Realtalk, our environment for combining computation with real-world objects.
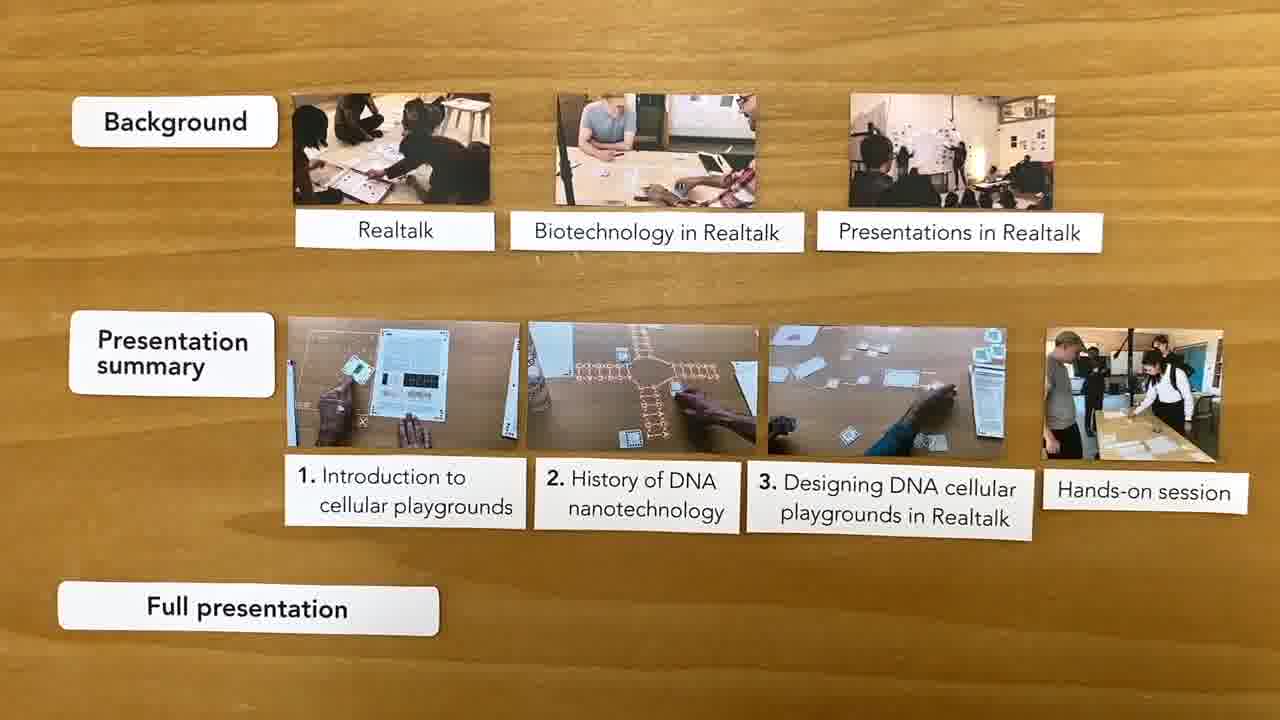
In this video, I'll give a brief background on Realtalk, including past biotechnology projects, as well as past presentations.
Then I'll give a summary of each of the three parts of our conference presentation, and show what was significant about them.
And I'll talk about the session after the presentation where audience members could then try it out for themselves.
This meta-presentation will be about 15 minutes. And that'll be followed by a recording of the full presentation itself, which is 70 minutes, and assumes a more specialized audience.
Background
Realtalk is a computing environment, or operating system, for real people working together in the real world. There are no screens and no apps. Instead, people craft computational activities using real-world materials, out in the open, where everything is immediately accessible and everyone can learn from everyone else. [more]
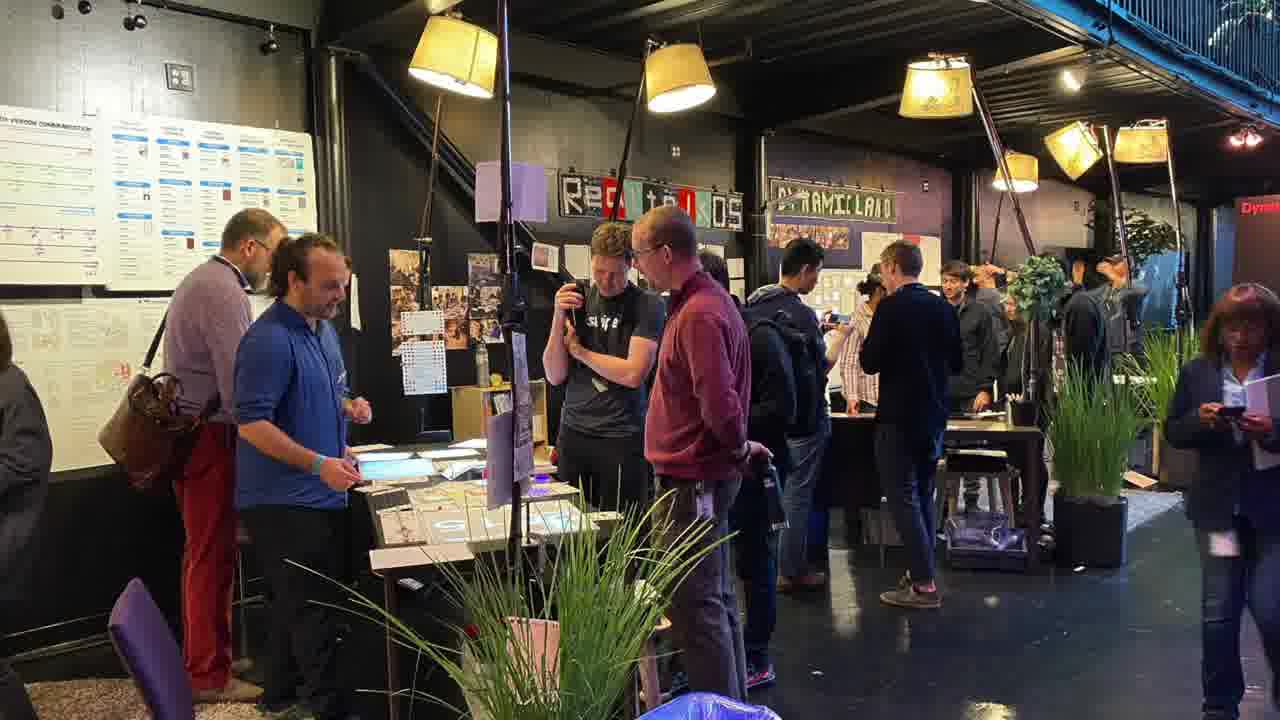
For several years, we ran a community space called Dynamicland, where a thousand people of all kinds, with different interests and backgrounds, made hundreds of projects to communicate their own ideas.
One of our community members was Shawn Douglas, who runs a DNA nanotechnology lab at UCSF. Both Shawn and the Dynamicland team were very interested in how Realtalk could support the work of scientists, as well as scientific thinking for everyone.
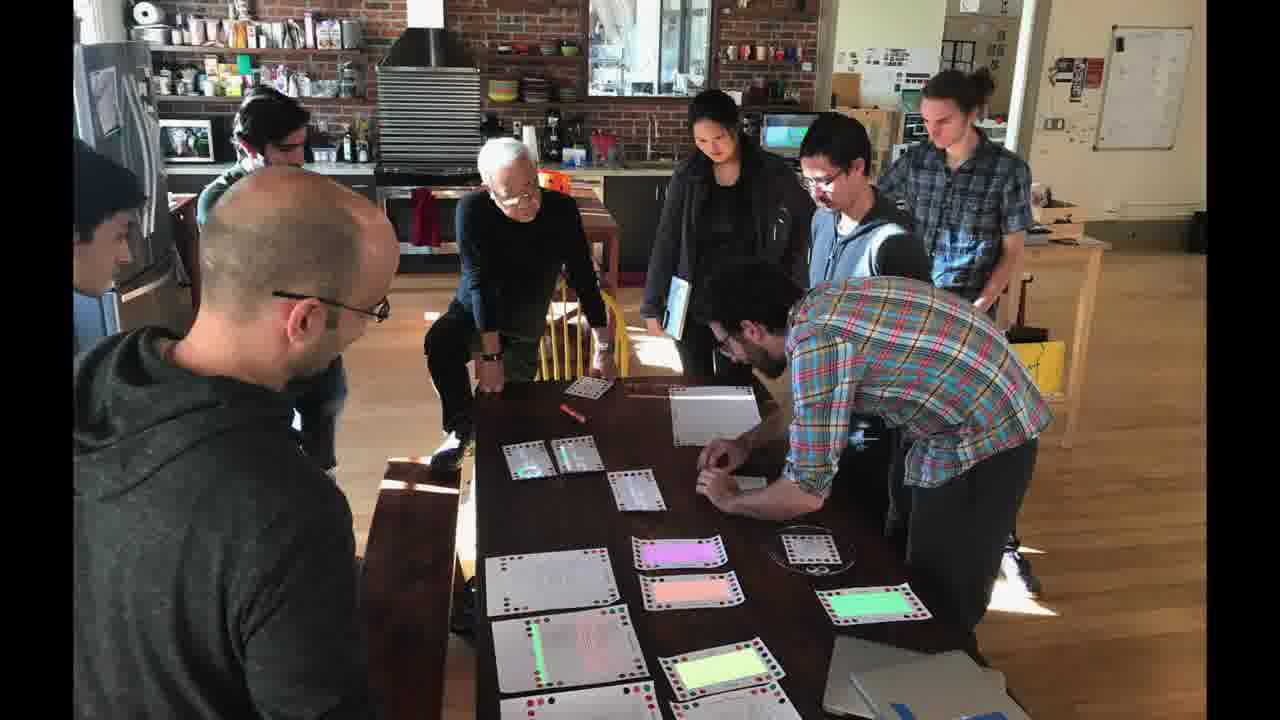
In 2017, Shawn brought some colleagues to Dynamicland to build a tangible environment for designing recombinant DNA. We all created it together, out on the table, in a group discussion. [more]
In 2021, we prototyped a DNA CAD tool where each component of the program could be introduced one at a time, and explored in conversation, as we gradually built up the complete program to design a DNA nanostructure. [more]

In 2022, we prototyped a set of tools for biomolecular design. We could design molecules together by building scale models on the table, explore ideas by hand-drawing over computational renderings, and actually see what we were doing in the wet lab. [more]
And in 2023, one thing that happened was an opportunity to give a presentation.
Realtalk was intended from the beginning as medium of communication, for people to discuss ideas using computational models. And one way we wanted to use this medium was to give “dynamic presentations”.
At Dynamicland, there were a number of presentations using Realtalk, where the presenter dealt out programs and dynamic media instead of showing slides. [1] [2]
Some presentations were for a seated audience, and other ones were more like tours around a space of computational models. [1] [2]
We also brought Realtalk to places outside of Dynamicland, and gave live demonstrations. [1] [2] [3]
What we had never done before was to go to a conference and use Realtalk to give a presentation about something other than Realtalk itself. Using Realtalk as the medium, but not the subject of the talk.
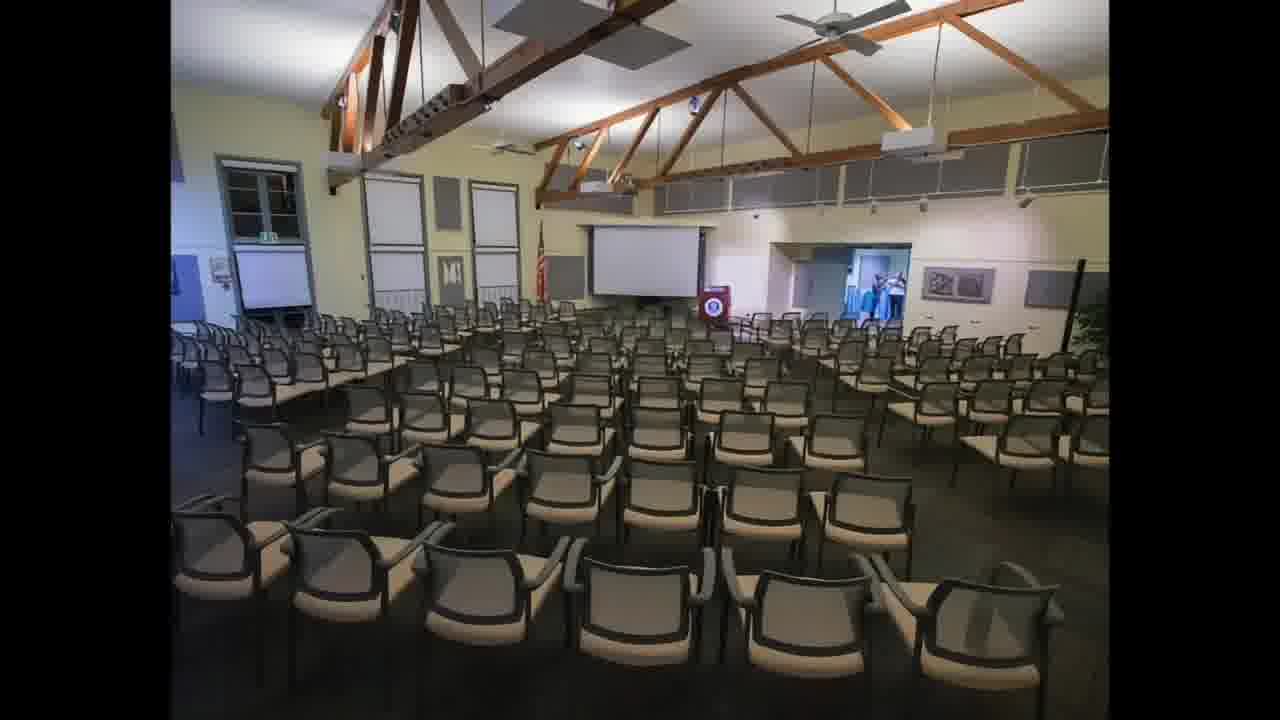
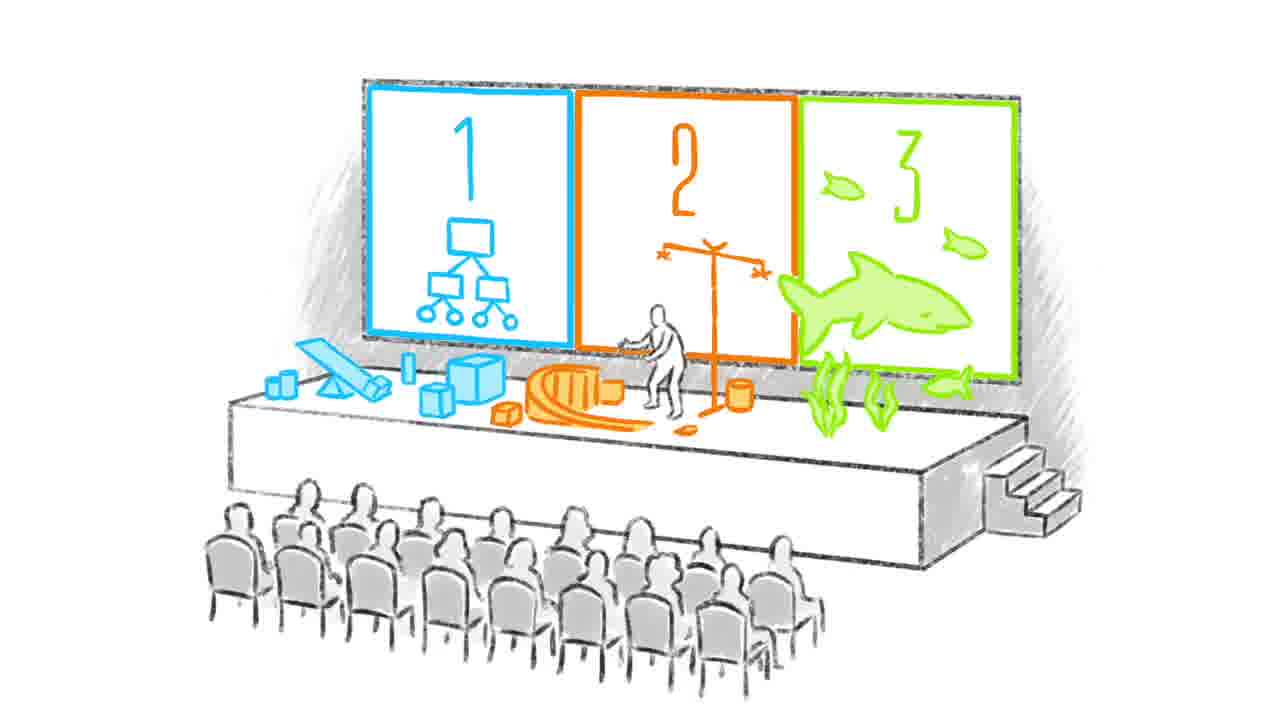
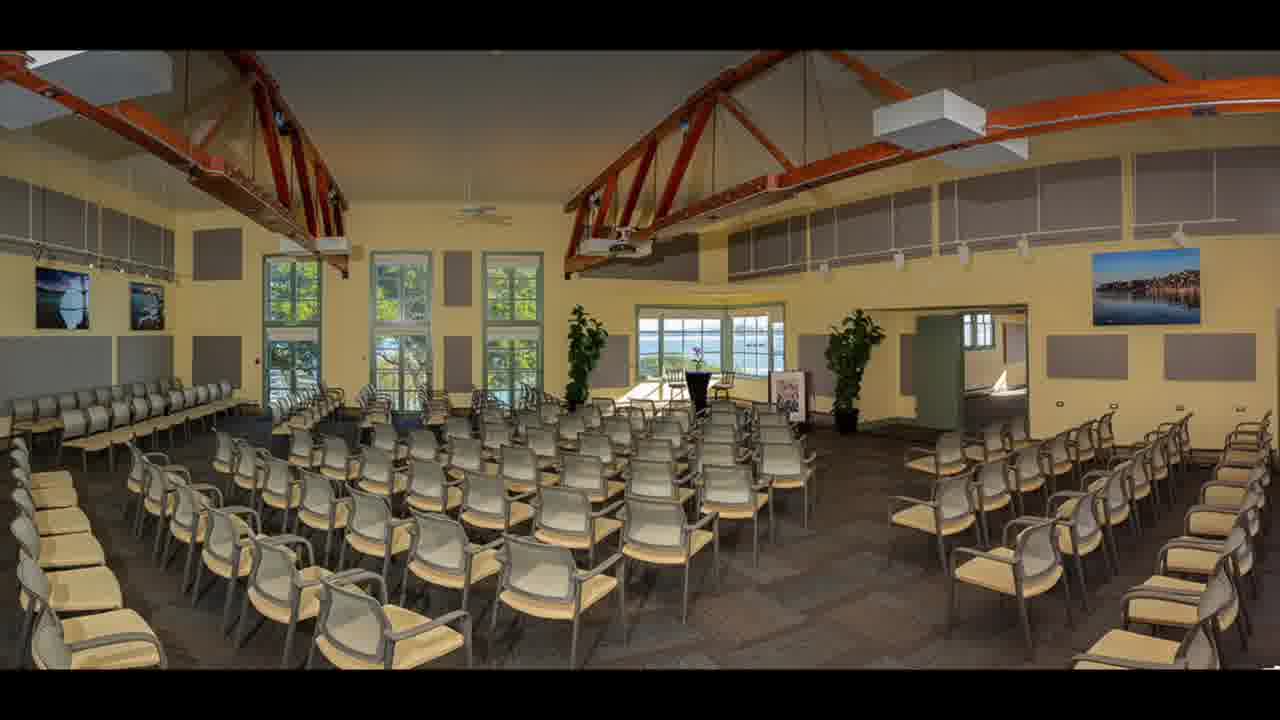
In a typical conference presentation today, it's just a speaker alone on a stage with a big screen. So they can't make use of the entire space to show context or persistent peripheral information.
The screen typically shows a sequence of slides. When the next slide is shown, the last slide disappears, so the audience can't refer back to anything.
And the sequence of slides is fixed in advance, so the presentation has to stick to the script. The materials don't help the speaker with digressions or discussion, which are the reasons you'd actually want a live speaker.
And typically the slides are just words and pictures, so the speaker isn't actually using the computer to compute anything.
Despite that, the presentation software may be tens of millions of lines of code. That's an overwhelming amount of complexity. So, most speakers can't change the program, or program their own presentations They are restricted to generic mass-market software packages.
Our goal with this presentation was to begin to demonstrate what a scientific talk could look like in a humane dynamic medium.
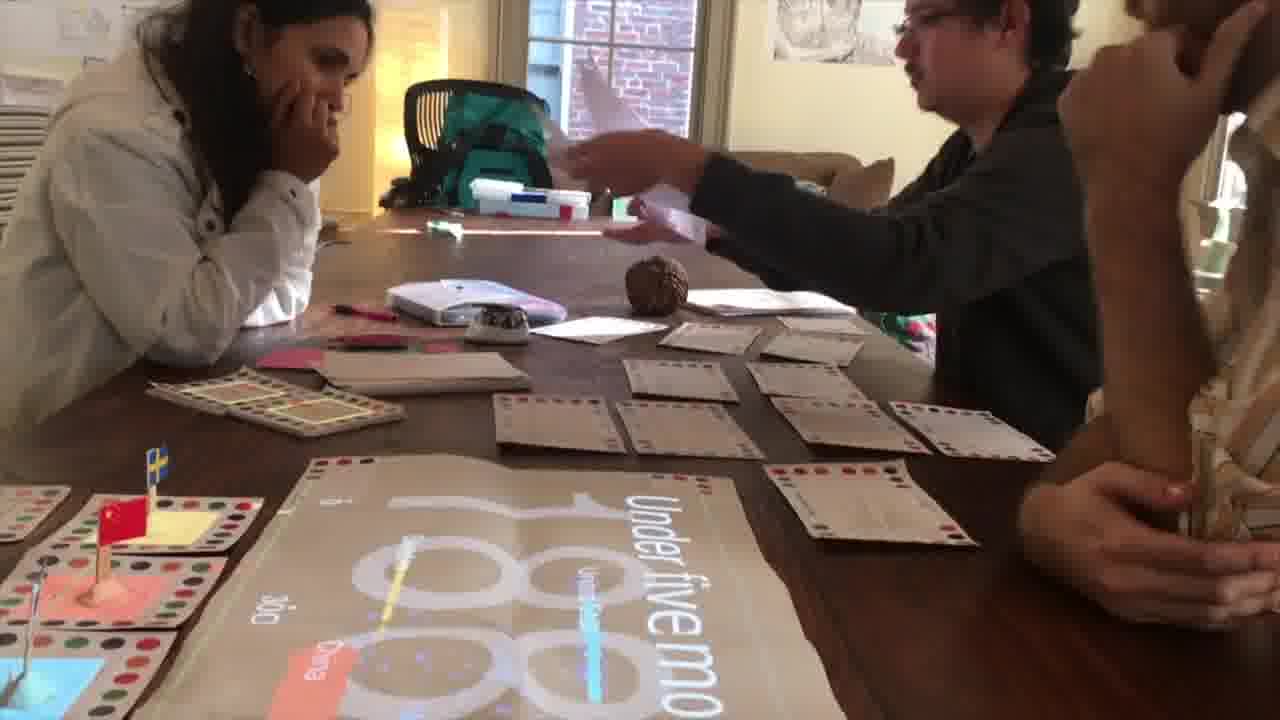
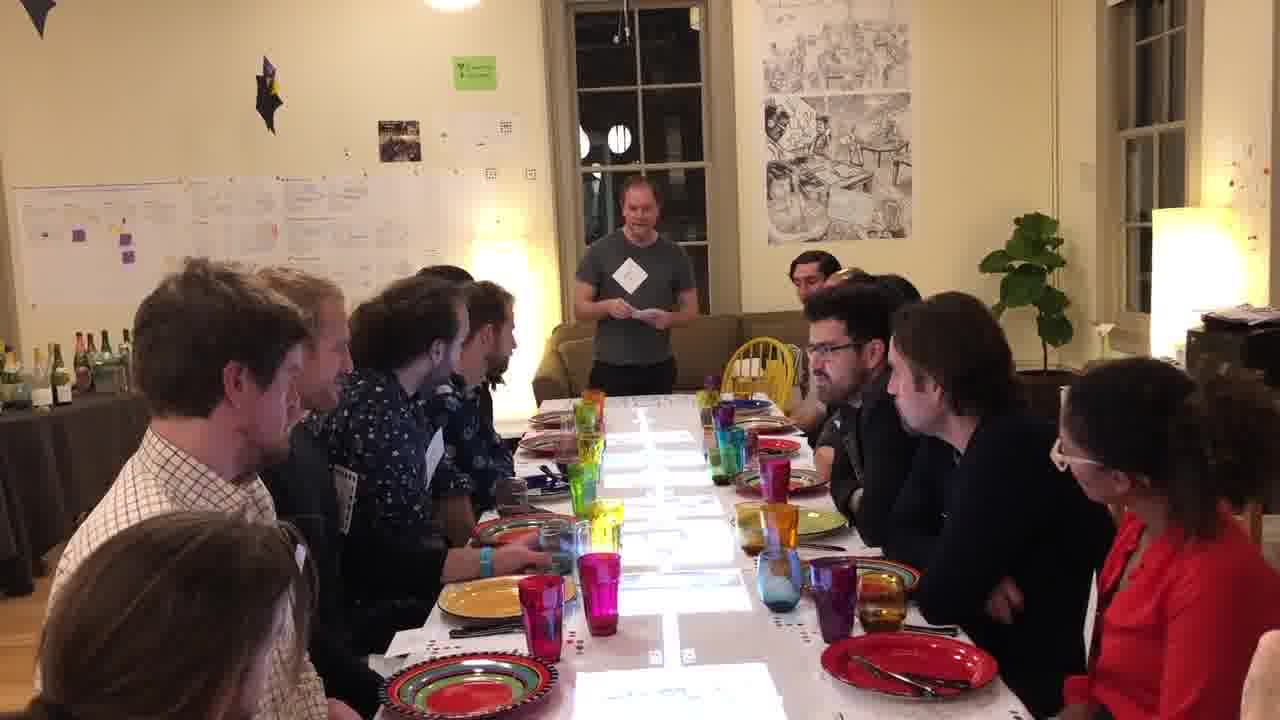
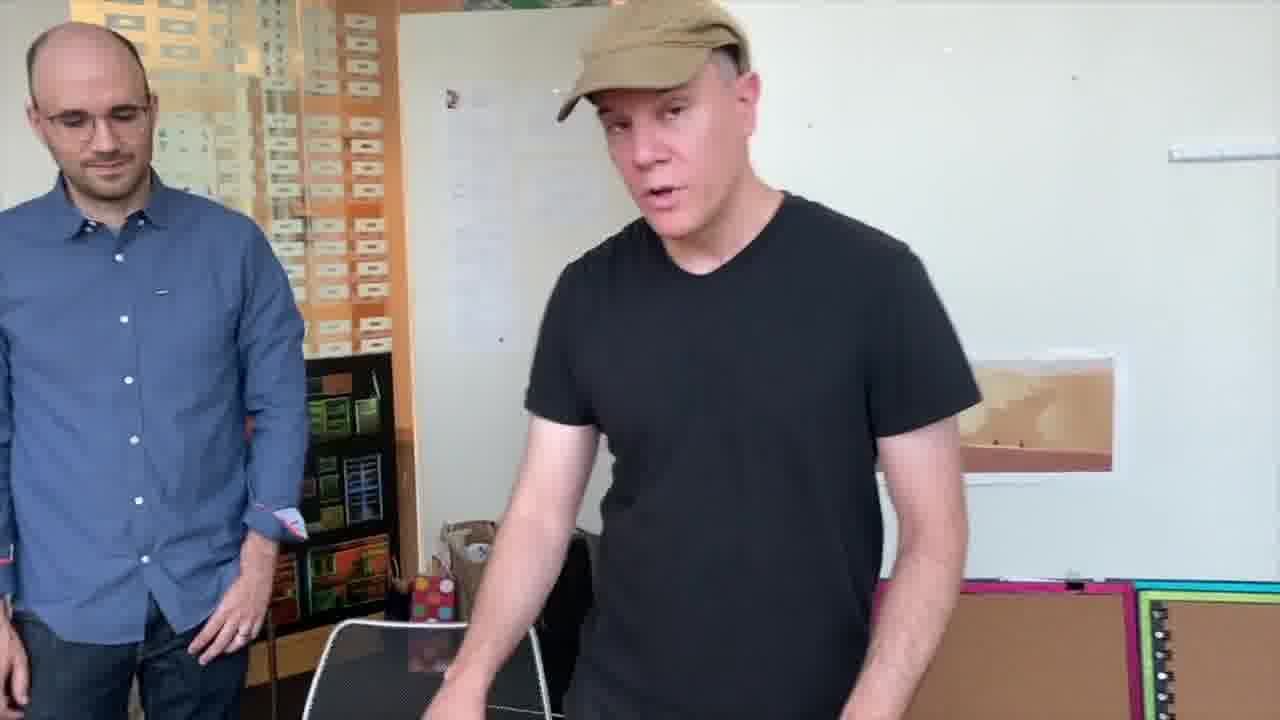
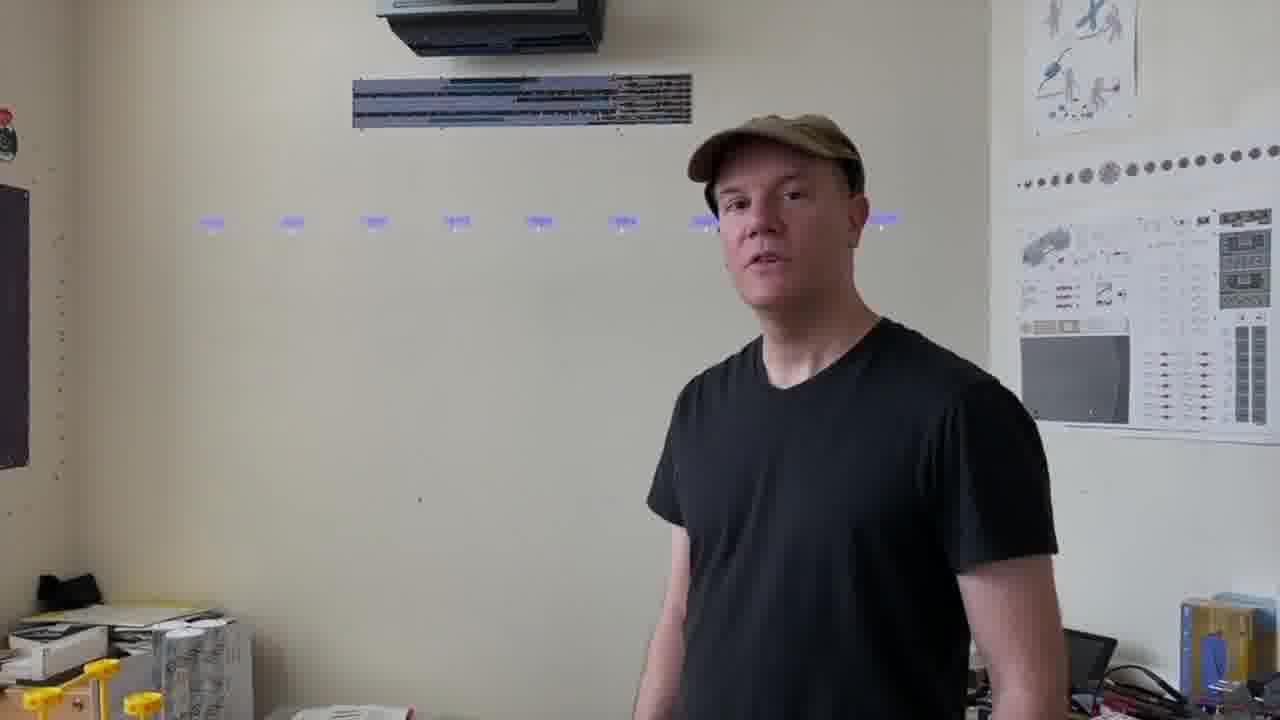
The presentation took place at a conference of cellular engineers and synthetic biologists. There were about eighty people in the audience.
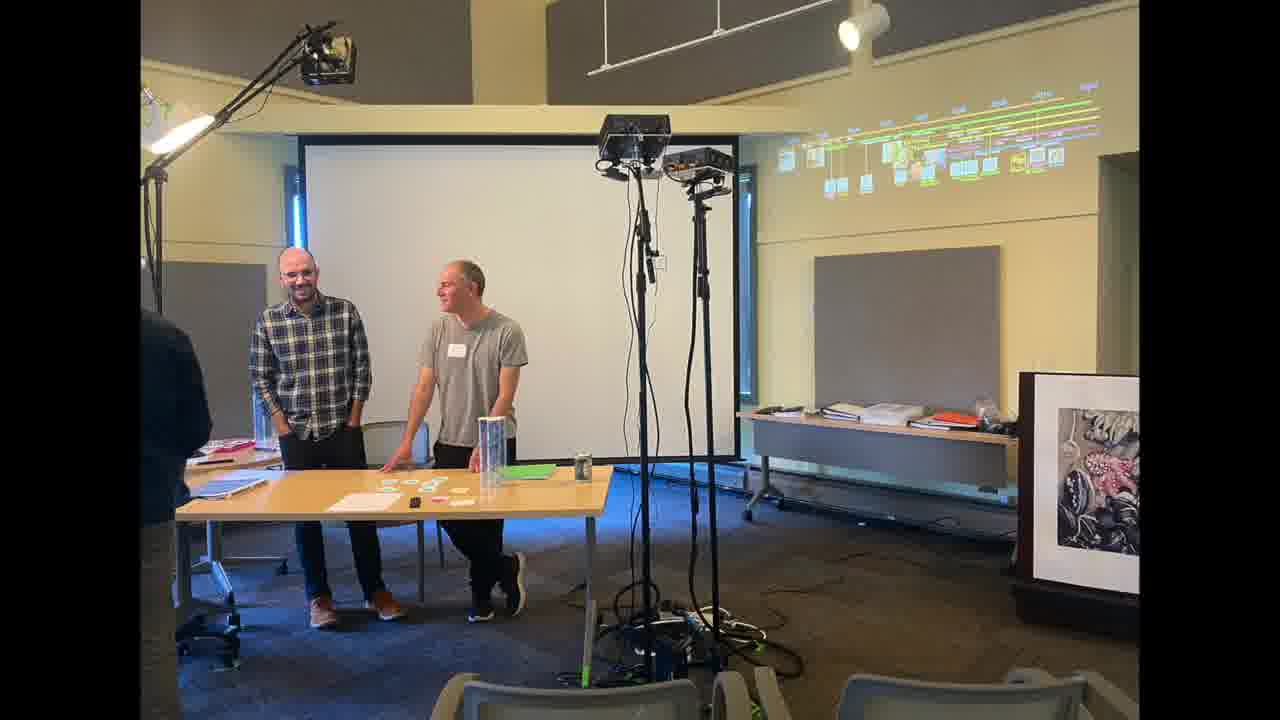
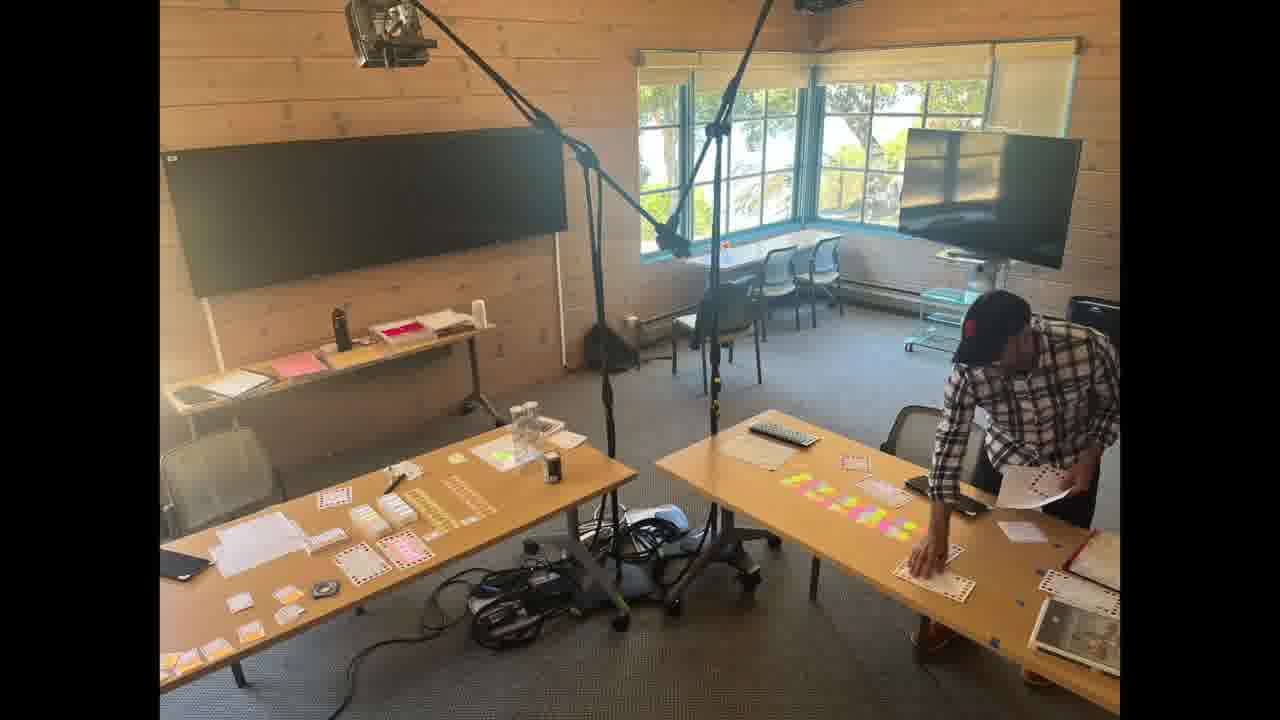
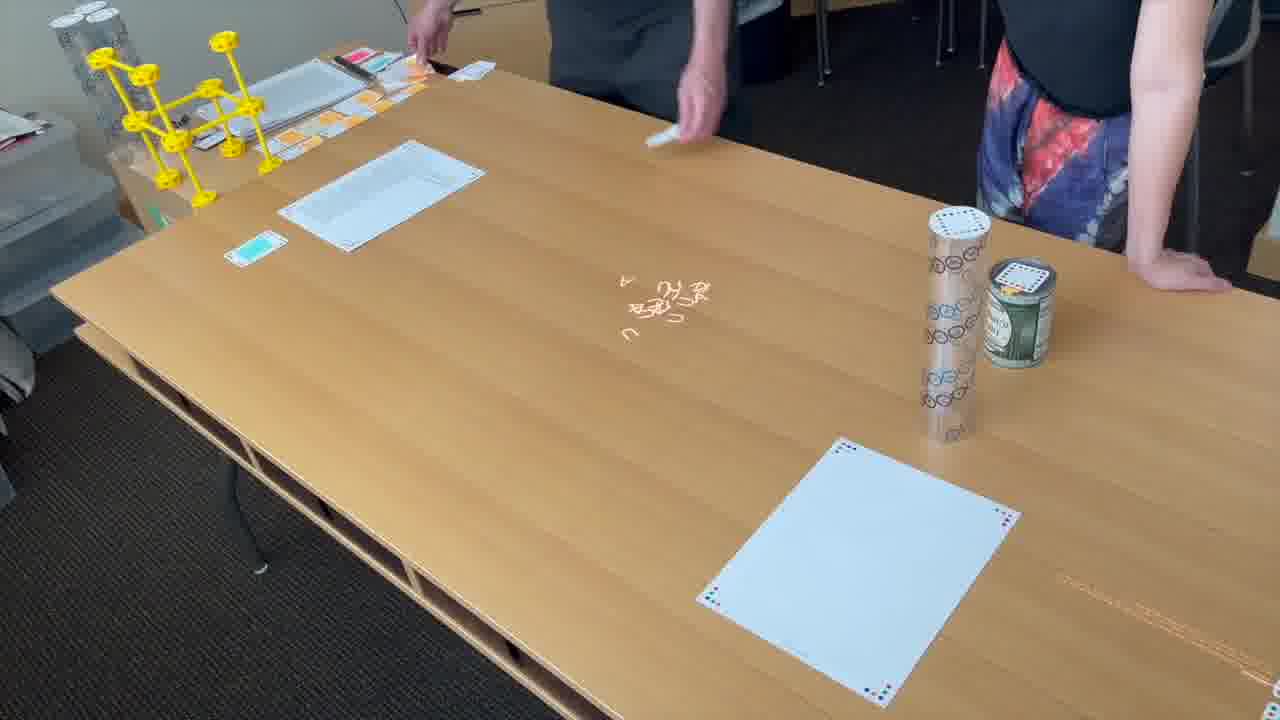
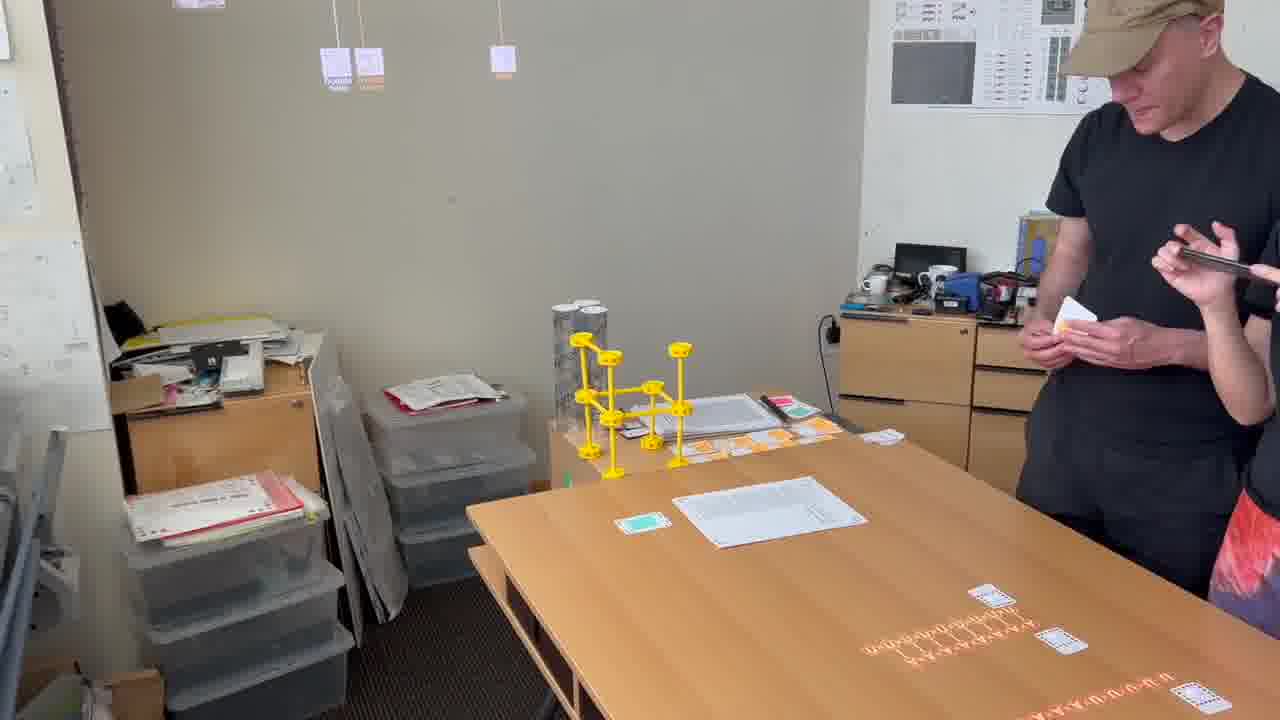
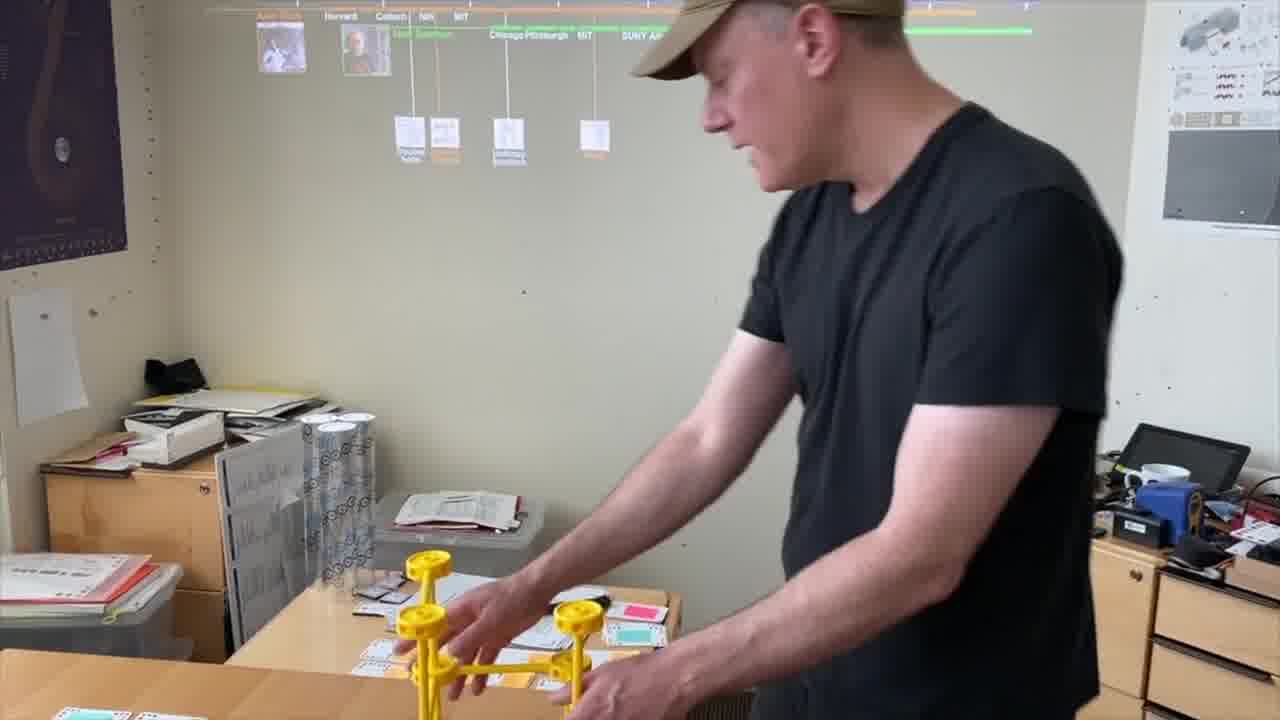
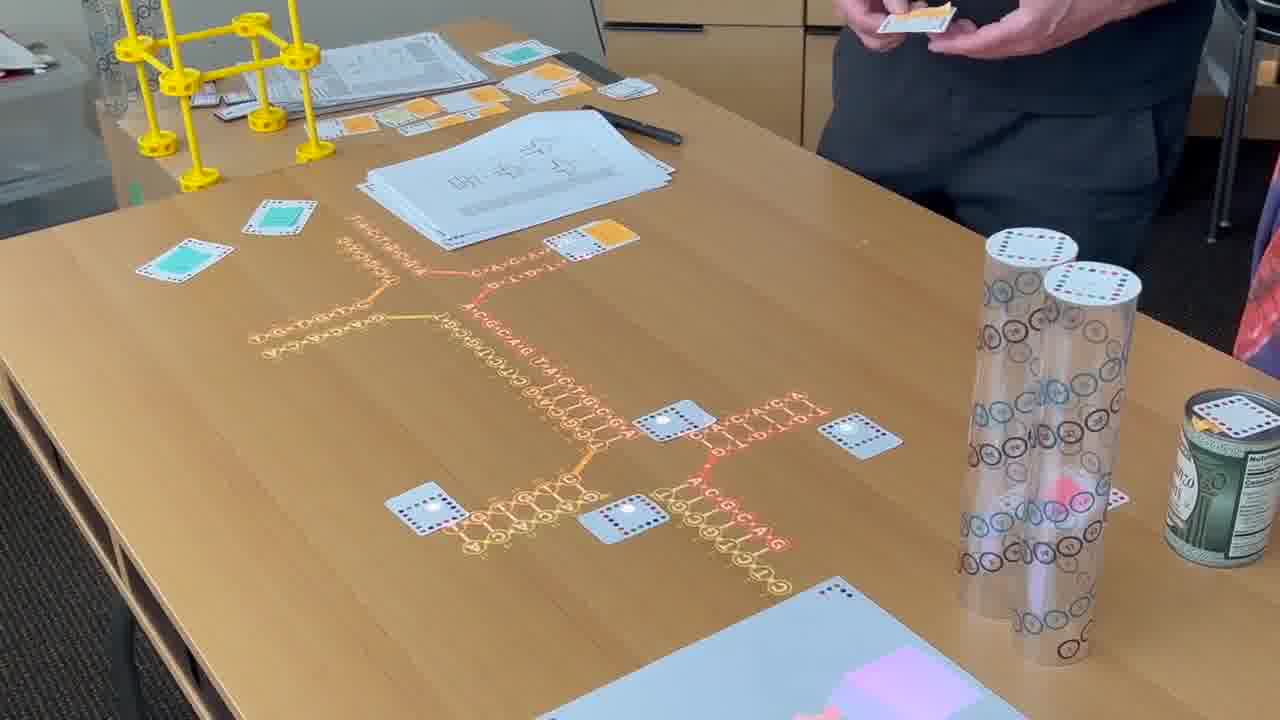
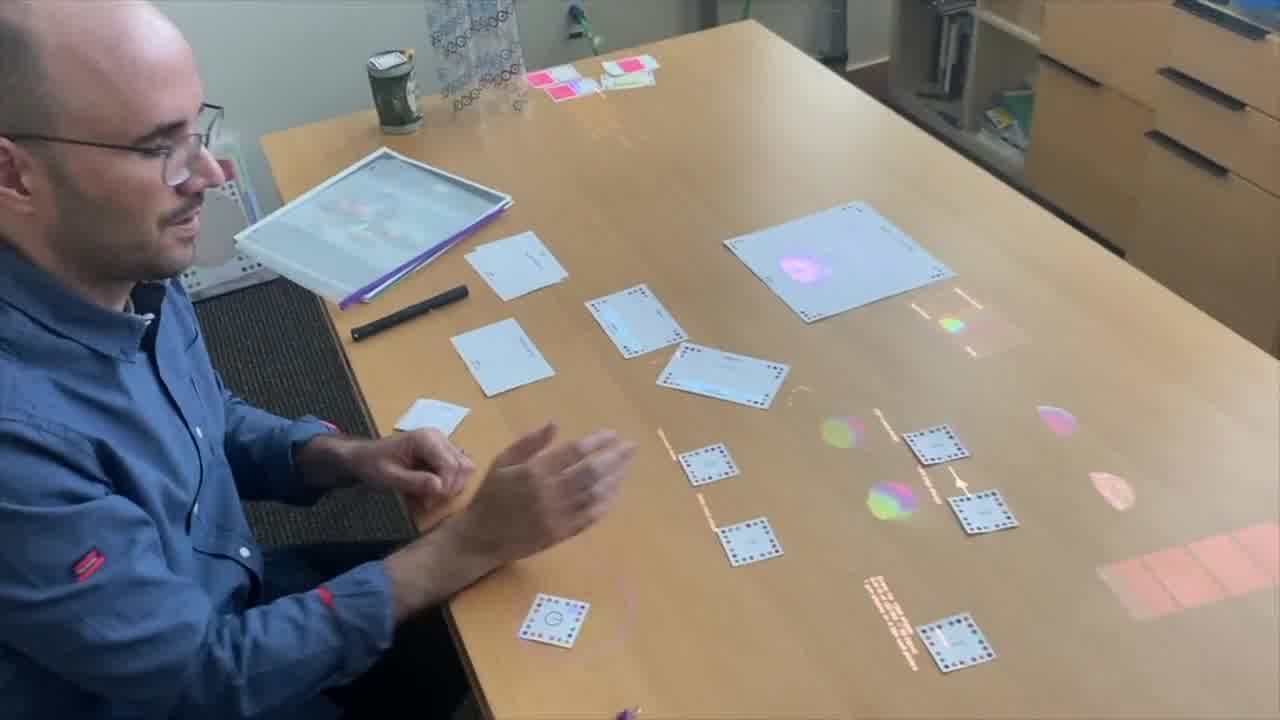
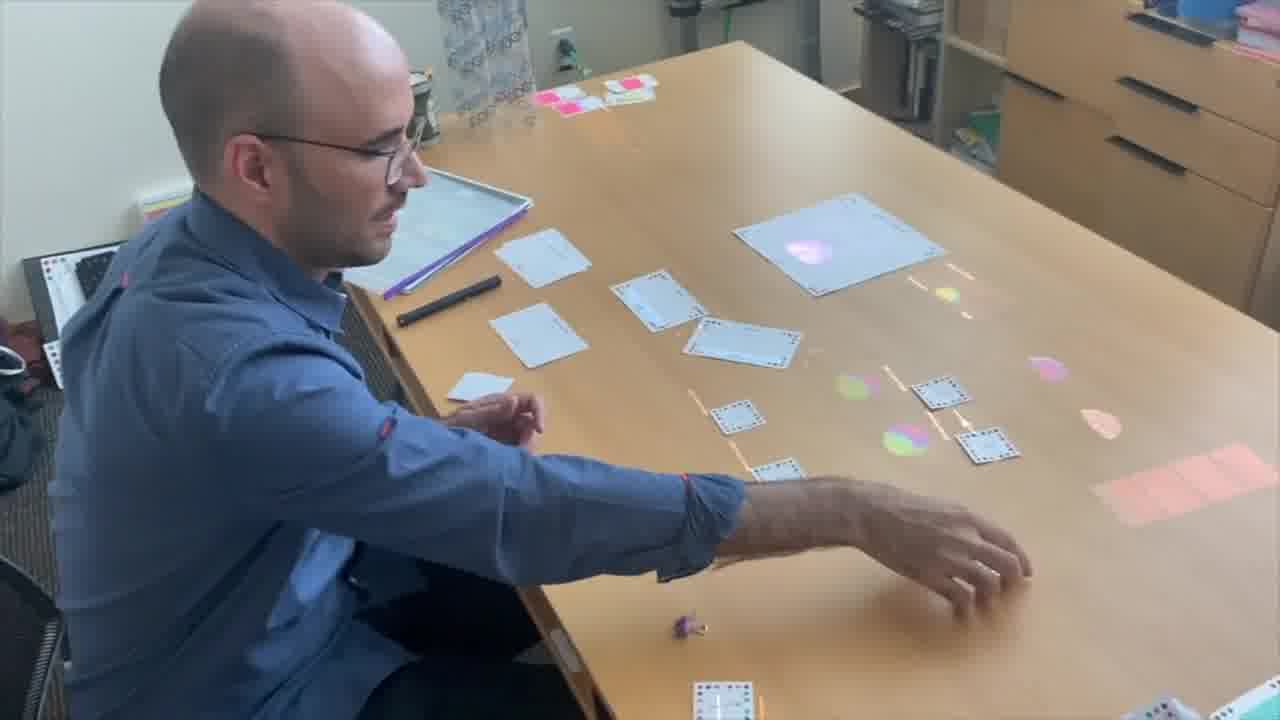
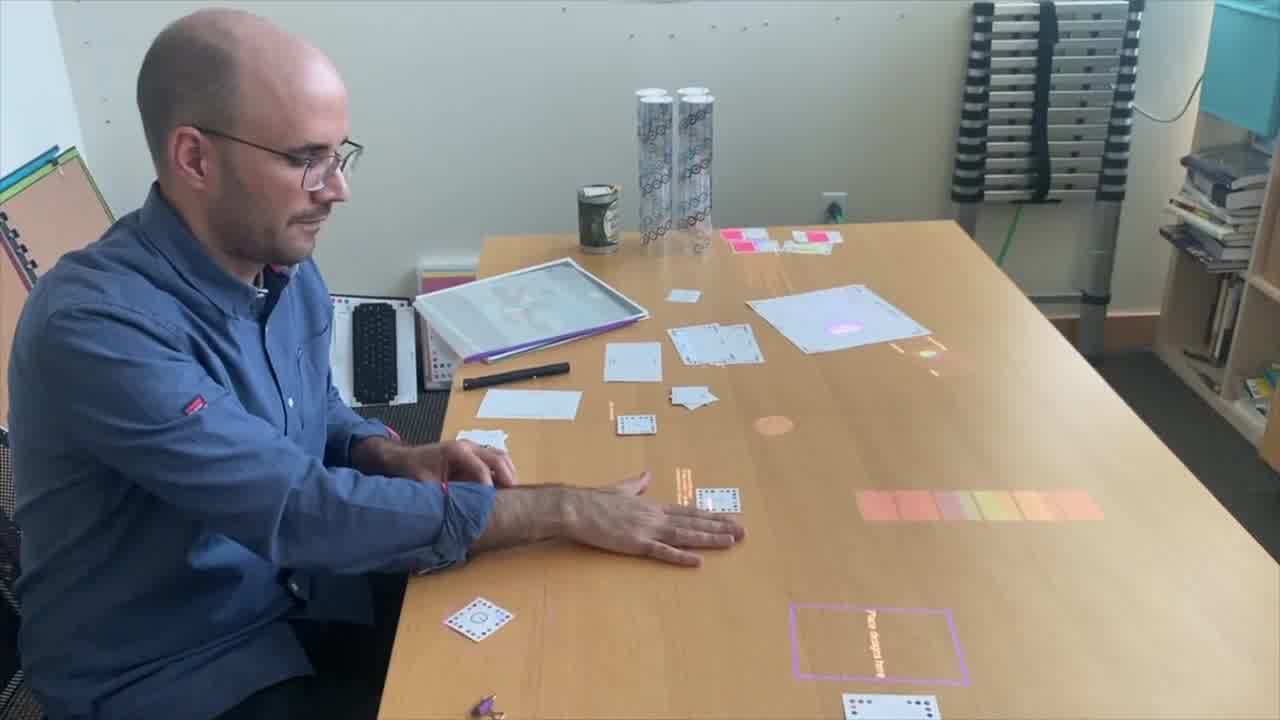
We set up the space so Shawn and I could work on a table in the front of the room, and we had a small side table for our materials.
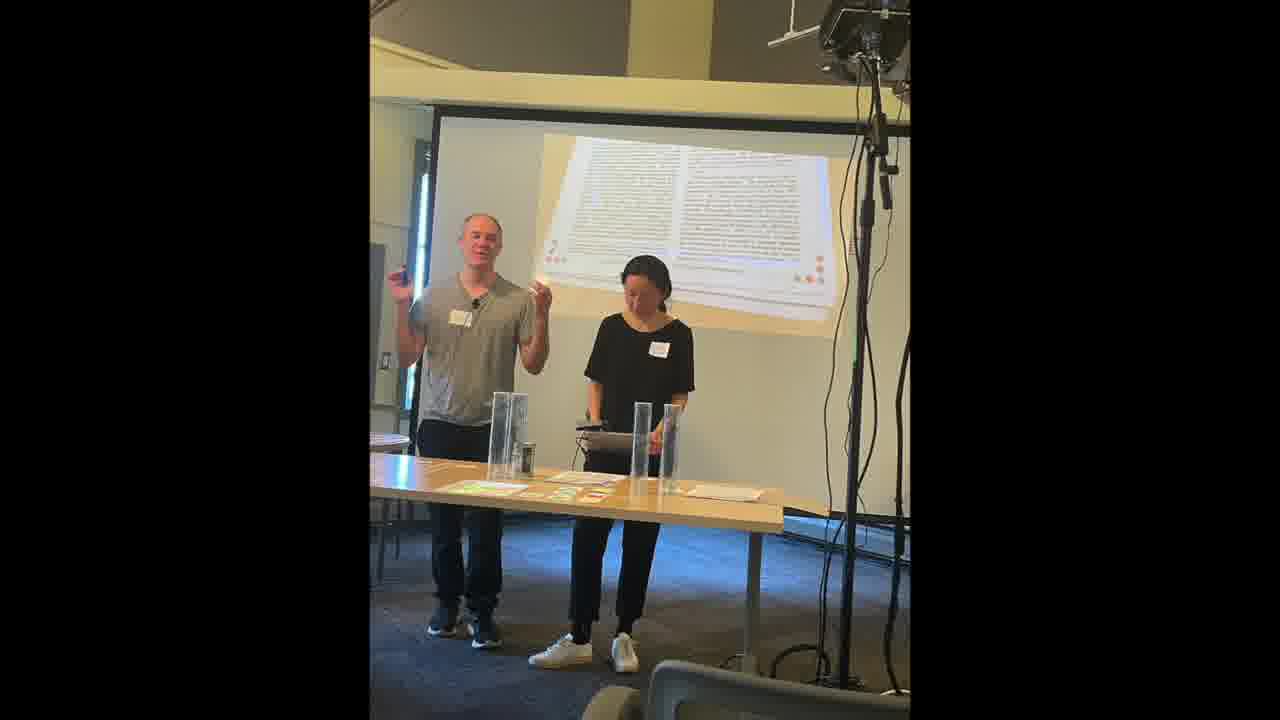
Joanne was next to us holding a camera, and the camera feed was projected on the screen behind us, so the audience could see a closer view of what we were doing on the table.
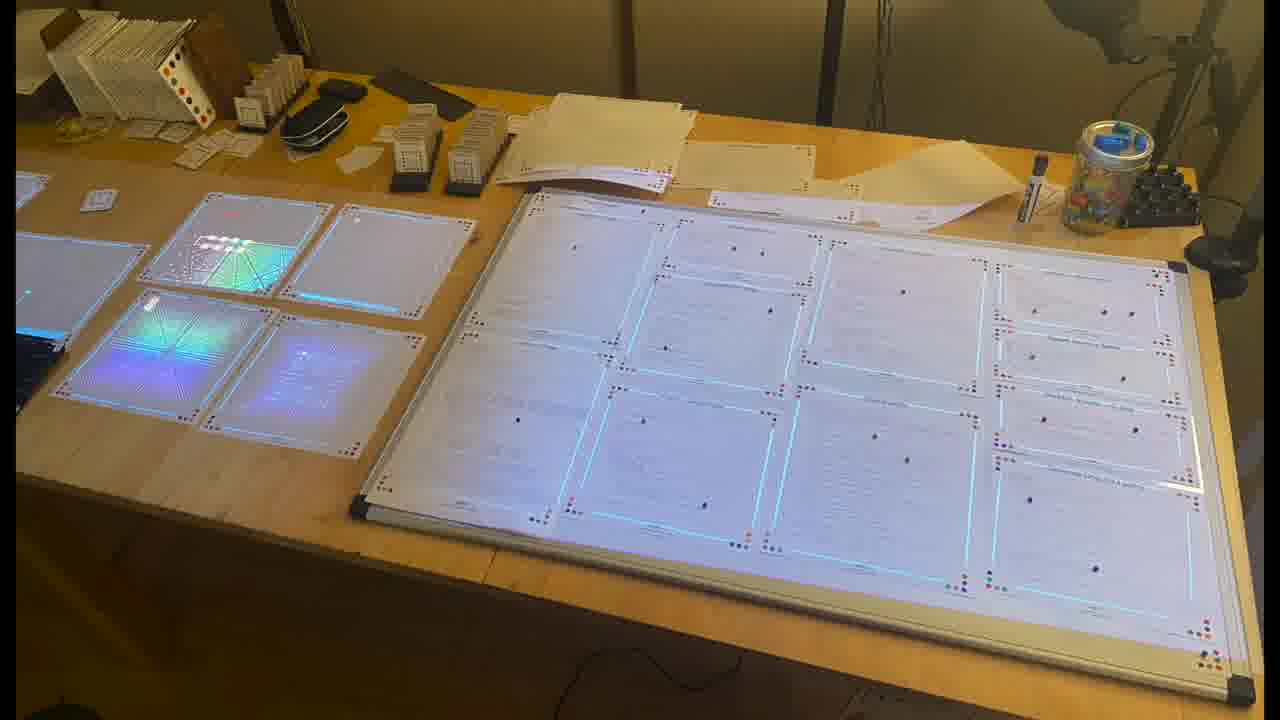
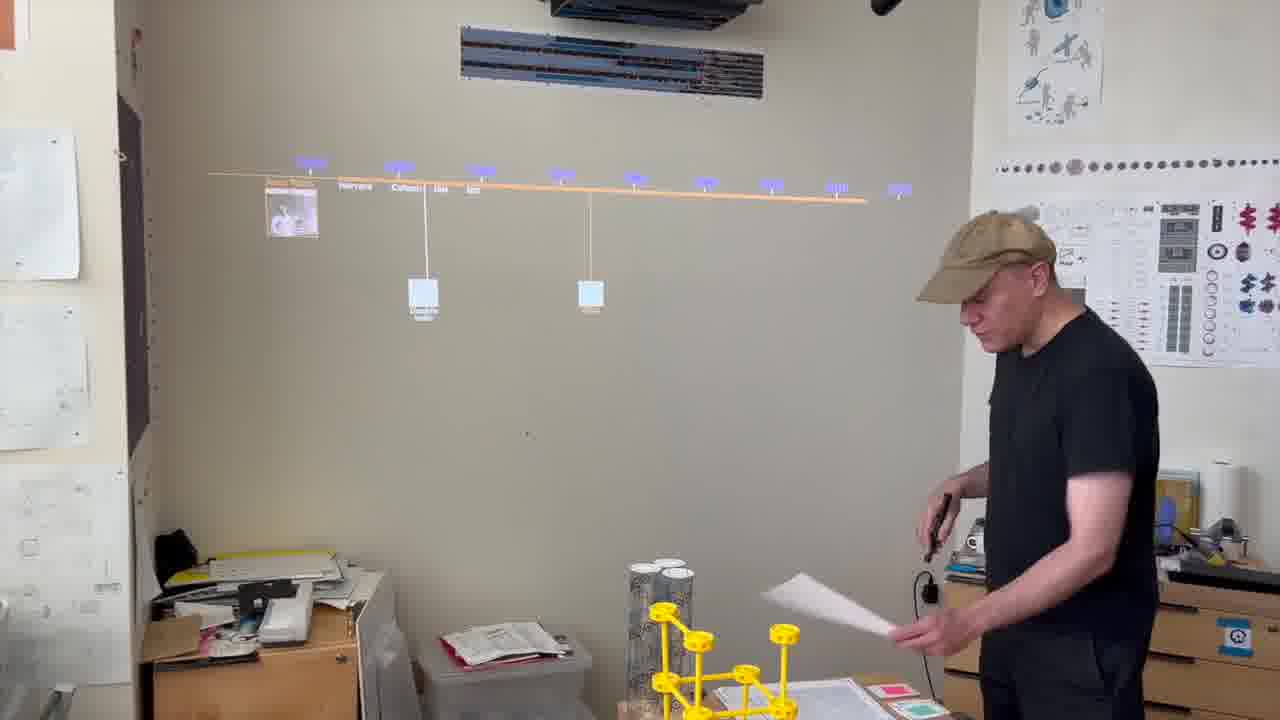
We had also set up Realtalk on a side wall, for a persistent dynamic timeline in the periphery.
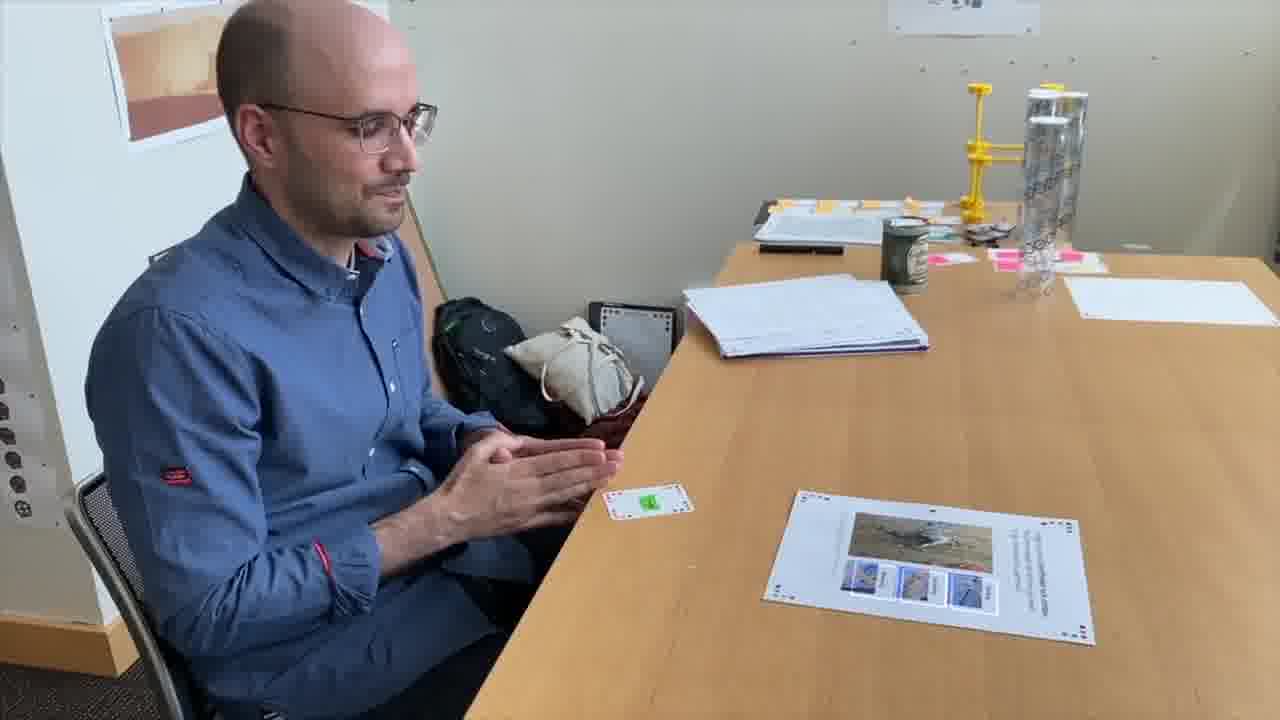
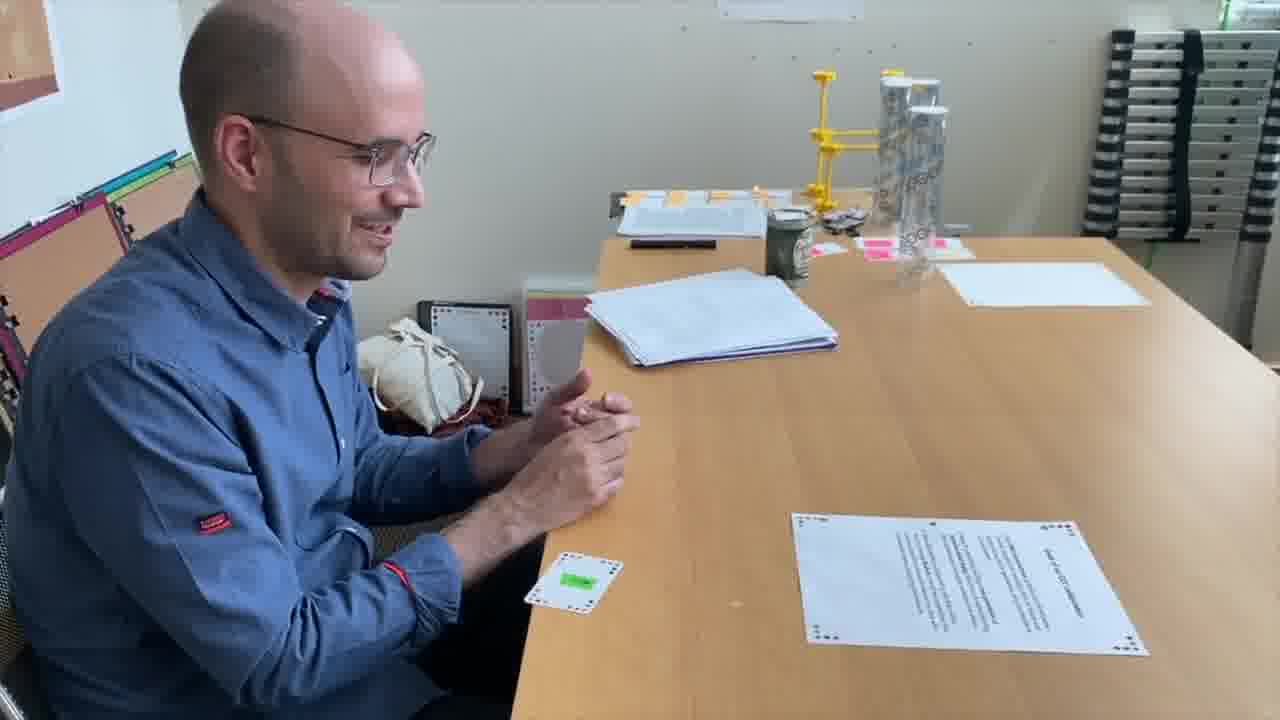
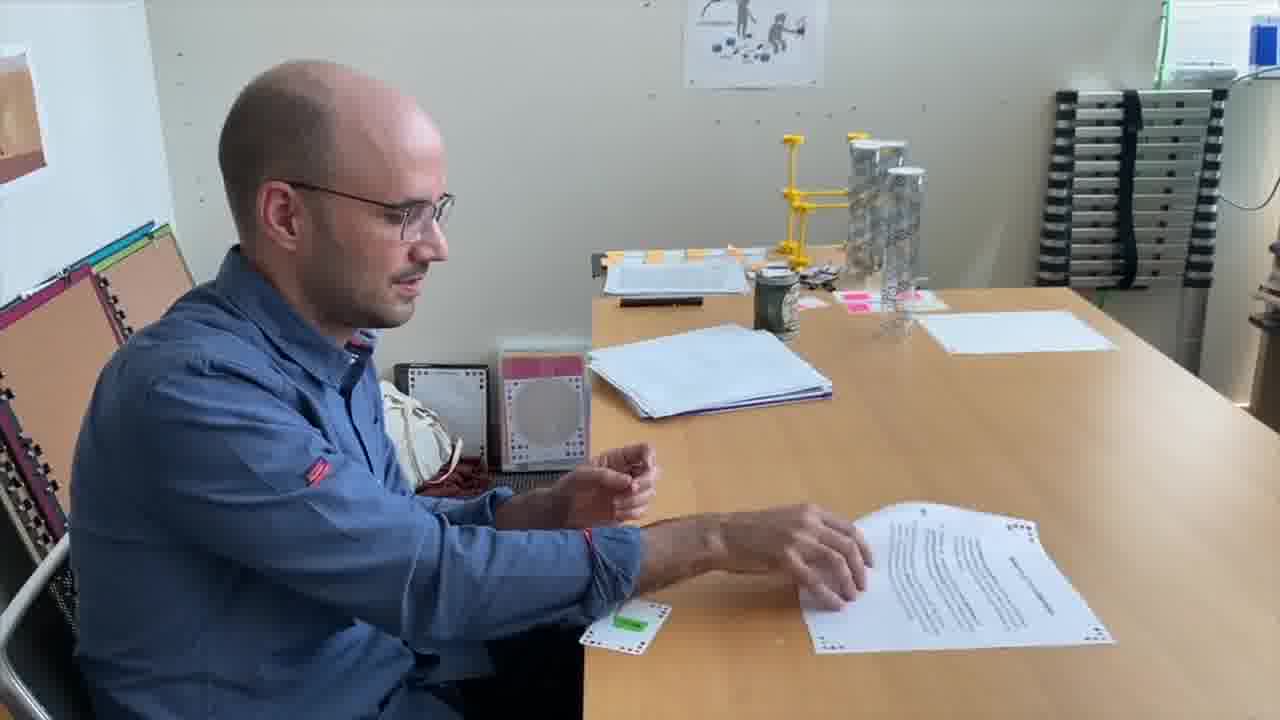
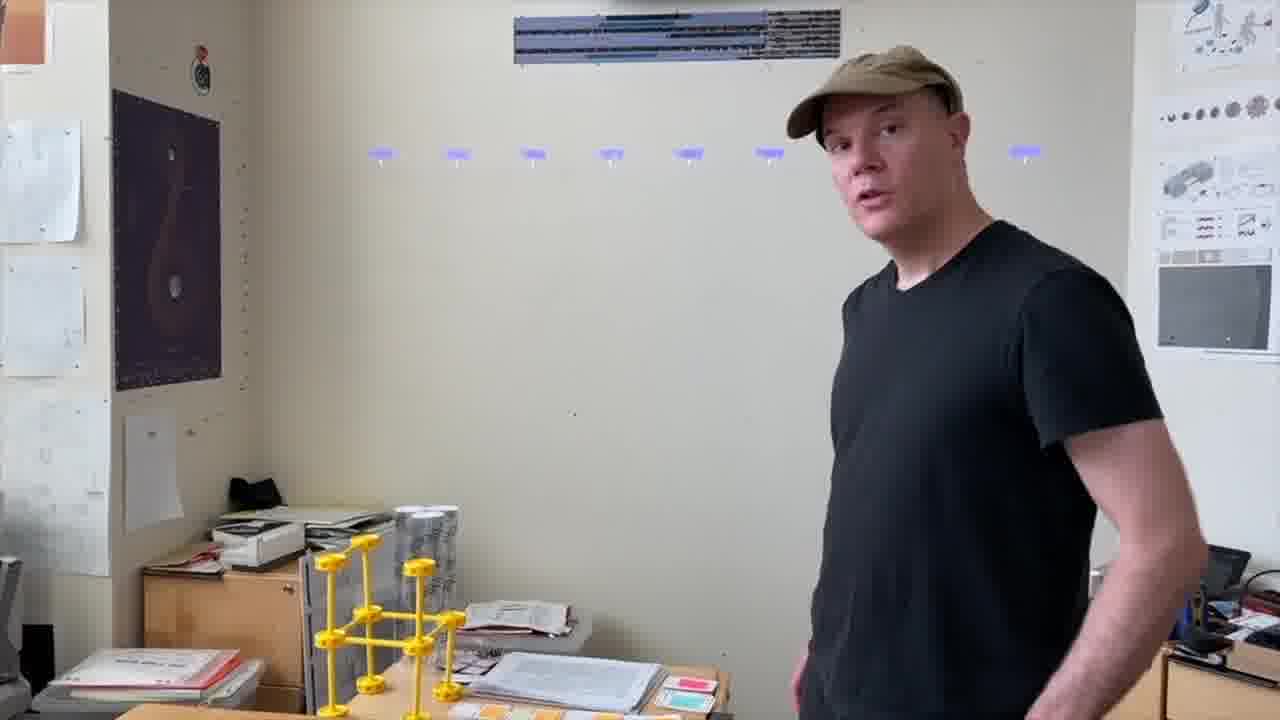
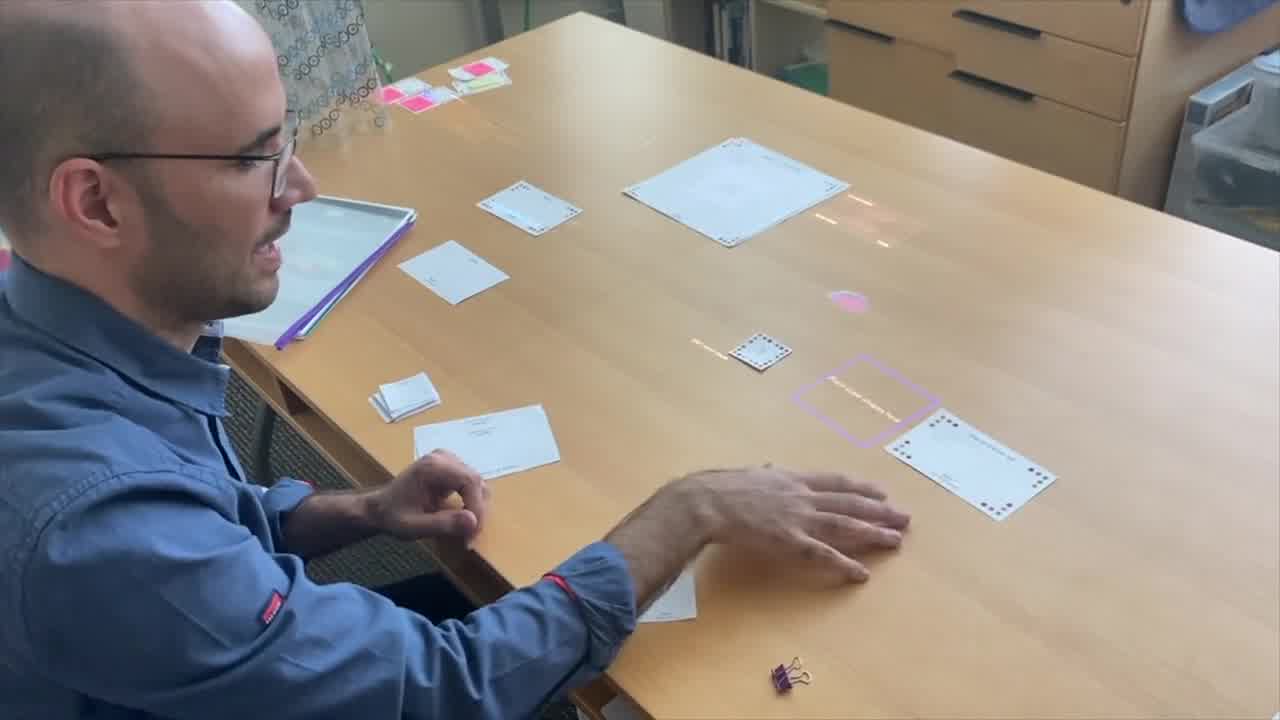
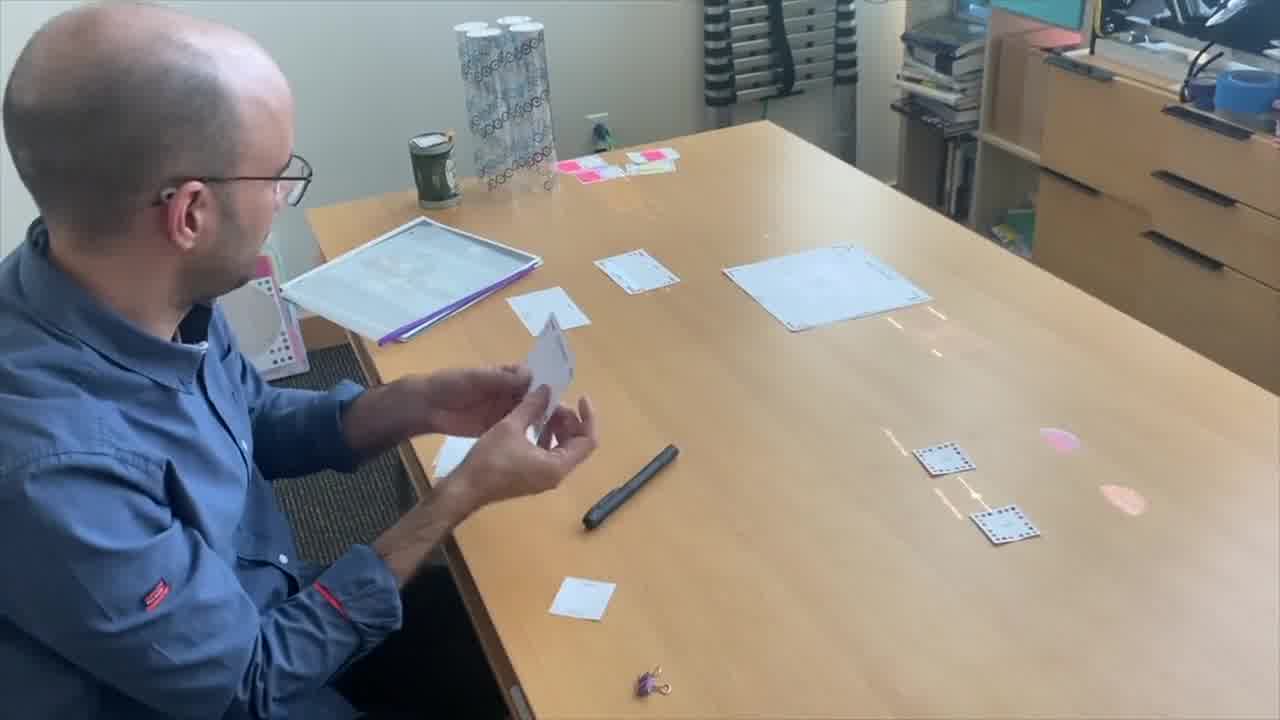
The presentation went well, but unfortunately, it was not recorded. So what you'll be seeing here is a reenactment we did a week later, in Shawn's office at UCSF.
Introduction to cellular playgrounds
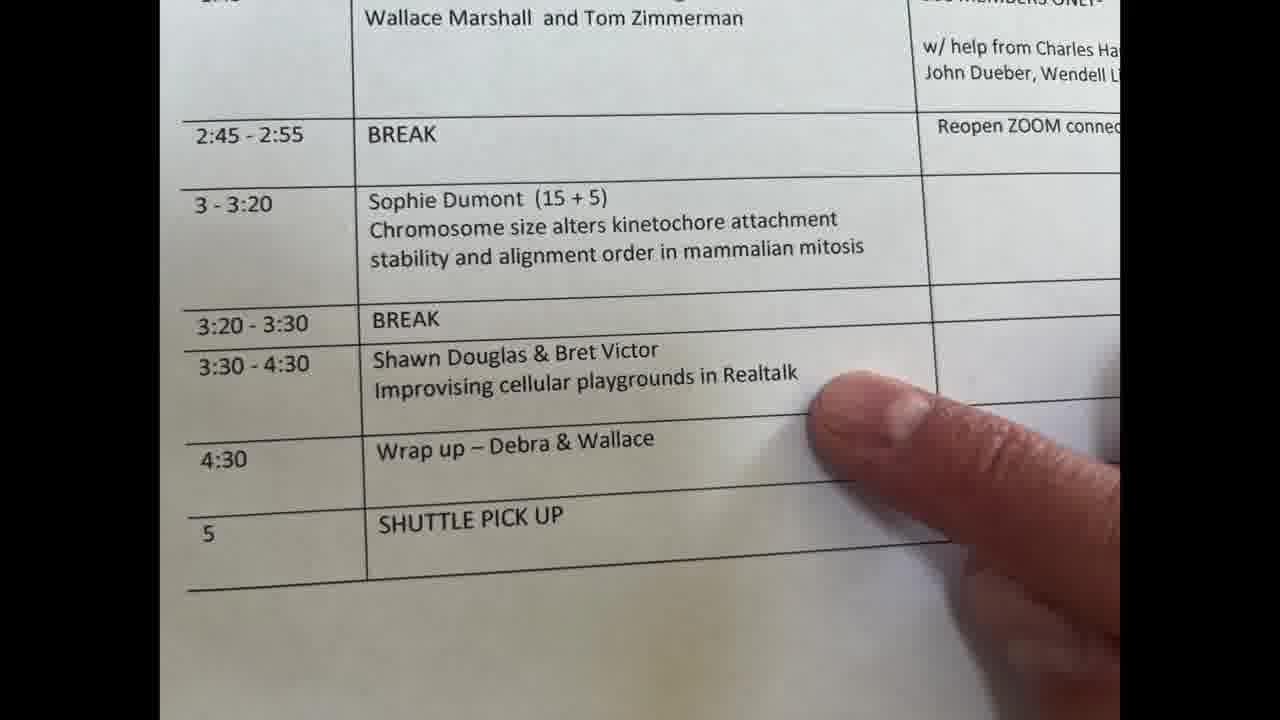
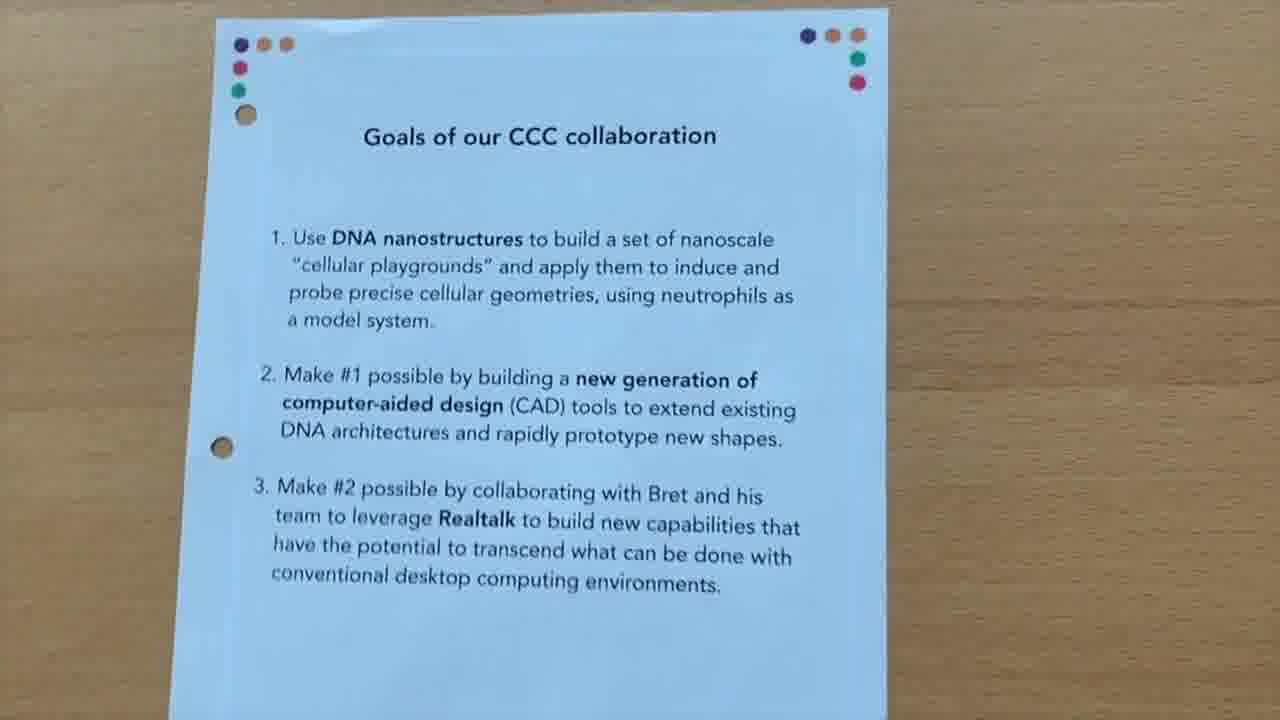
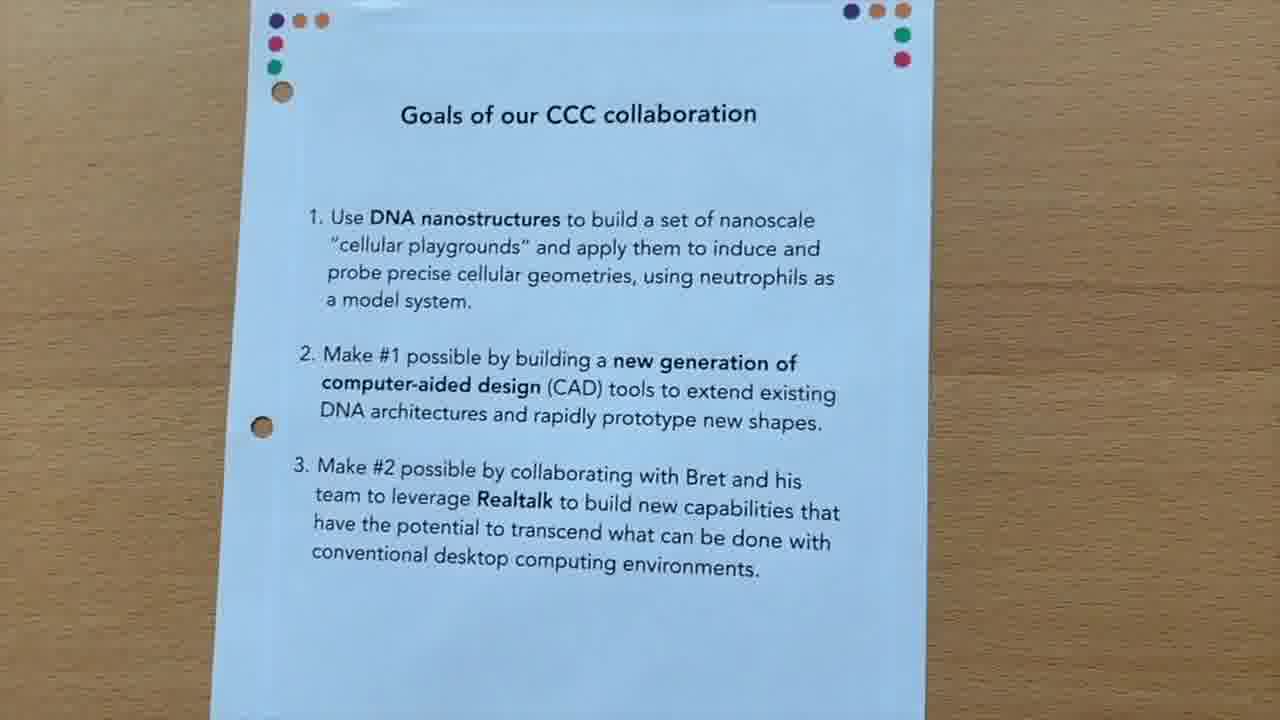
This talk has three parts. In the first part, Shawn introduces his lab's collaboration with Orion Weiner's lab. They're building tiny playgrounds for cells to crawl around on, in order to study how cells are able to crawl around. [more]
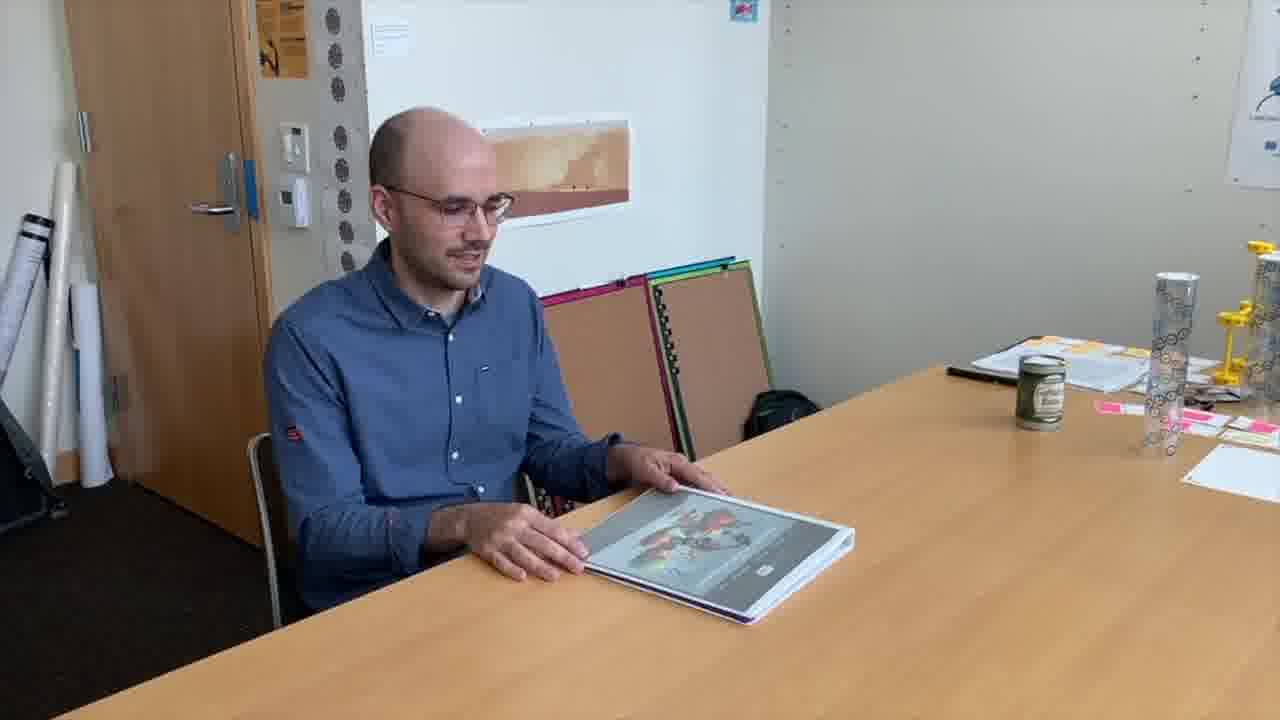
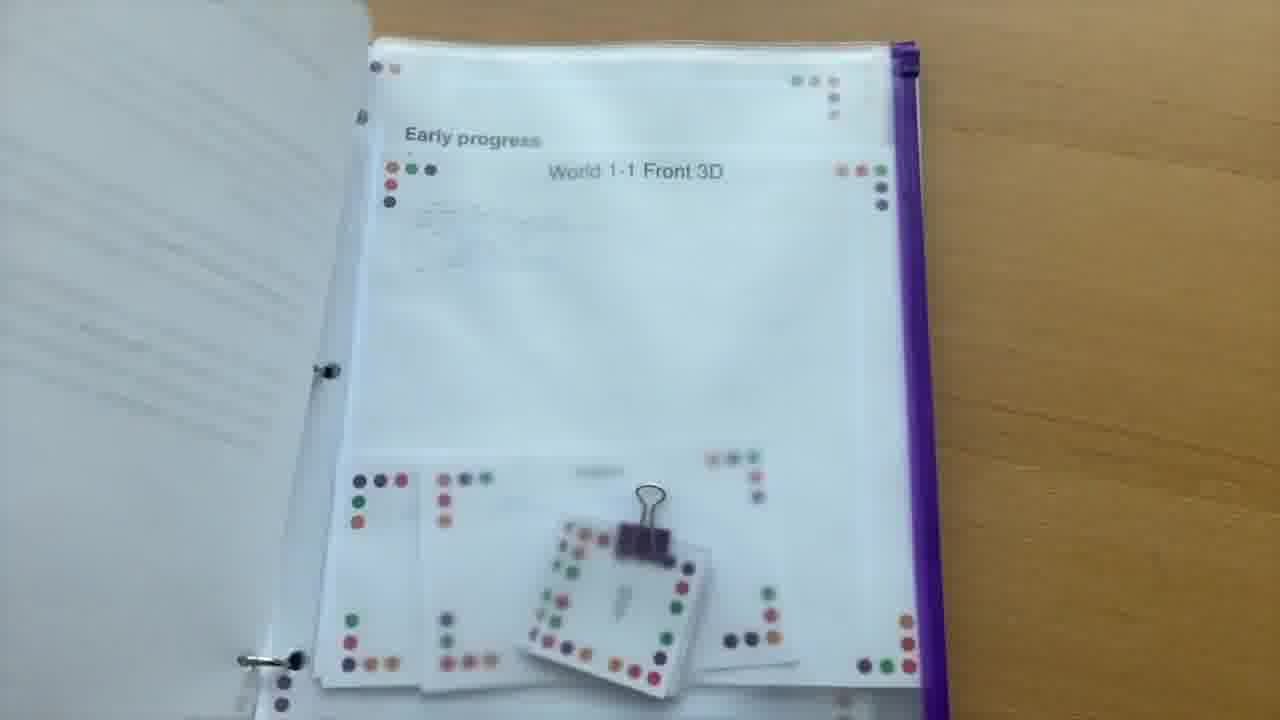
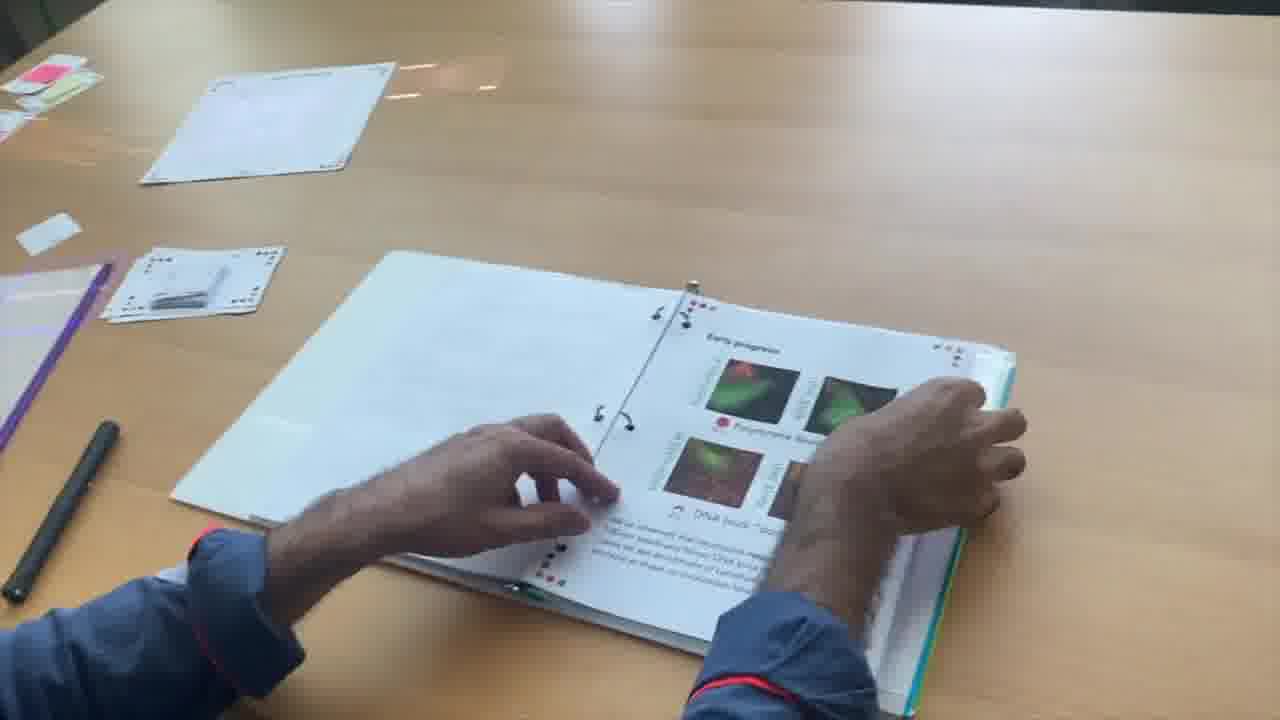
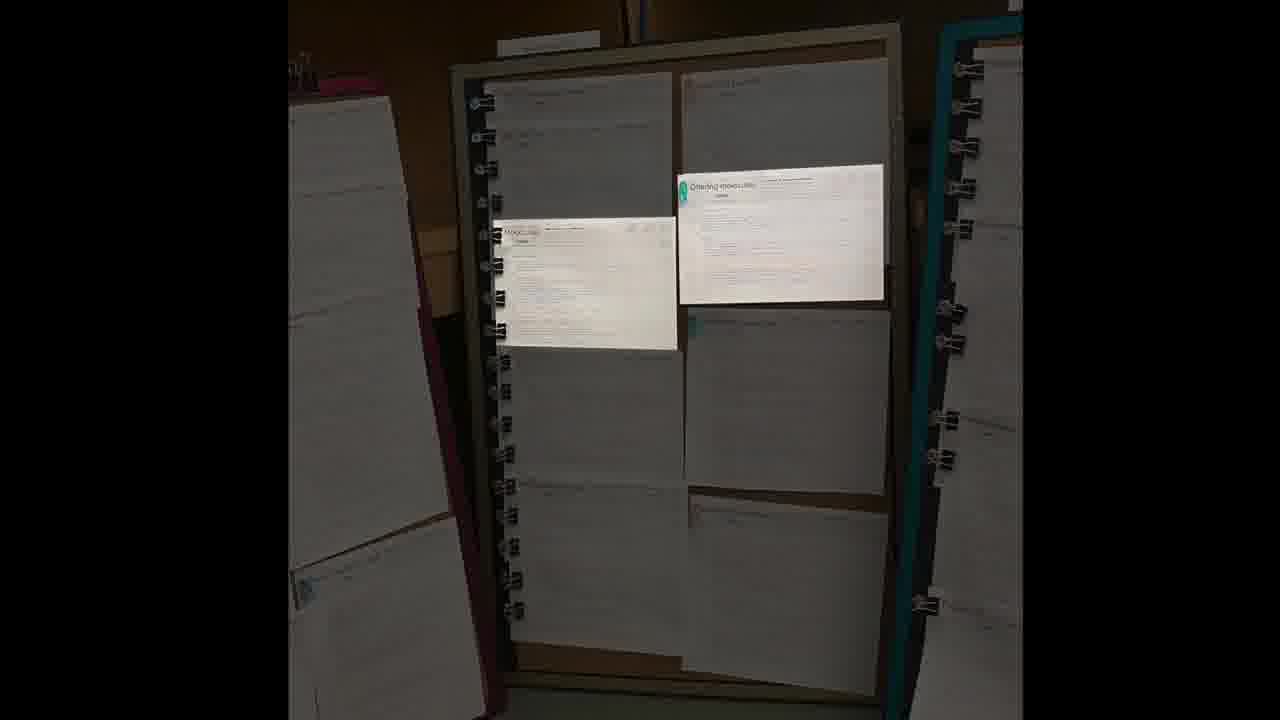
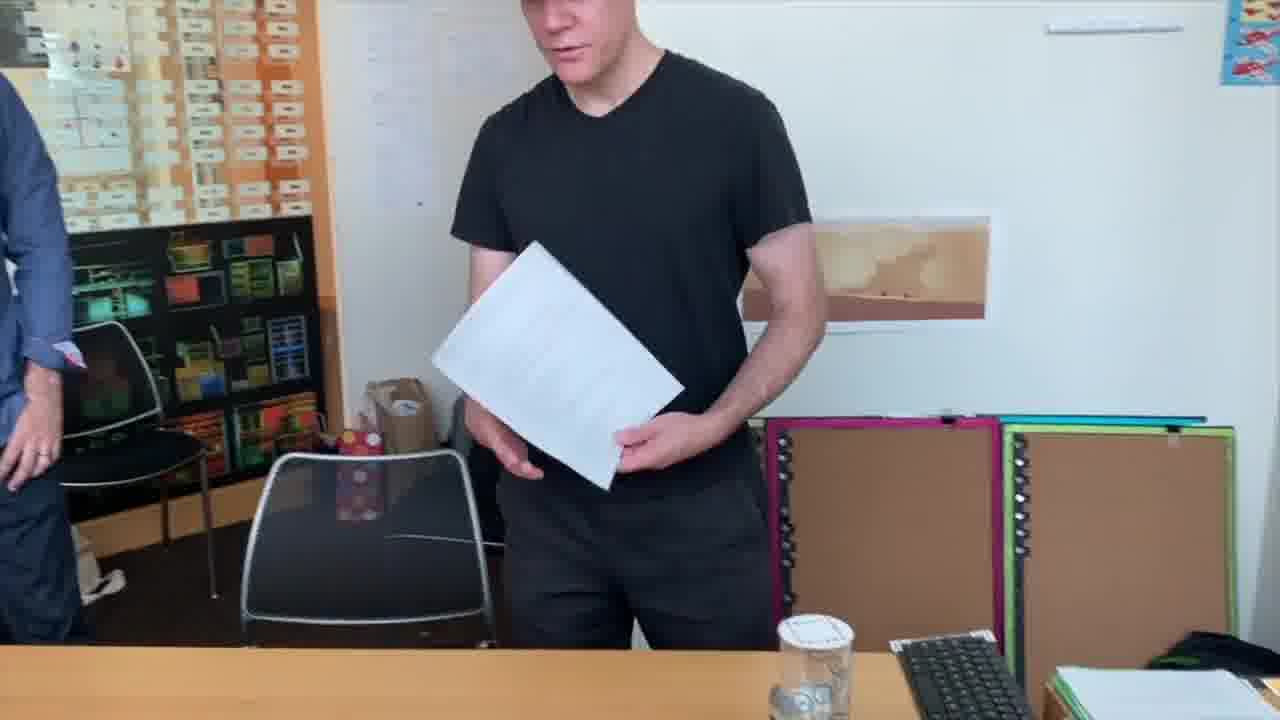
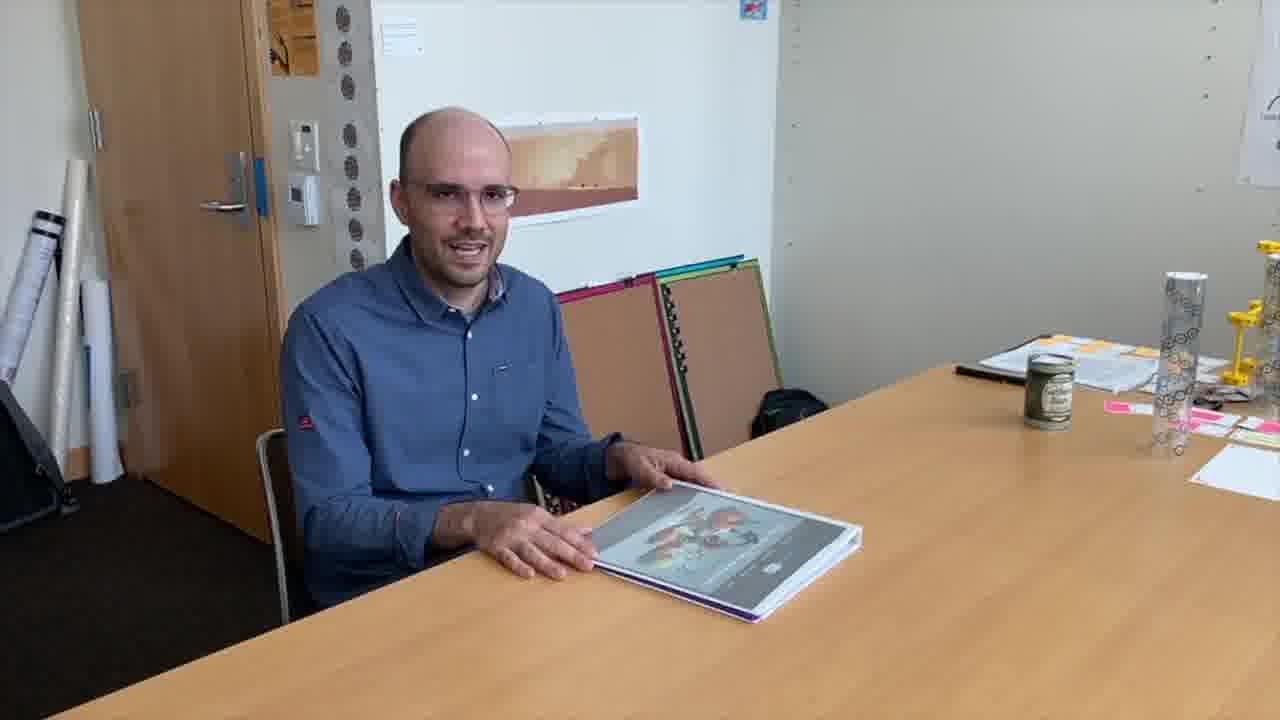
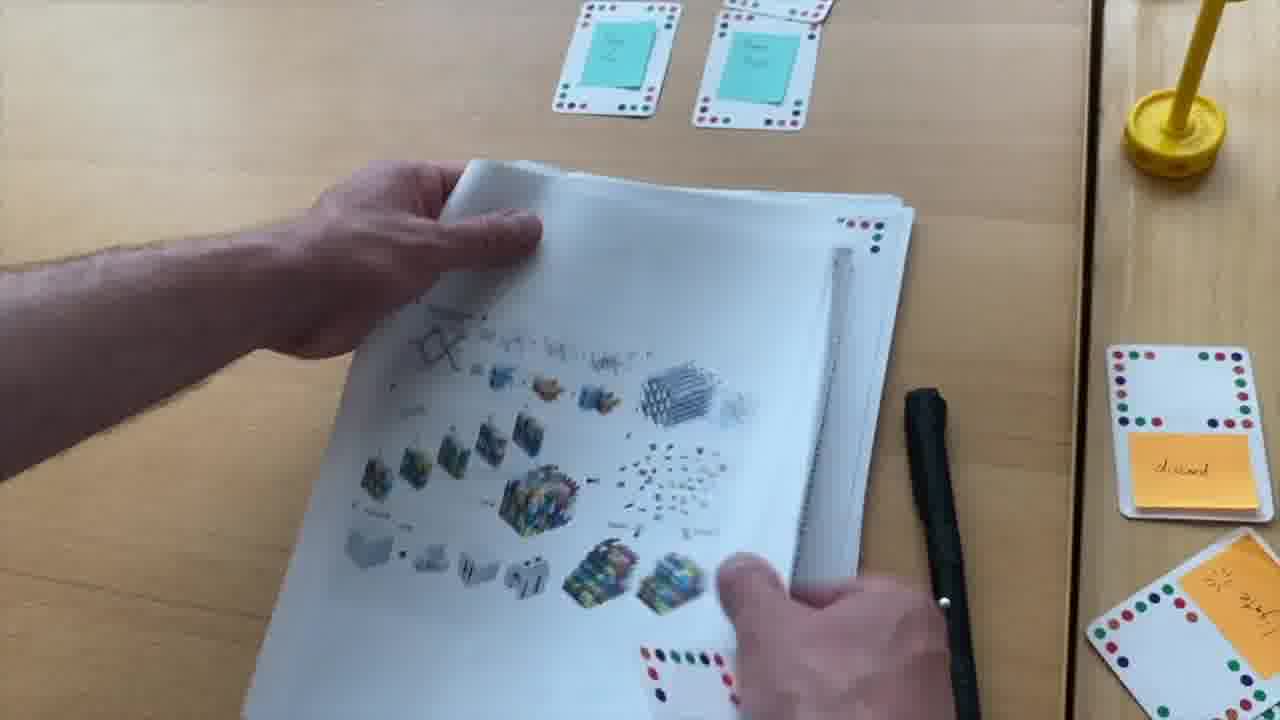
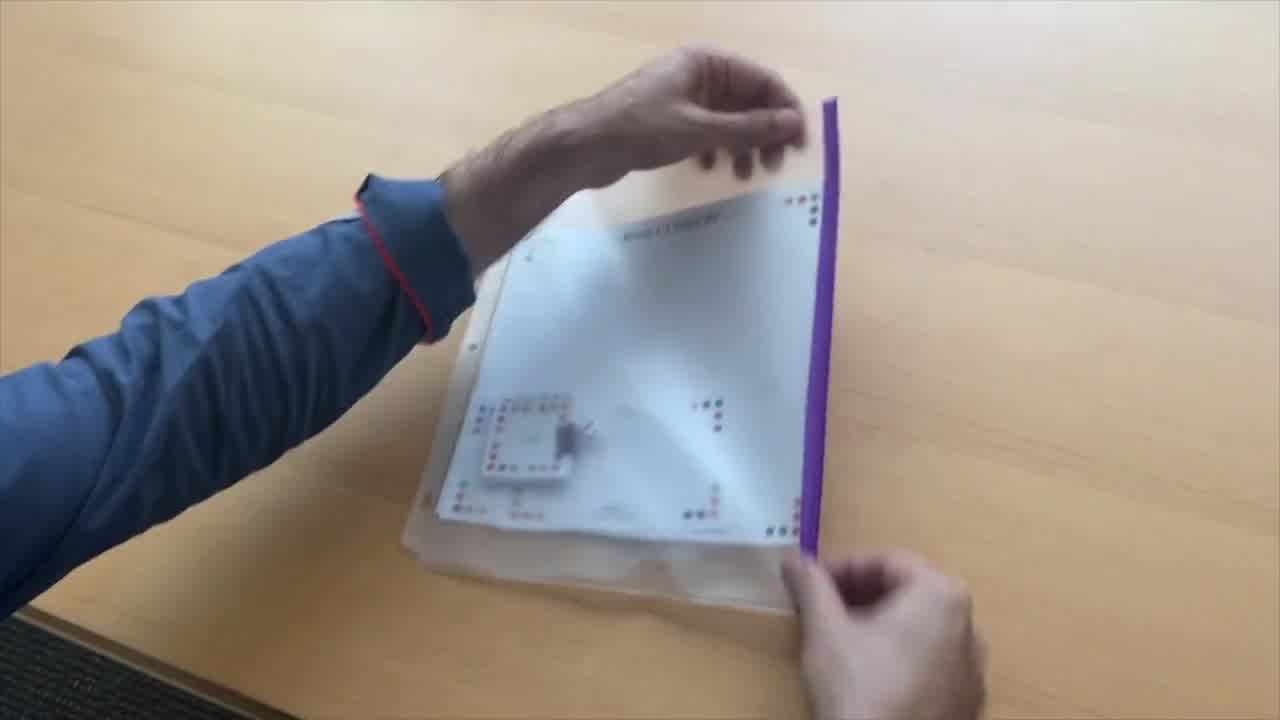
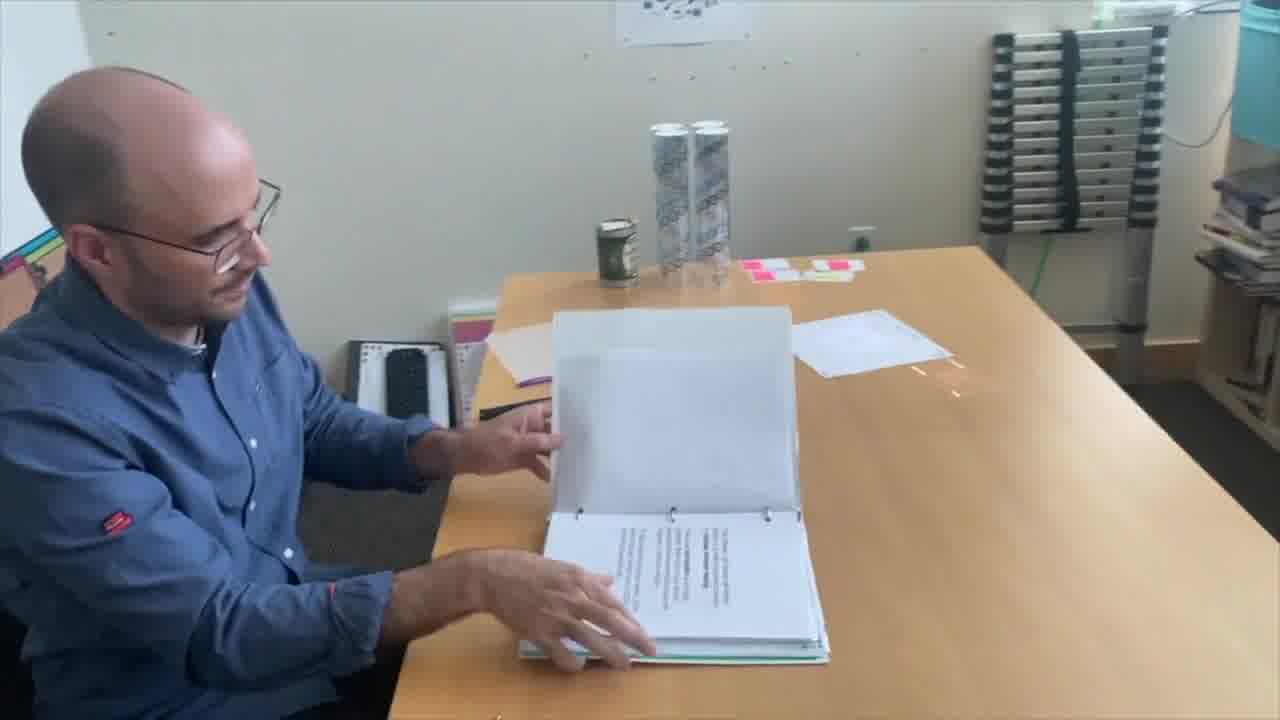
Instead of a PowerPoint deck, Shawn collected materials about the collaboration into a three-ring binder, where he can freely flip through the pages, take them out as needed, spread them out, show them to us with his hands.
Some of these pages are more like slides, with textual prompts and figures.
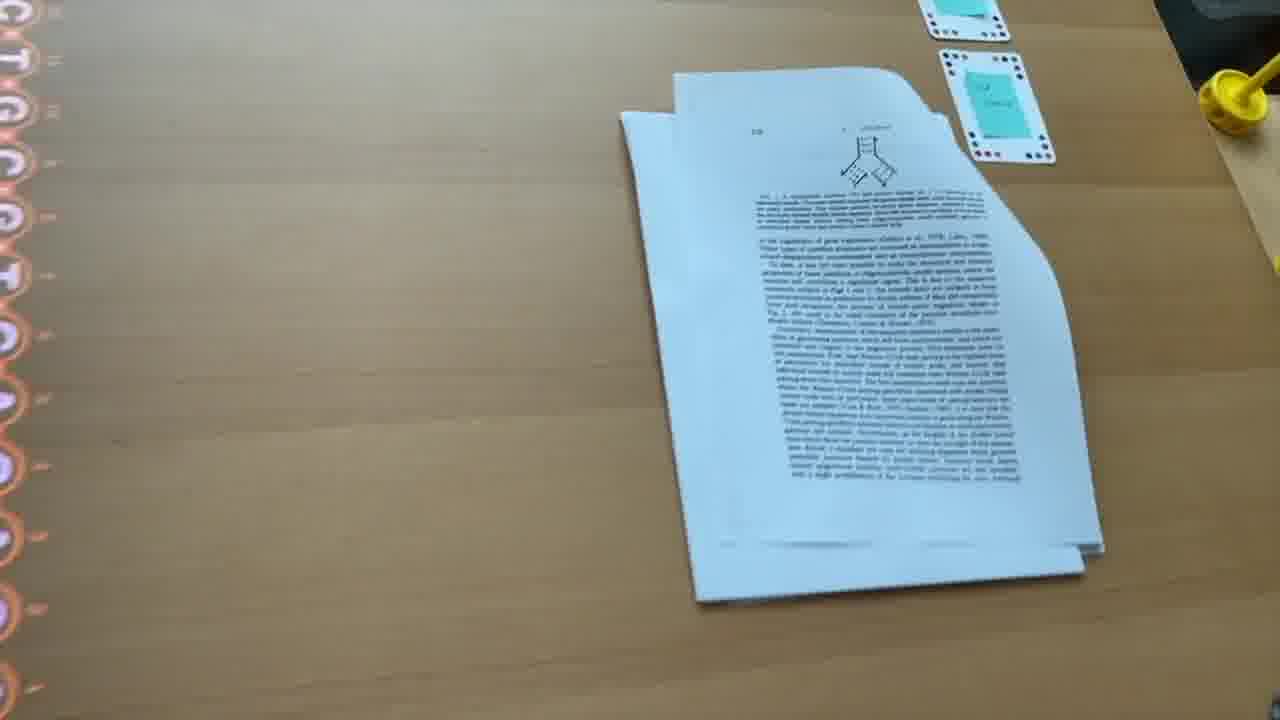
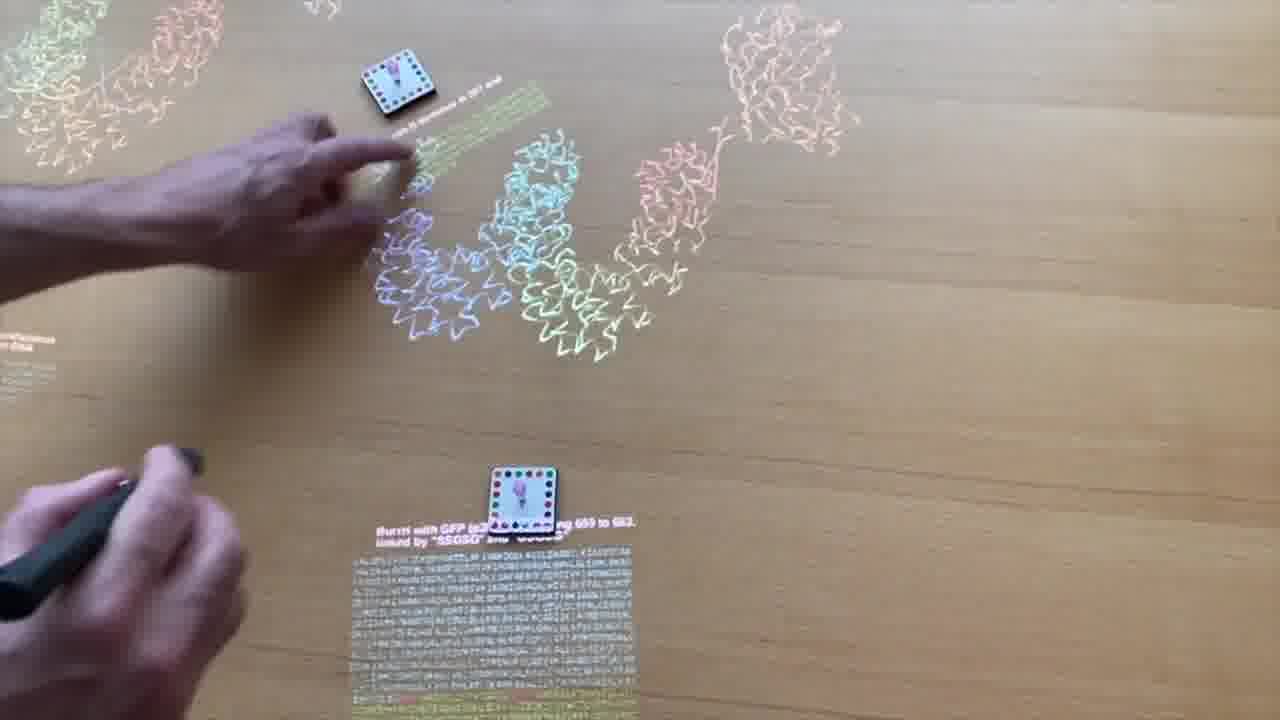
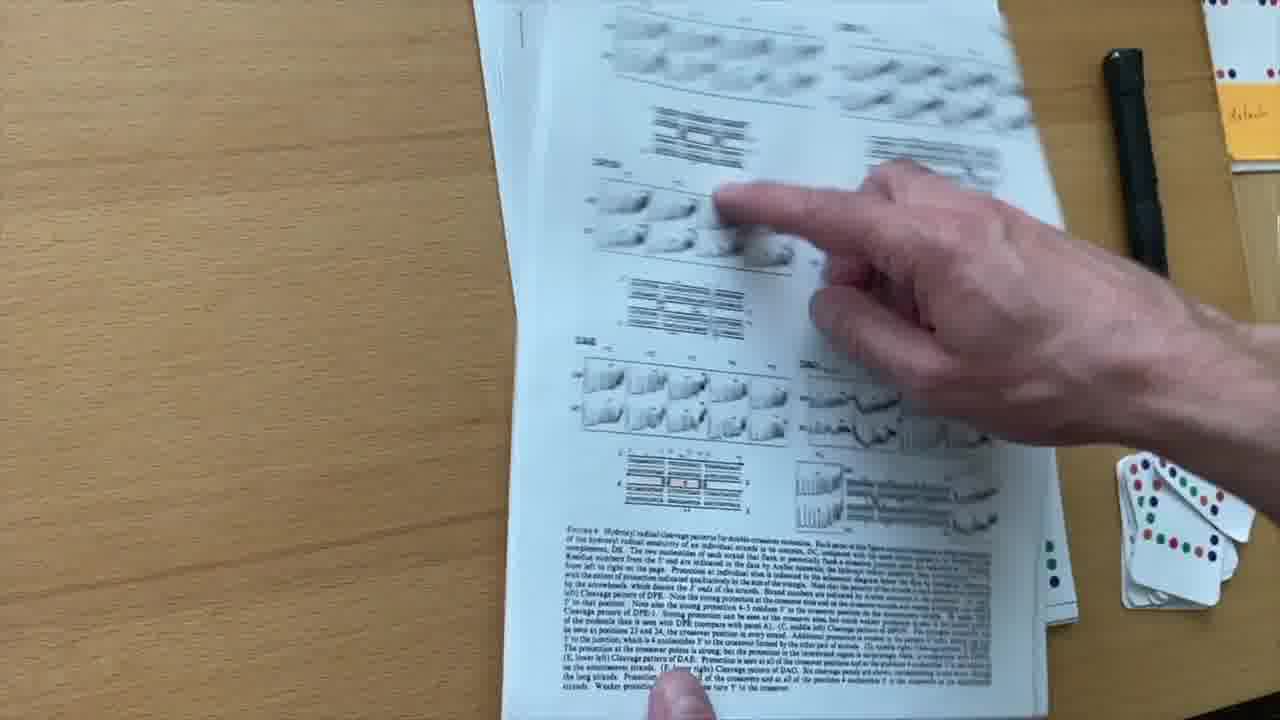
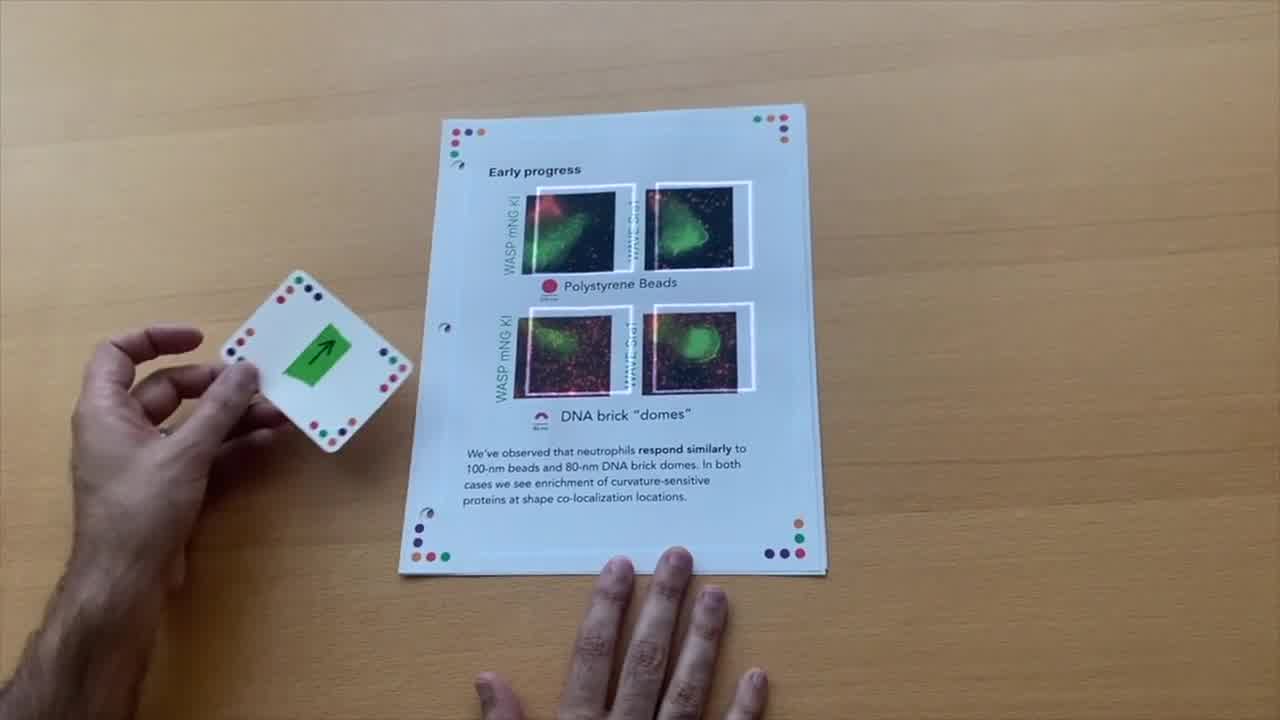
He also has research papers in the binder that he takes us through. And these papers have embedded media in them. [more]
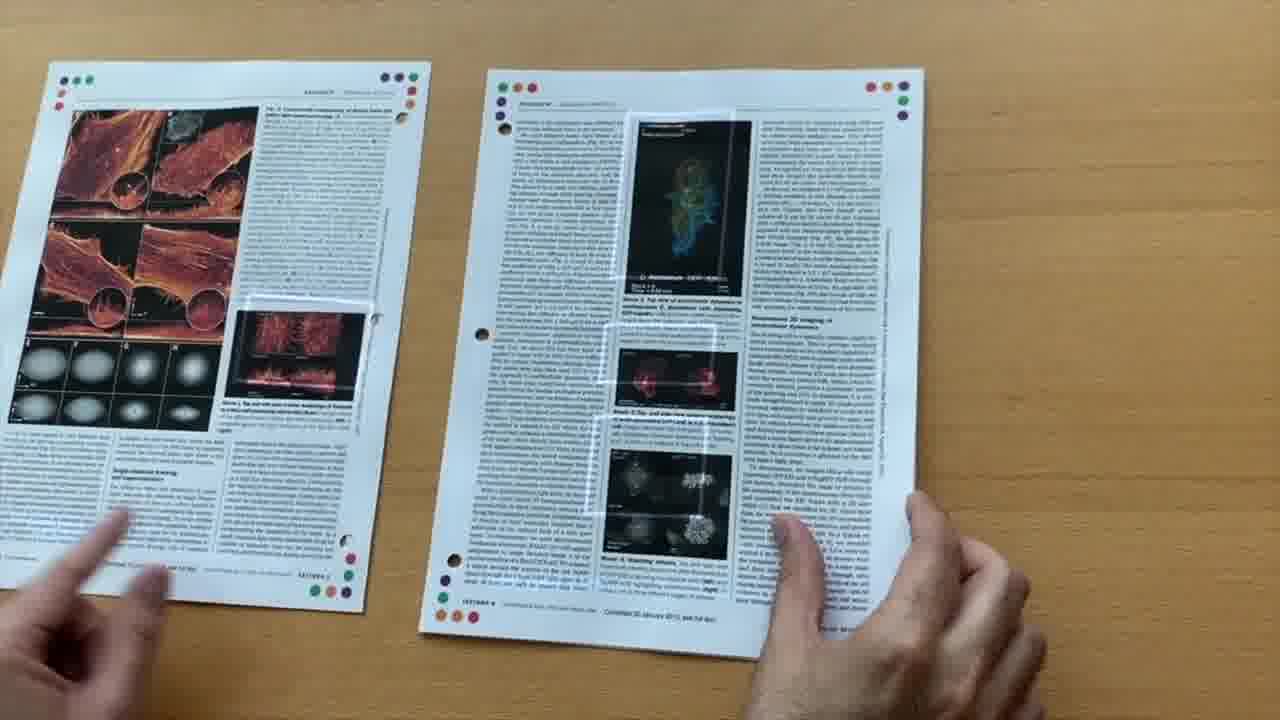
By pointing a card directly at a figure in the original paper, he reveals the video for that figure. And he plays the video and scrubs around in the video as he talks about it.
These videos were originally published in the paper's supplementary materials online, where they're not very easy to get to.
Shawn implemented the program for attaching and playing videos in one page of Realtalk.
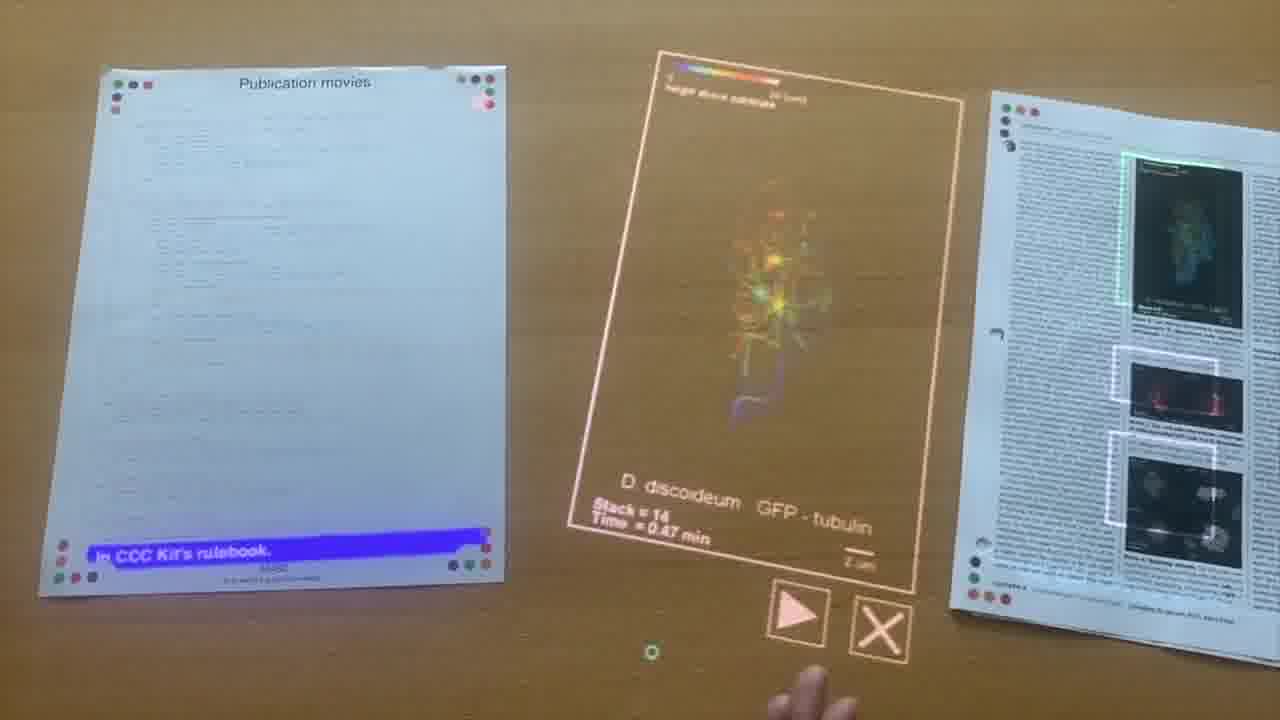
Here's the entire program, and here Shawn is talking about how the program works as he points to each part of it.
The binder and slides, of course, require zero lines of code. They just physically exist.
Shawn made this binder for this presentation, but in the months afterwards, there were many times when Shawn would pull out the binder in a meeting with colleagues or funders, and they would all go though the material together.
This fit very naturally into the flow of the conversation, and the conversation could continue with the materials out on the table.
This felt very different than earlier meetings where Shawn would sometimes pull out his laptop or phone in order to show presentation materials, and everyone would crowd around the screen.
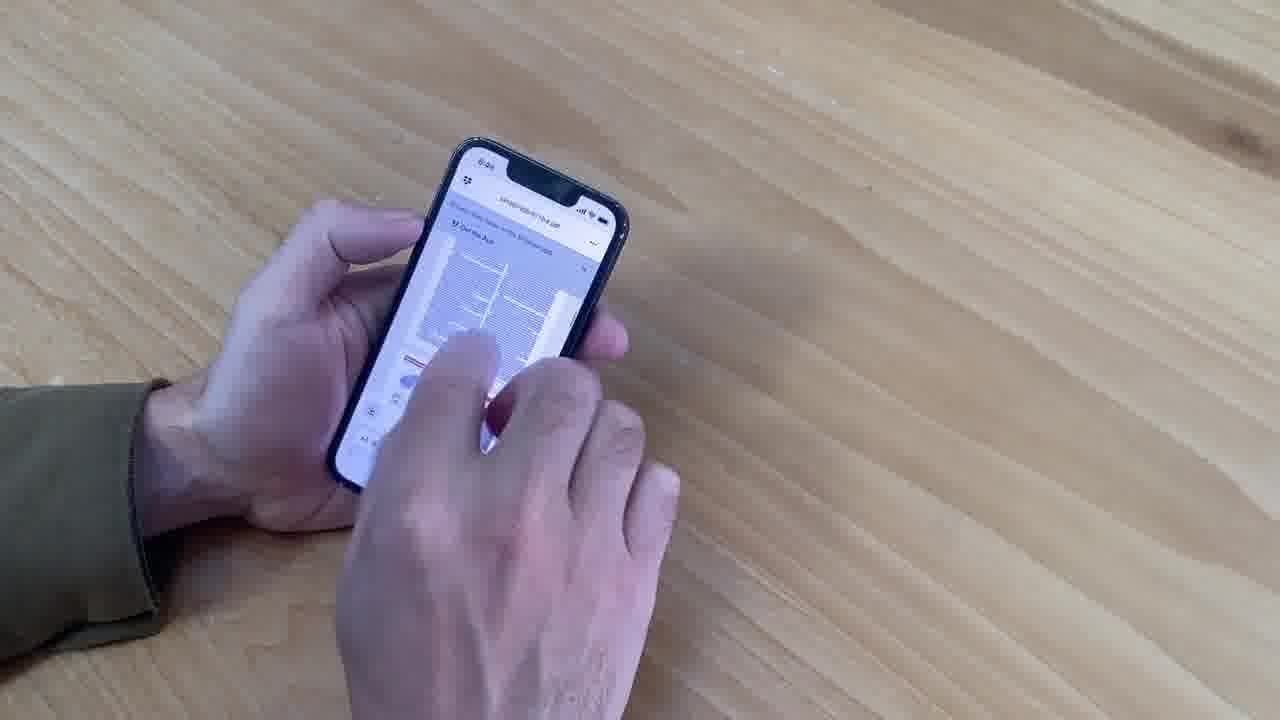
This always felt really awkward, and the device would get put away as soon as possible.
So, one notable thing about Realtalk presentations is that they seem to be continuous with conversations. The presentation materials become conversation materials in a very natural way.
History of DNA nanotechnology
The cellular playgrounds described in the first part of the talk are built out of DNA nanostructures. That brings up the question of: What are DNA nanostructures? And how did people ever figure out how to build structures out of DNA?
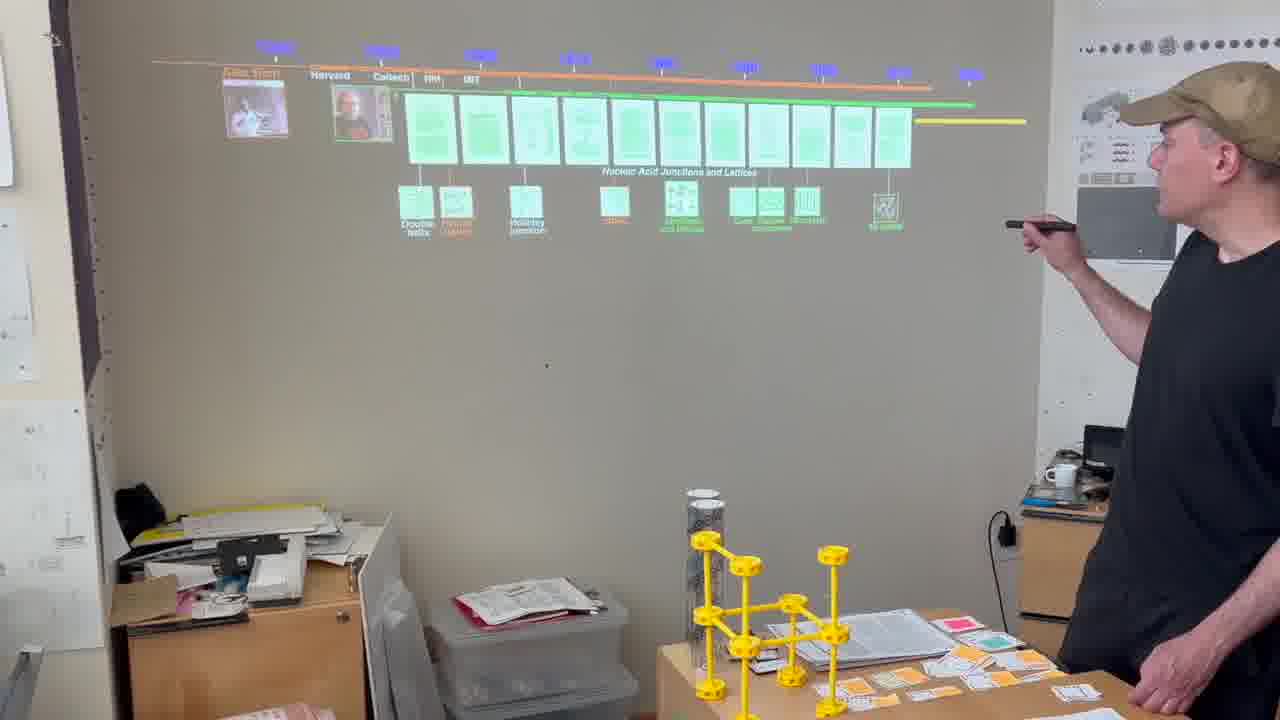
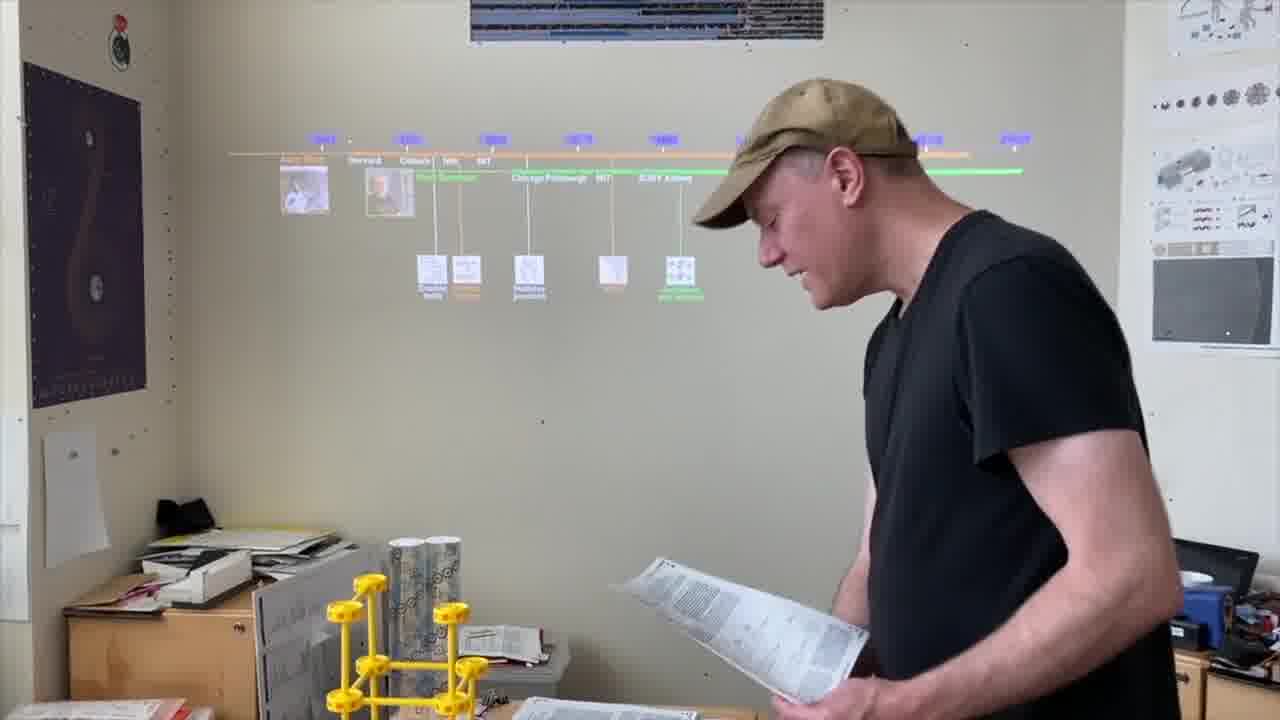
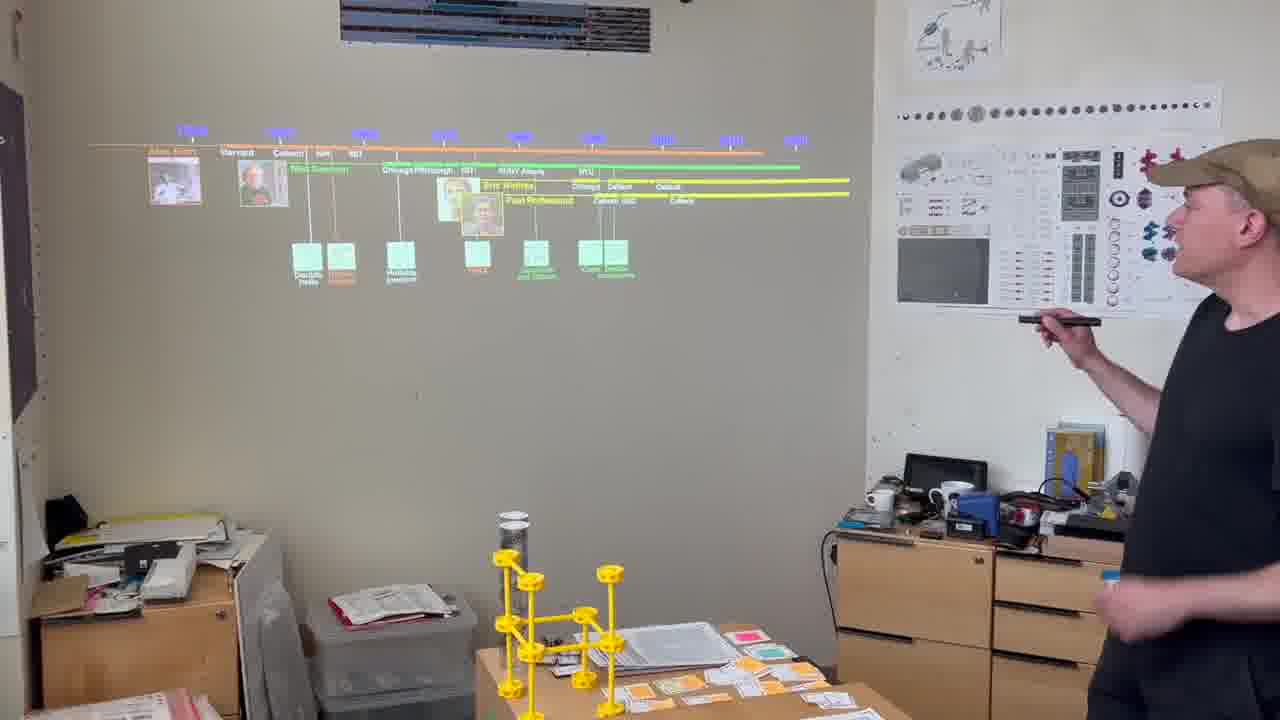
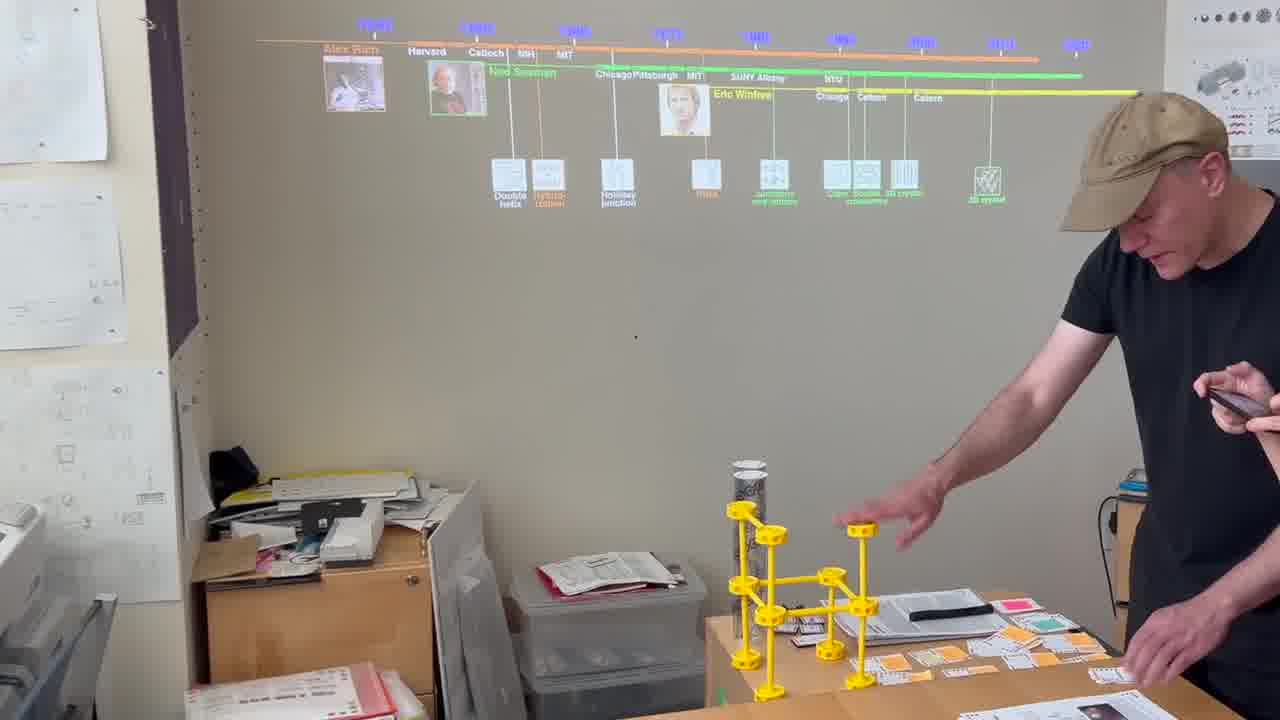
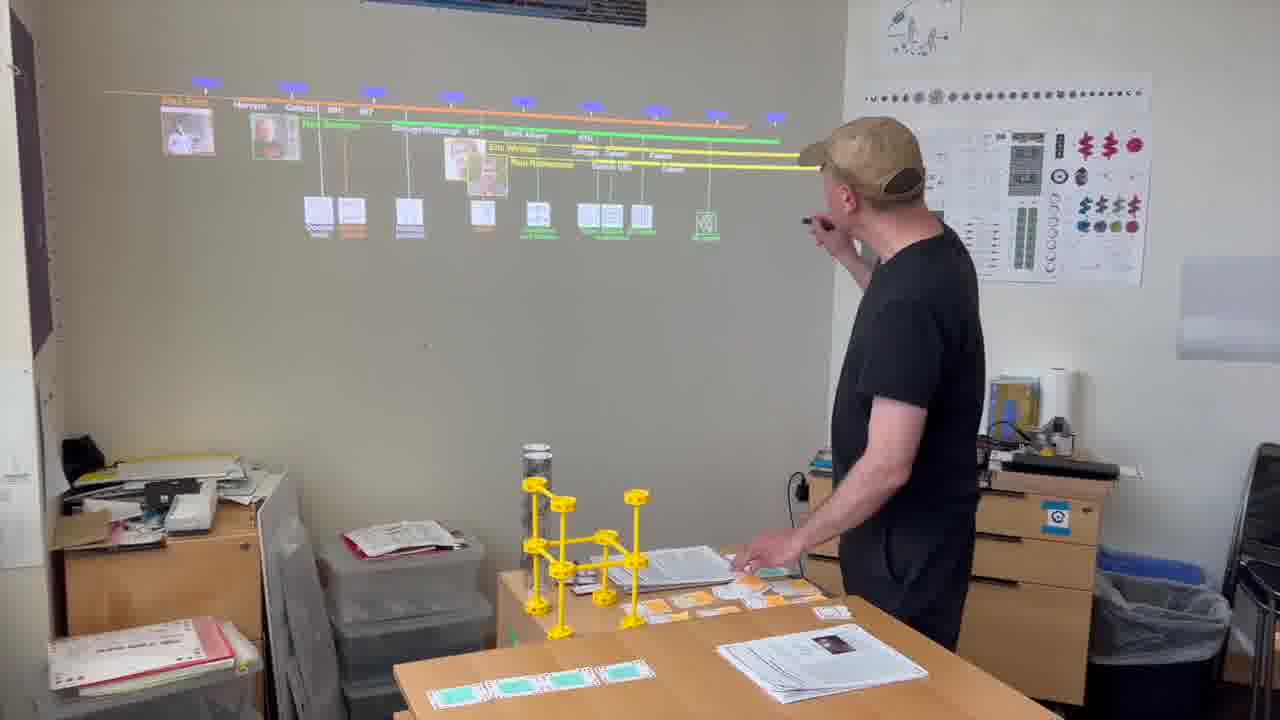
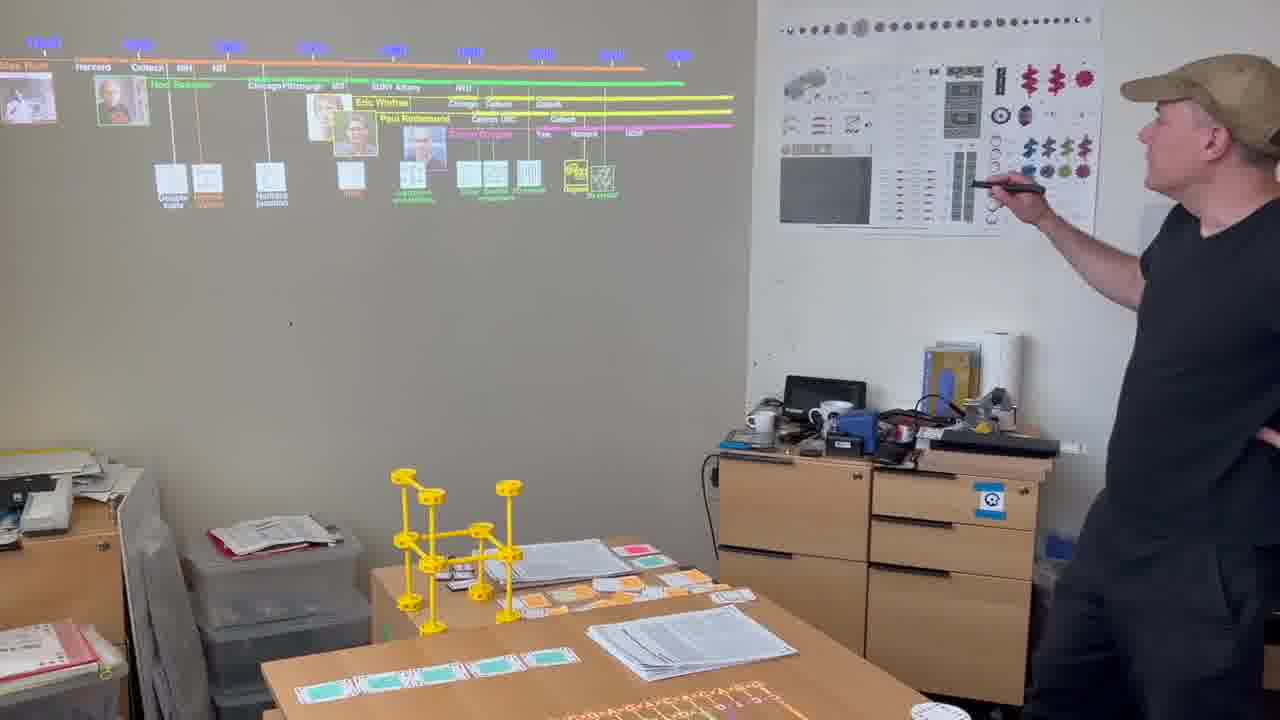
So, in the second part of the talk, I give a history of the field, going through the lives of some of the key people, and the key papers that they published.
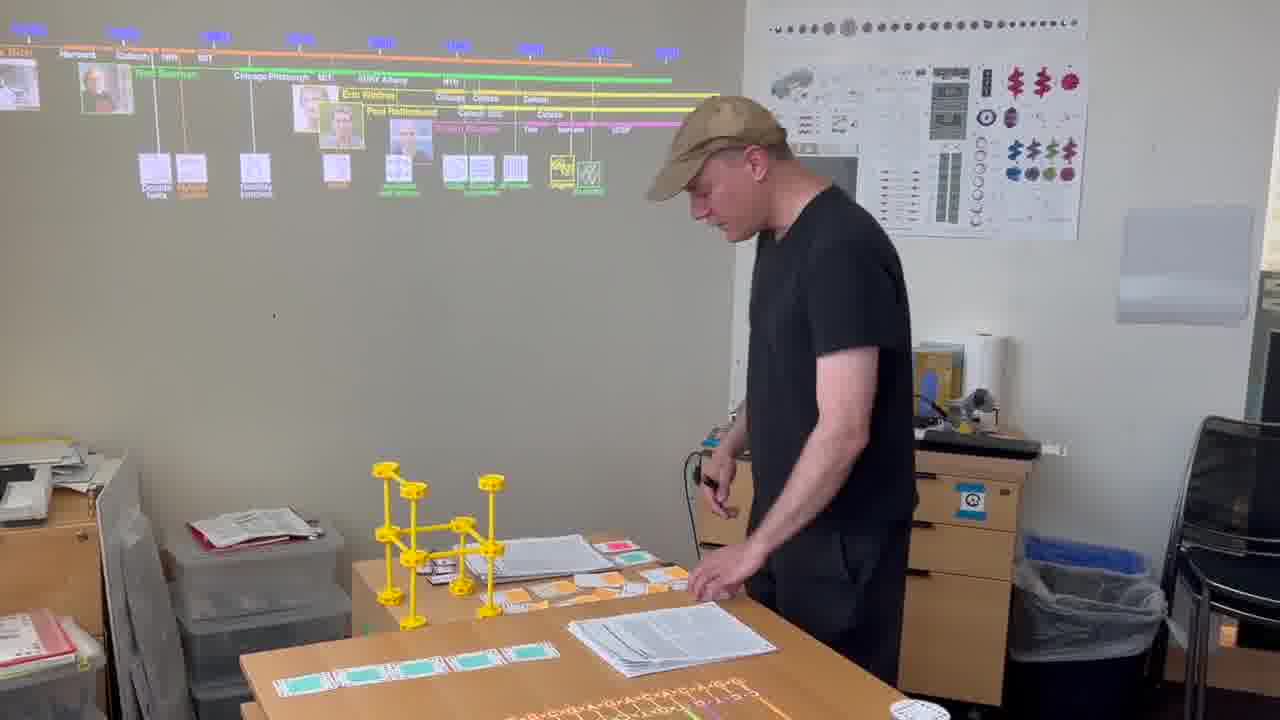
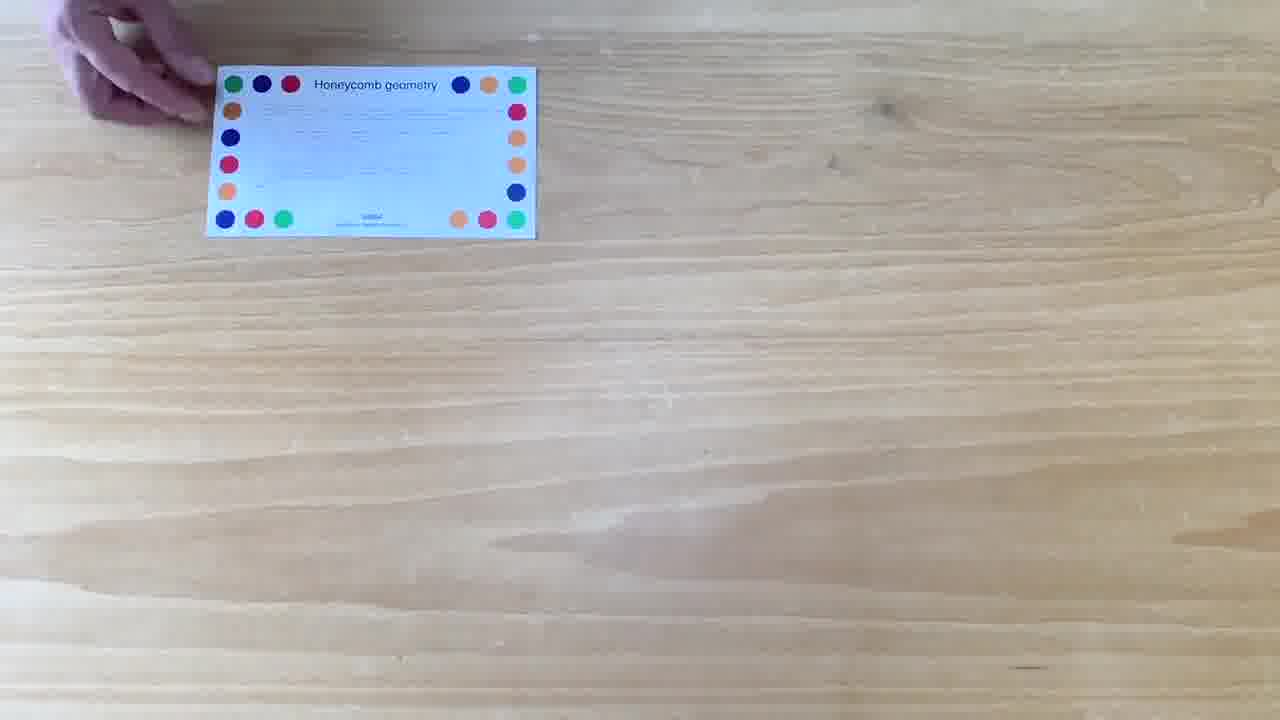
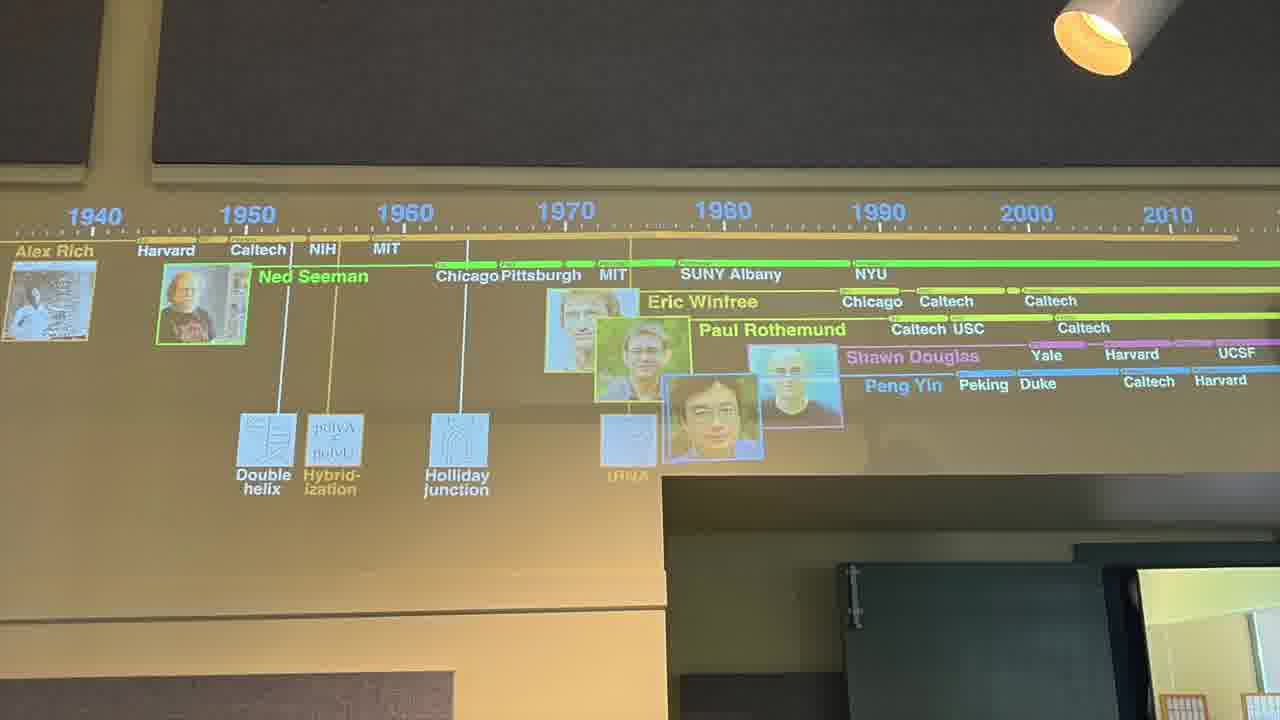
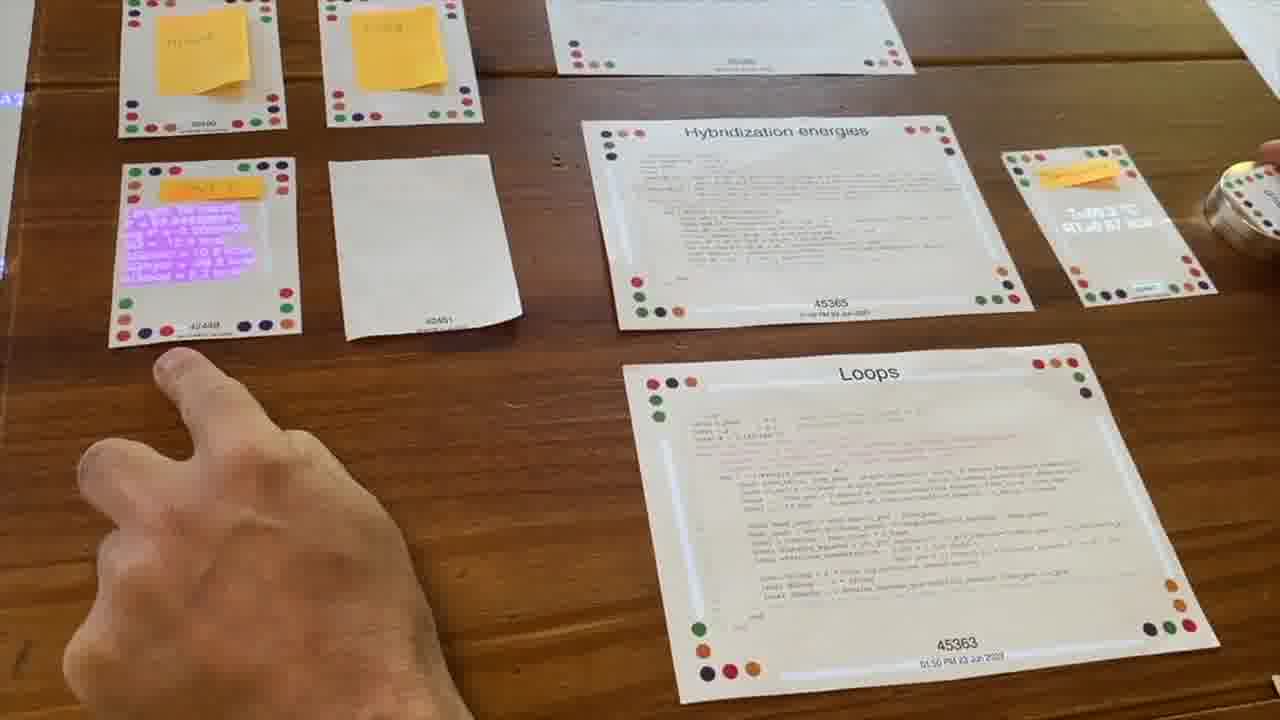
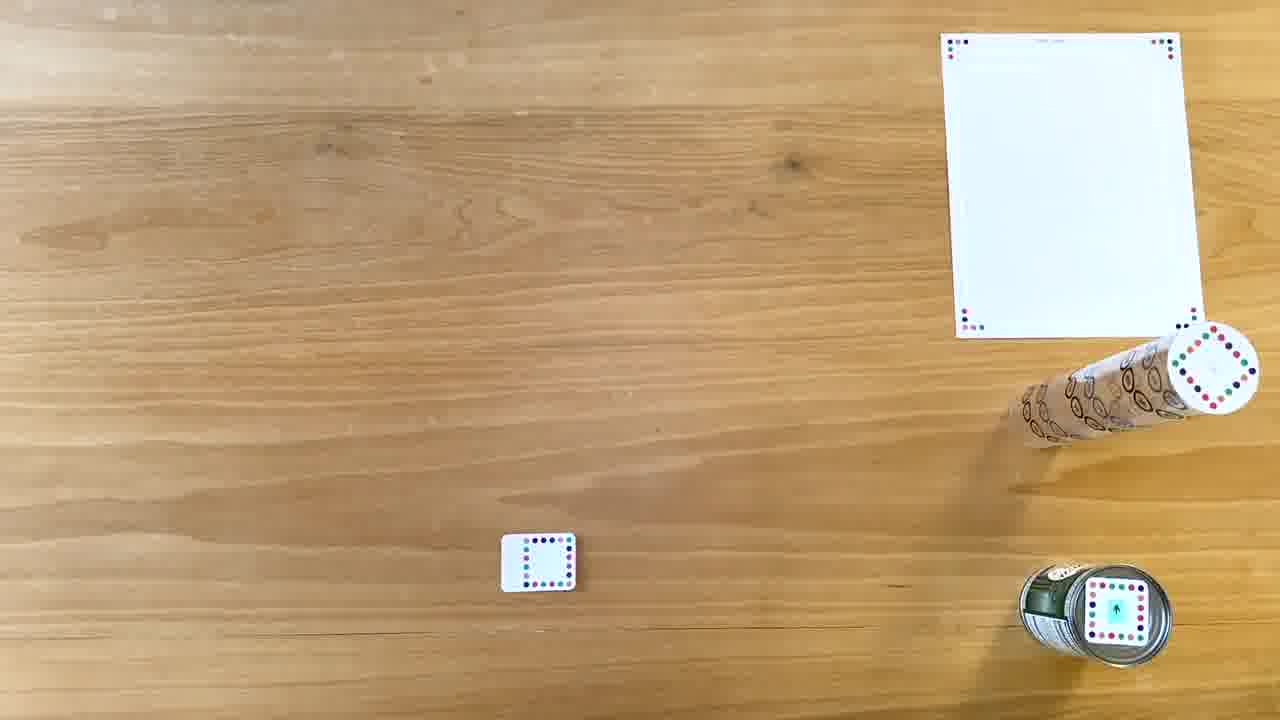
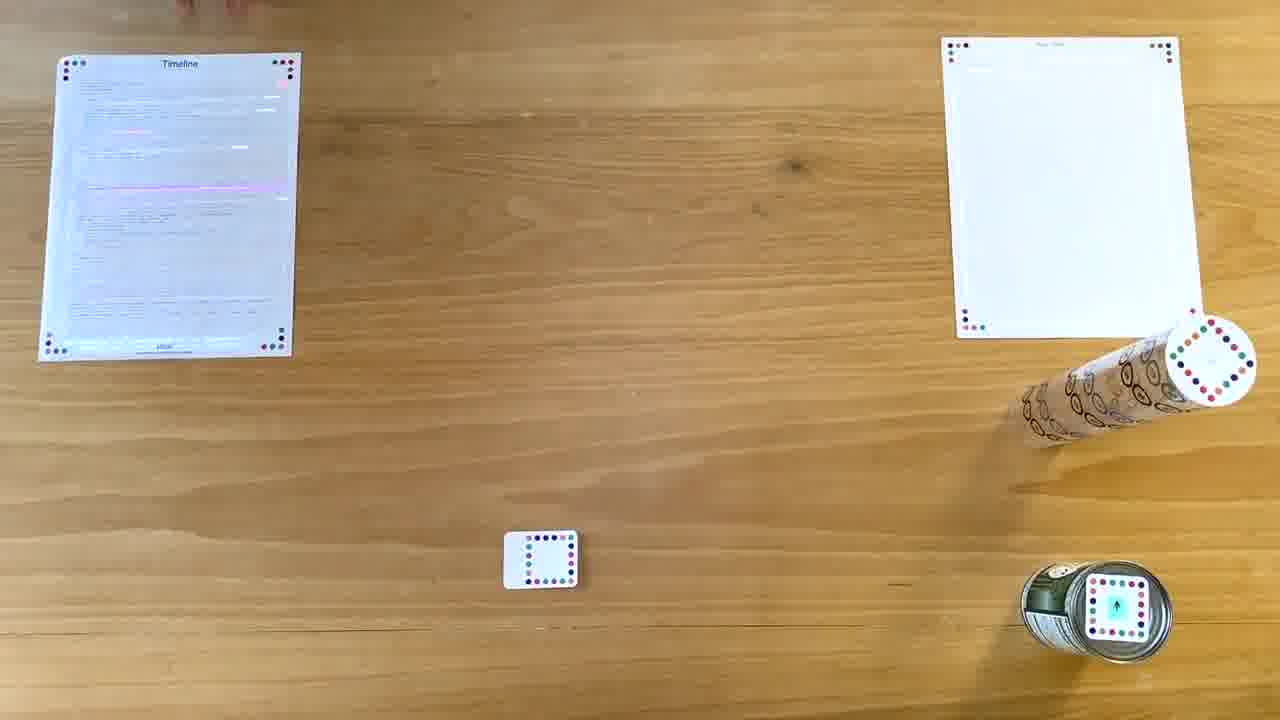
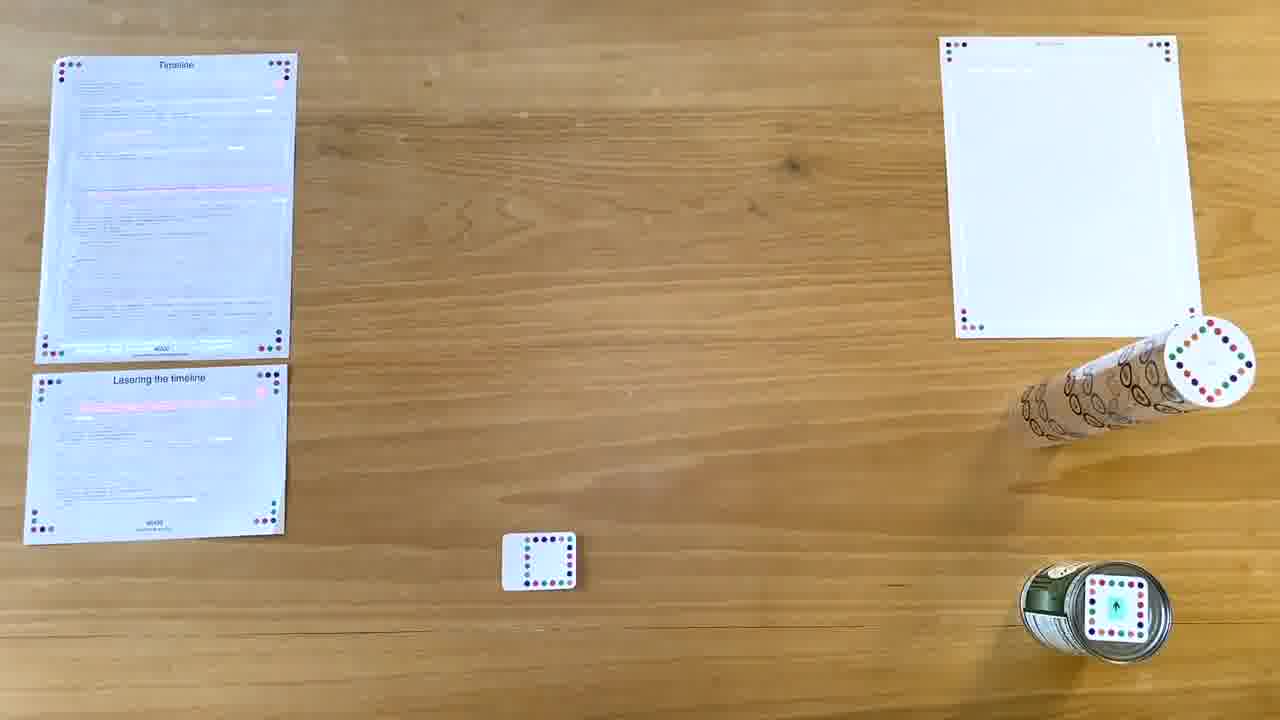
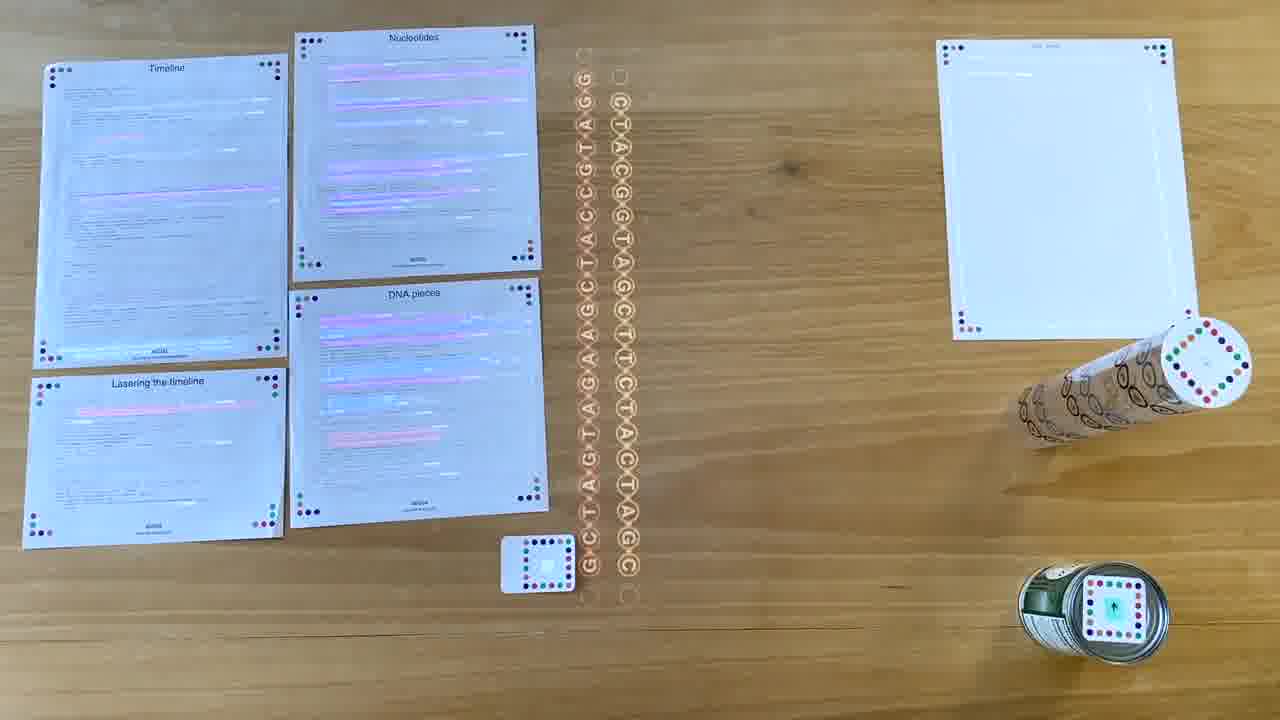
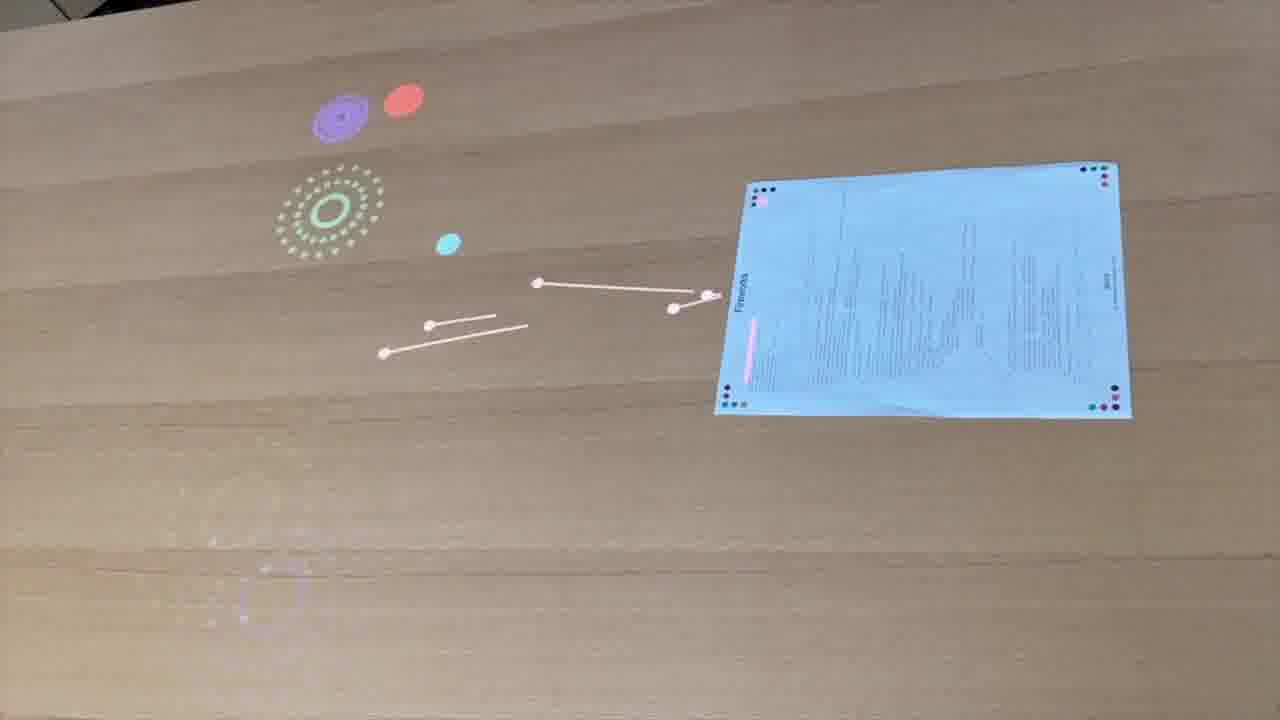
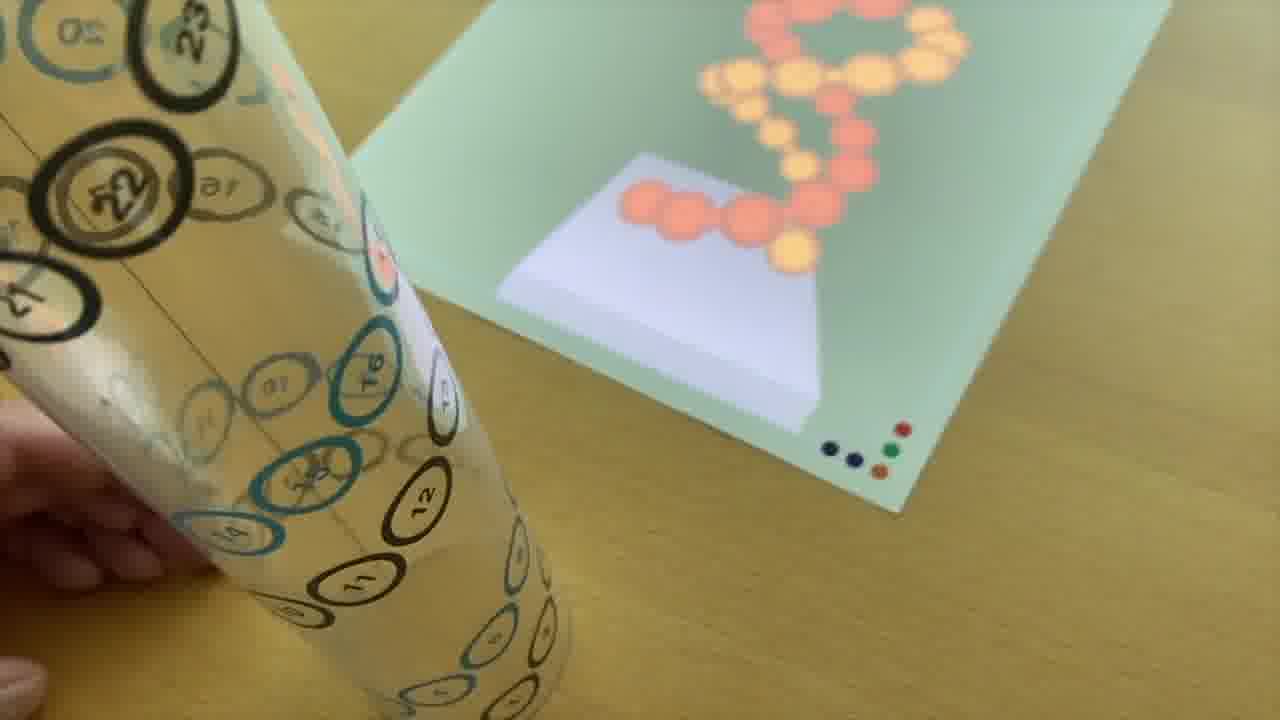
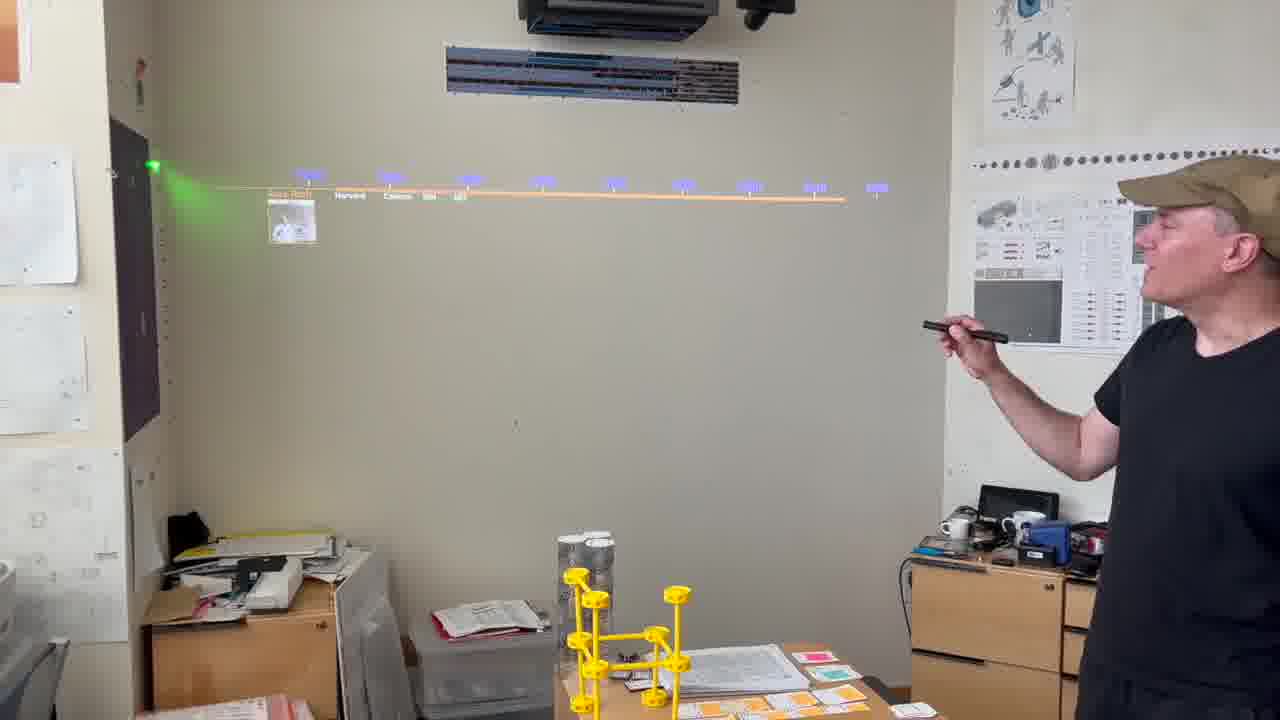
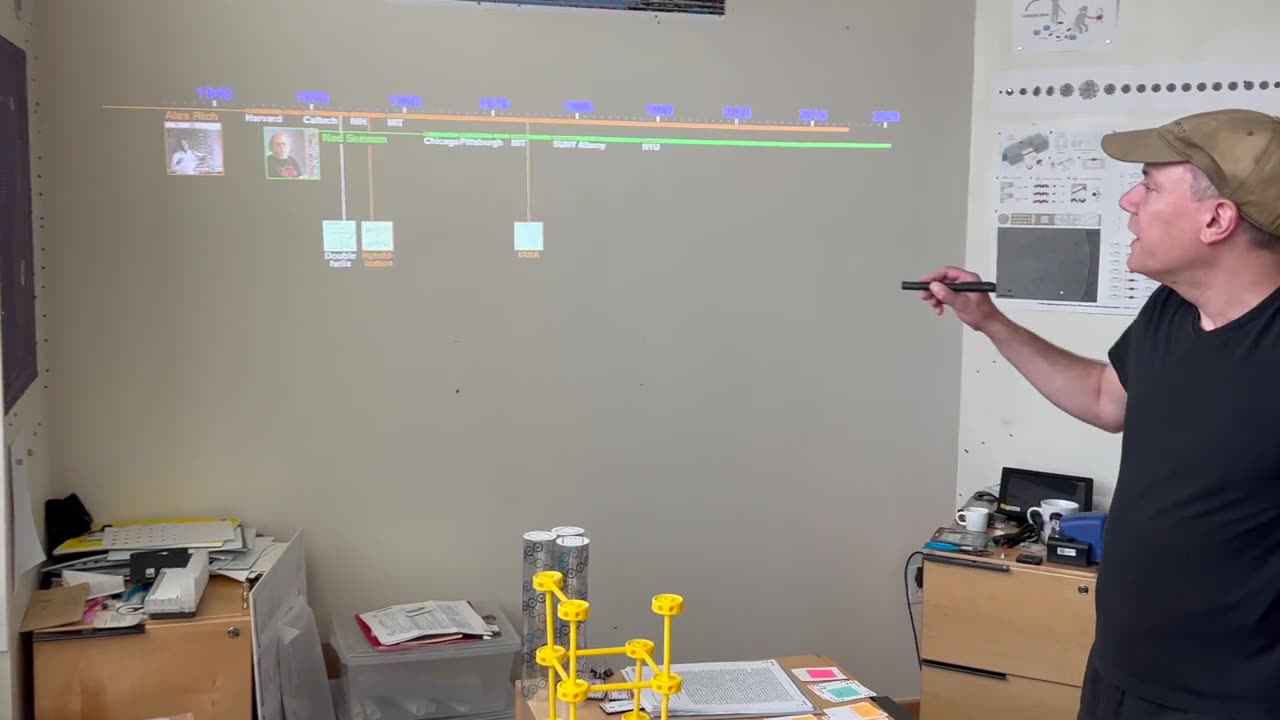
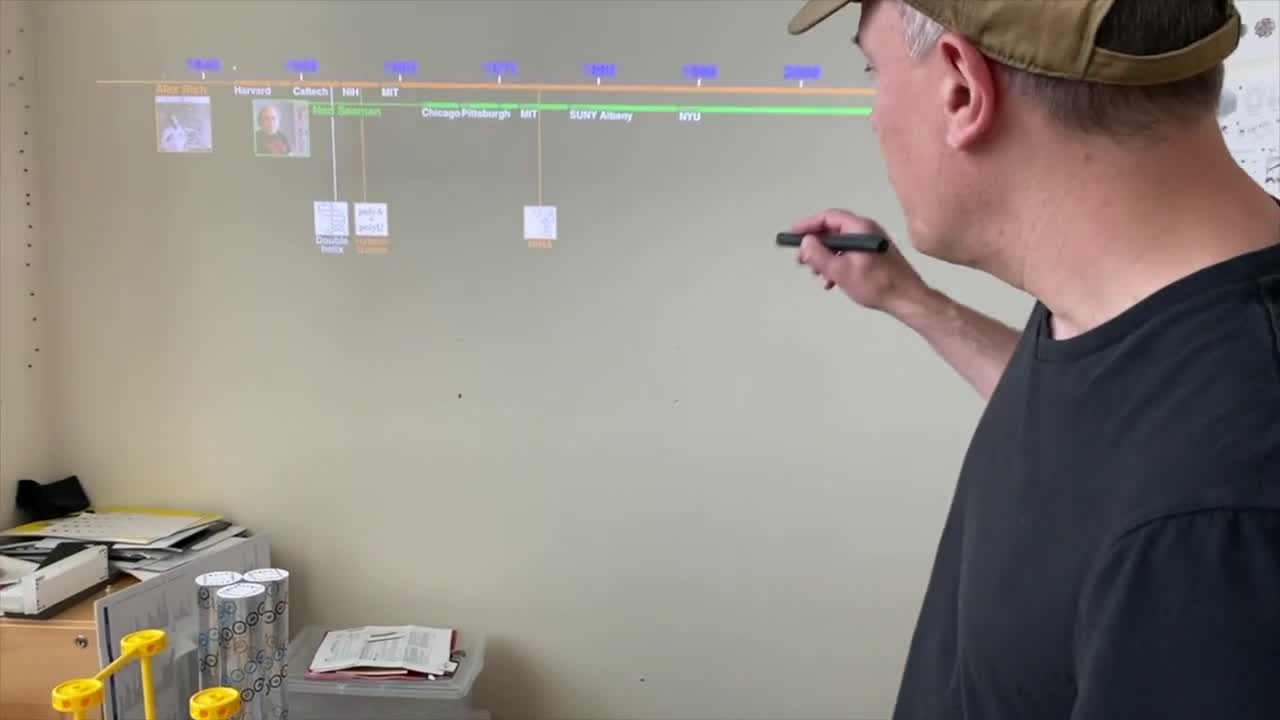
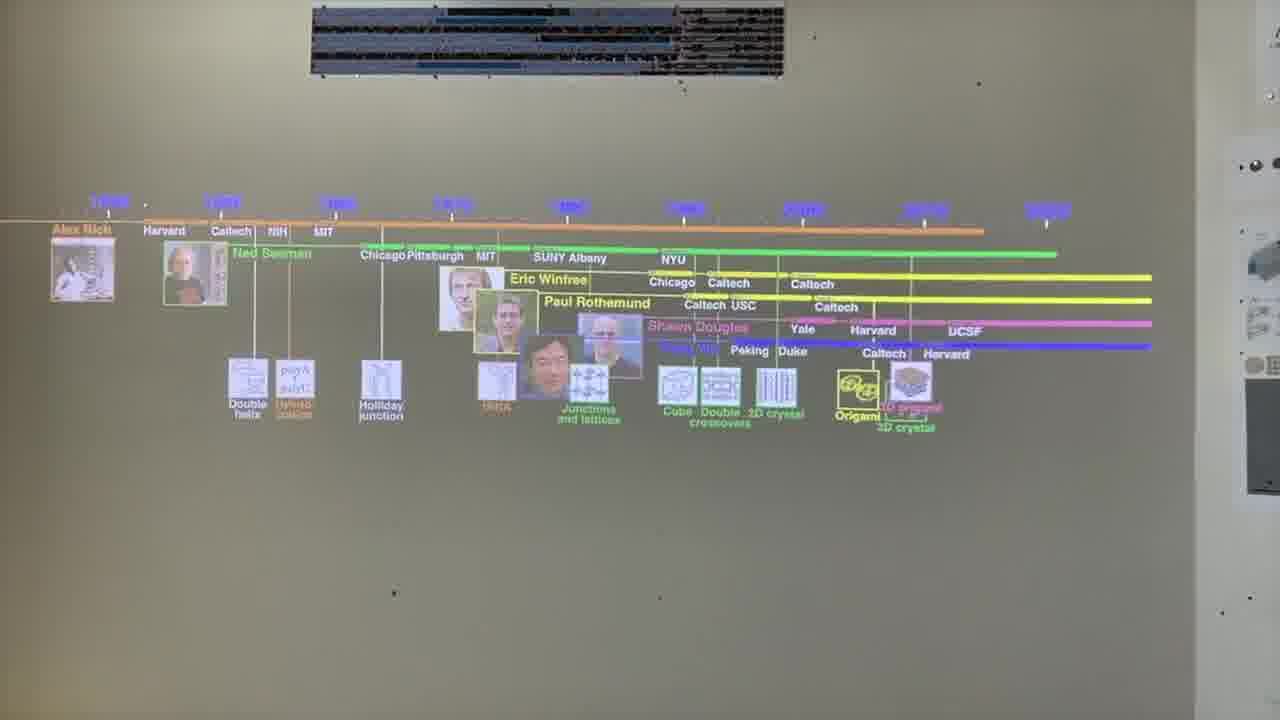
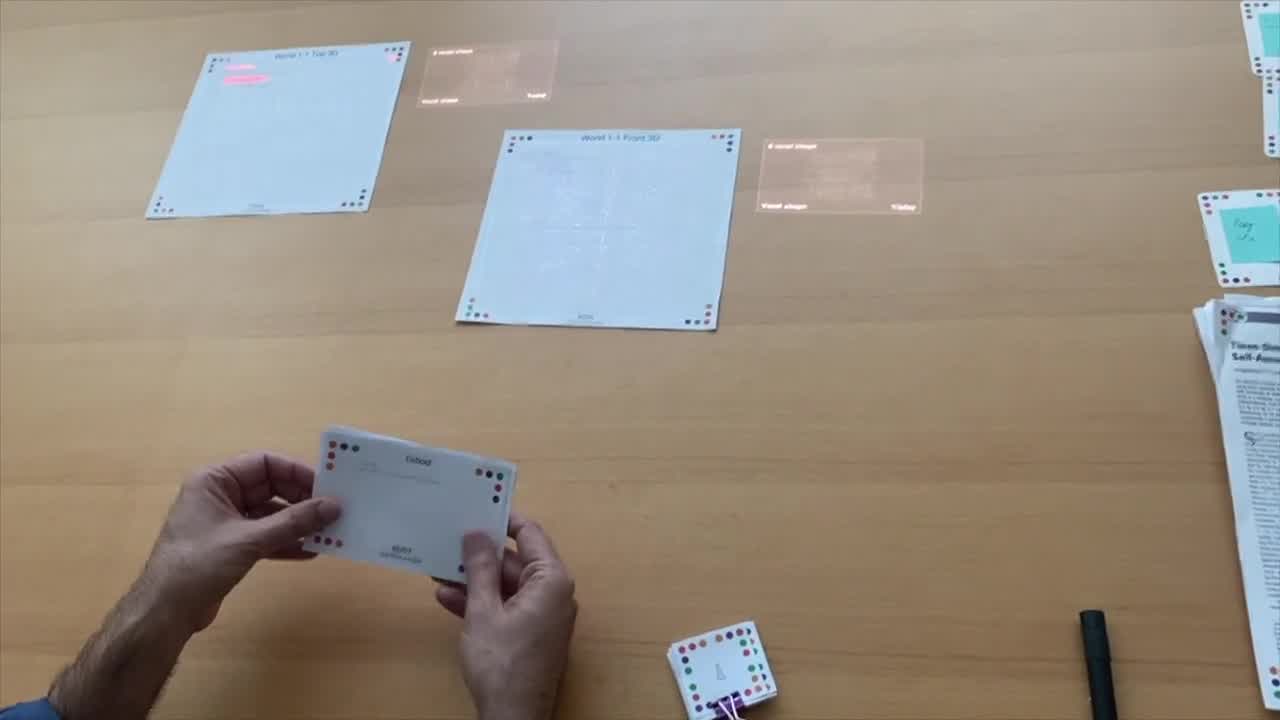
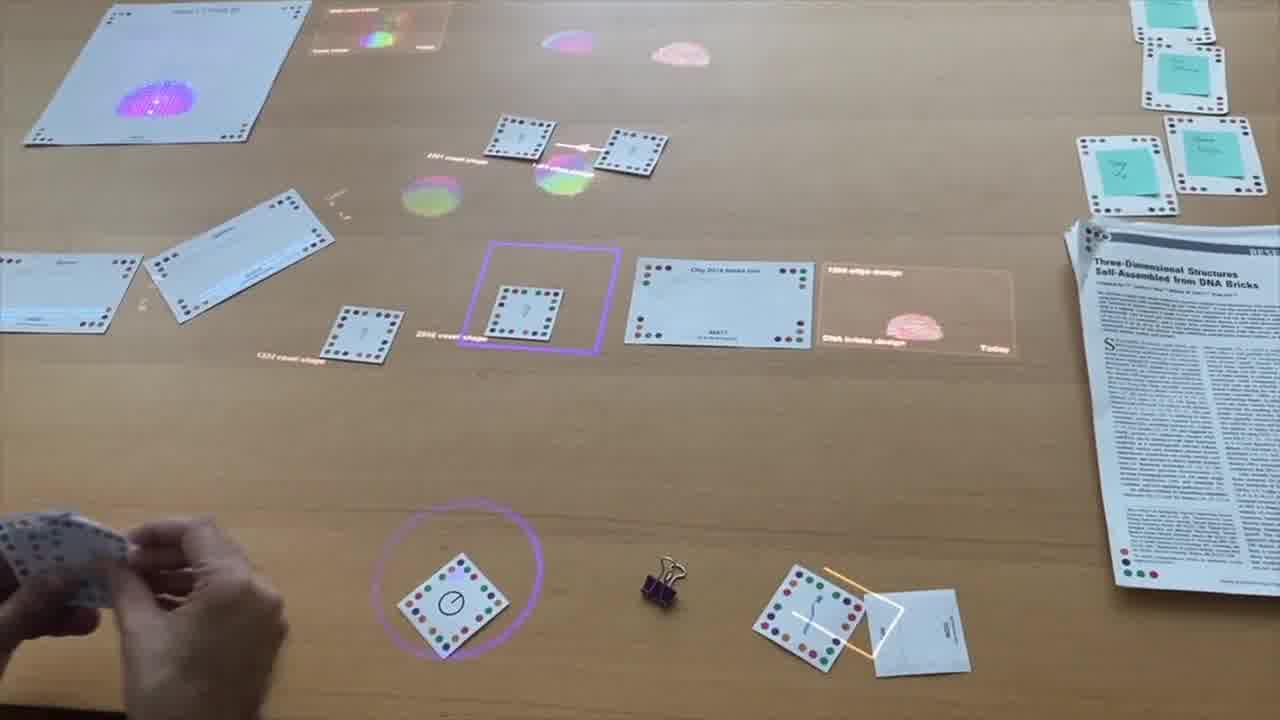
I have a timeline over on the side wall. And I have a stack of person cards. [more]
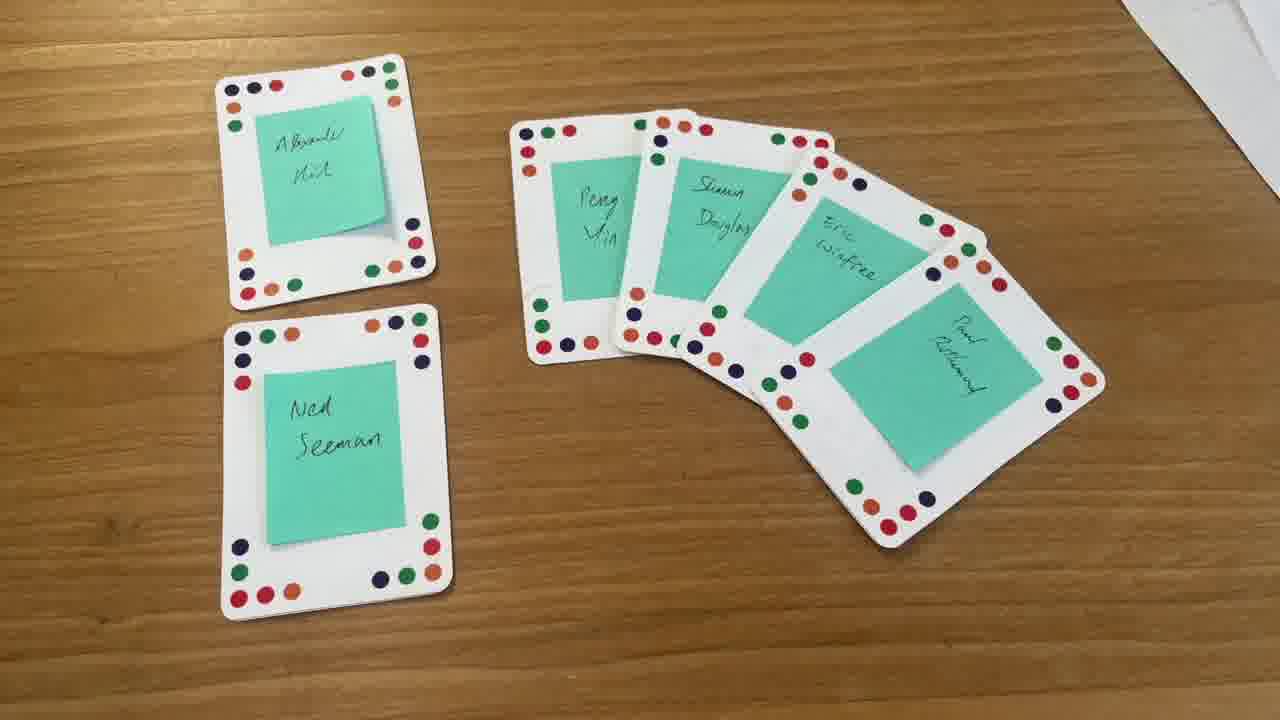
Each card has a person's information on it, and when the card is showing, we see the person's lifespan on the timeline, and the institutions they were at.
There was a lot cross-pollination among these people and their institutions, which is an interesting part of the story.
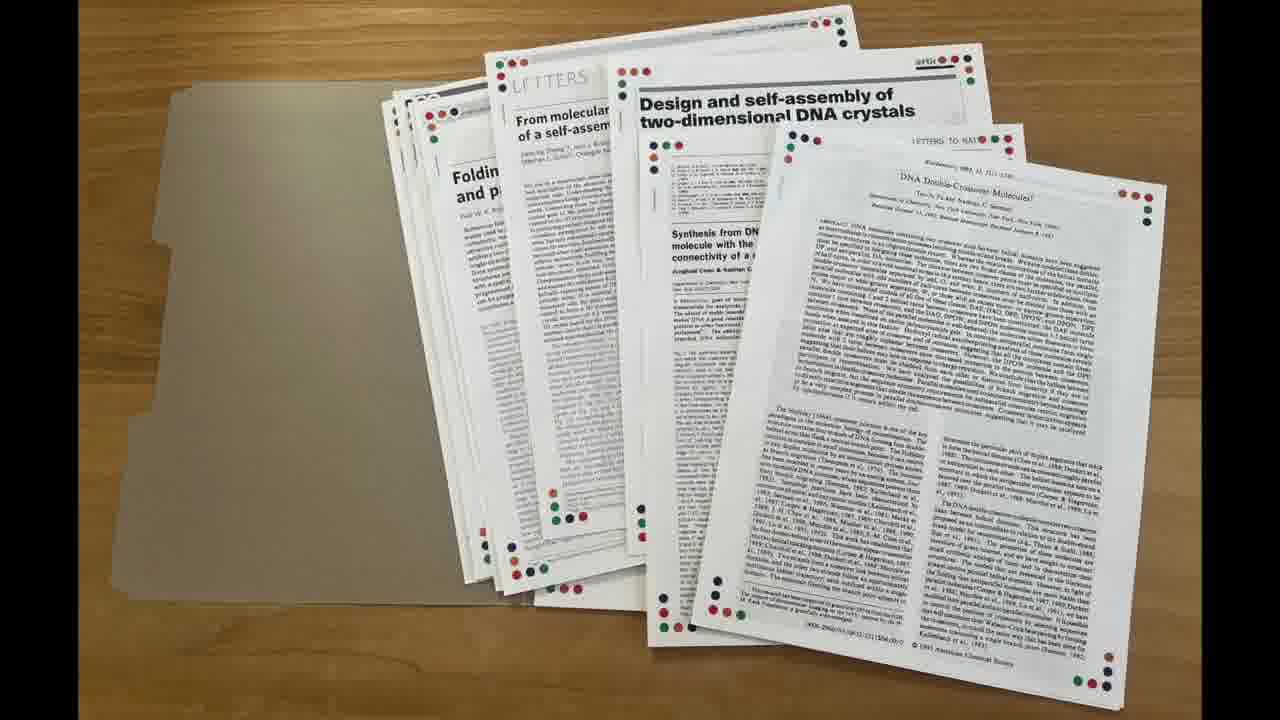
I also have a stack of published papers. These were the seminal papers in the field. As I put each paper on the table, its icon is added to the timeline.

So as the talk proceeds, you can always see the entire sequence of papers so far, in context.
I can point a laser pointer at an icon to show thumbnails of the pages.
I can also show the pages by physically flipping through the paper itself, and I do both of these throughout the talk.
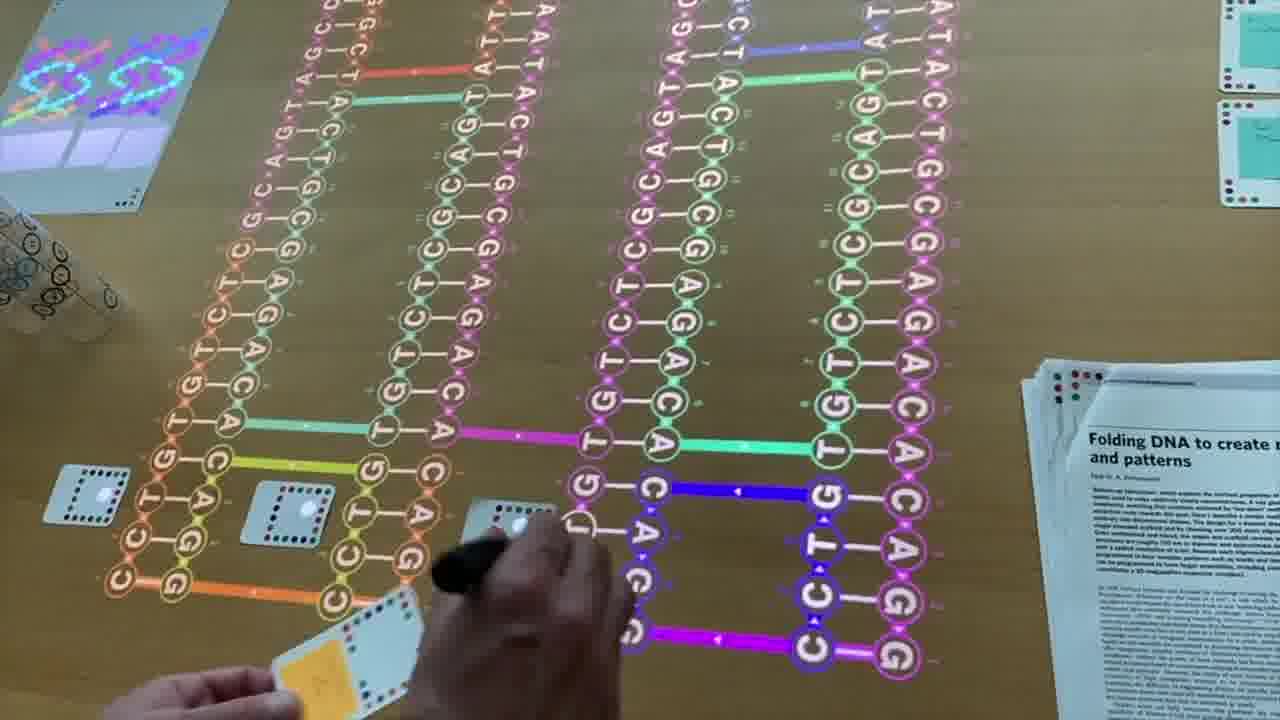
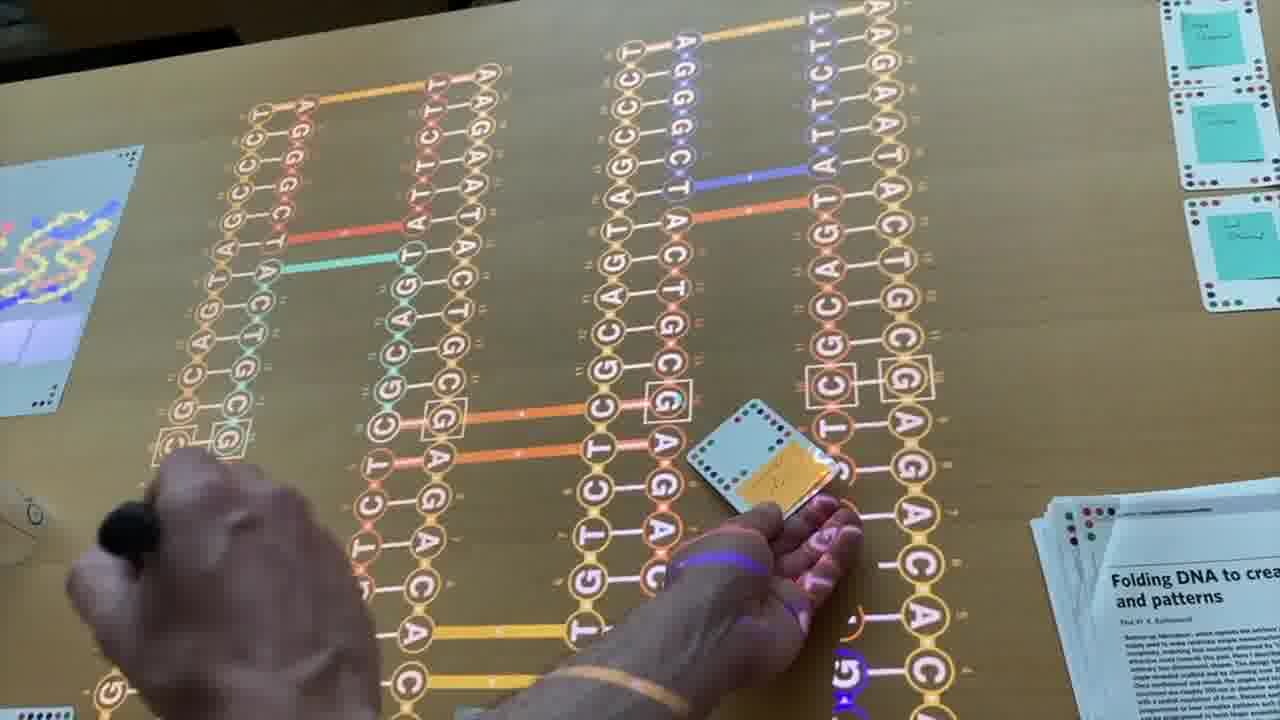
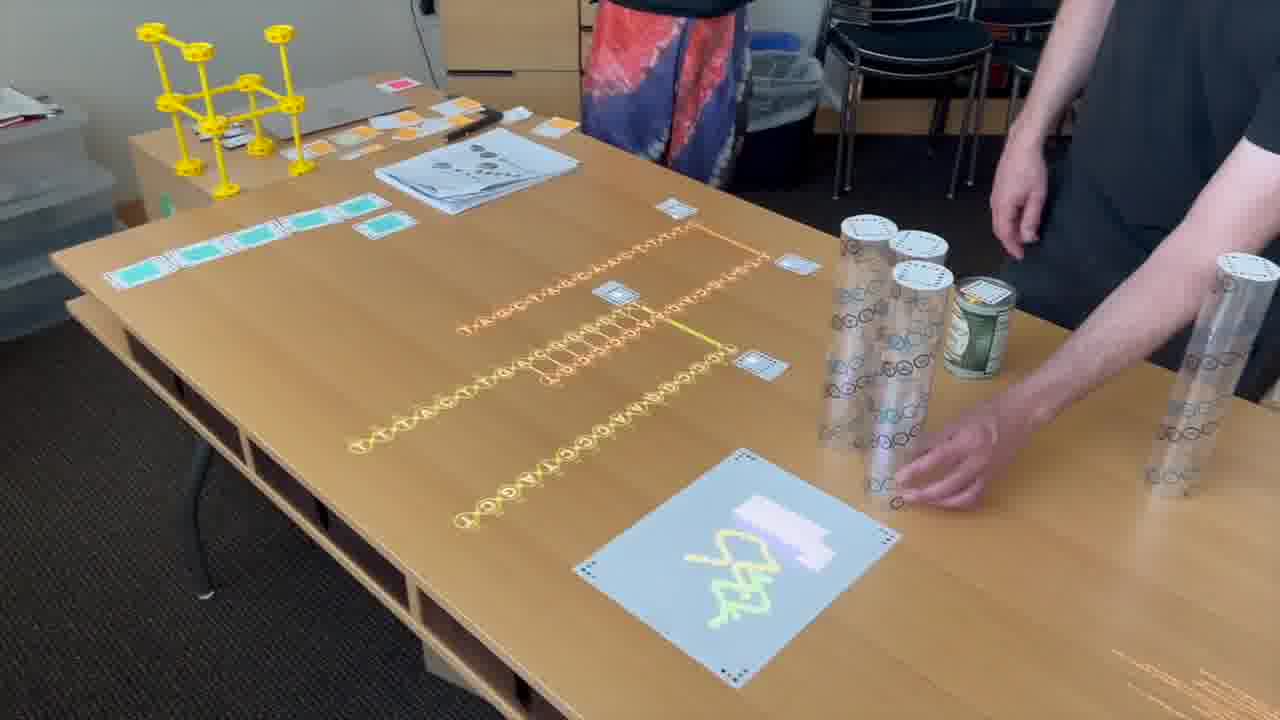
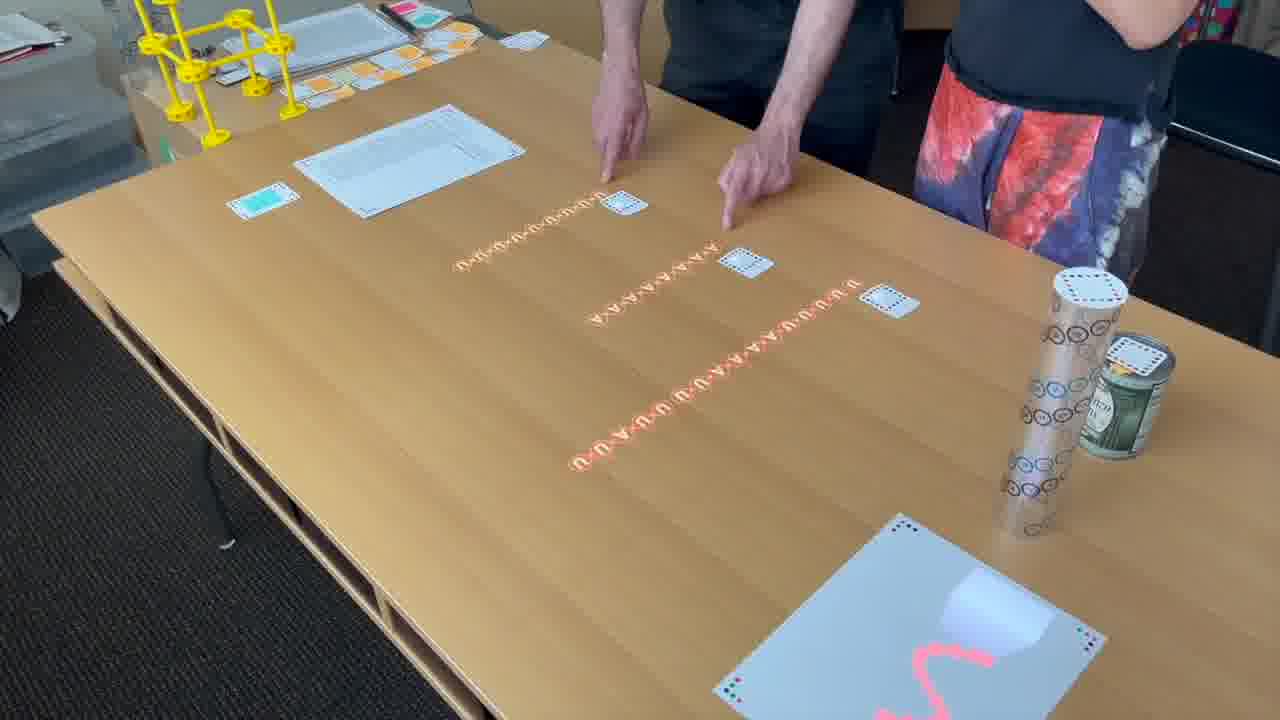
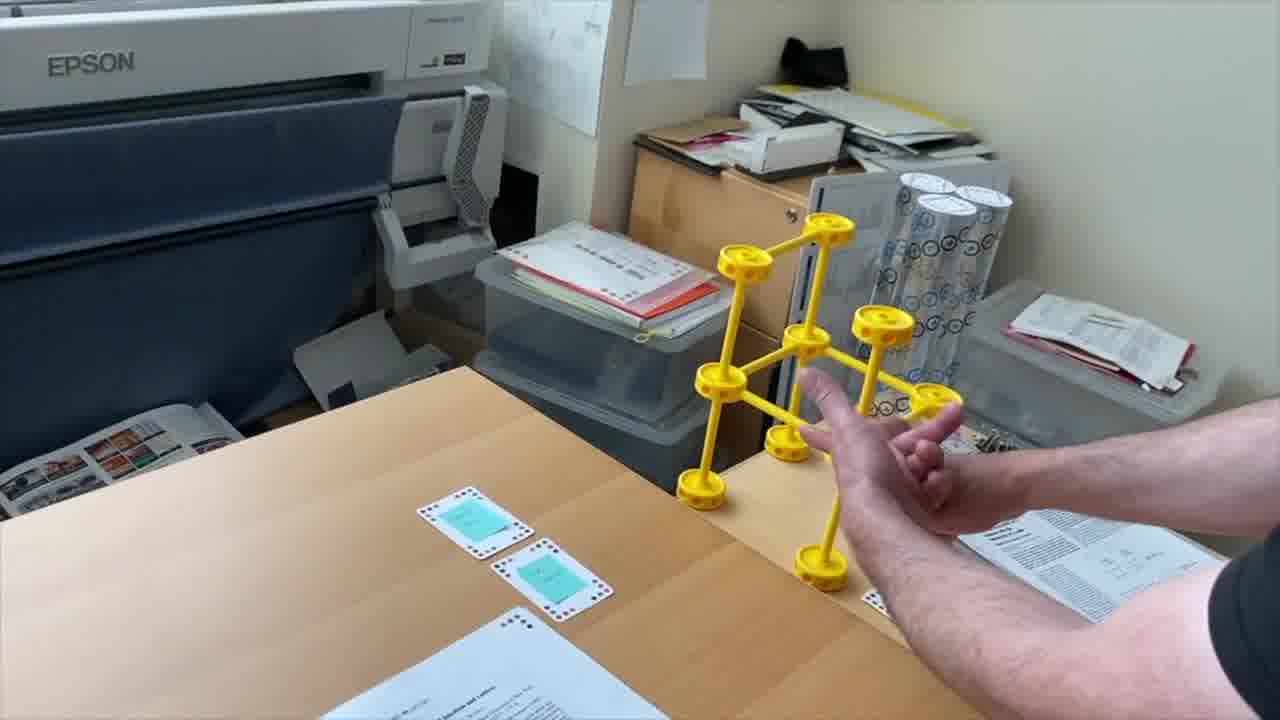
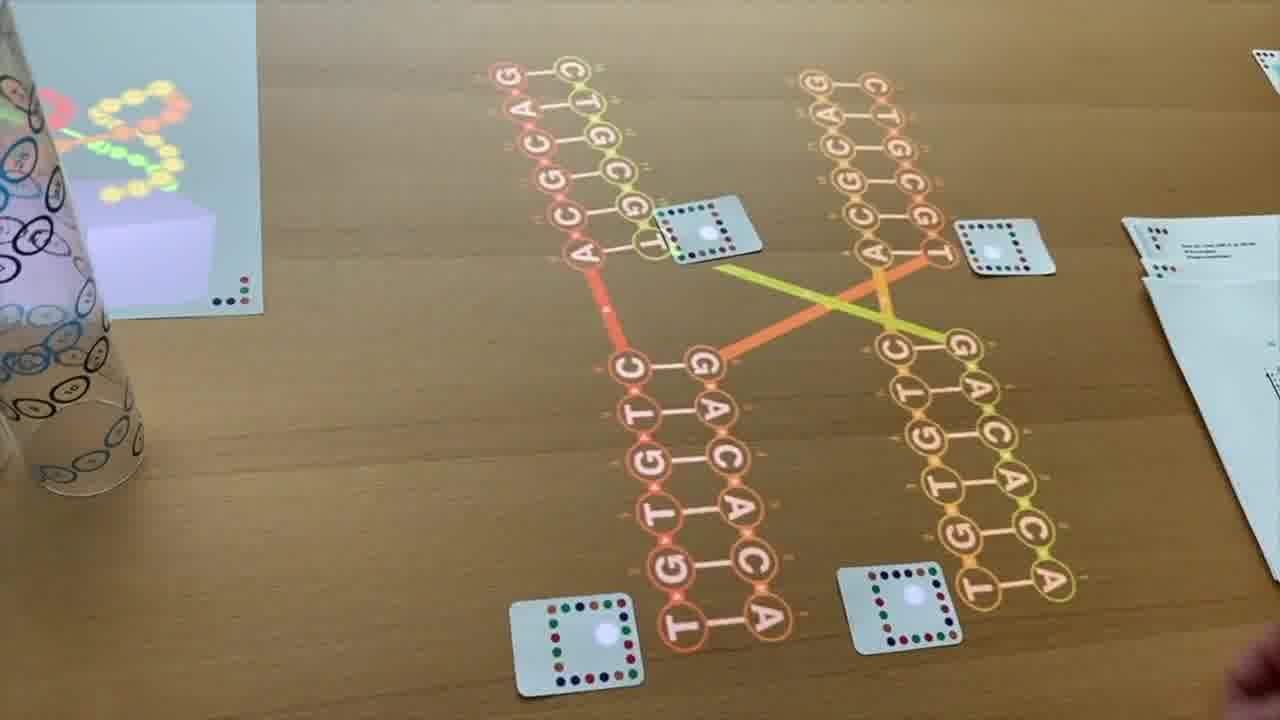
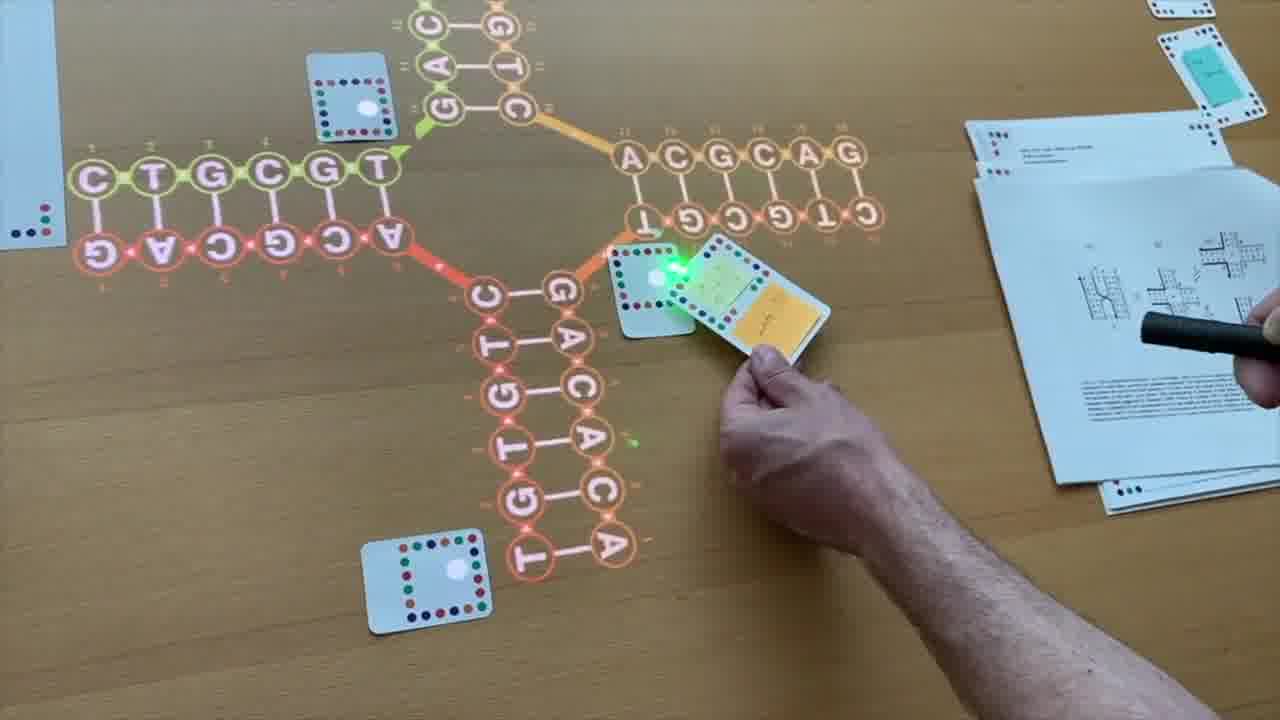
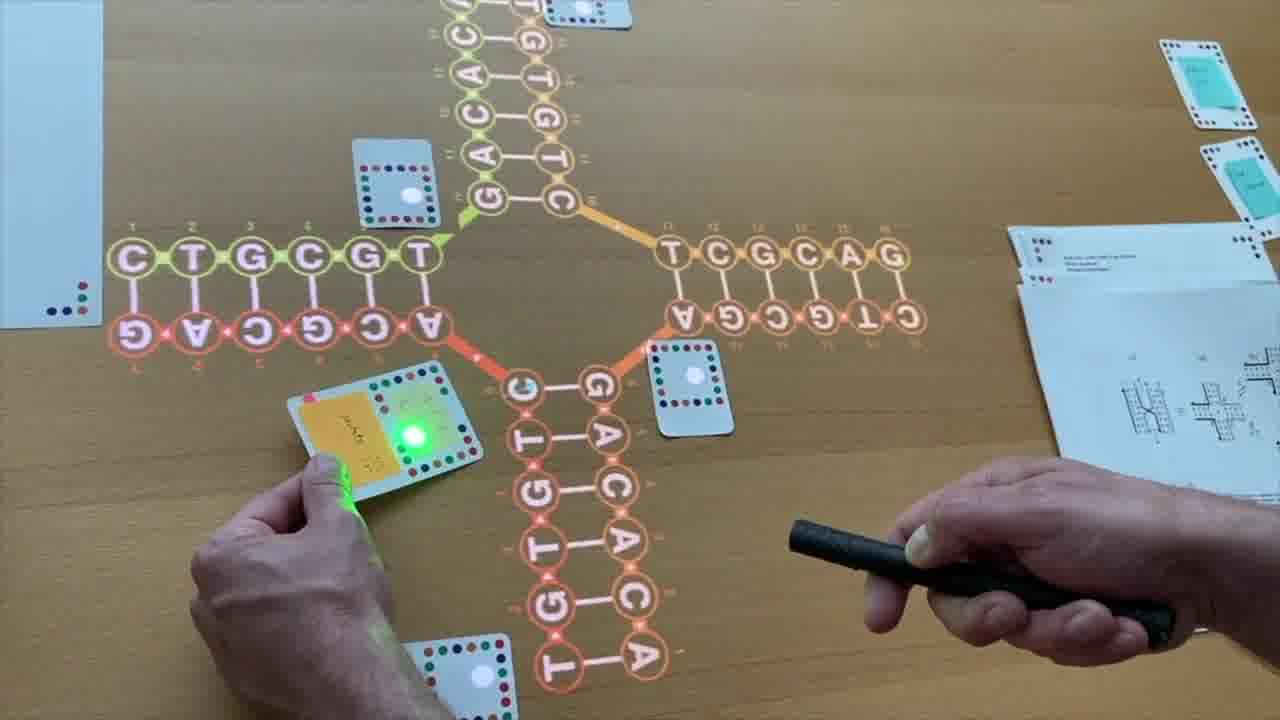
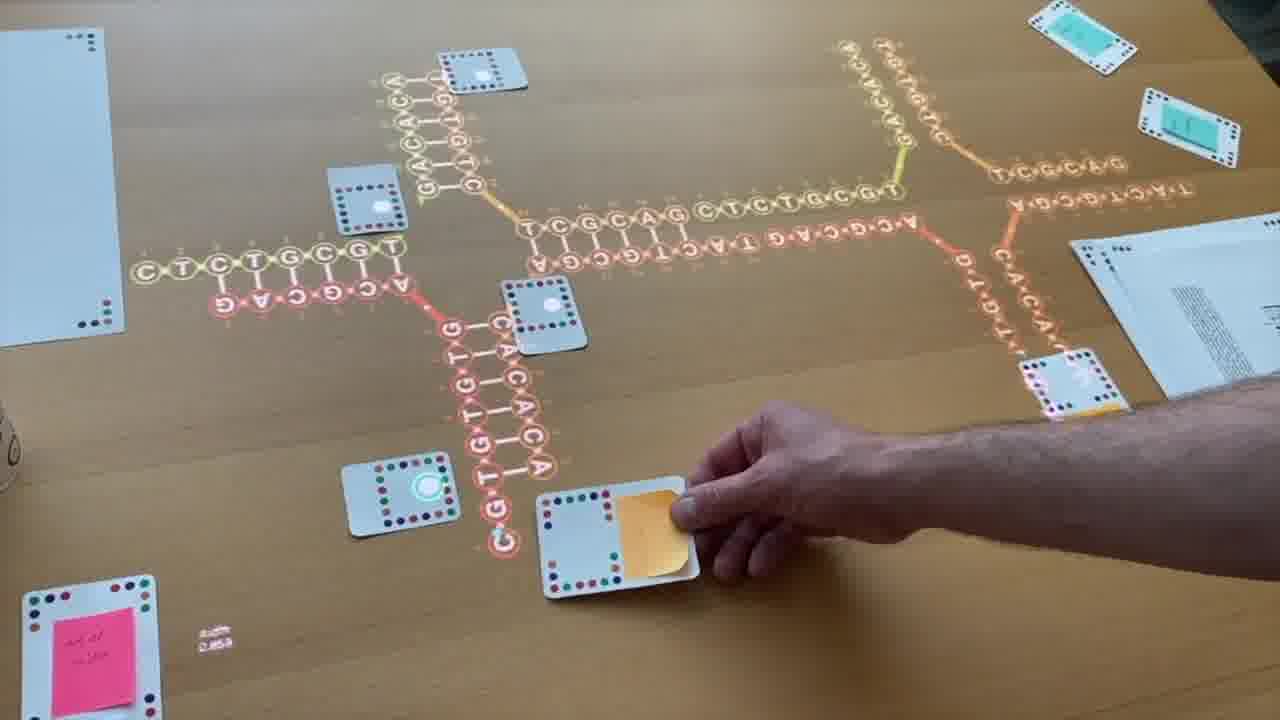
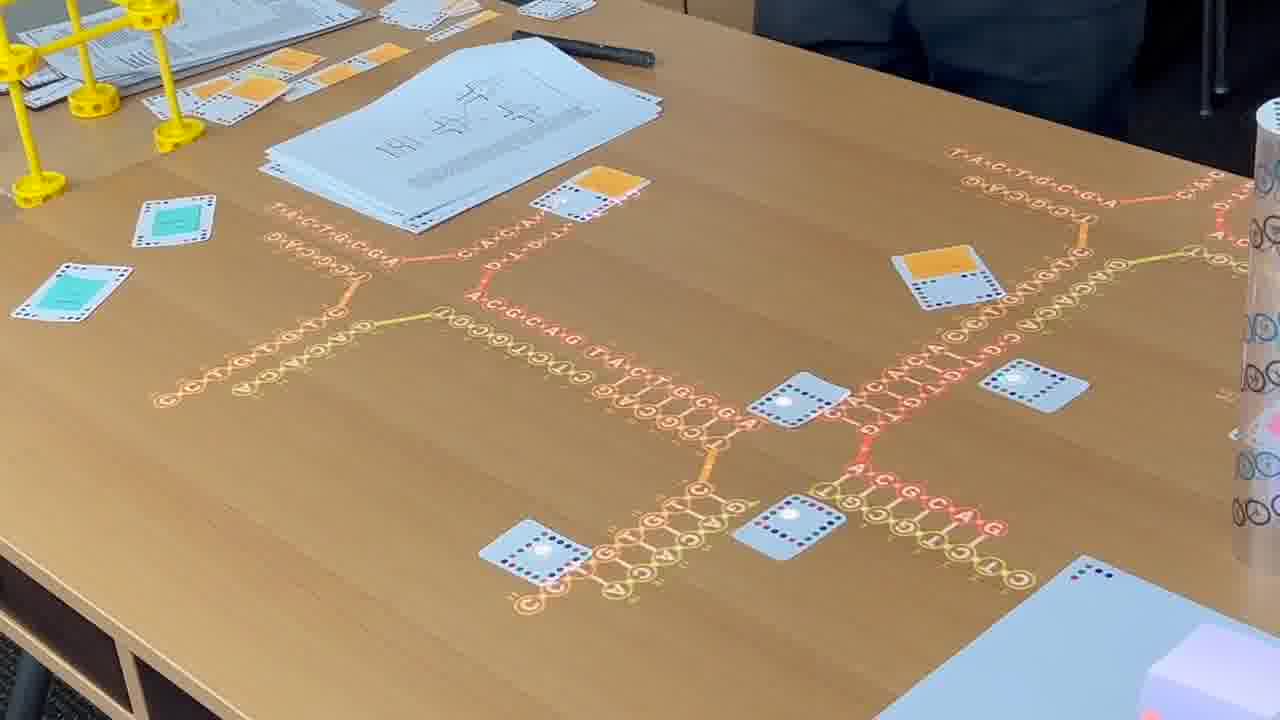
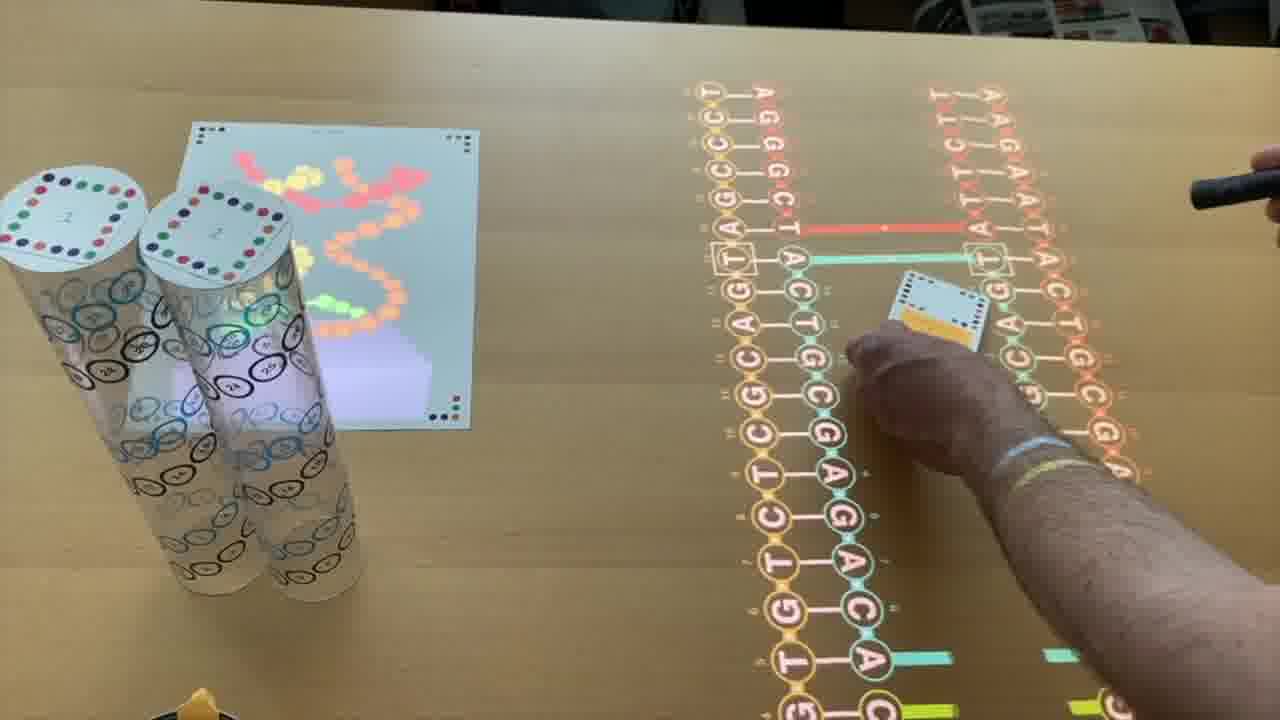
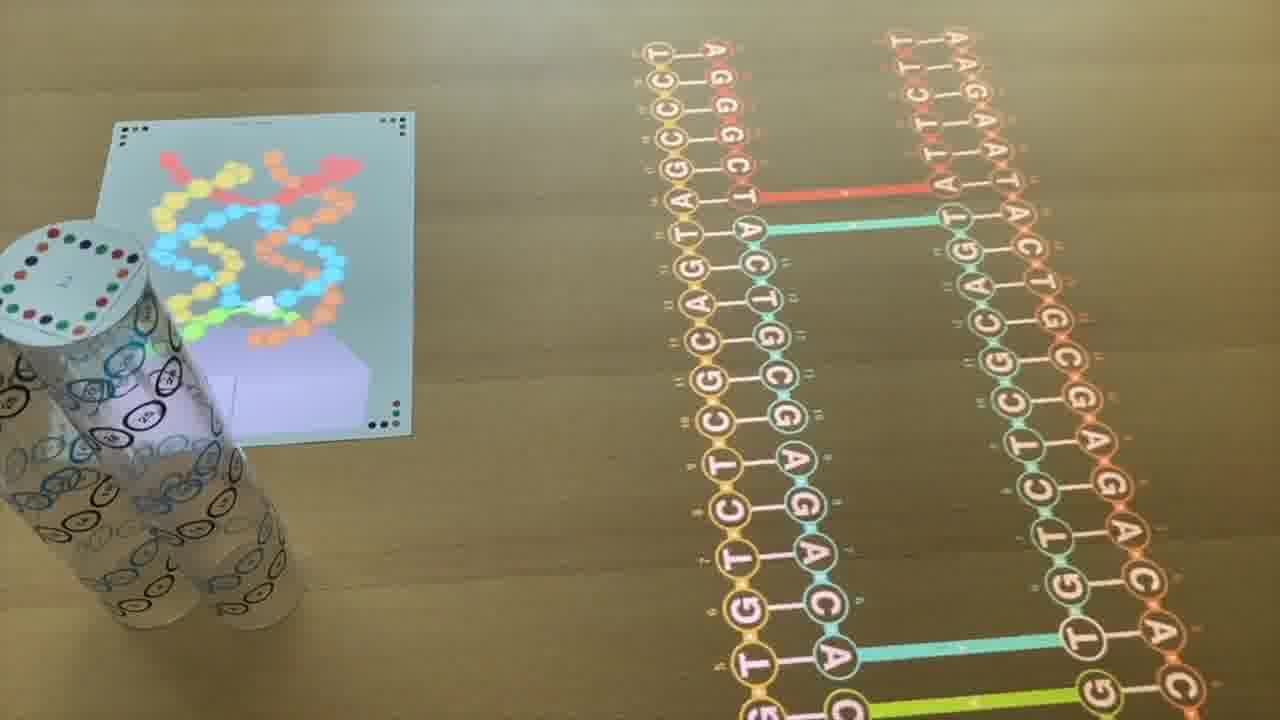
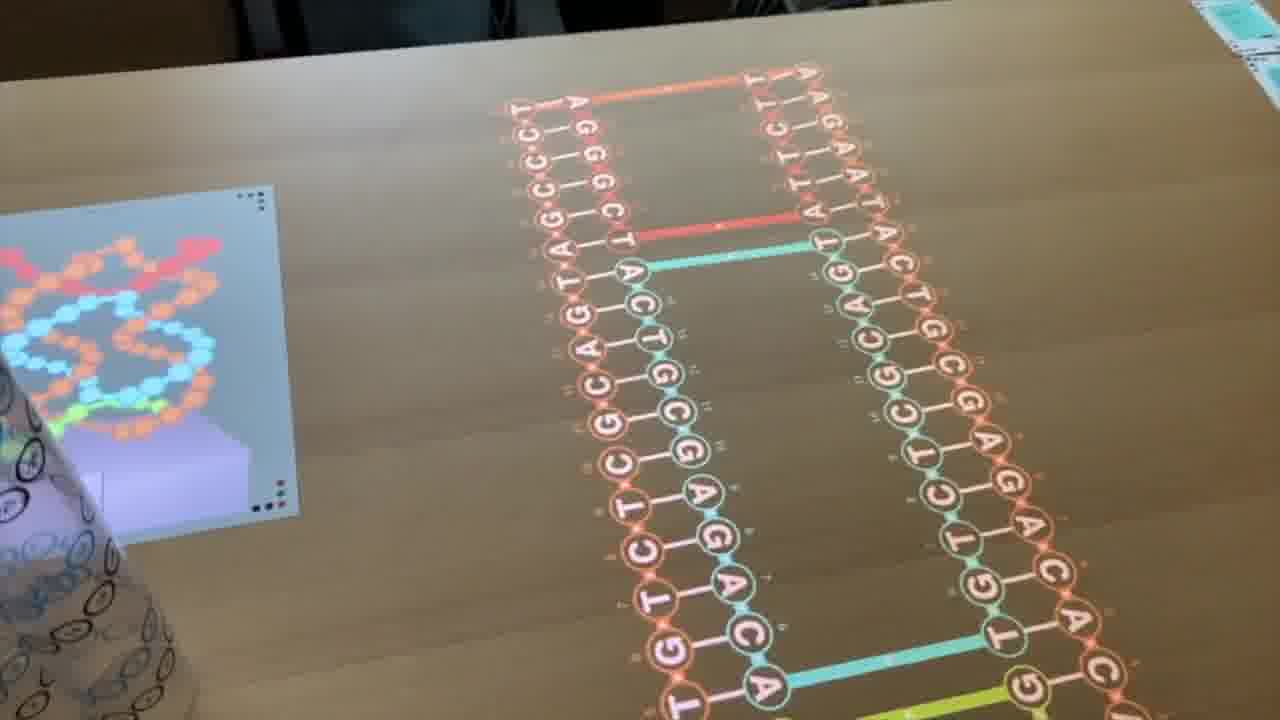
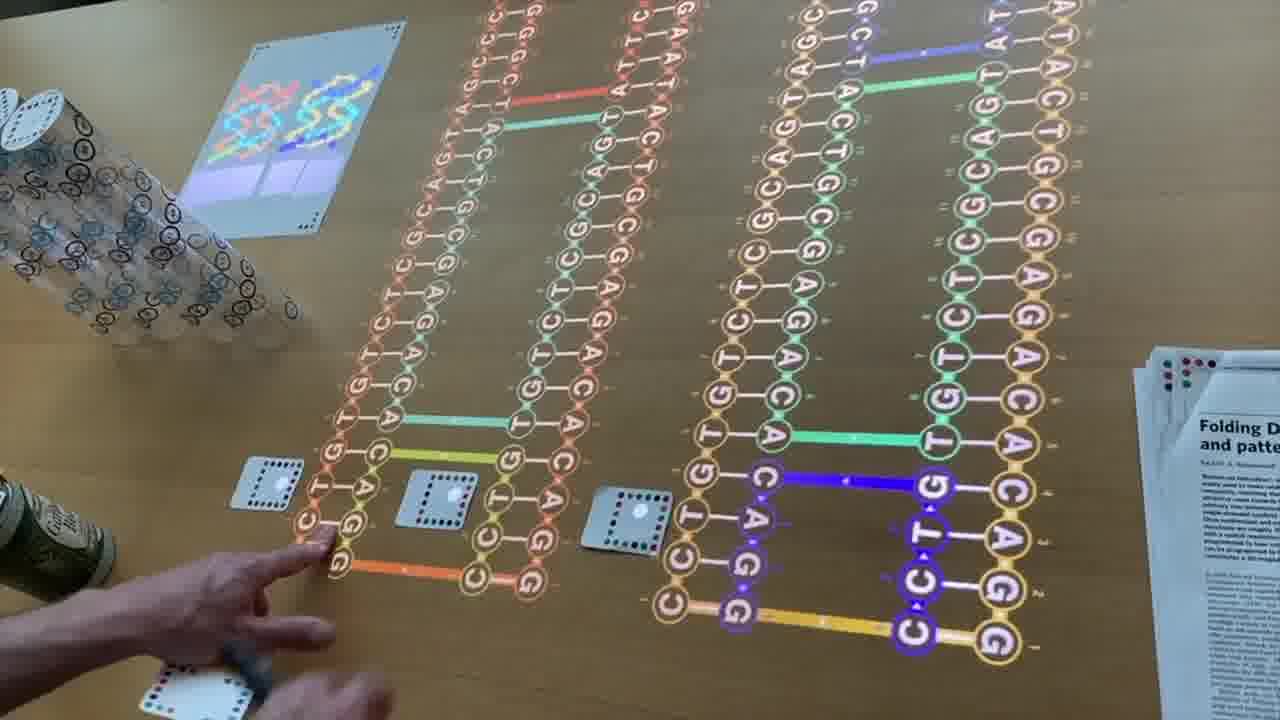
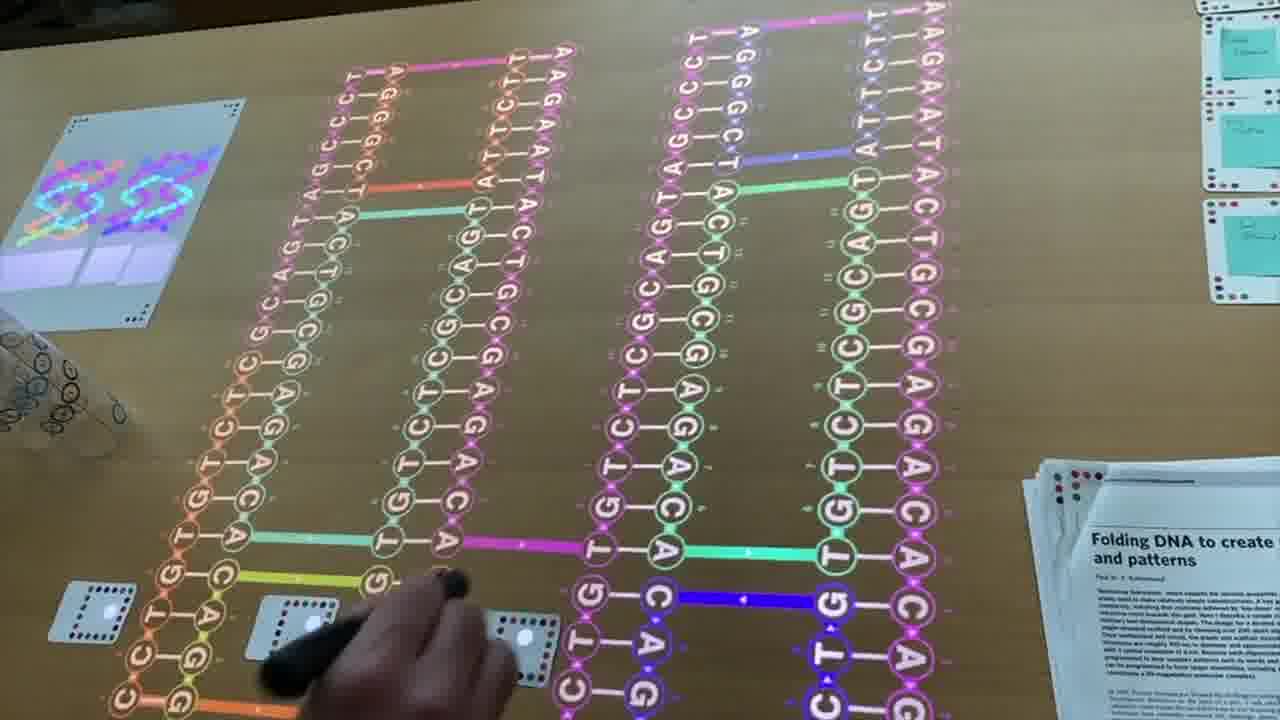
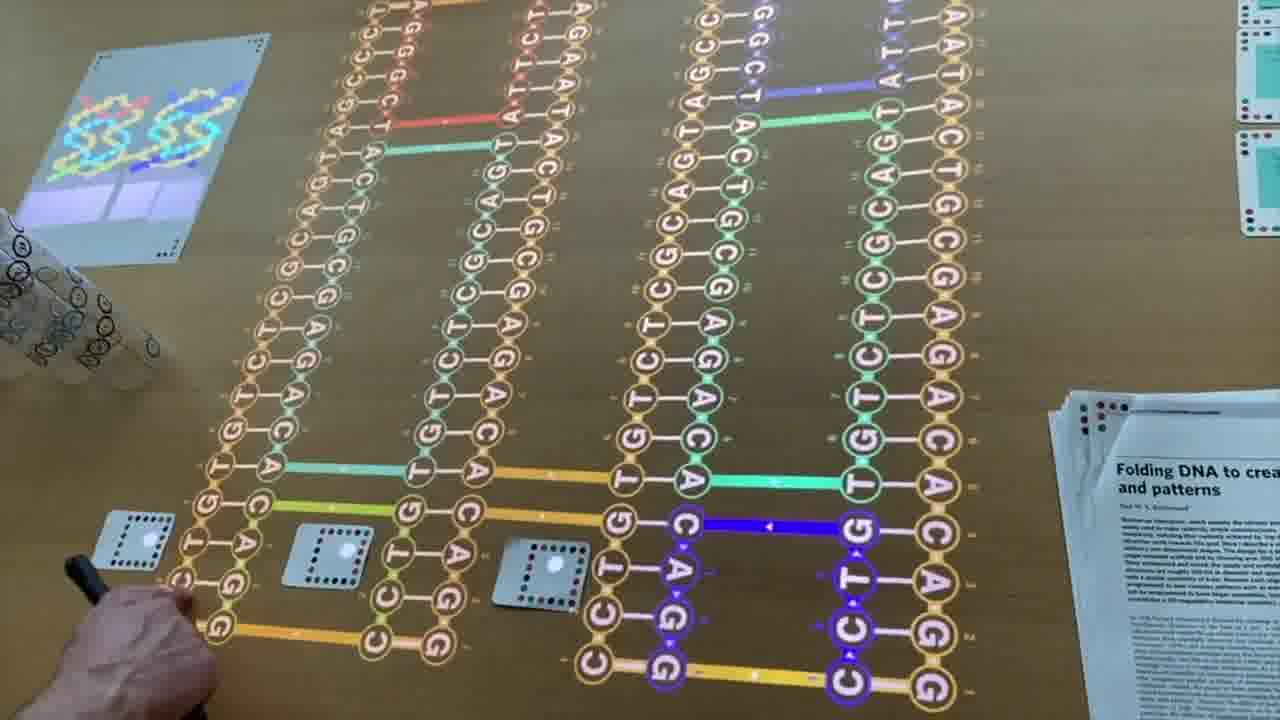
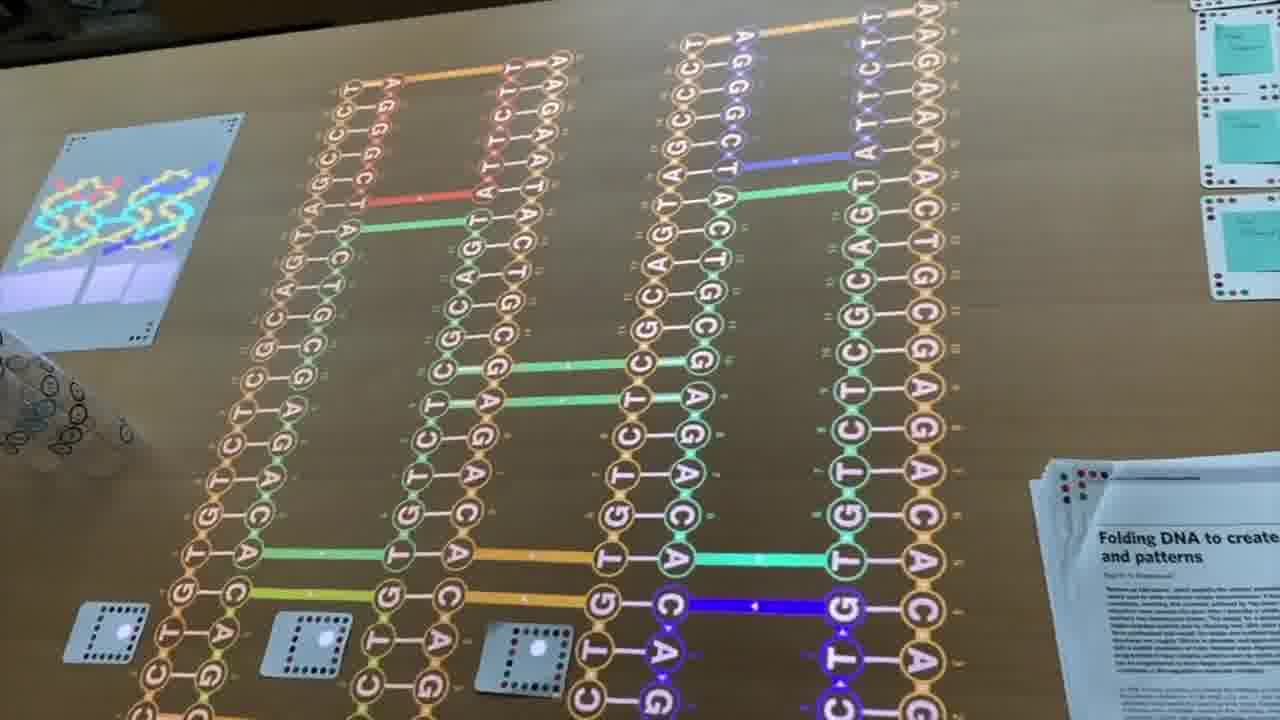
As we go through this sequence of papers, I want to show what was significant about each one. So instead of just talking about it or pointing at figures, I recreate, live on the table, the structure described in the paper.
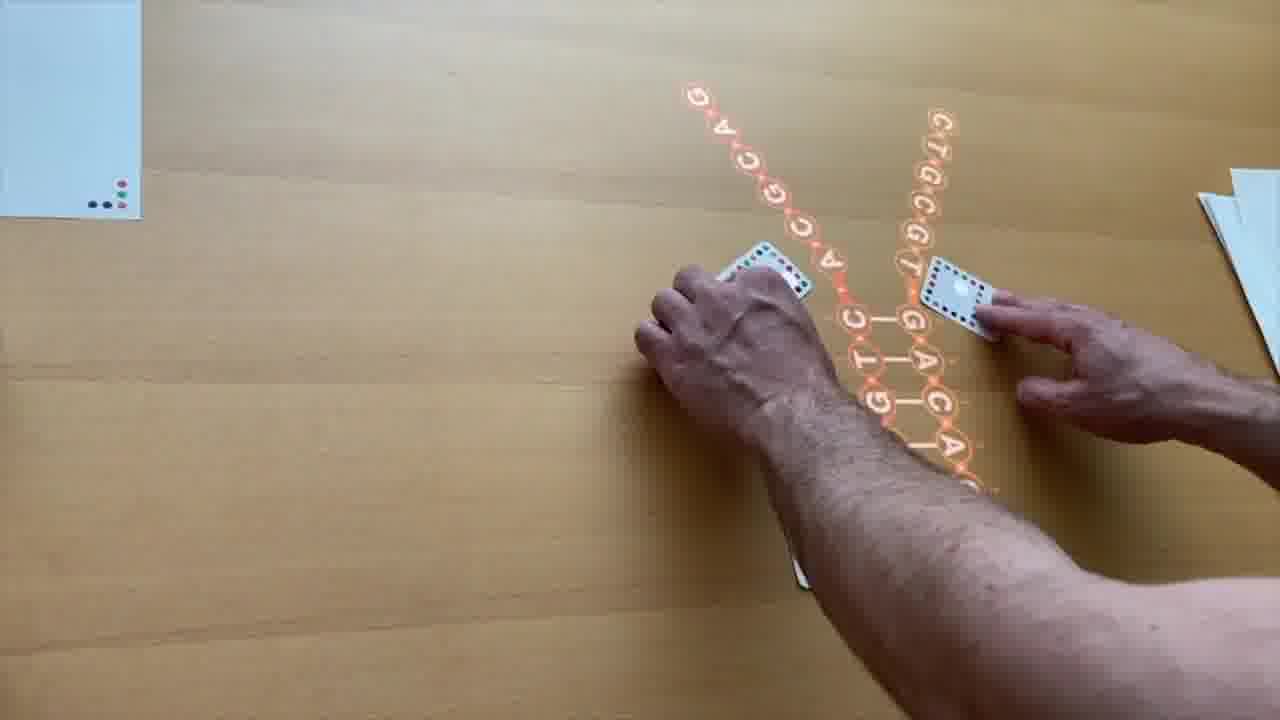
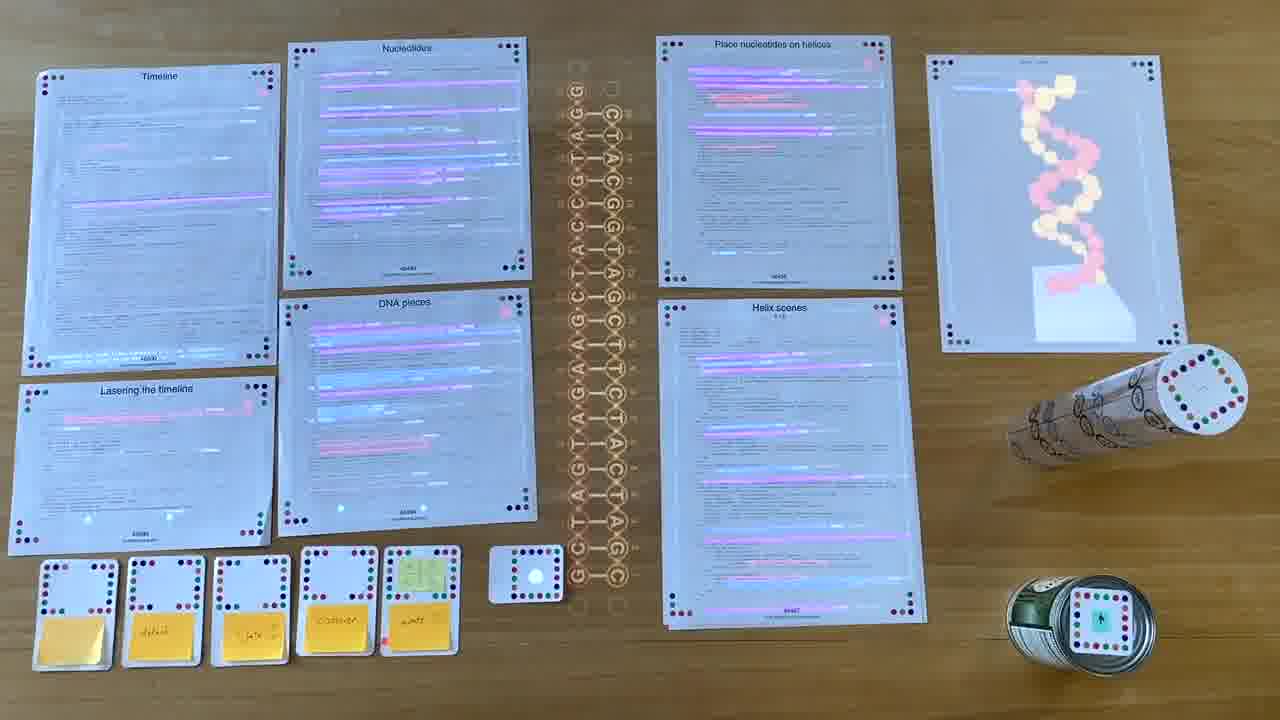
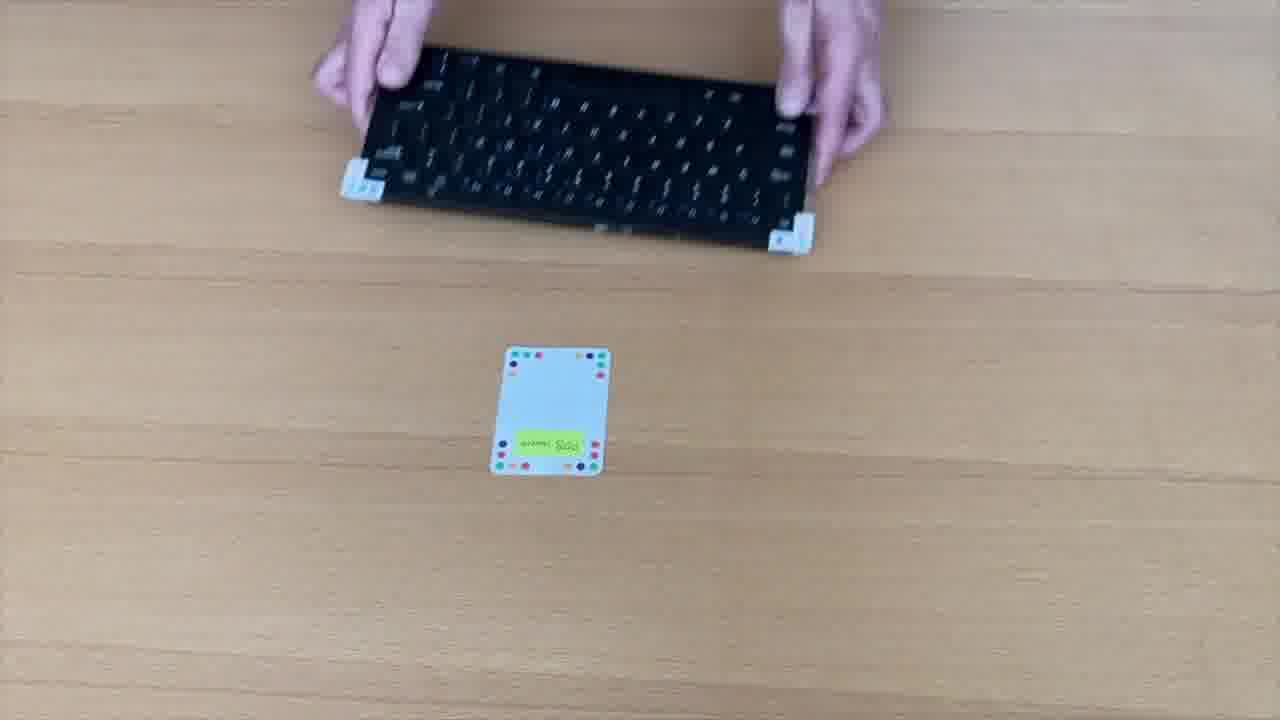
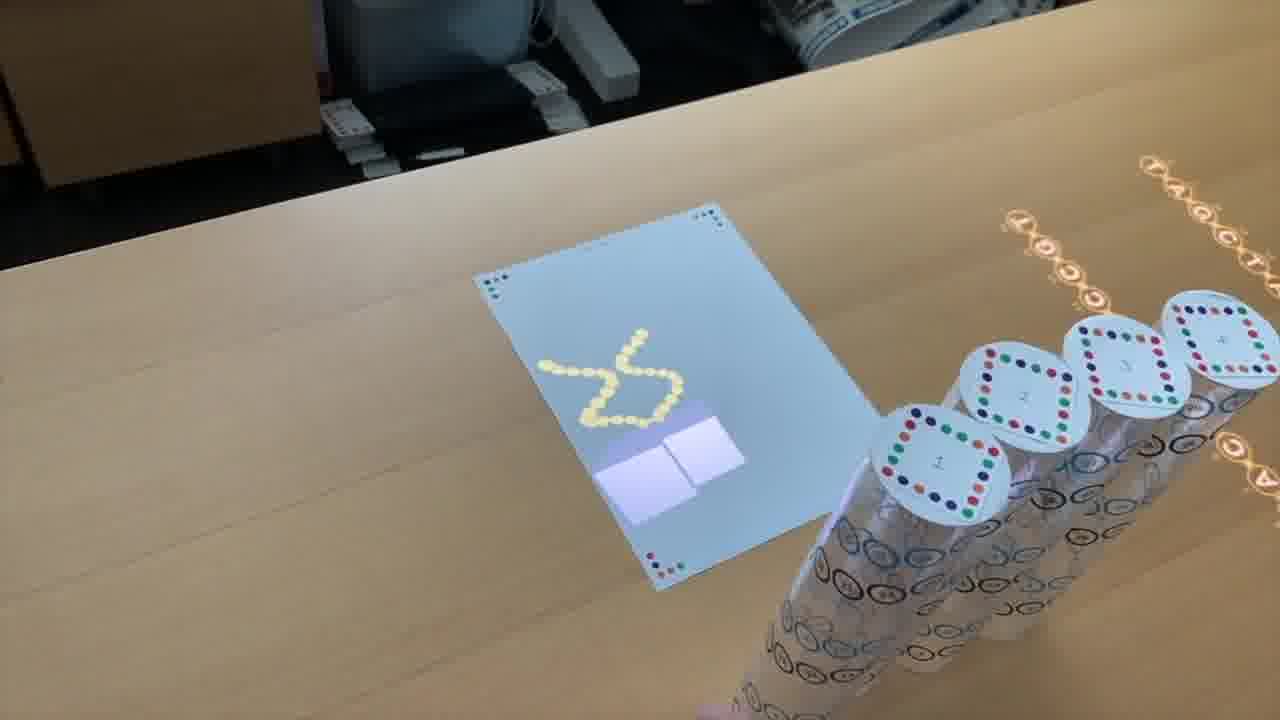
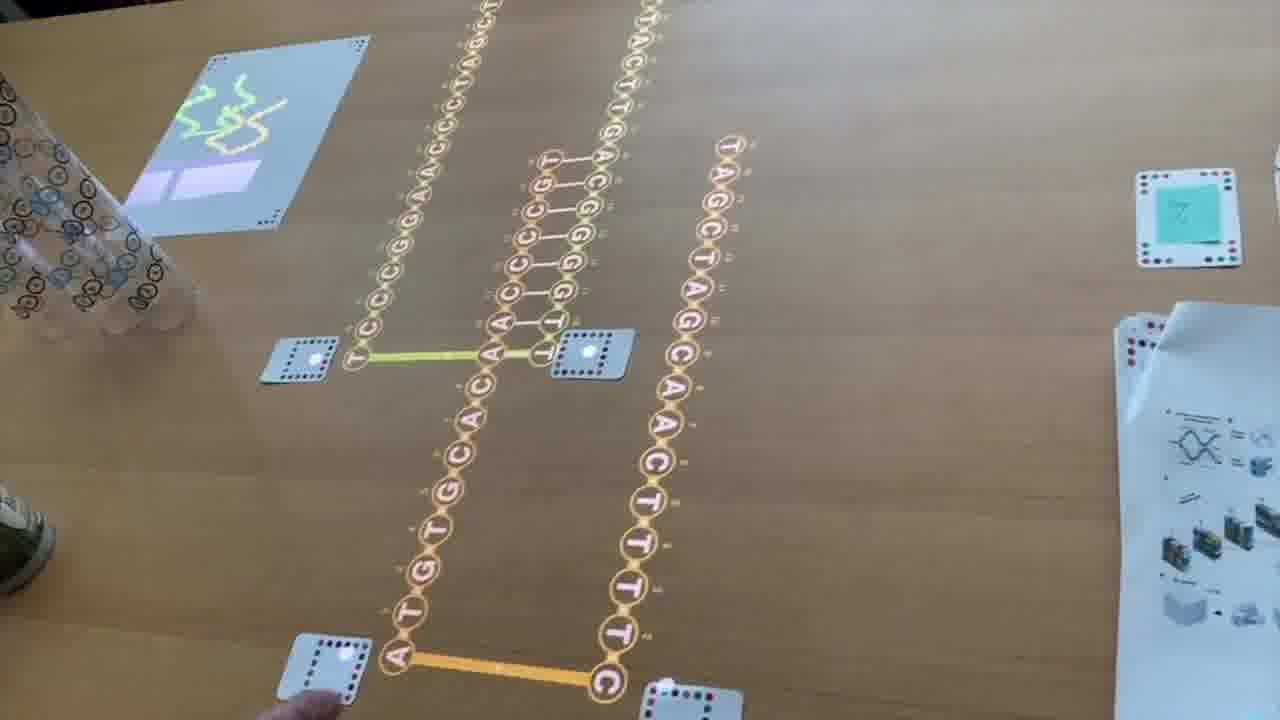
To do that, I use a set of cards for modeling DNA strands. [more]
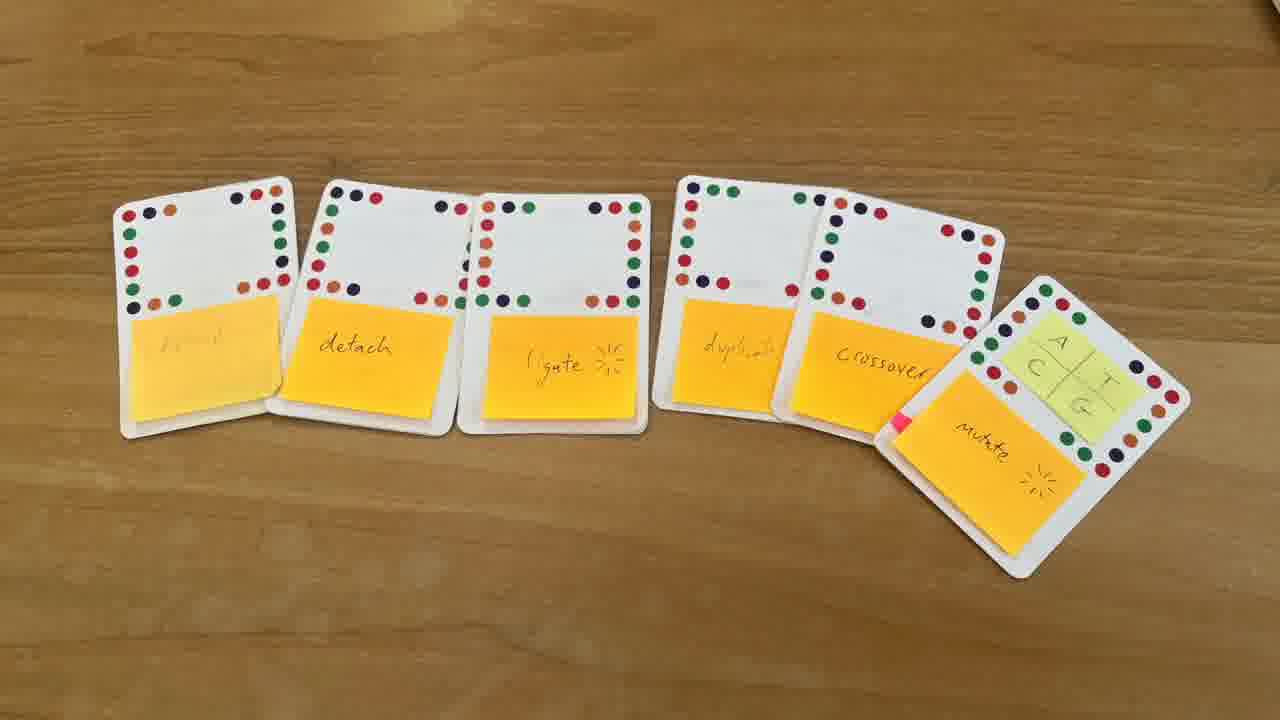
I have a card that adds bases to a strand, a card that removes bases, a card that forms crossovers, cards that nick or ligate or recolor, and so on. About six double-sided cards.
These cards don't know anything about the papers, they're just a generic toolkit. But of course, I made the cards for this talk, so they have what I need to express the structures from the papers.
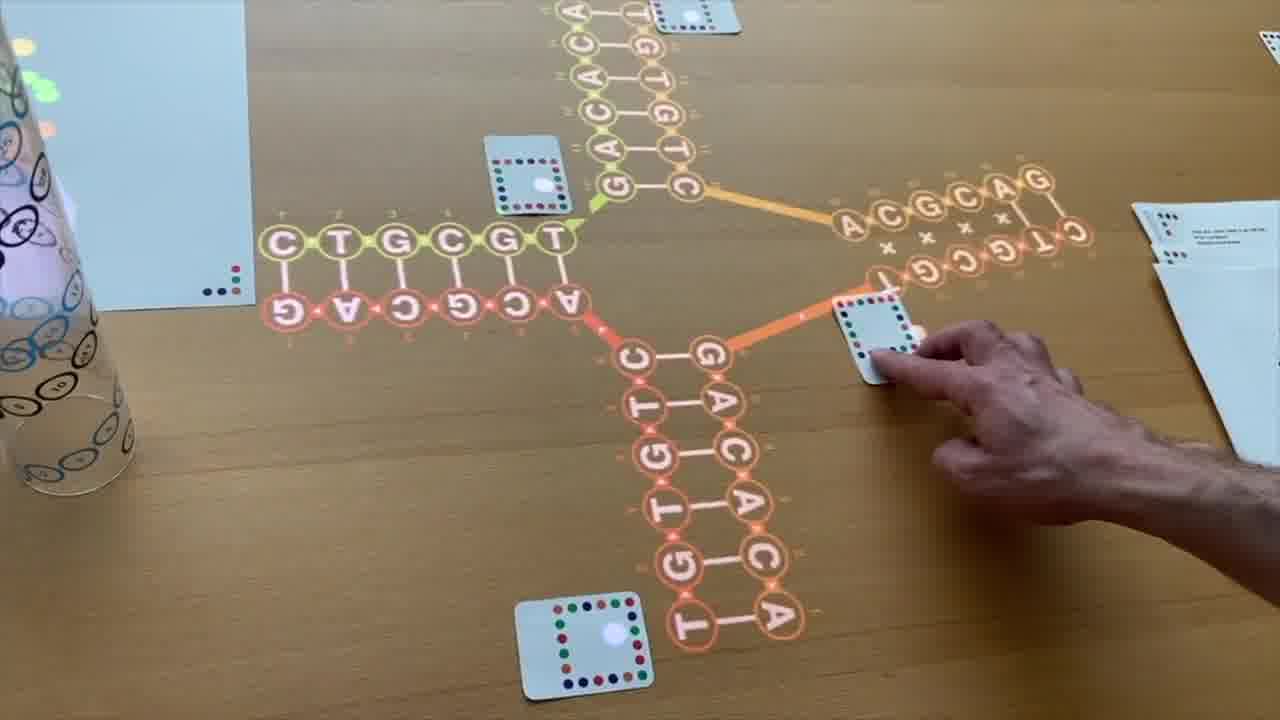
And each structure leads into the next one. We start with Alex Rich's paper about the discovery of hybridization.
Then, in Ned Seeman's paper, he's using hybridization to form different kinds of junctions, and talks about how an immobile junction with sticky ends could tile into a lattice.
In Ned's later paper, we have the invention of the double anti-parallel crossover, which is a crucial building block in DNA nanotechnology.
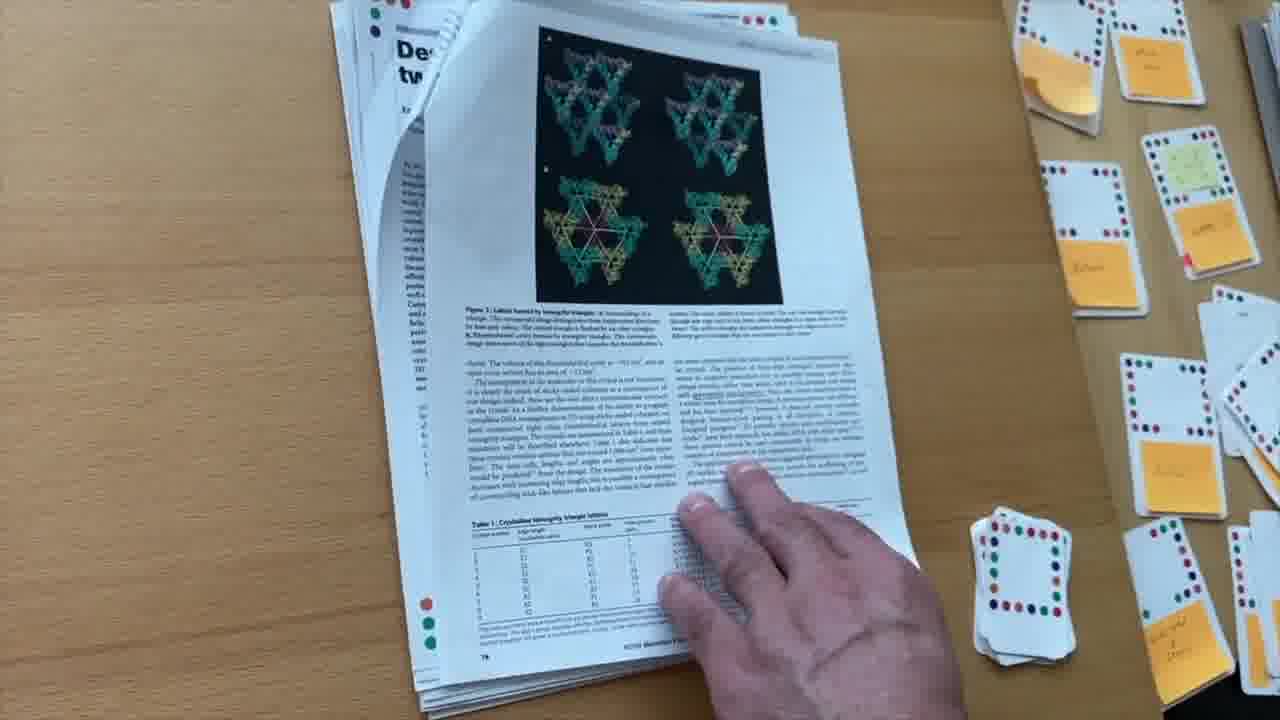
And that's used in Paul Rothemund's paper to make large asymmetric shapes, with a technique he called DNA origami.
So as I present each paper, I'm building the structure it describes out of the structure built up for the previous paper.
The last paper is from Peng Yin. He uses those anti-parallel crossovers in a different way, to make DNA bricks, and that's the technique that Shawn's lab is using in this project to make cellular playgrounds.
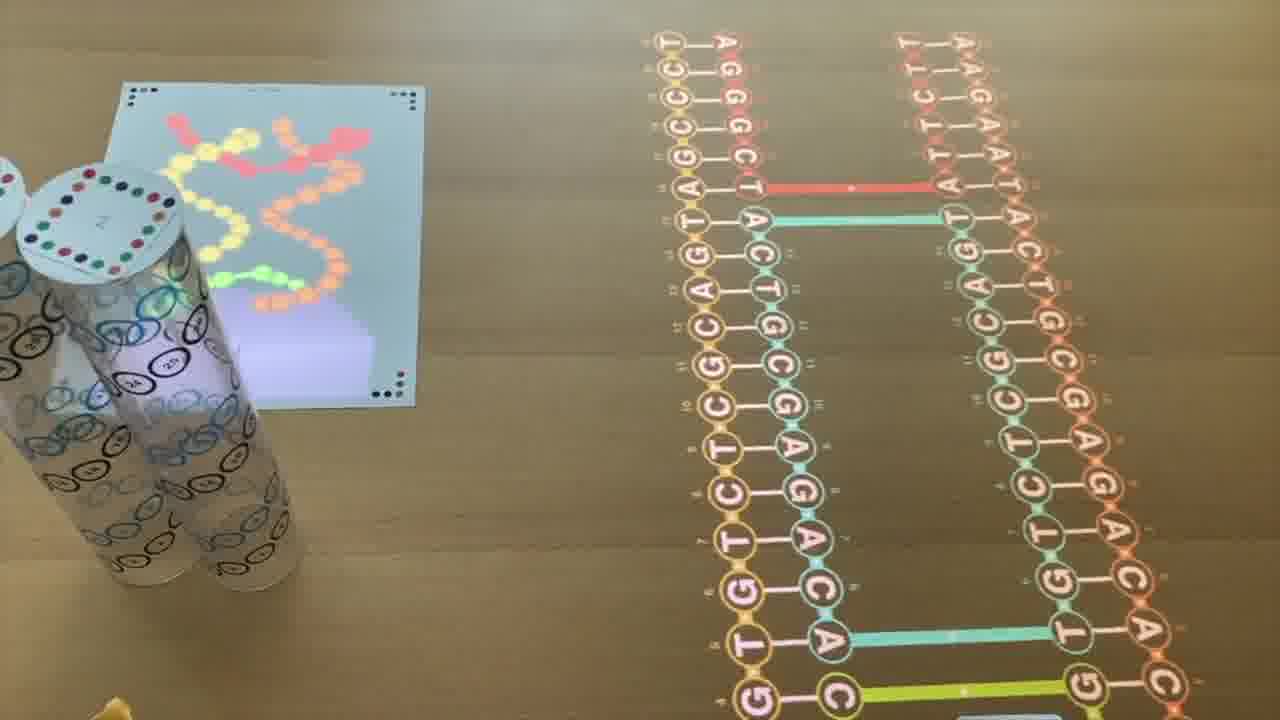
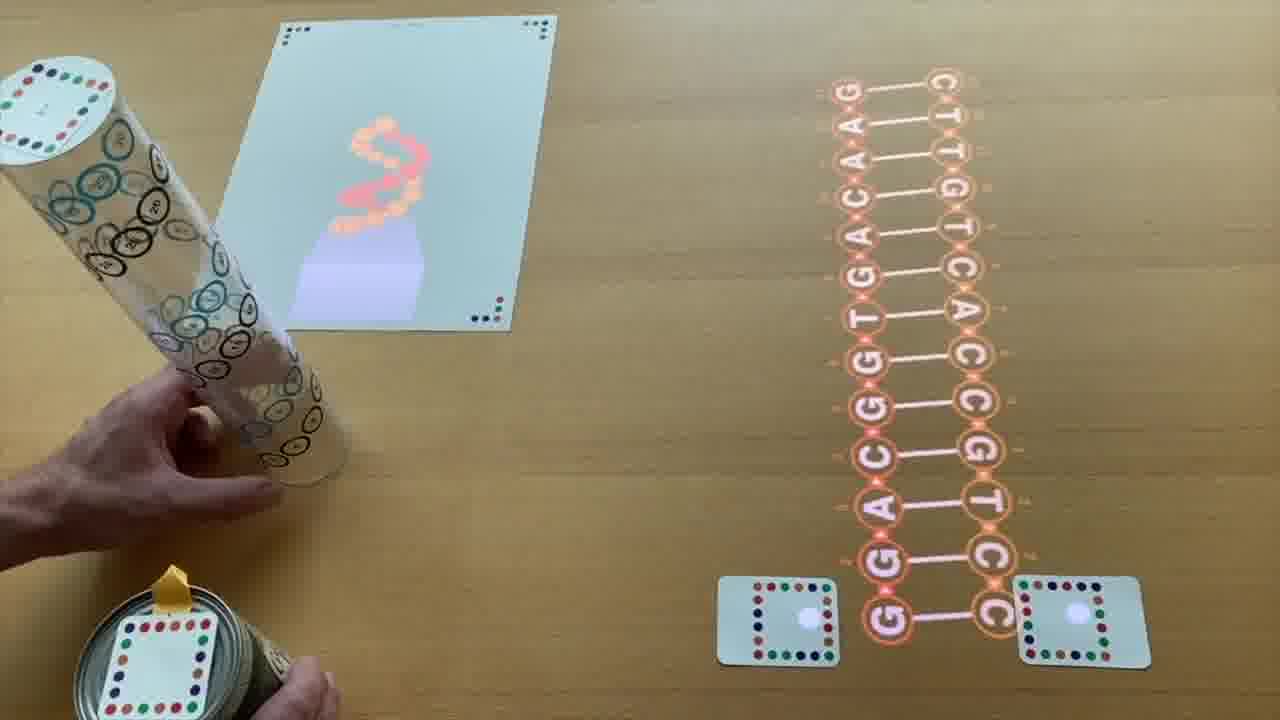
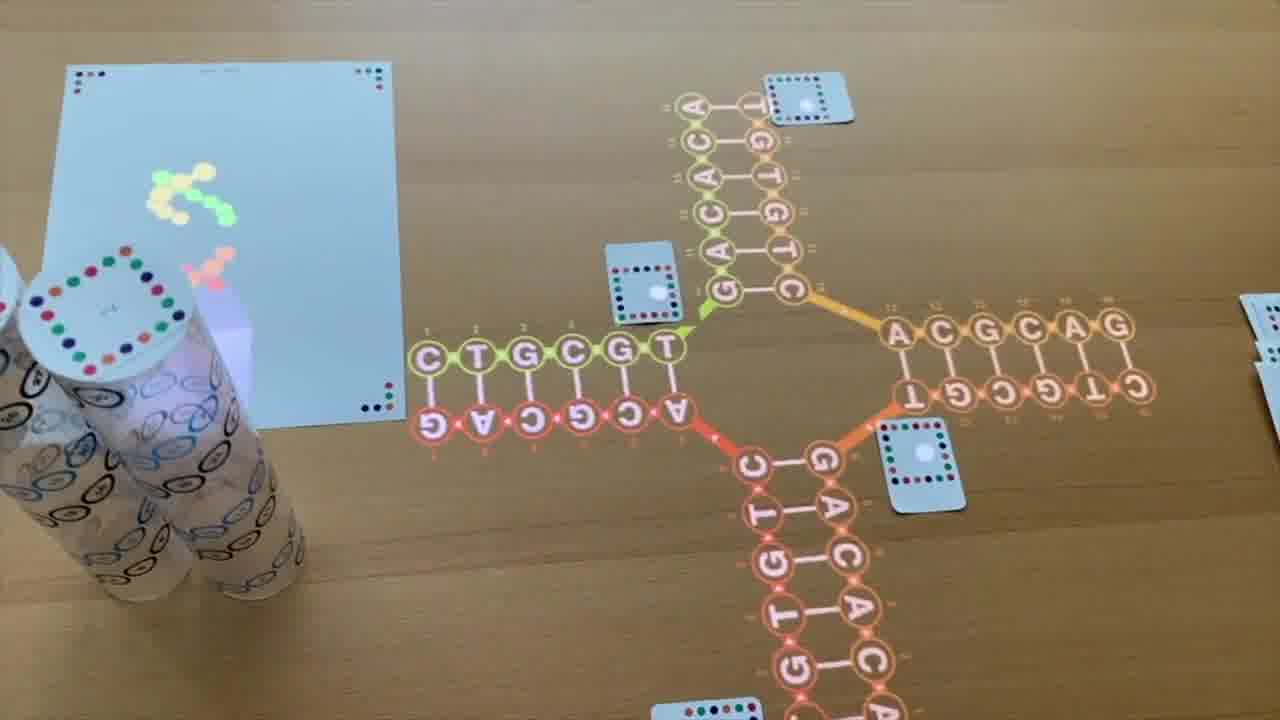
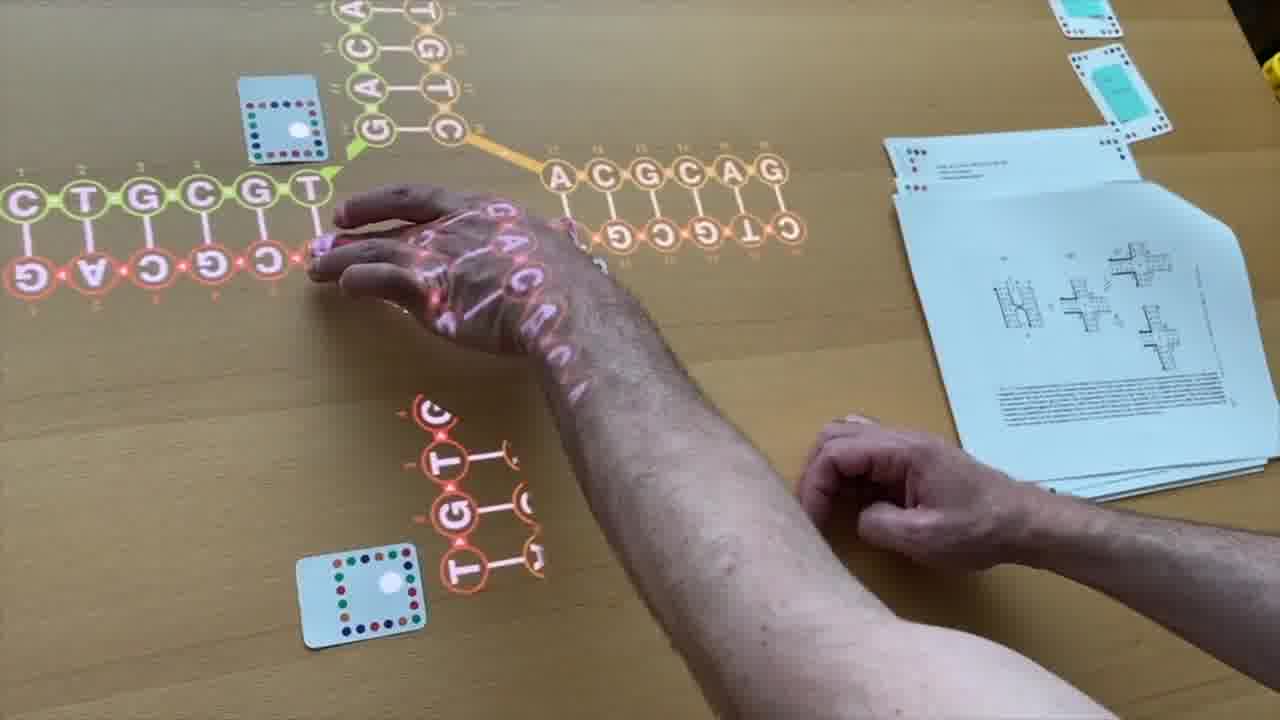
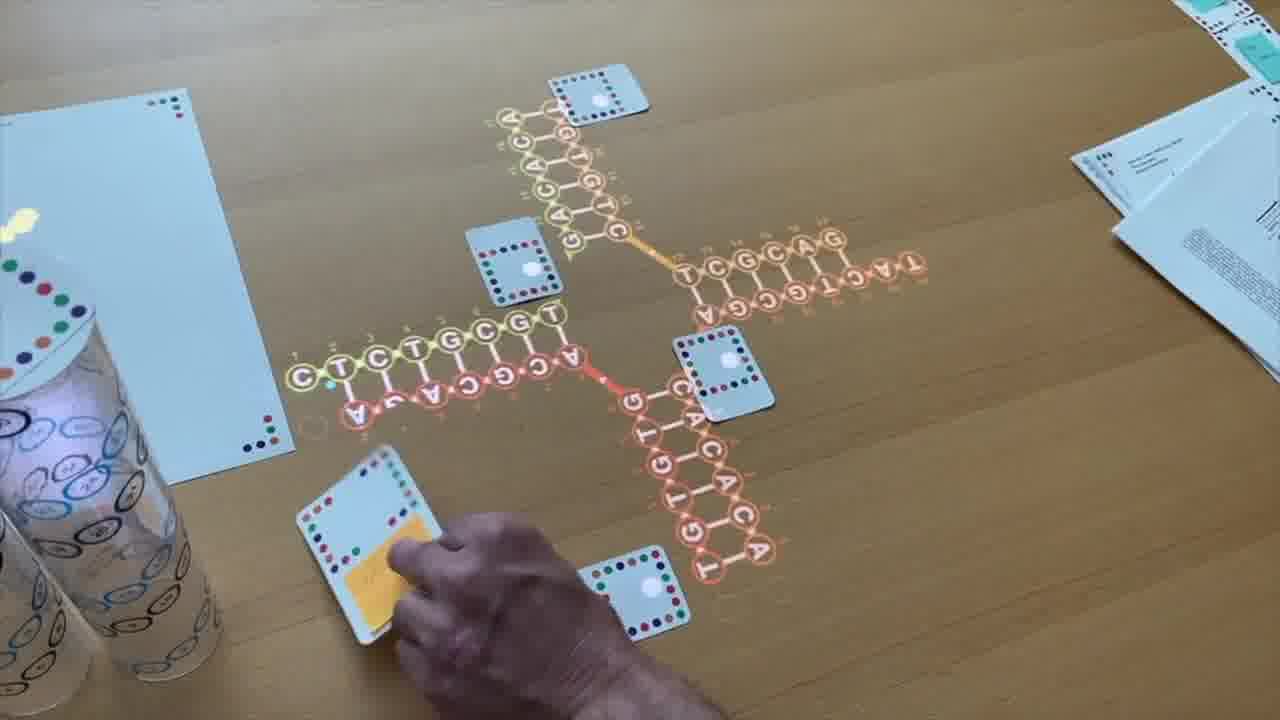
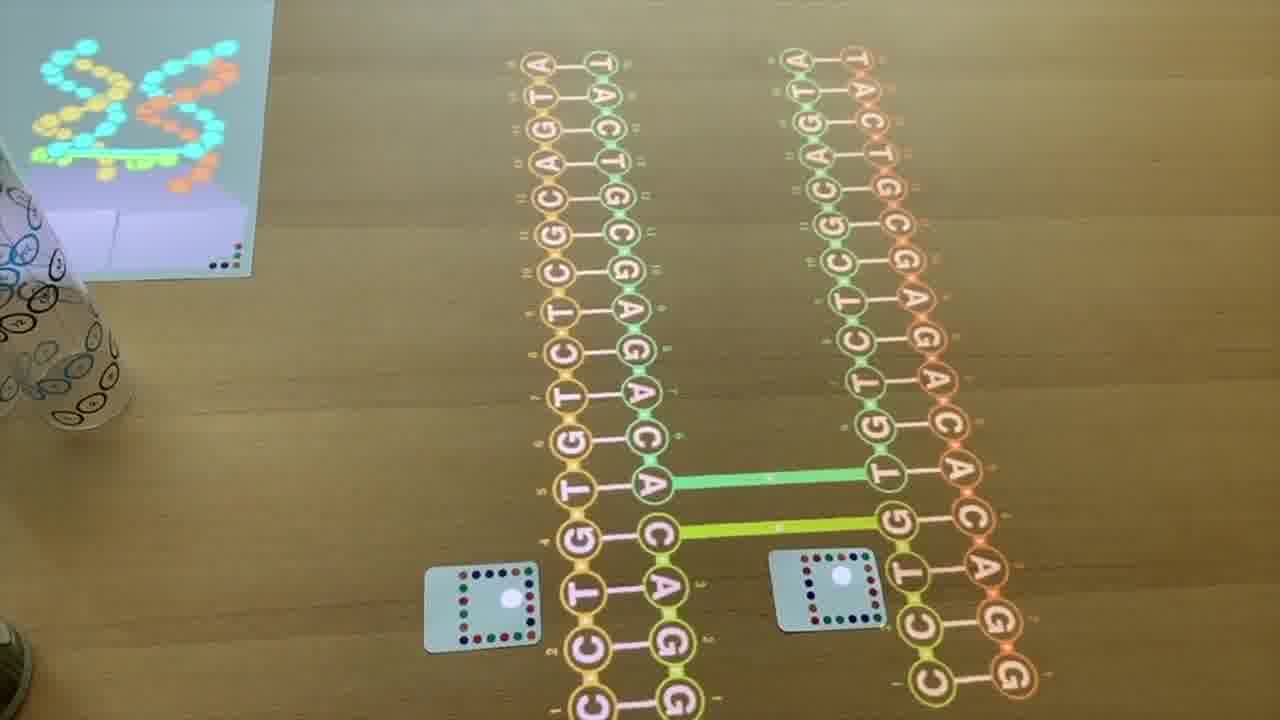
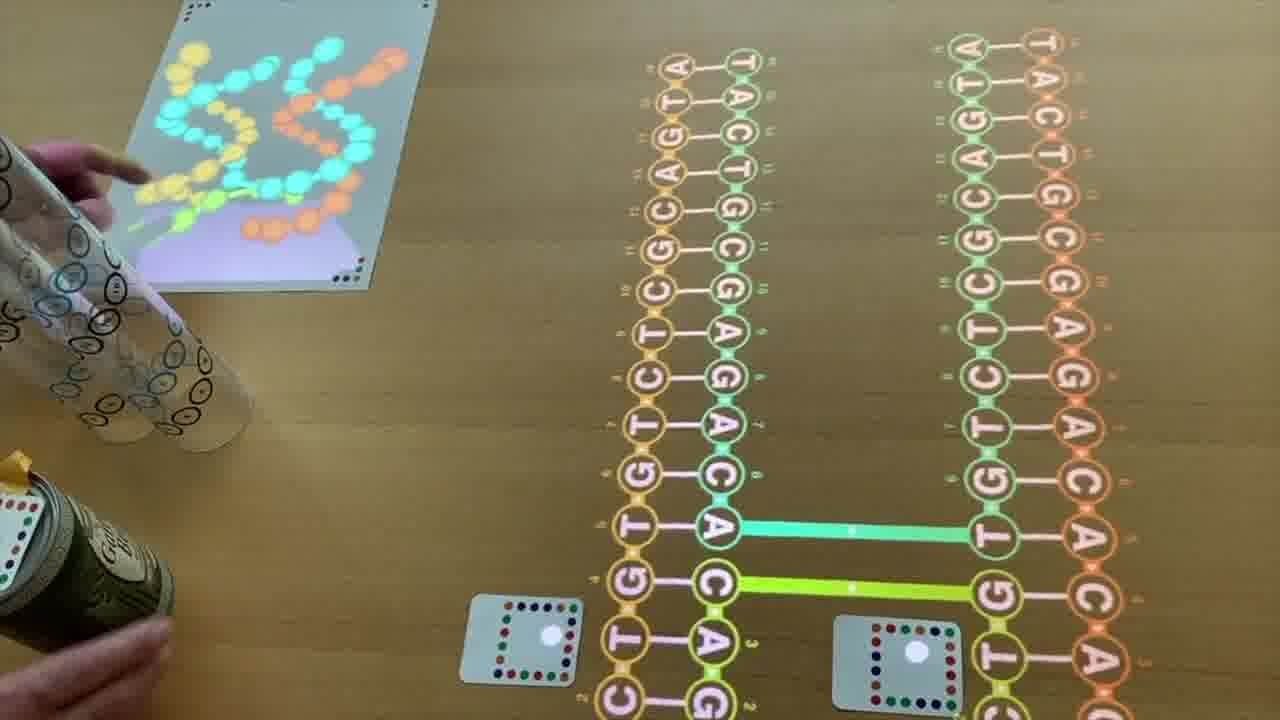
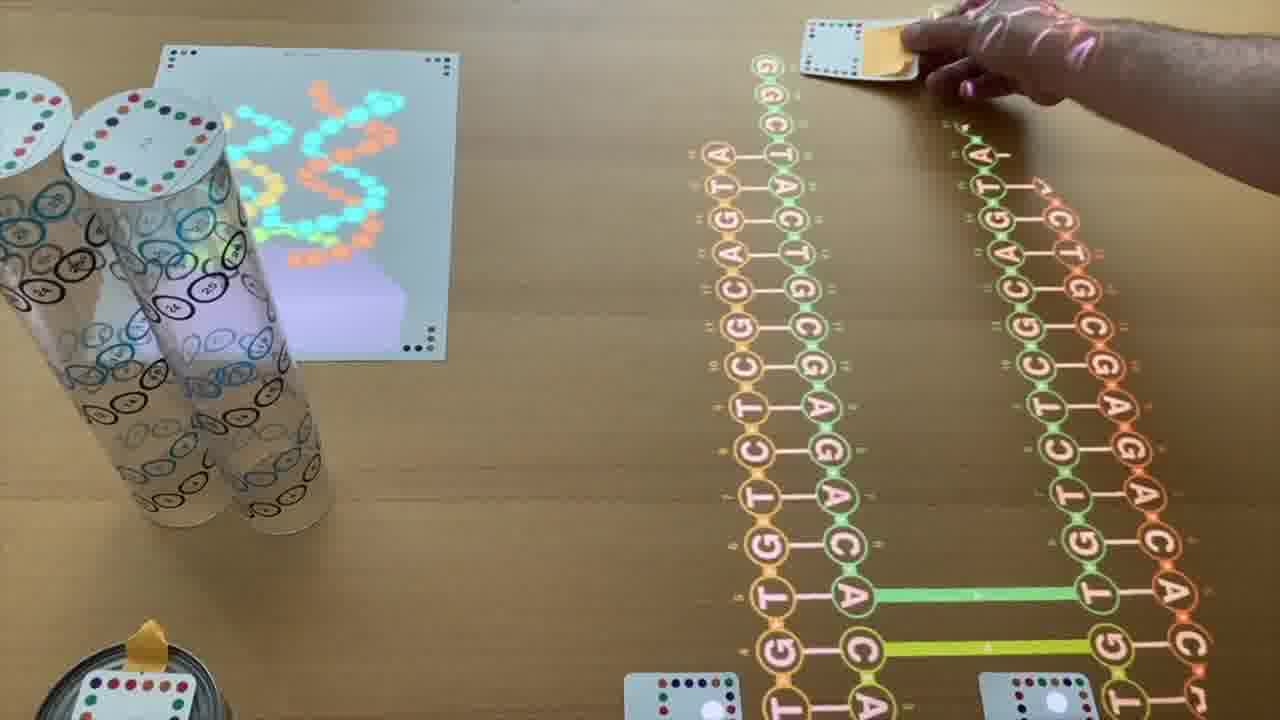
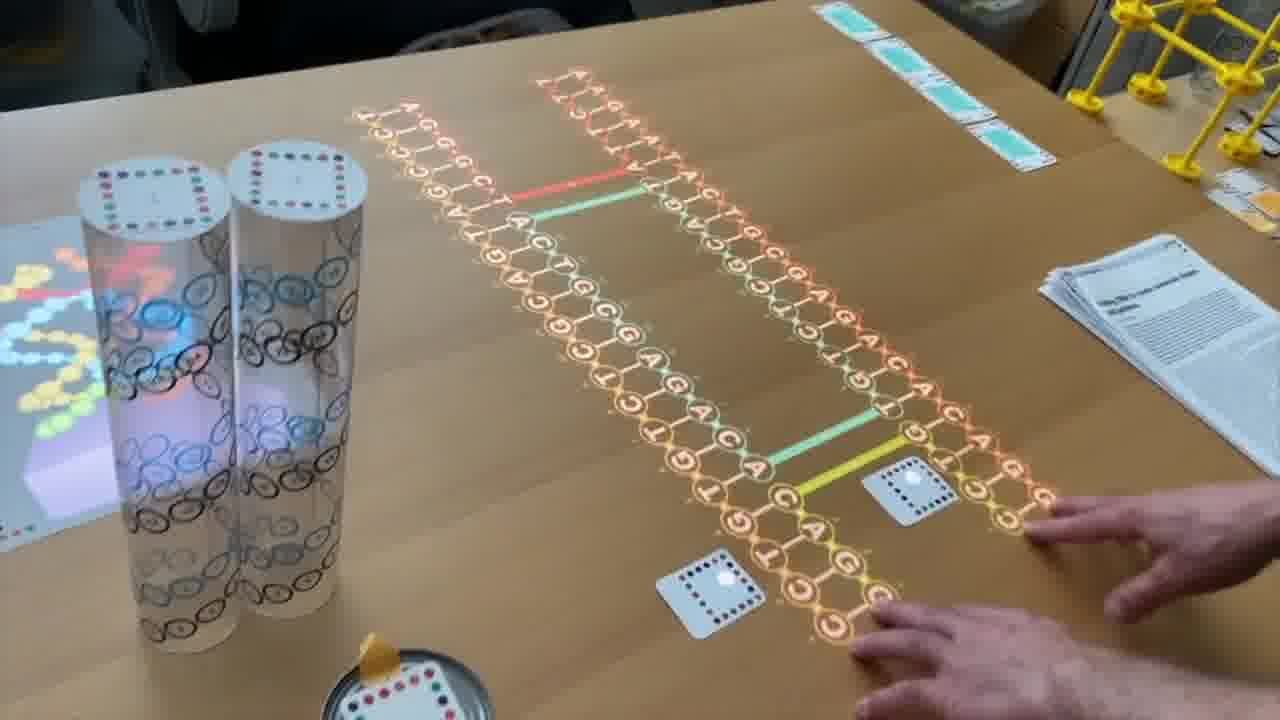
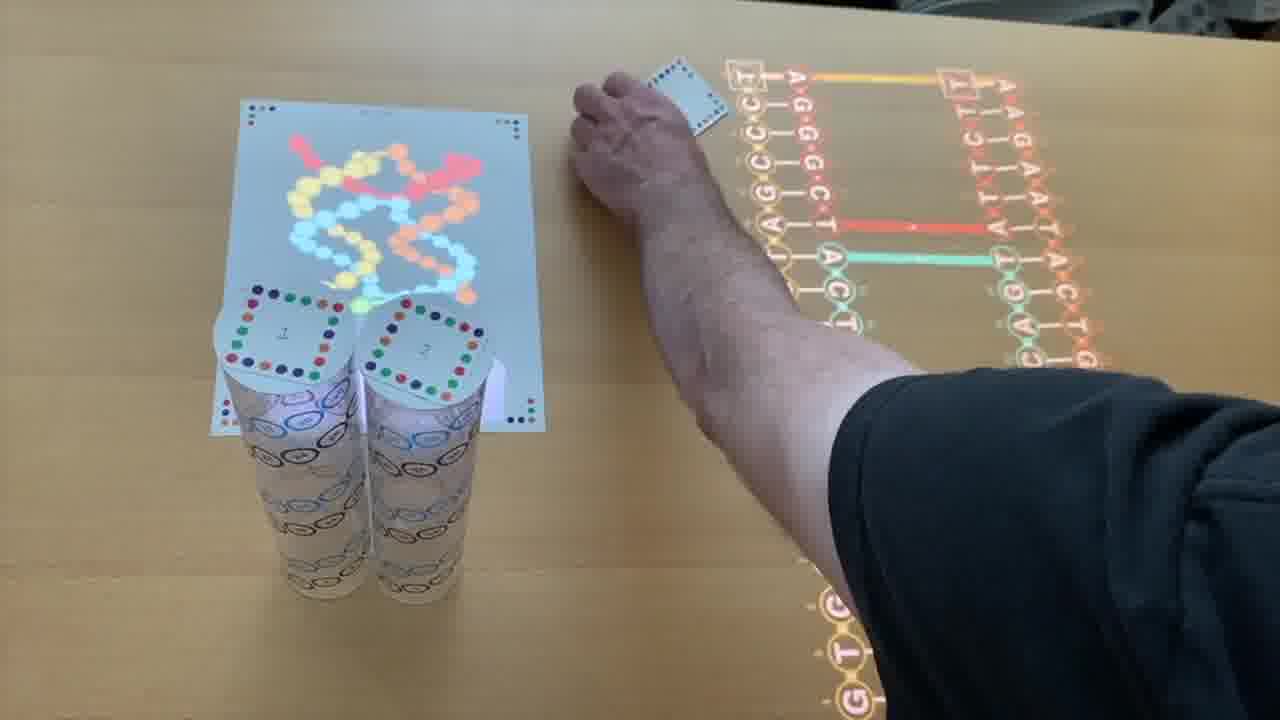
Now, these diagrams I'm forming on the table are 2-dimensional schematics, but they actually represent 3-dimensional structures made out of DNA double-helices.
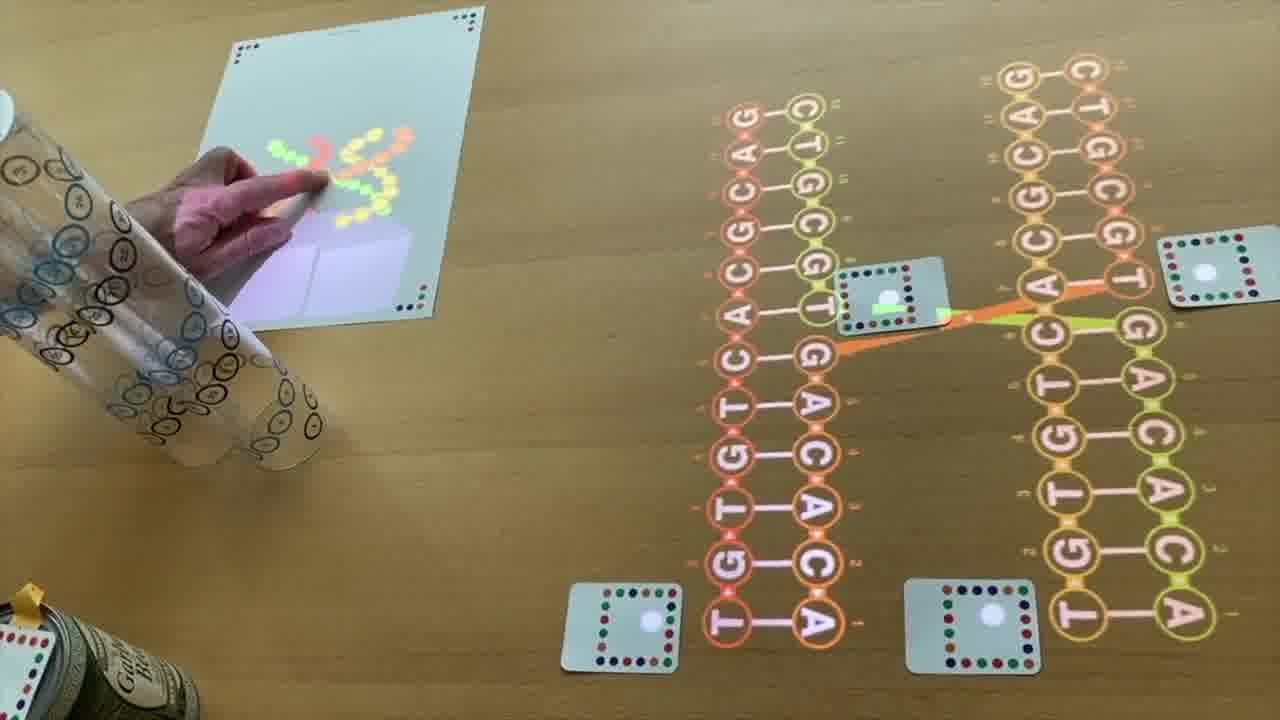
So we want to be able see what these things actually look like in 3 dimensions, and I have a couple of ways of doing that.
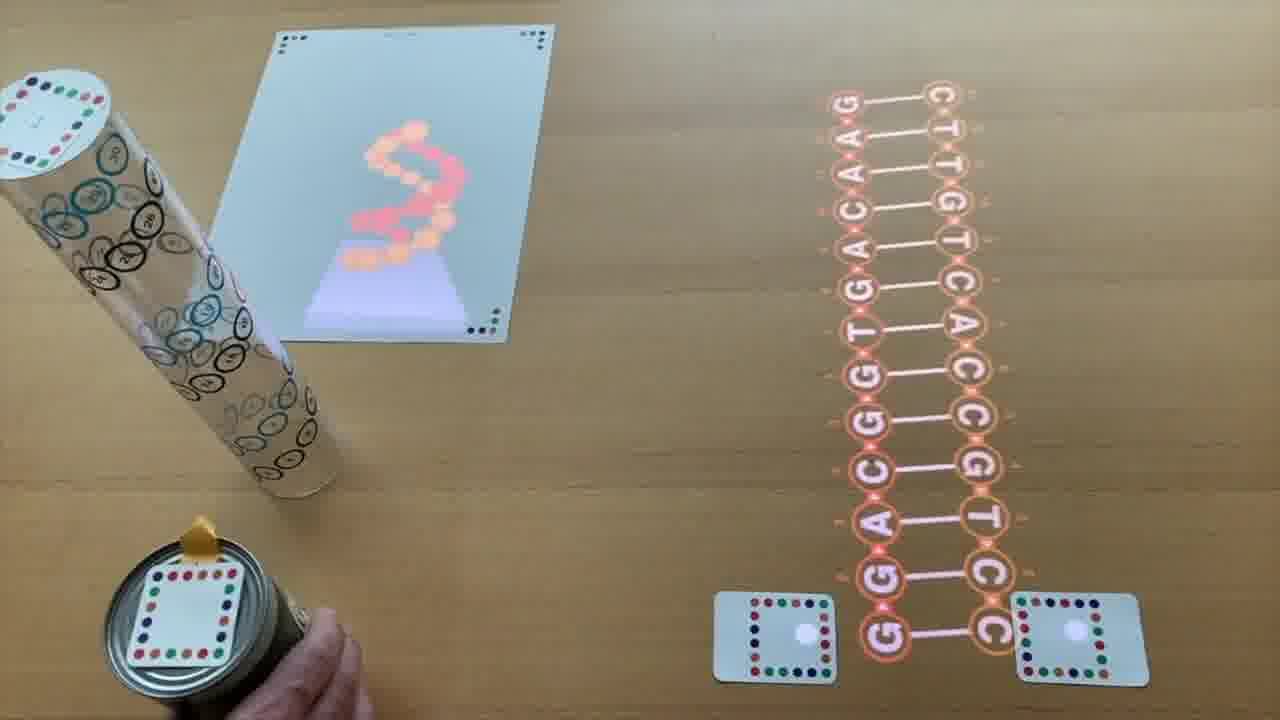
One is by rendering them in 3D on a piece of paper.
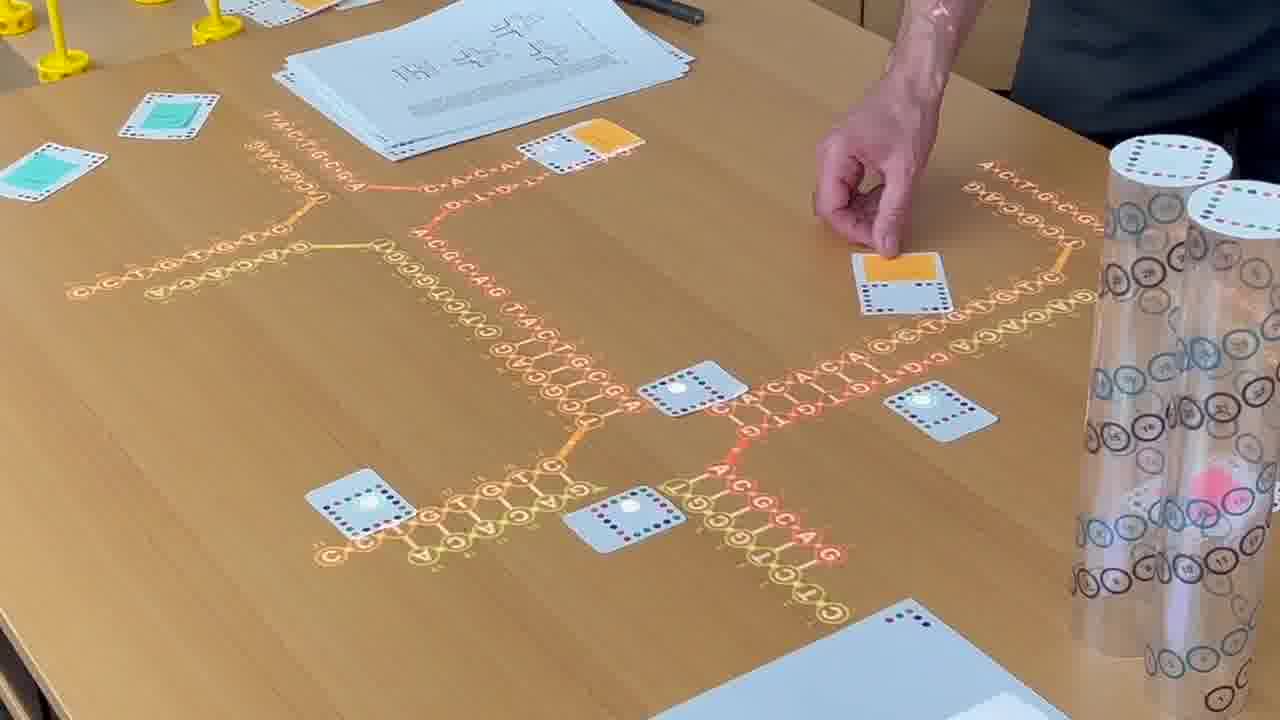
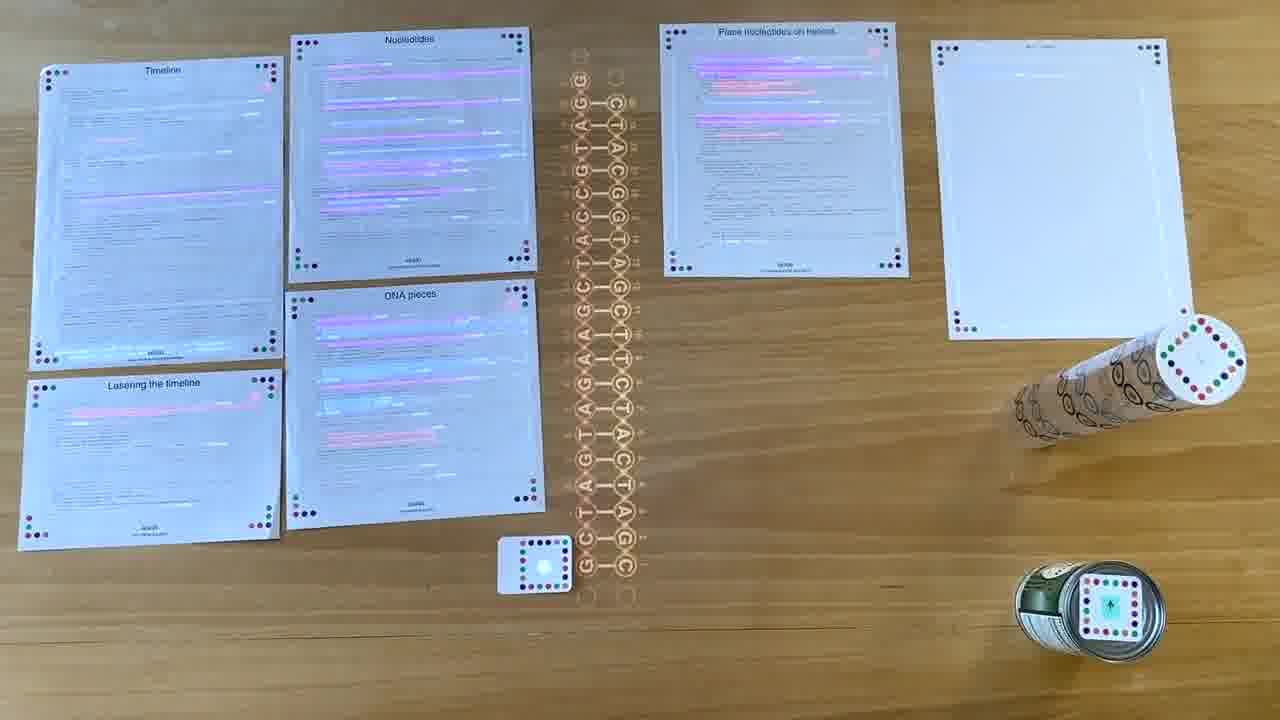
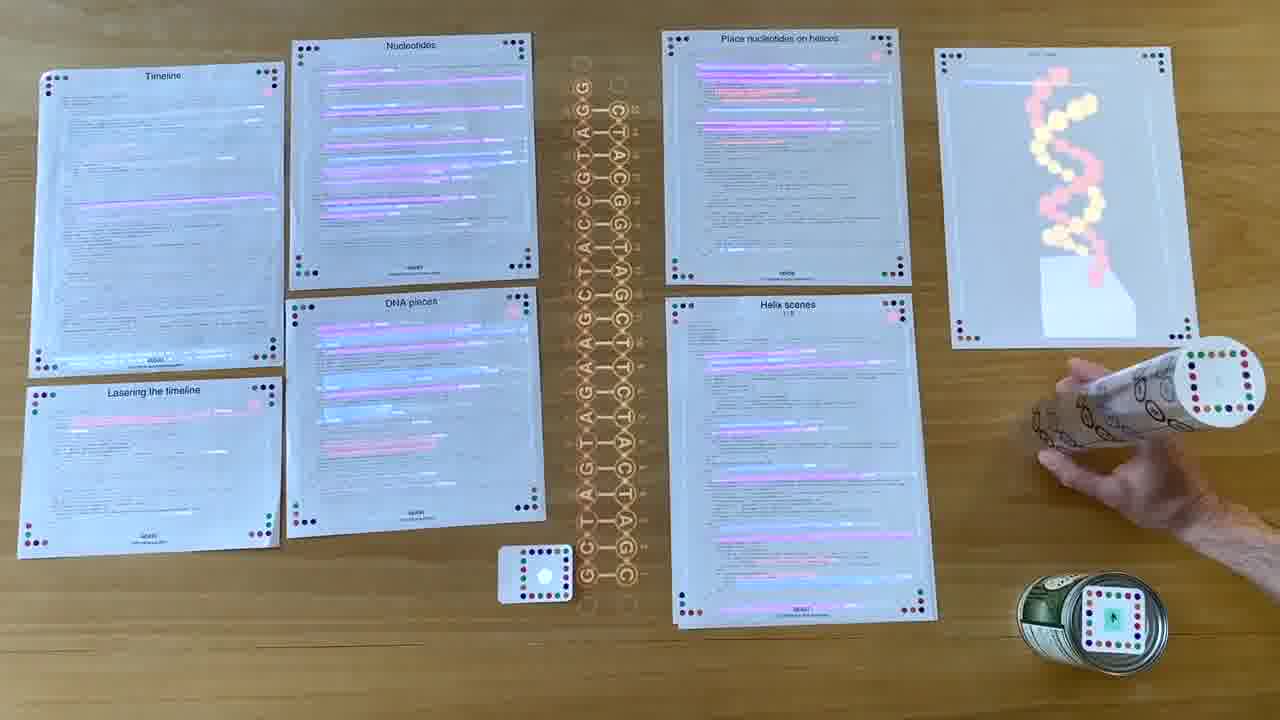
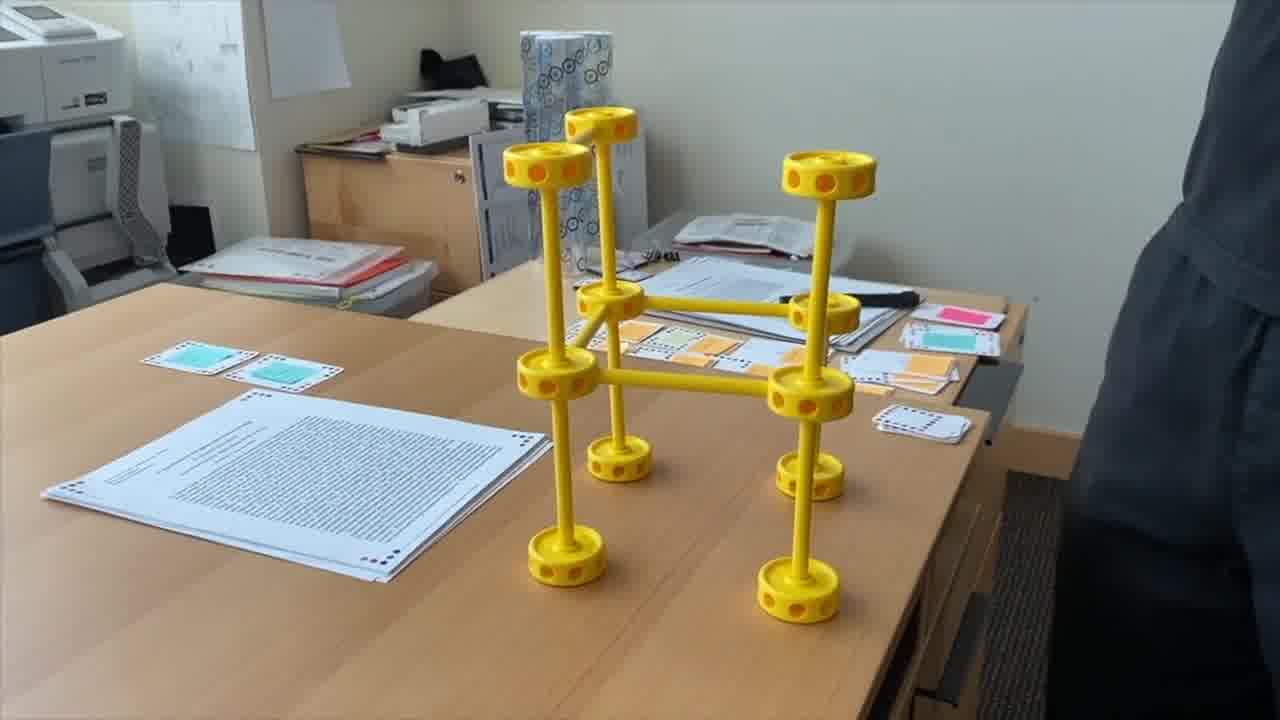
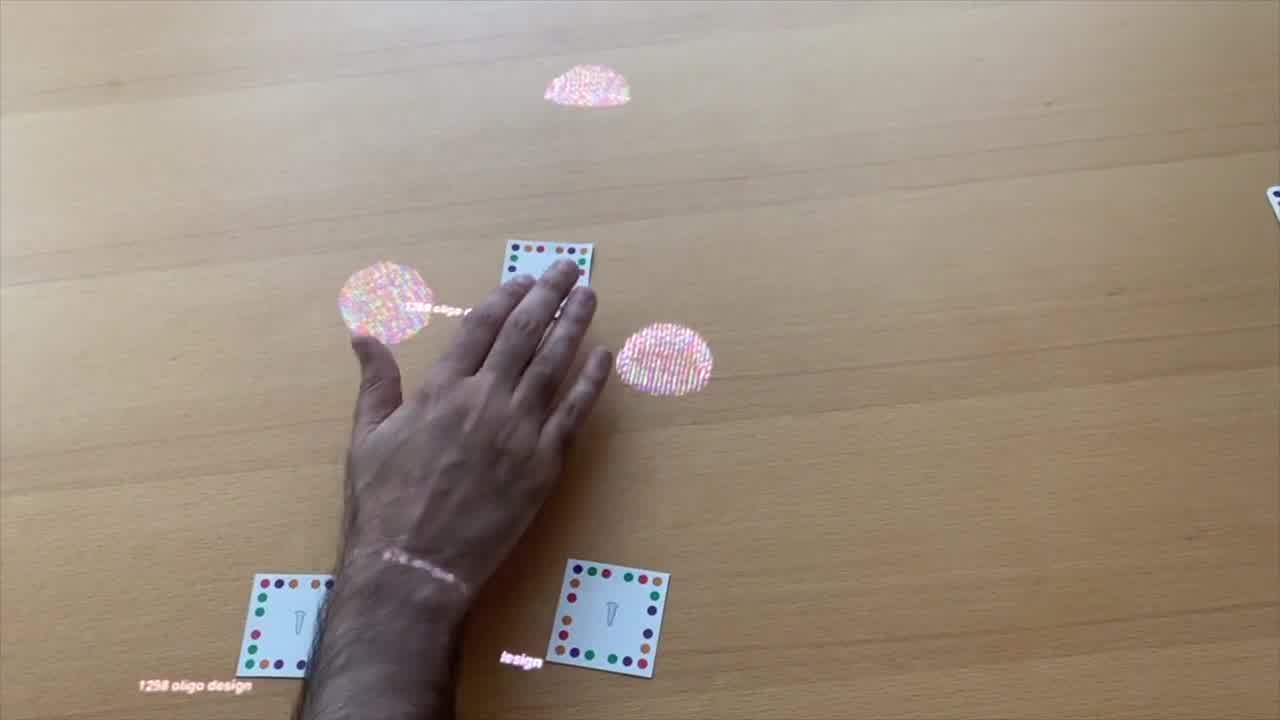
But the way you control this rendering is by arranging physical models on the table. [more]
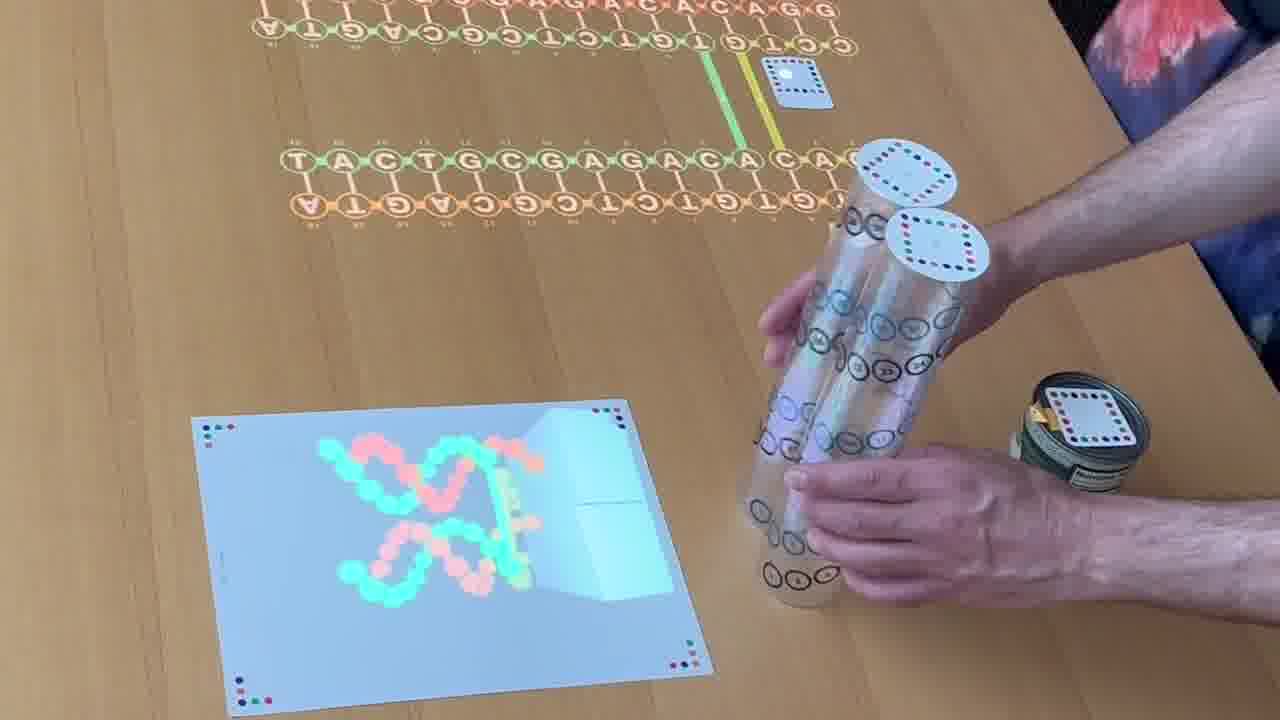
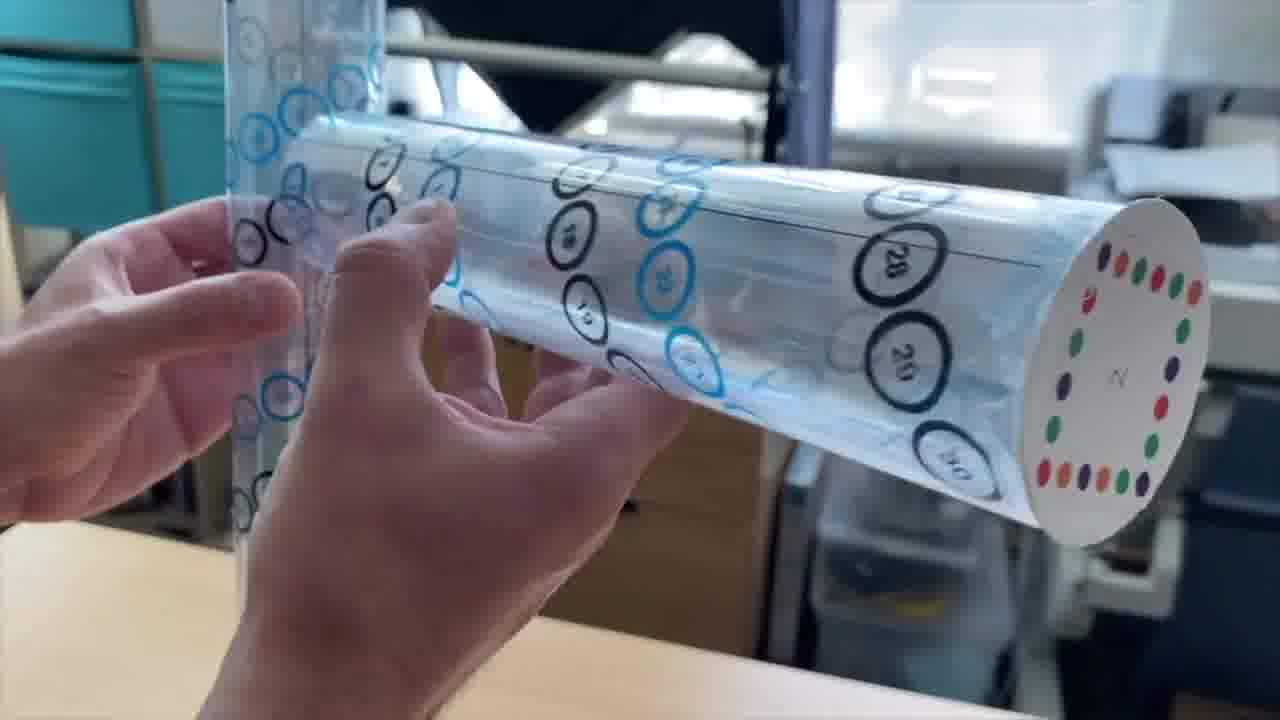
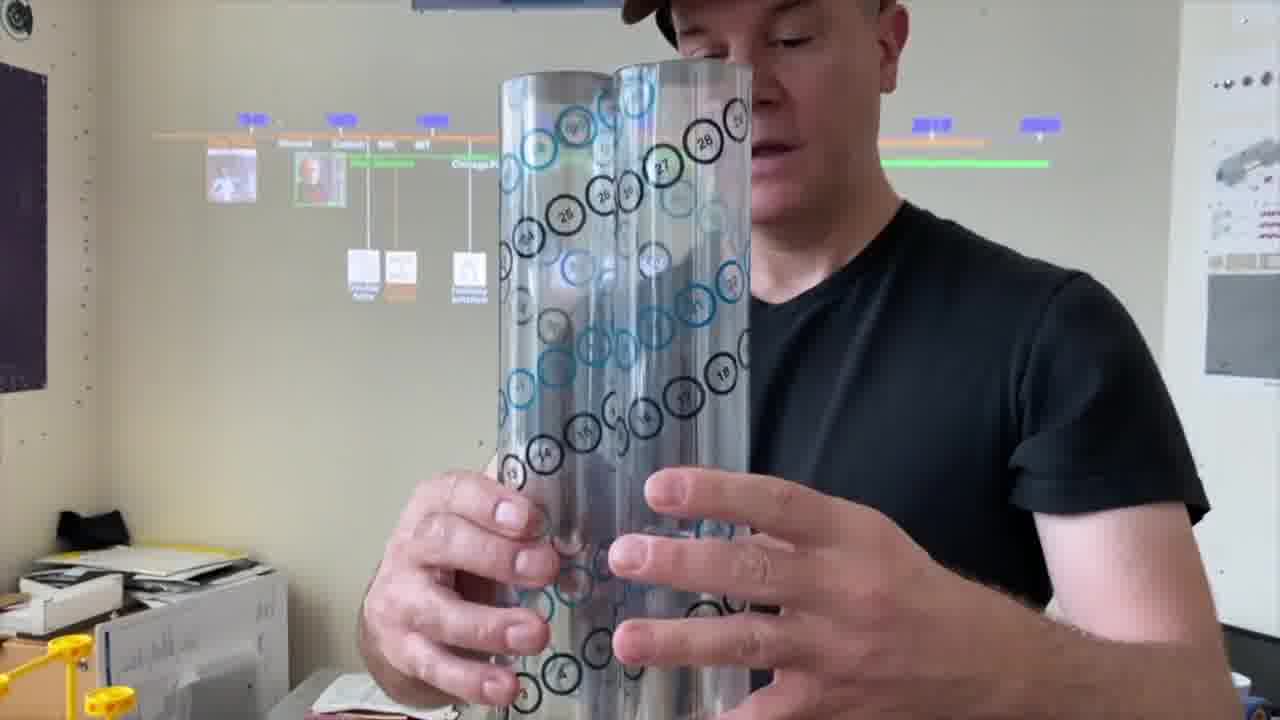
Each of these plastic tubes is a scale model of a DNA helix. And as you position them on the table and spin them around, it's that scene on the table which is being rendered.
And the viewpoint for the rendering is represented by this garbanzo bean can. That's just what I happened to have when I made this.
The scene is rendered as if you're looking at it from the edge of the can, so you can fly in and out by moving the can.
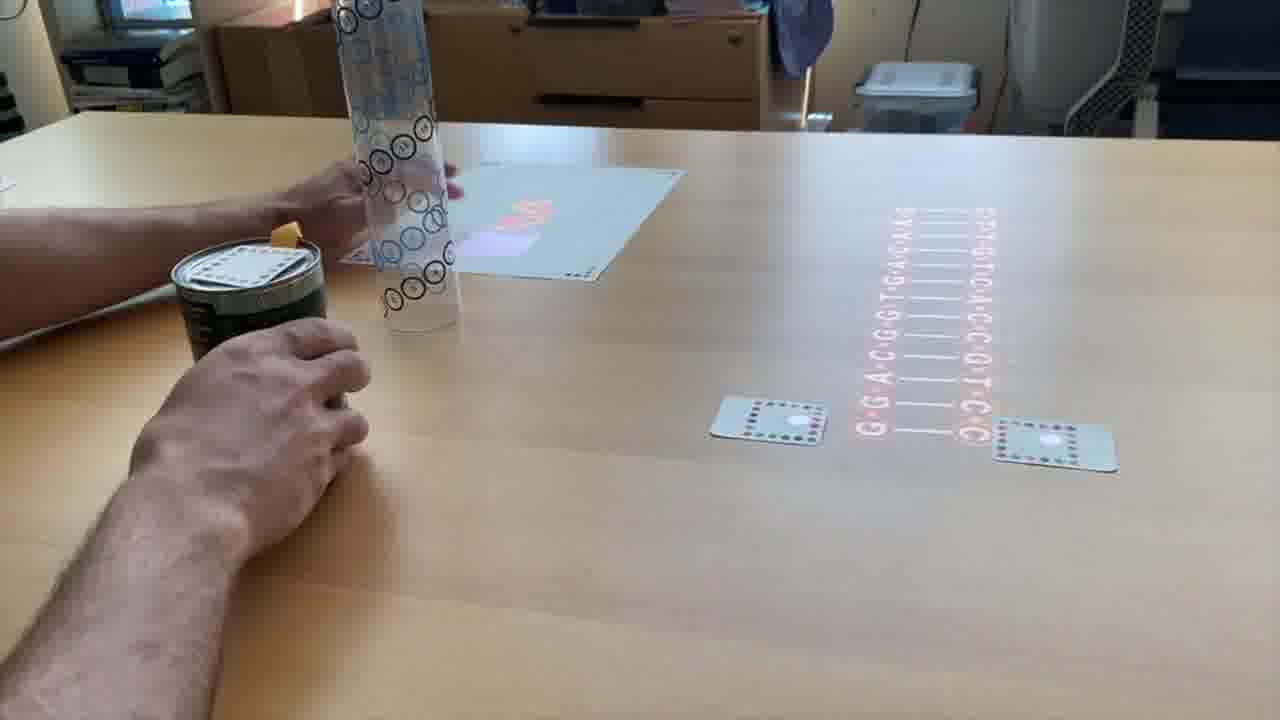
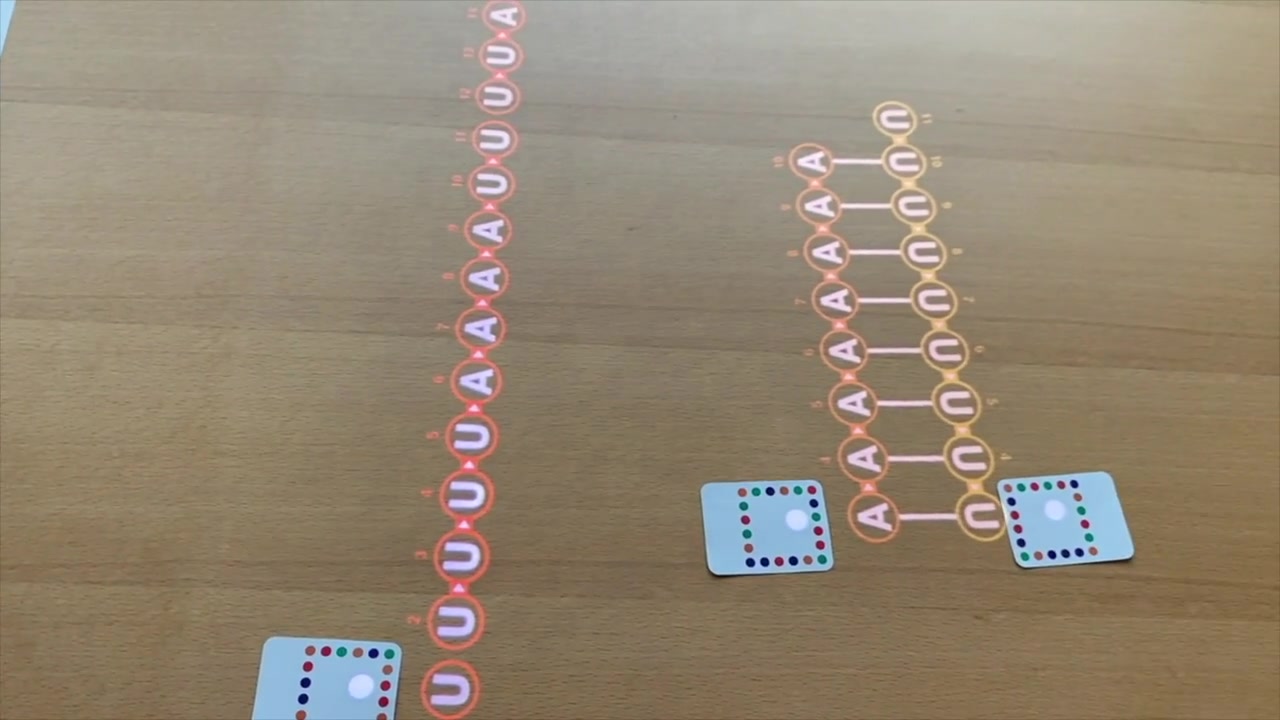
Because the tubes are clear, it's easy to see the helix in real life. You can see where all the nucleotides are, even as they go around the back, and you can trace the helix with your finger.
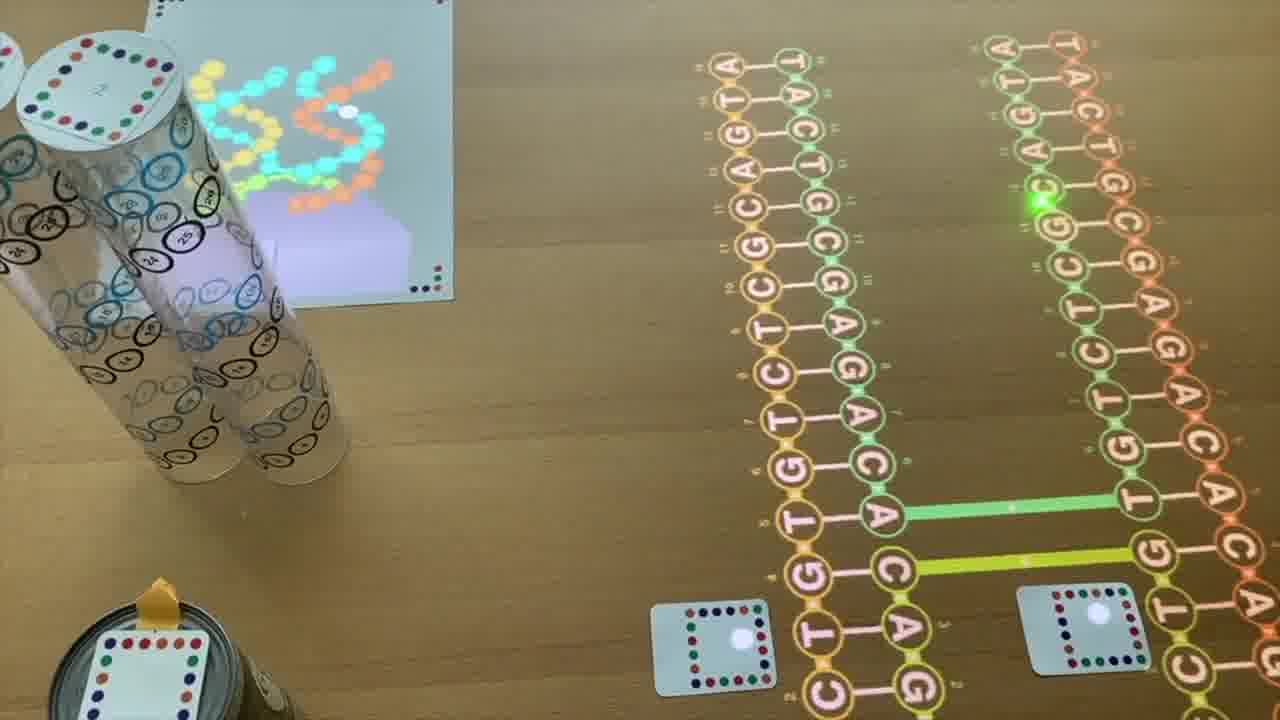
And the nucleotides are numbered, with the same numbers on the 2D schematic, in the 3D rendering, and printed on the tube, so you can make the correpondence between all three representations.
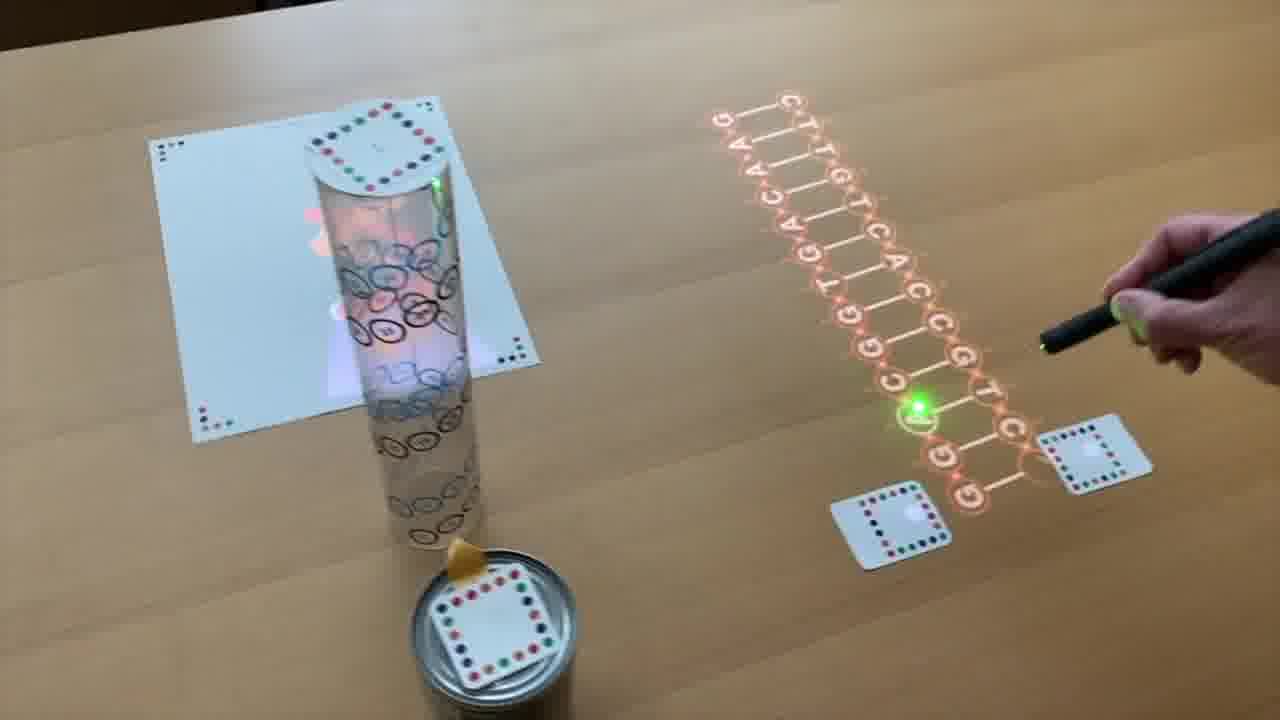
You can also point at the schematic with a laser pointer to light up the corresponding nucleotide in the rendering.
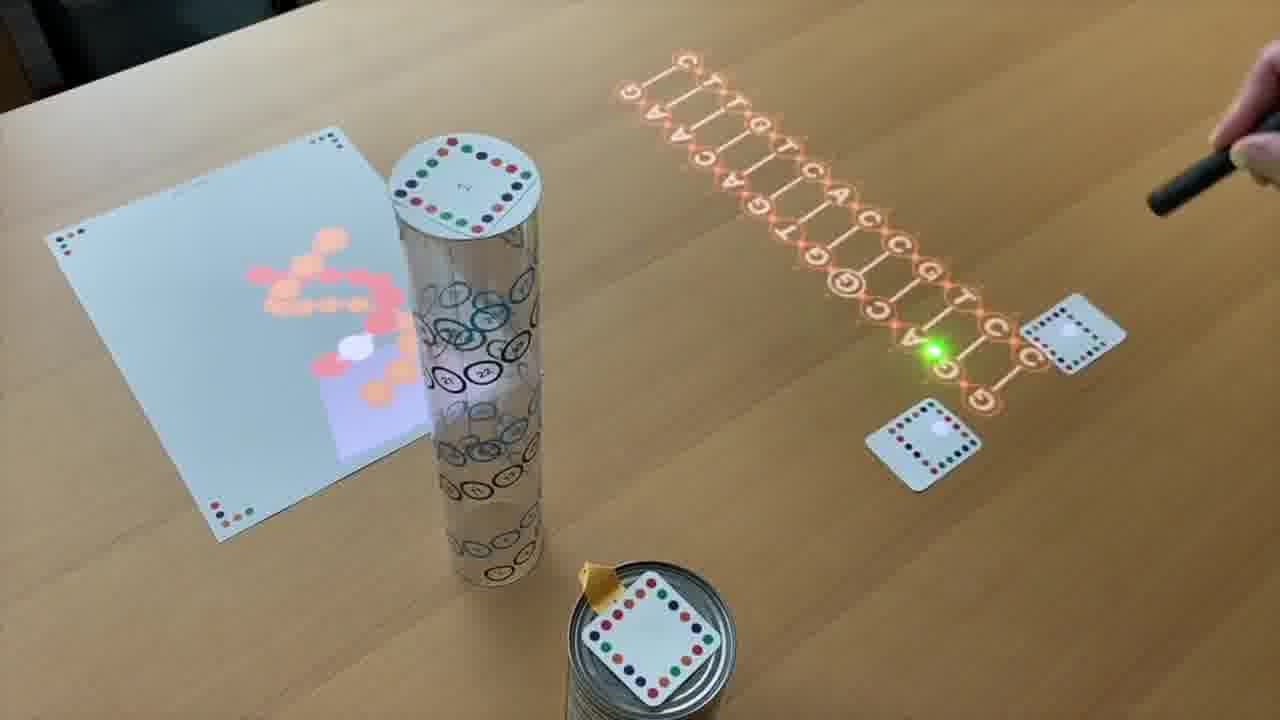
In these structures, it's important what angle the helices meet at. Here, you can see they form an L-shape.
That's much easier to see in the real-world scale model than in the 3D rendering.
So, instead of just talking about this historical work, I'm presenting it by recreating it, live, as a computational model.
One consequence is that it sets up for, later, guiding a student though using the same tools to recreate it for themselves, and thereby actually learning something. That happened after the presentation, and I'll get to that in a bit.

Another consequence is that we can bring in programs to analyze the structure as we're building it.
I don't show that in this talk, but we have little programs which will compute, for example, the binding energies of the duplexes, and the overall stability of the molecule, as you play with it. [more]
I think that if you're talking about a computational model while seeing a live simulation of its behavioral properties, you're less likely to be fooling yourself.
Here's the implementation of this part of the presentation.
This page draws the timeline.
This half a page is for interacting with the timeline.
These two pages take care of drawing and manipulating the 2D representation on the table.
This page notices when two strands are lined up so they can be paired as a helix.
This is the page and half which renders the 3D scene, using the tubes.
That's my presentation software.
Except, each card also has a little program on it, to add bases or form crossovers or whatever it does.
There's between a couple lines to a dozen lines on each card, and those lines are not currently visible.
So that's a violation of our principles, and we have some ideas for how programs on small cards in Realtalk could be more visible.
Designing DNA cellular playgrounds
The previous part of the talk culminated in explaining the "DNA bricks" technique.
In this last part of the talk, Shawn uses a Realtalk-based toolkit to actually design and fabricate real DNA brick structures, which were used to get experimental data about cellular playgrounds.
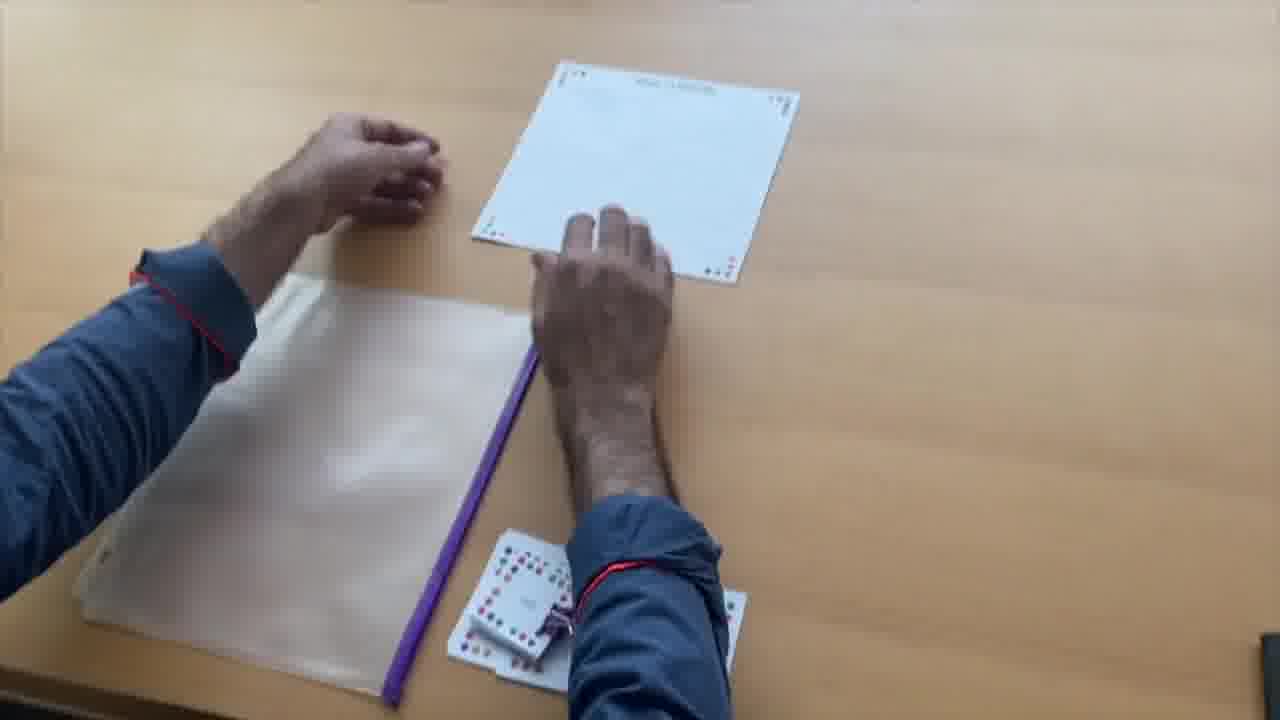
Shawn starts this part of the talk by pulling his toolkit out of a zipper pouch in the binder. The binder contains both presentation materials and working tools.
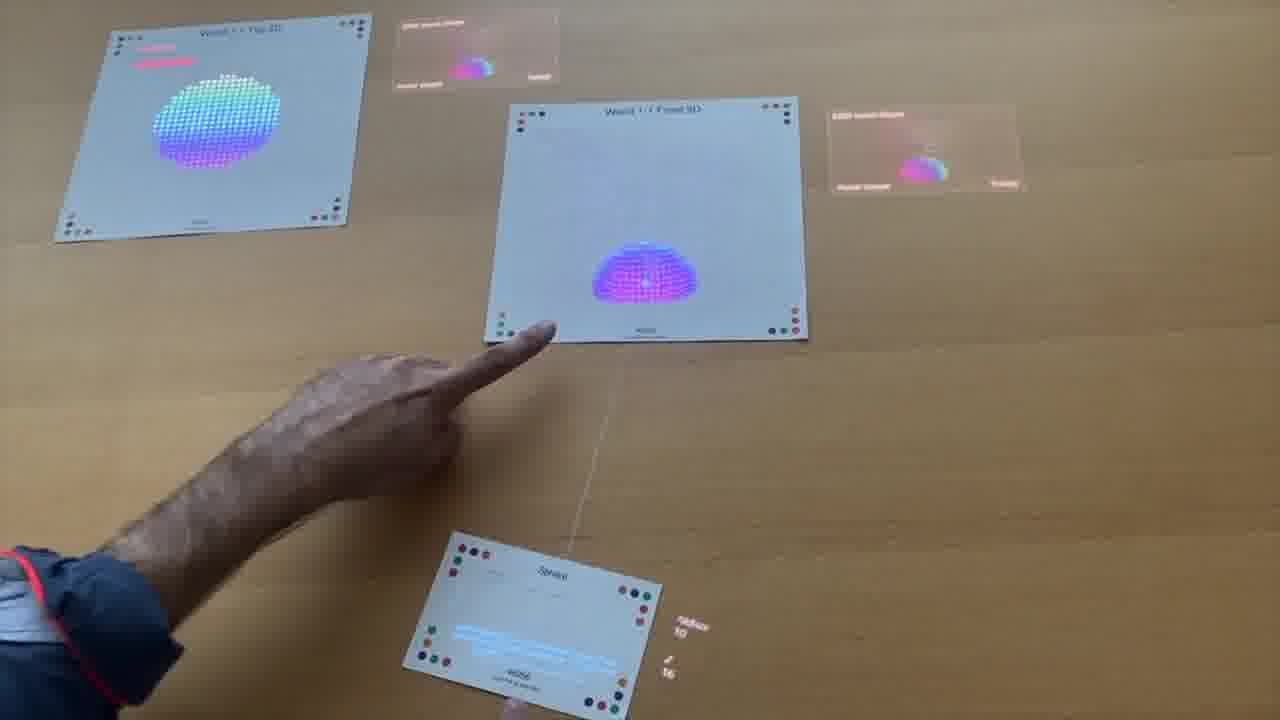
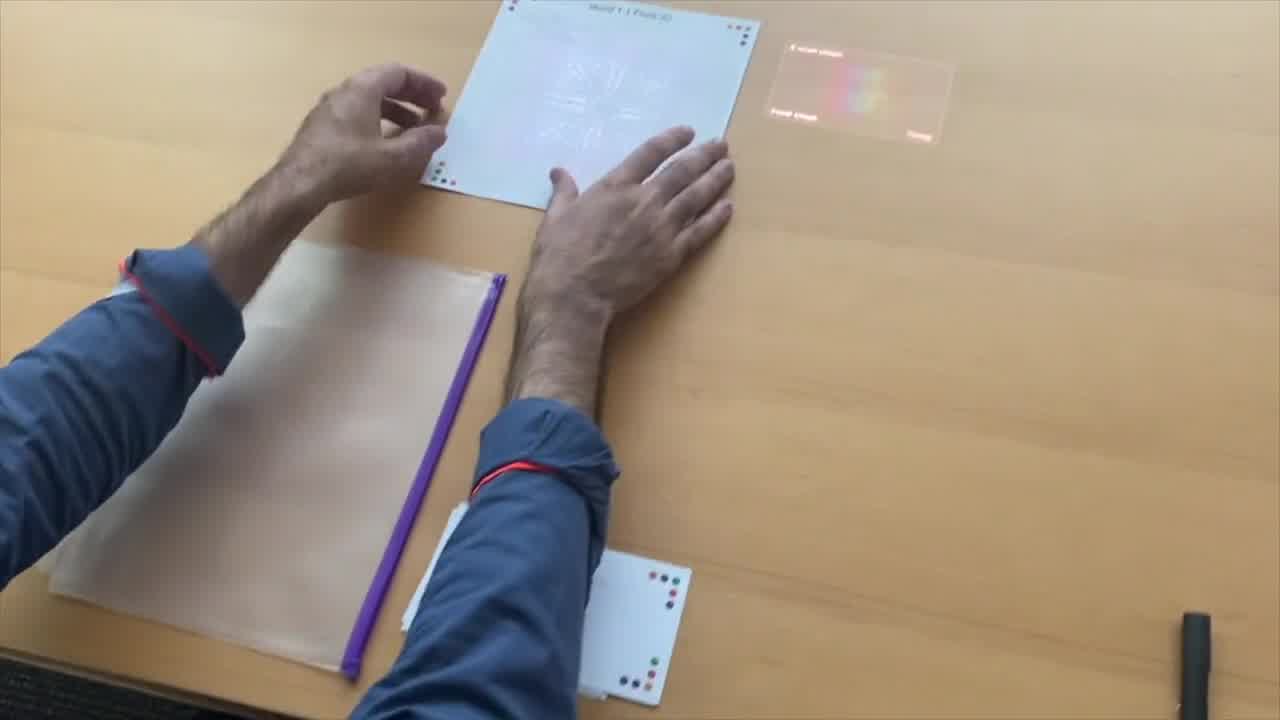
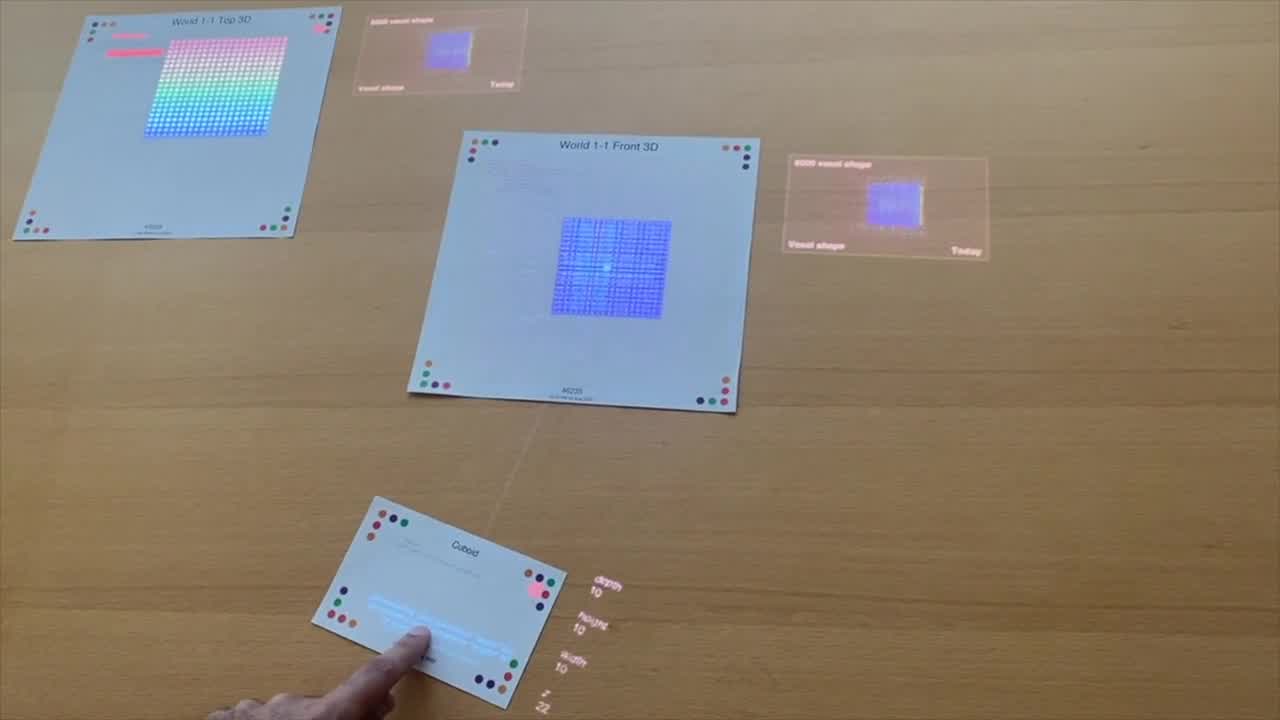
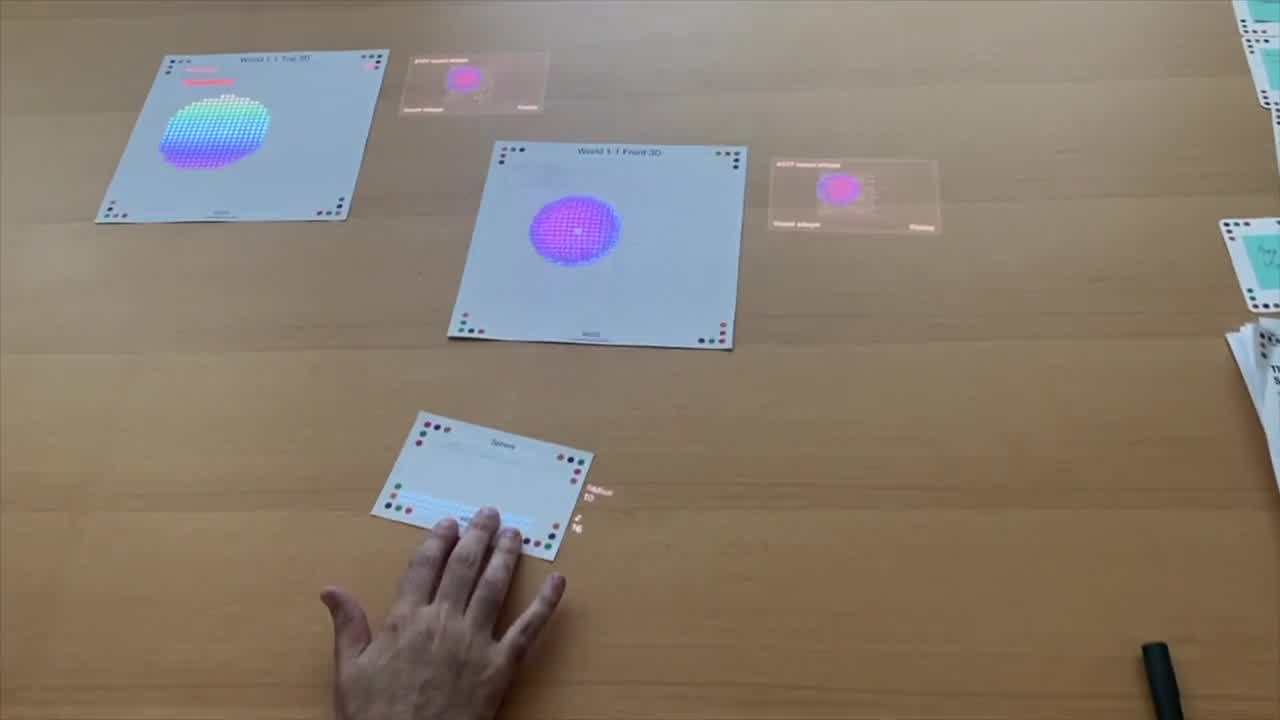
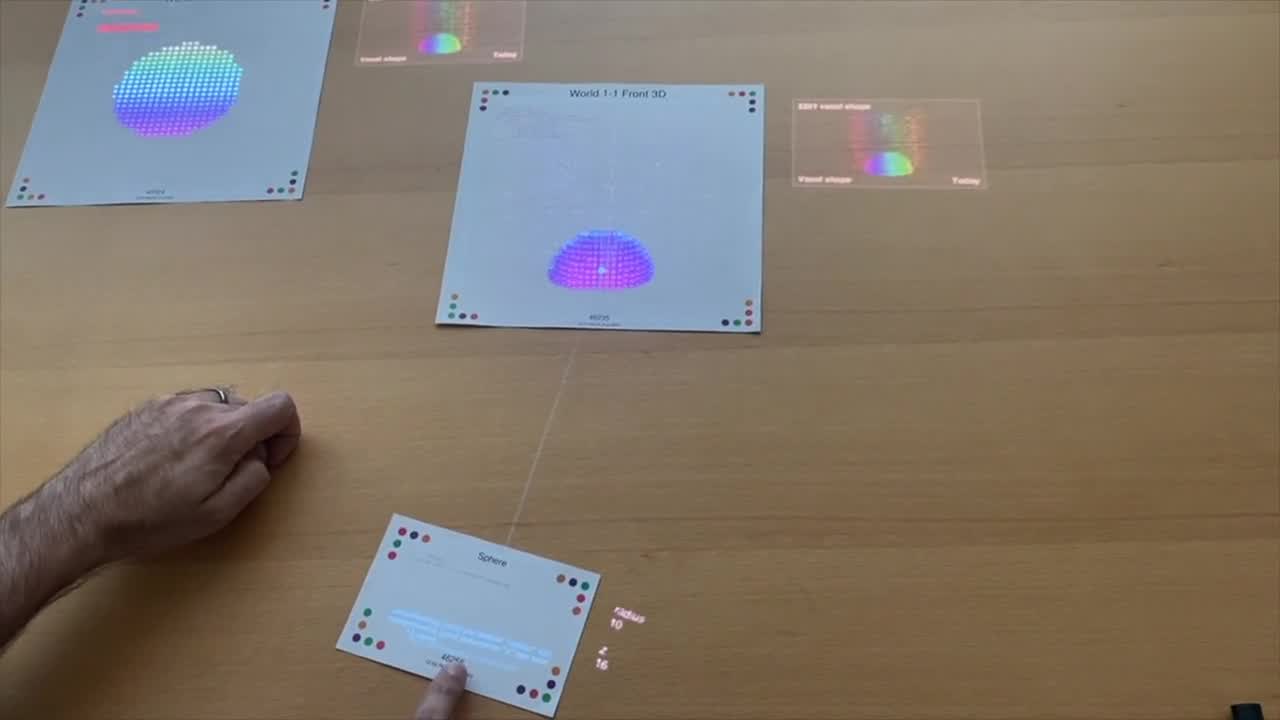
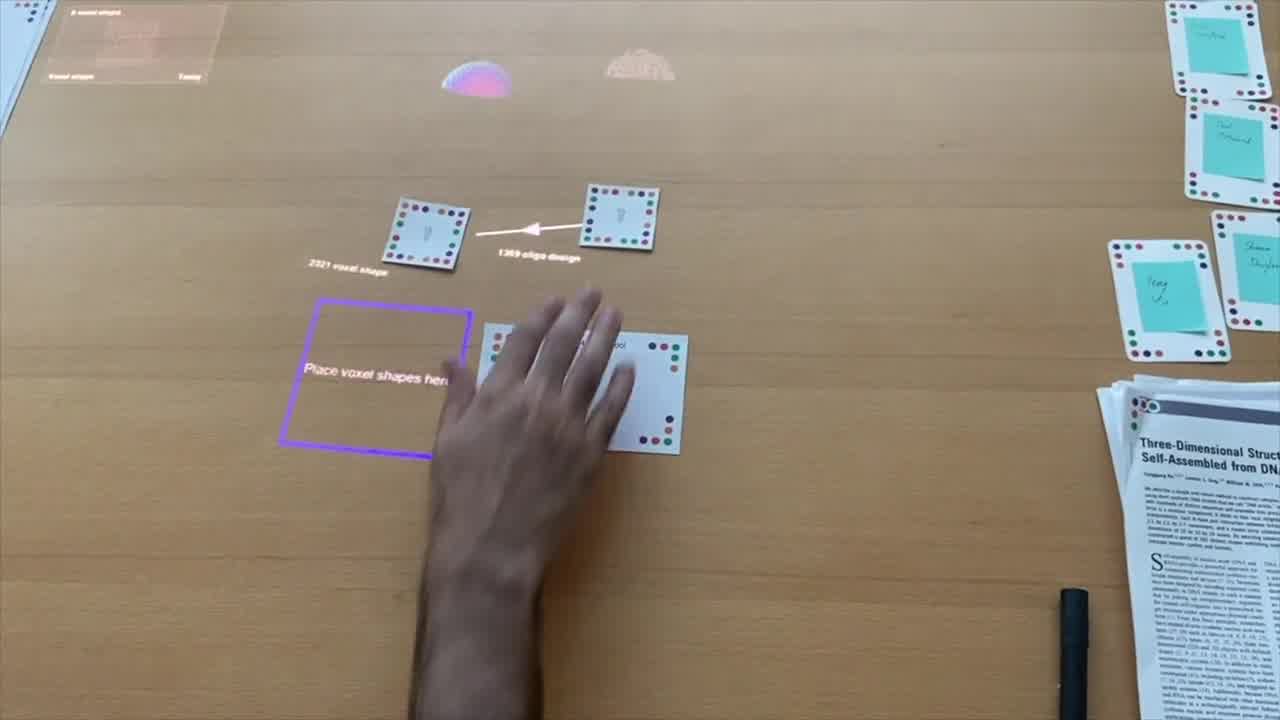
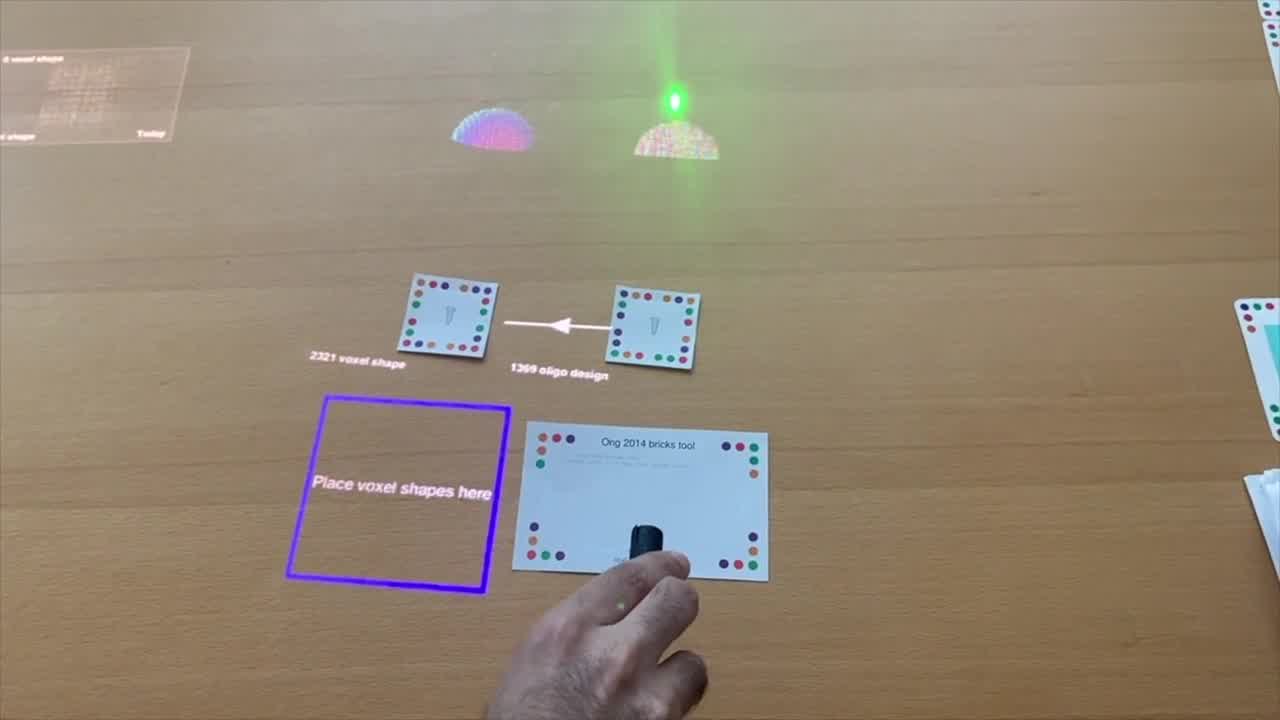
This tool is a voxel editor that Luke made for defining 3-dimensional shapes. Here, Shawn is placing a sphere into the scene, by pointing into the page with a sphere card. [more]
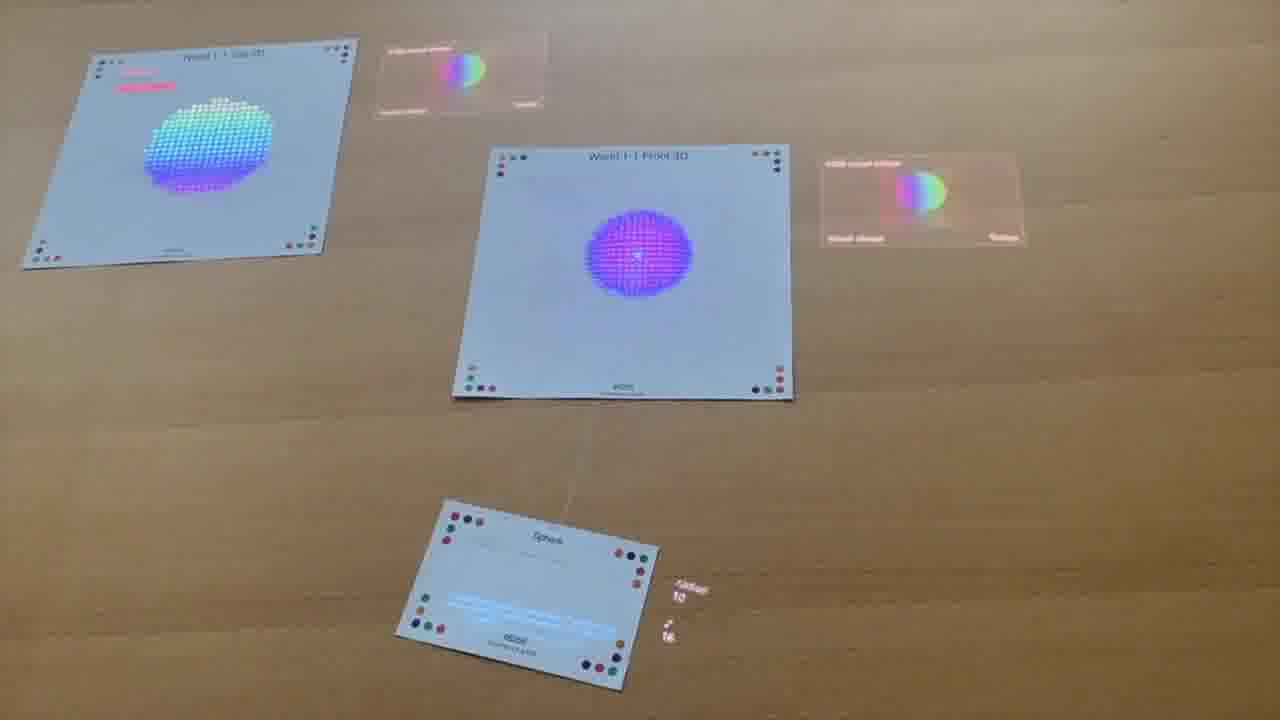
He moves the sphere to the bottom of the space, to truncate it into a hemisphere.
Then he adds a second shape — a negative sphere — in order to hollow out the hemisphere into a shell.
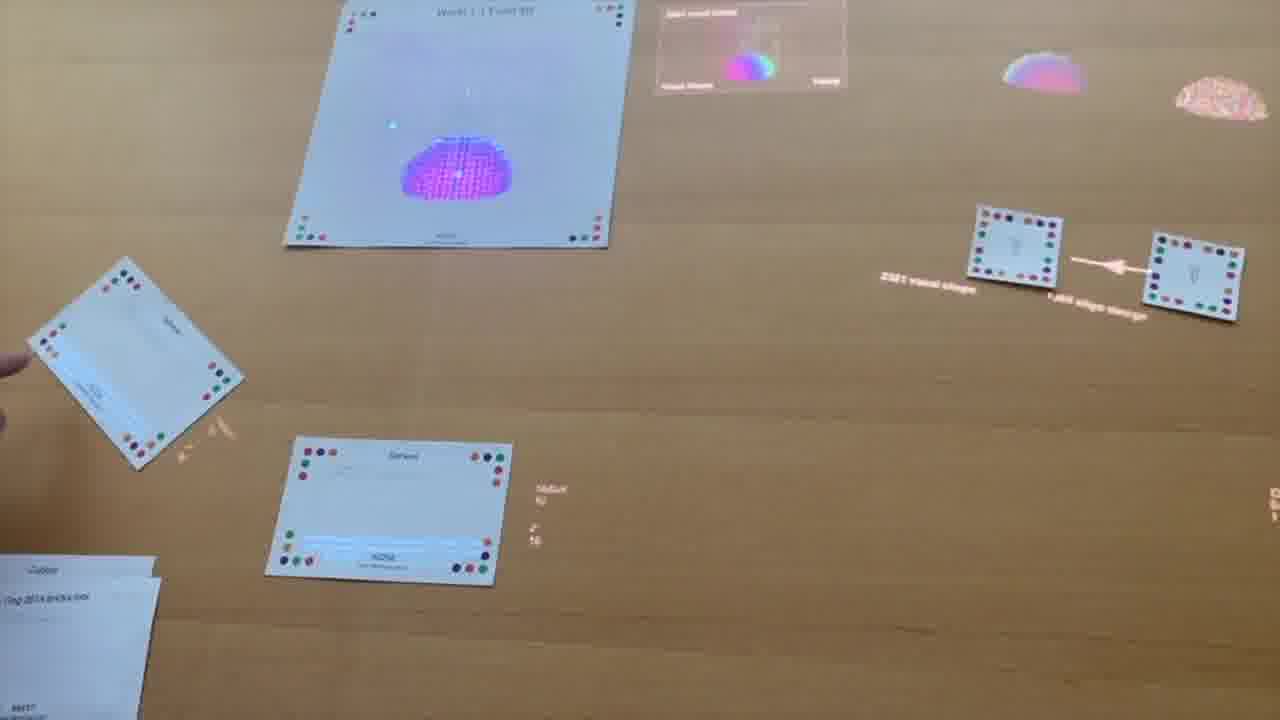
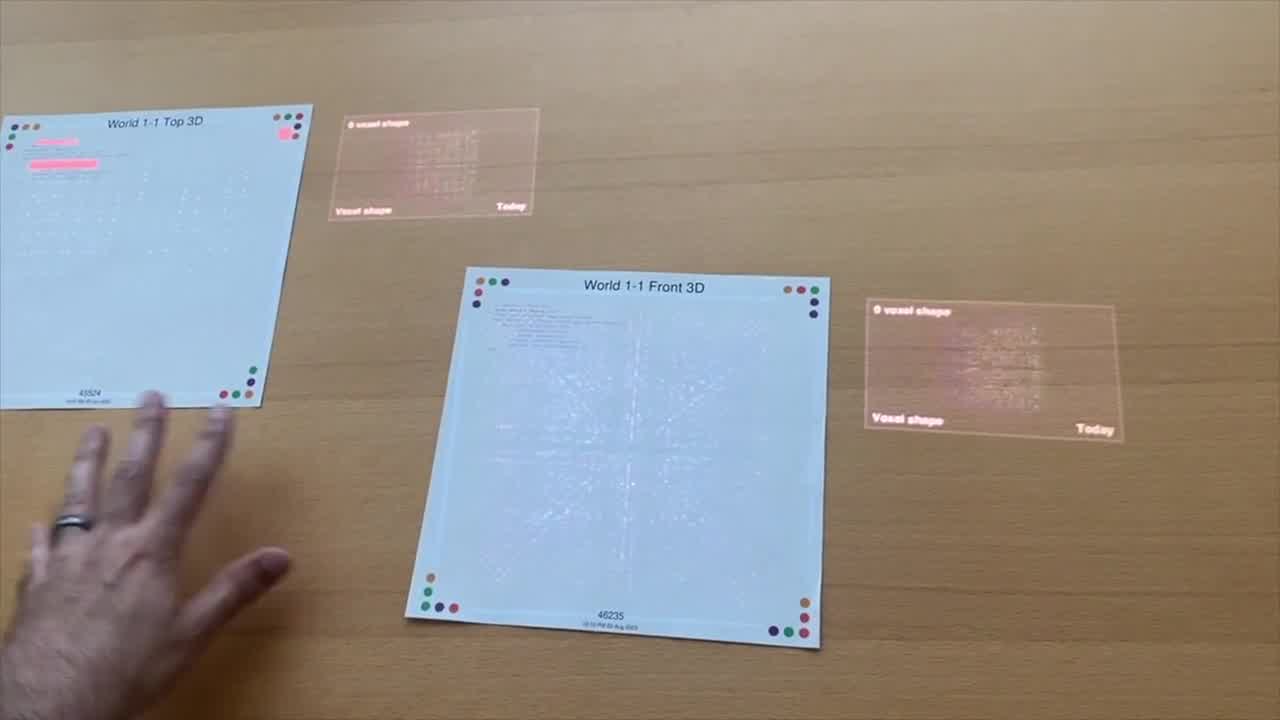
He's doing this by pointing at a front view of the space, but in a separate page, we can also see a top view, and he could operate on it there as well.
The shapes he's adding have parameters, such as their dimensions, which can be adjusted by turning a small card as if it were a knob. [more]

Here, Shawn picks up a composite shape into a token which represents a test tube.
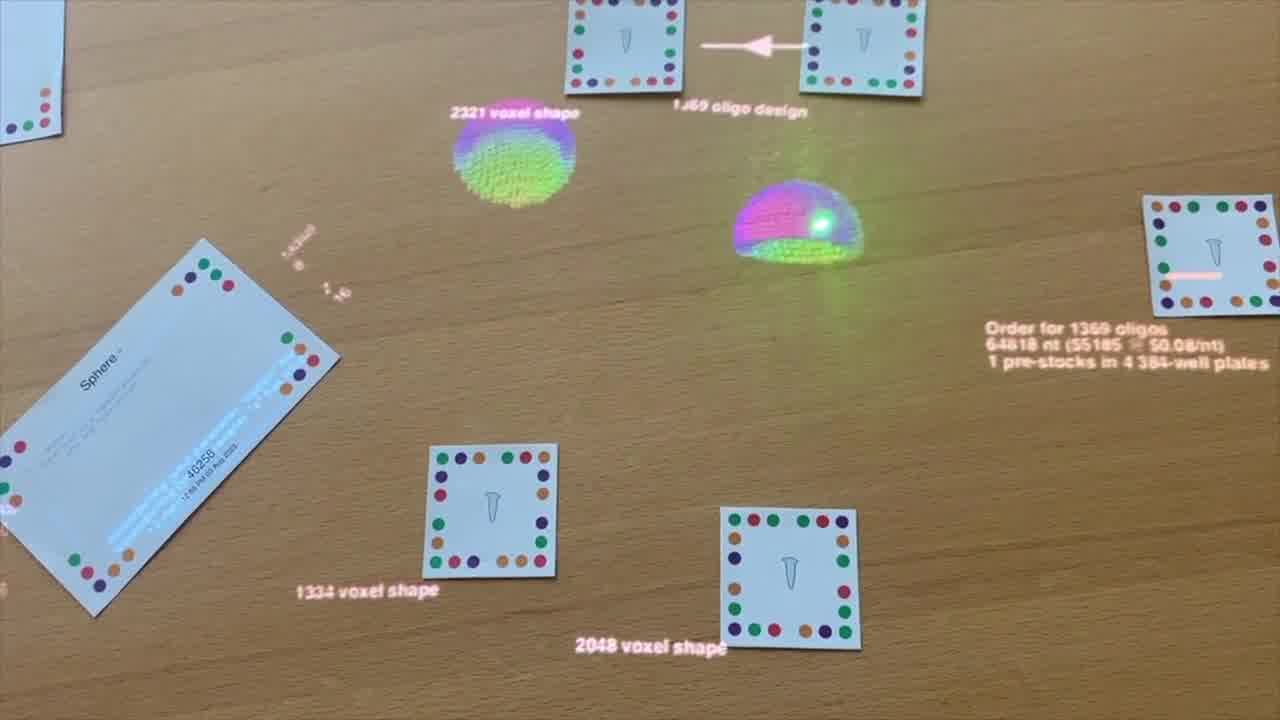
He makes a couple more designs, and picks each of them up as well, so all three designs are on the table.
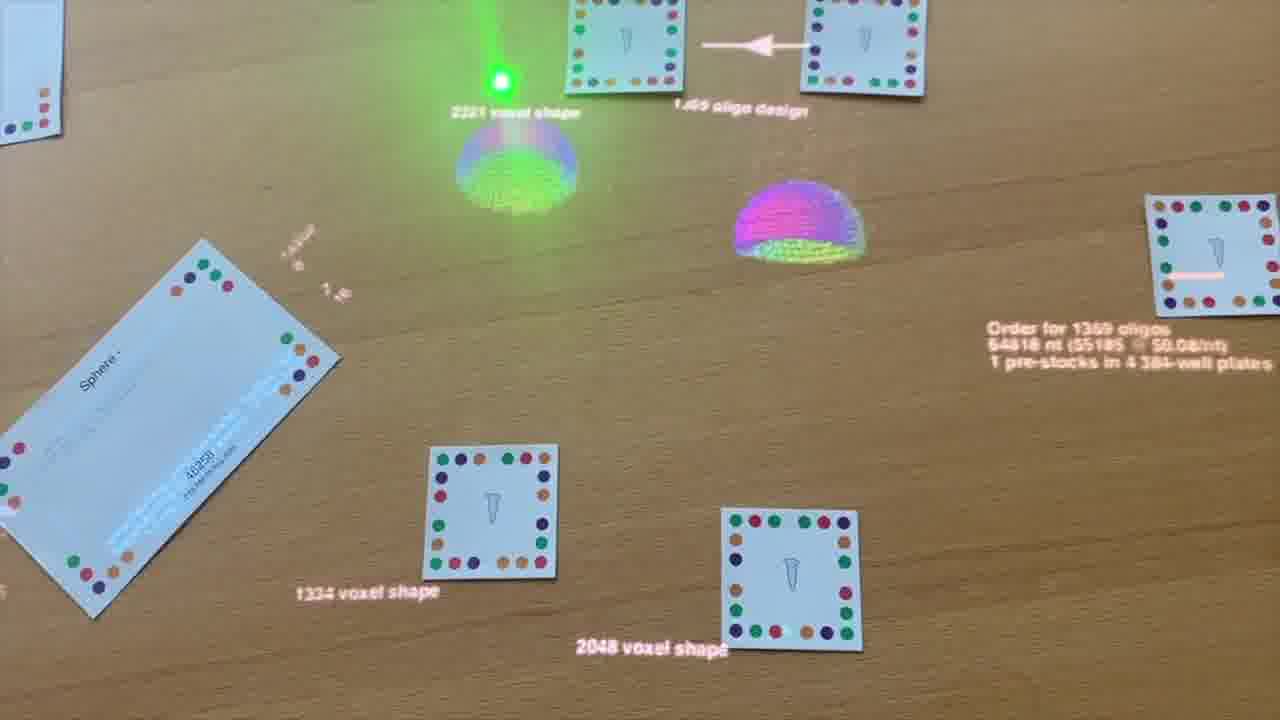
He looks underneath a design by tumbling it with a laser pointer.
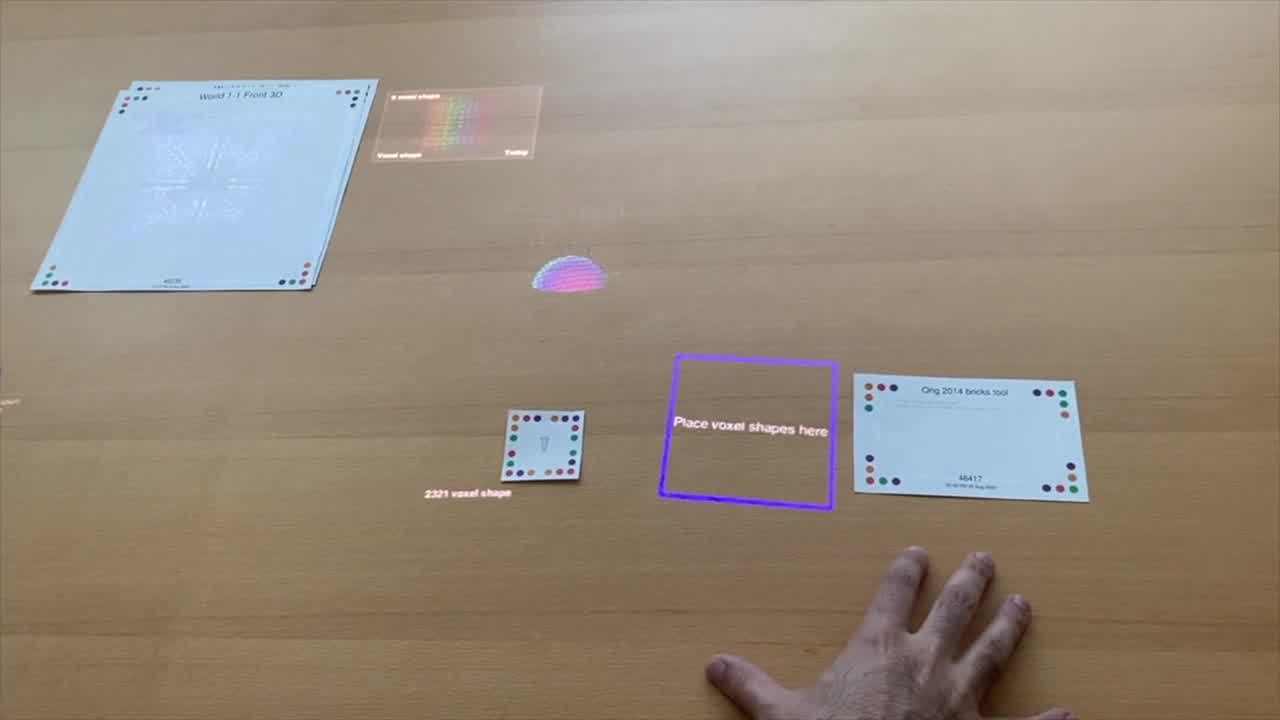
Then, he uses other tools to process these designs.
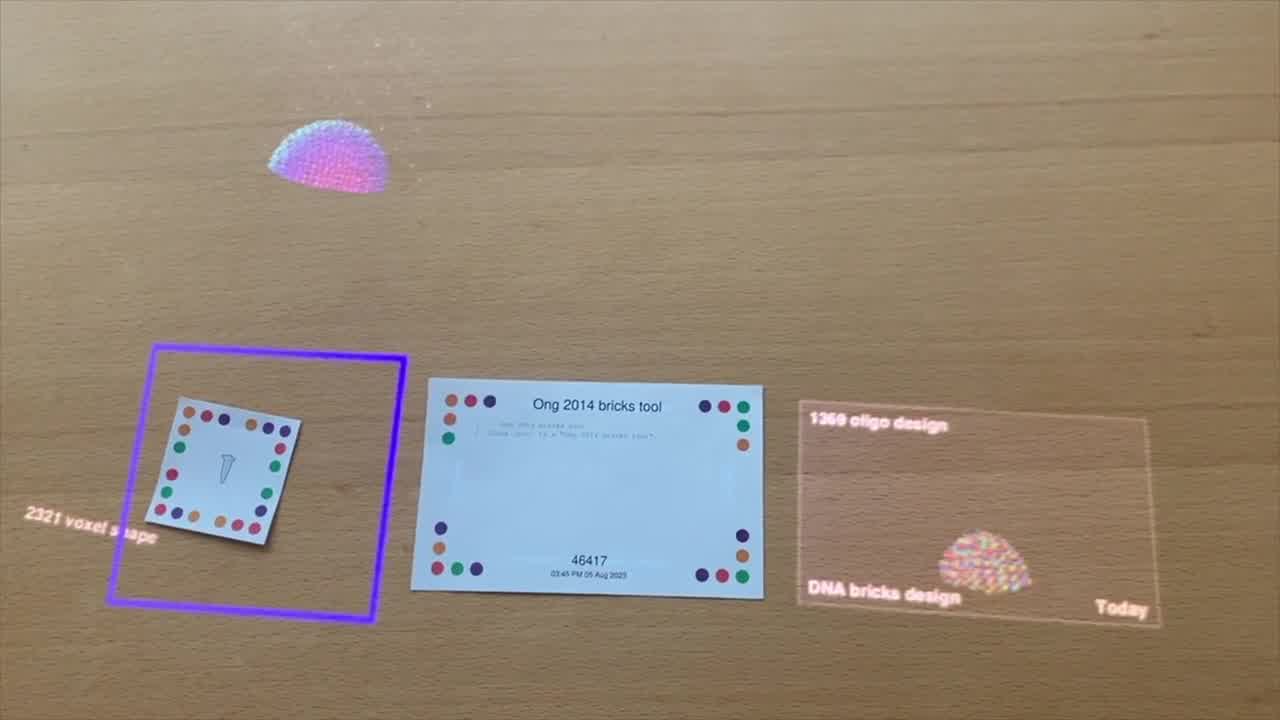
This tool converts a voxel shape into a set of DNA sequences, following the DNA bricks technique.
He picks up the generated set of DNA sequences into its own tube.
So, on the left is the geometry he specified, and what's shown on the right is the nanostructure that these DNA strands will fold into.
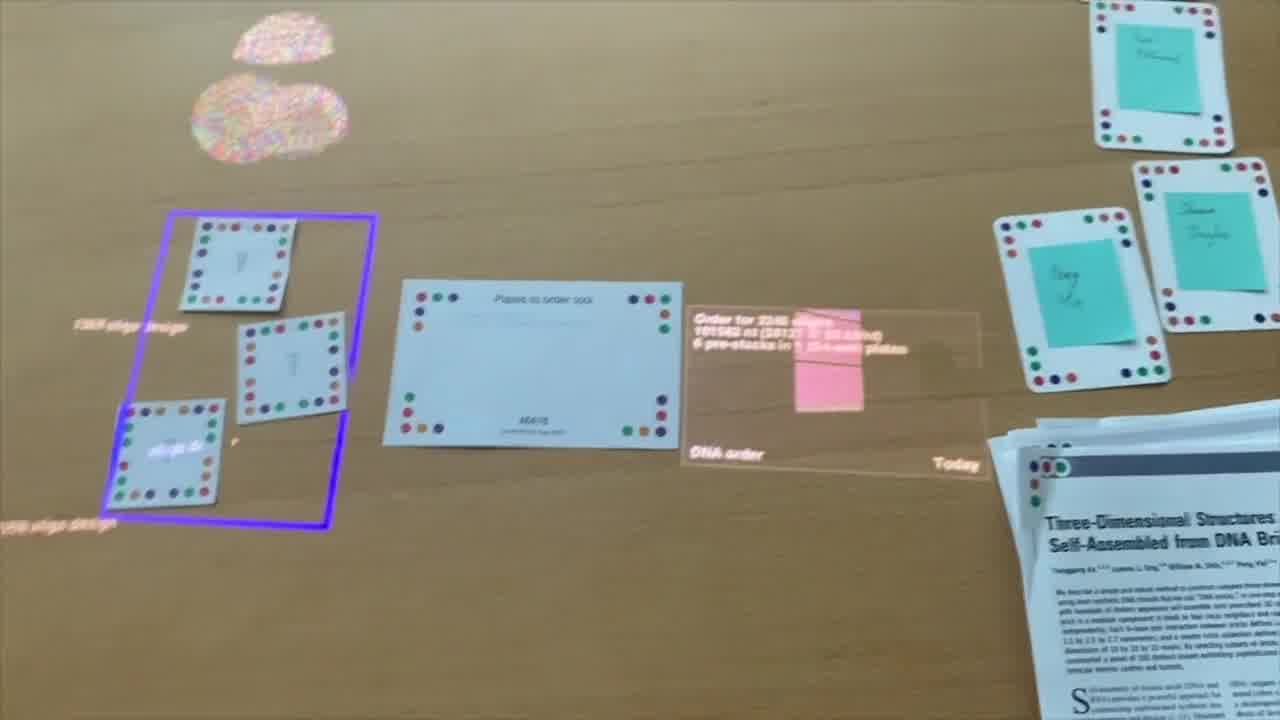
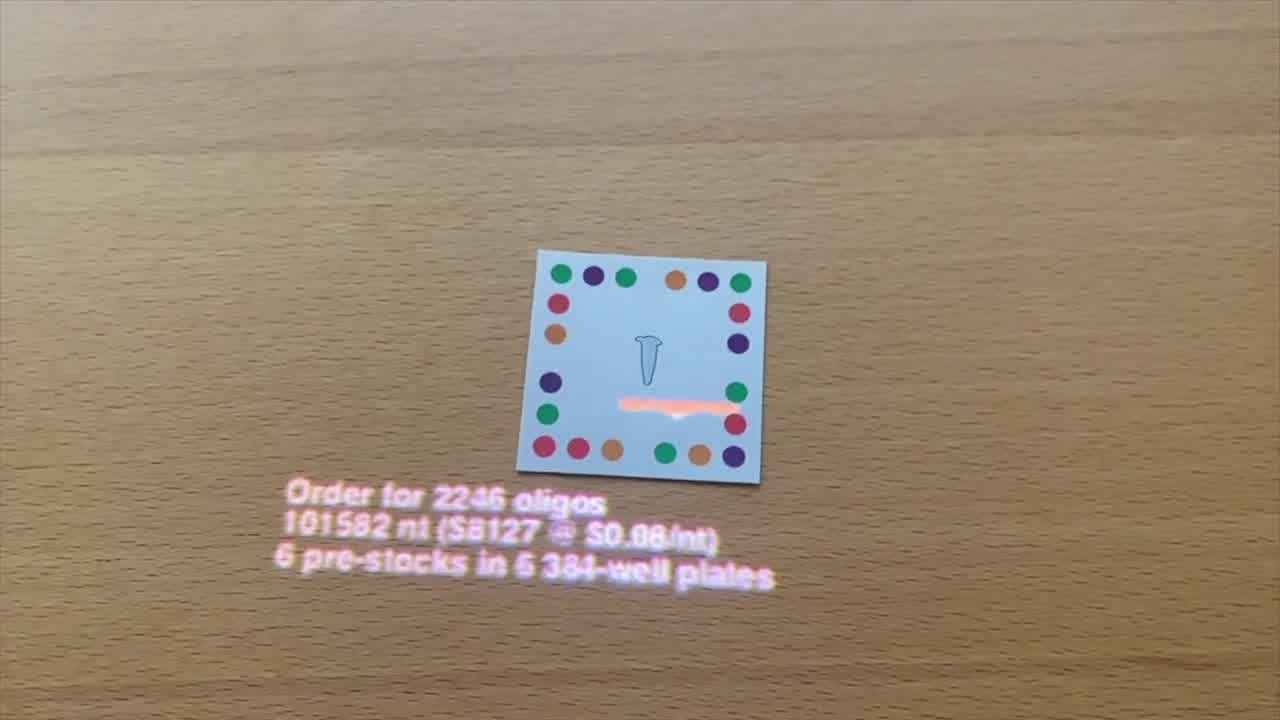
The next step is to combine these DNA sequences into a format that's suitable for ordering from vendors and using in the wet lab.

By placing them into this box, the tool generates an order, and even estimates the cost.
There are other tools, not shown here, that convert these designs into a step-by-step procedure for fabricating the structures in the wet lab.
These shapes were, in fact, ordered and fabricated, and tested with live cells by students in the Weiner lab.
Here Shawn is pulling the results of the experiments out of the binder.
These videos show the results with the fabricated nanostructures, as well as the results of the control experiment using an alternative method.
And here are some plots analyzing those results.
The team was satisfied that they could replicate the old behavior using this new method, and can now move forward with new designs.
So, instead of just showing pictures of the nanostructures and describing how they were built, Shawn is actually building them, live, as part of the presentation, so the audience can see where they came from.
The algorithm for generating DNA sequences was not made visible here, but in future presentations, we intend to build the algorithms live as well.
Here's the entire implementation of the voxel editor and DNA sequence generator. It's about eight full pages.
Luke likes to collect his kits on portable whiteboards that can be placed on the table or hung on the wall. [more]
The implementation of picking up designs and moving them around extends from a set of biomolecular design tools we had prototyped the previous year, where we would pick up proteins and DNA structures into these little test tube tokens. [more]
So for this DNA brick workflow, we're reusing two pages from this poster from last year.
Hands-on session
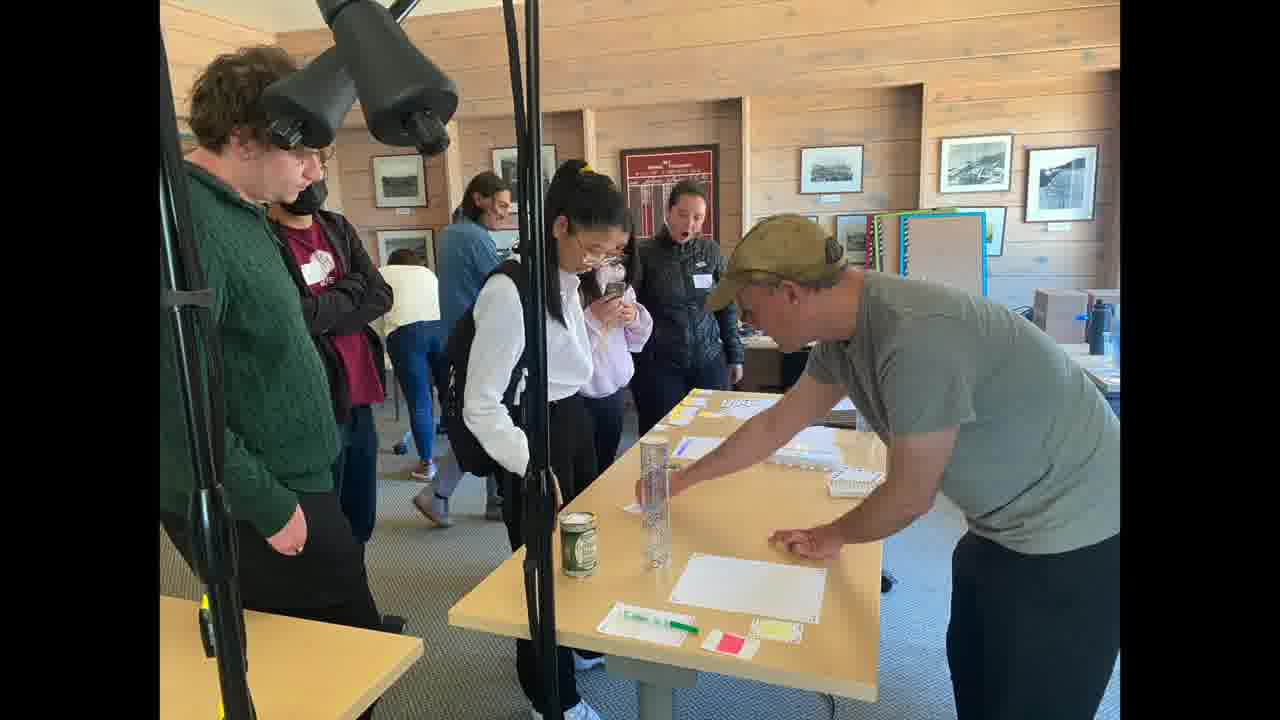
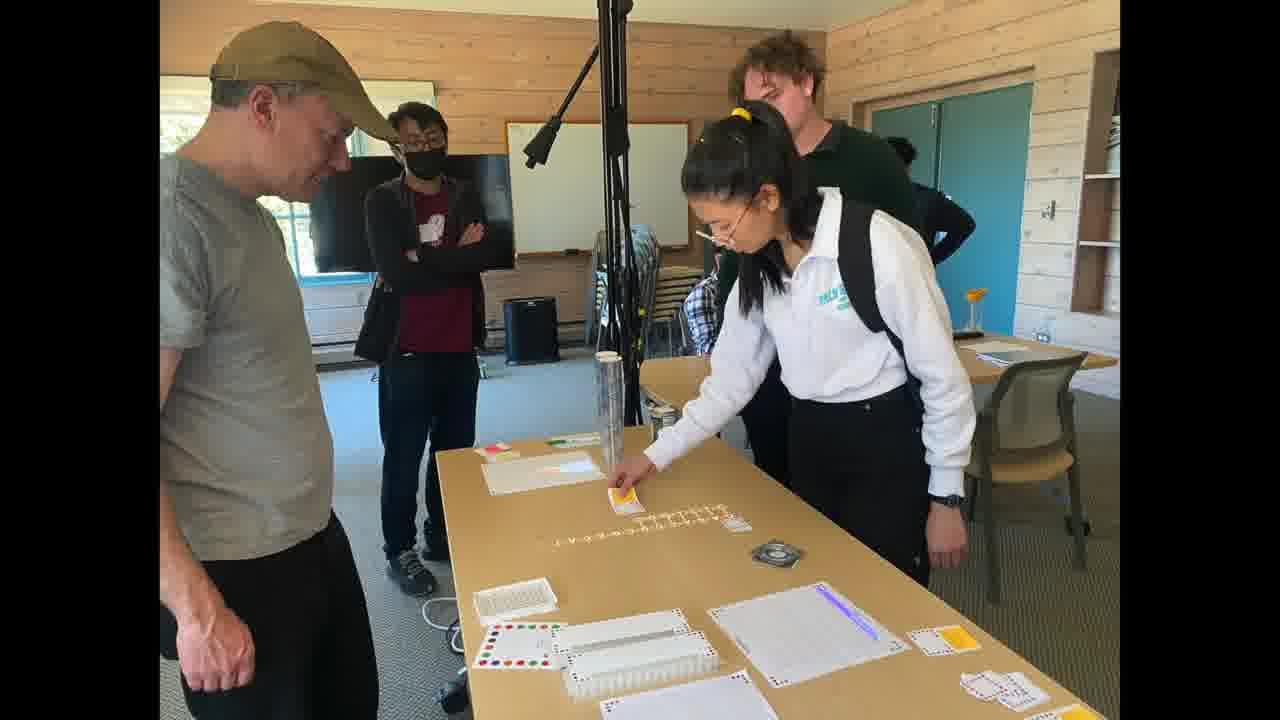
My favorite part of the presentation happened after the presentation.
We had set up Realtalk in another room, so after the presentation was over, audience members could then get their hands on what they had seen.
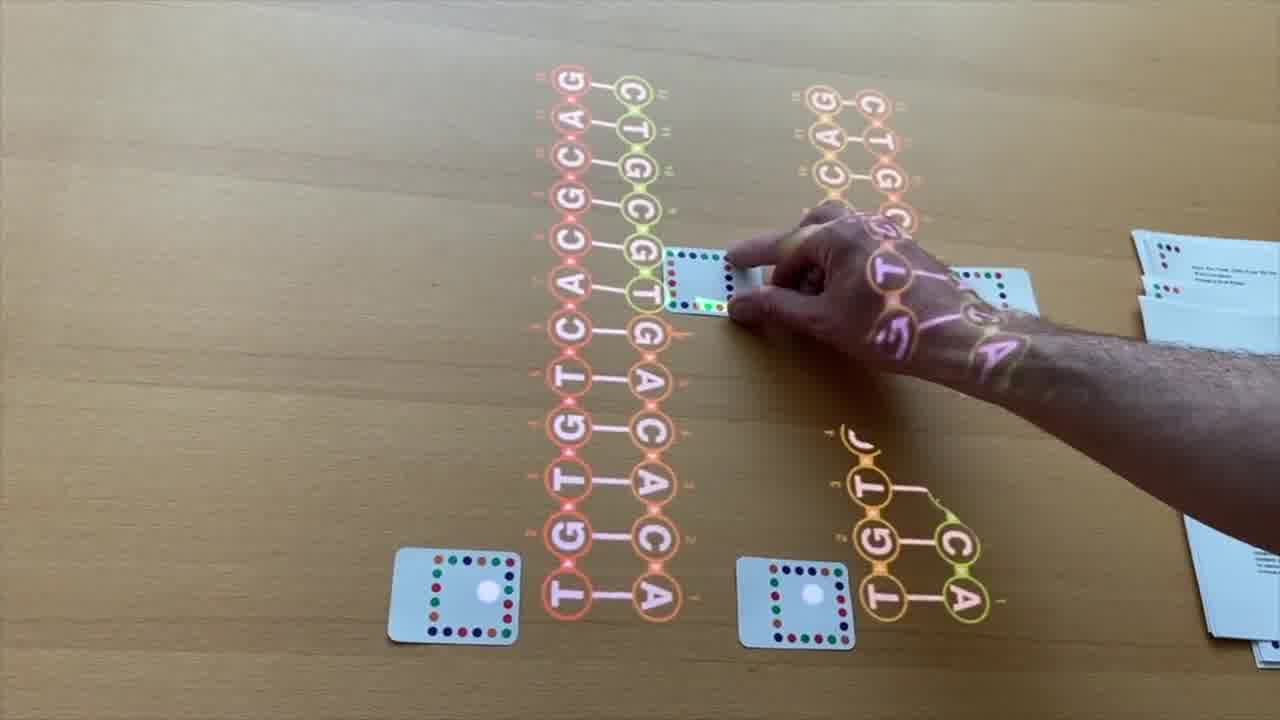
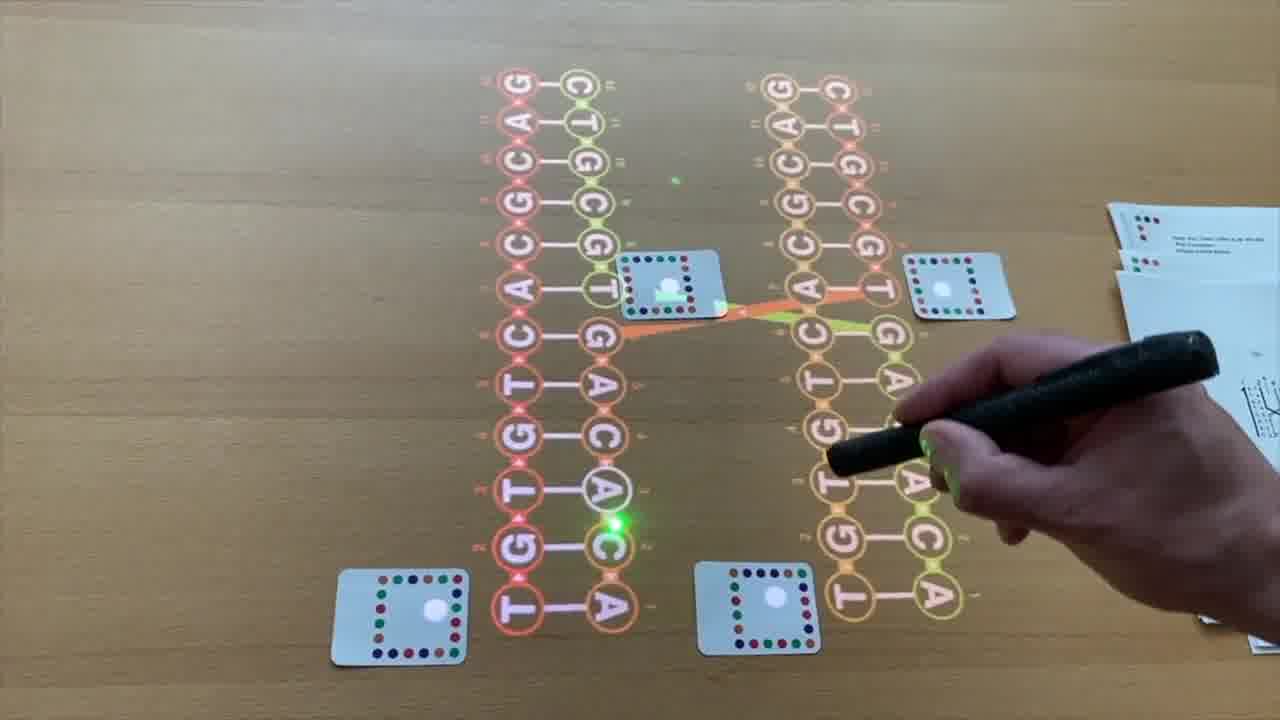
One student came in, and wanted to build a Holliday junction.
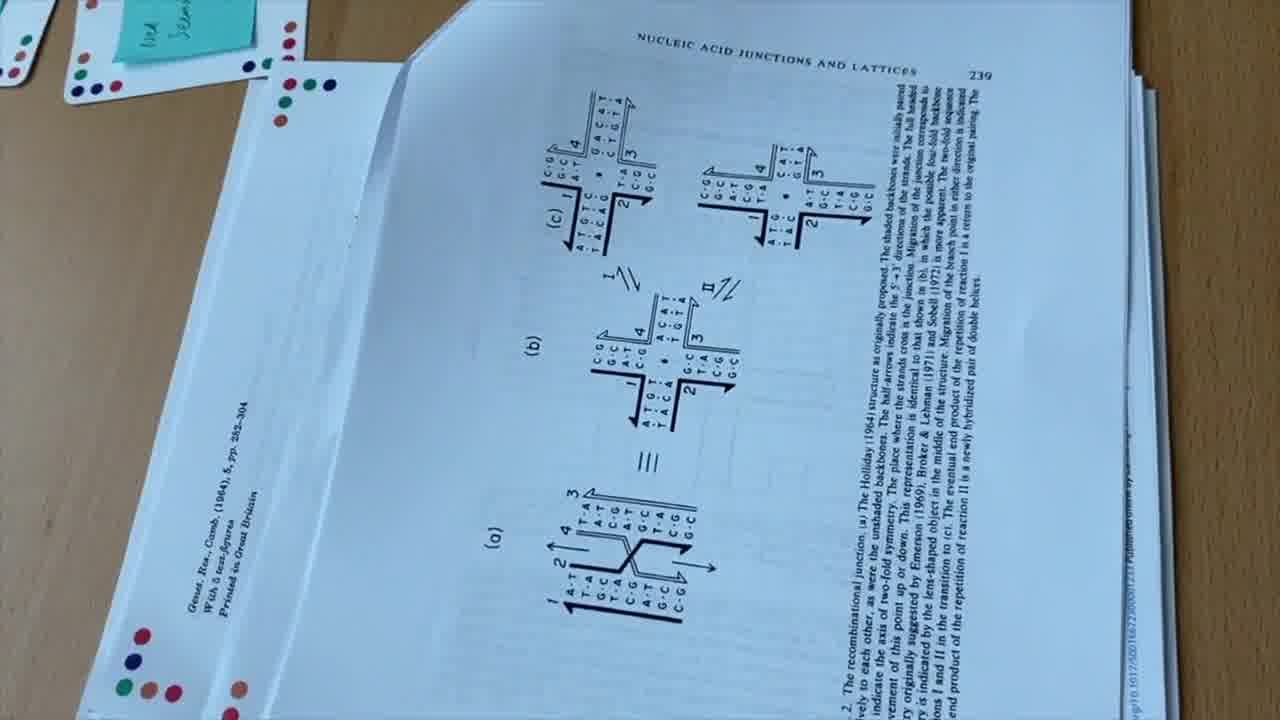
She had seen pictures of Holliday junctions in textbooks, where they're always drawn like this. [more]
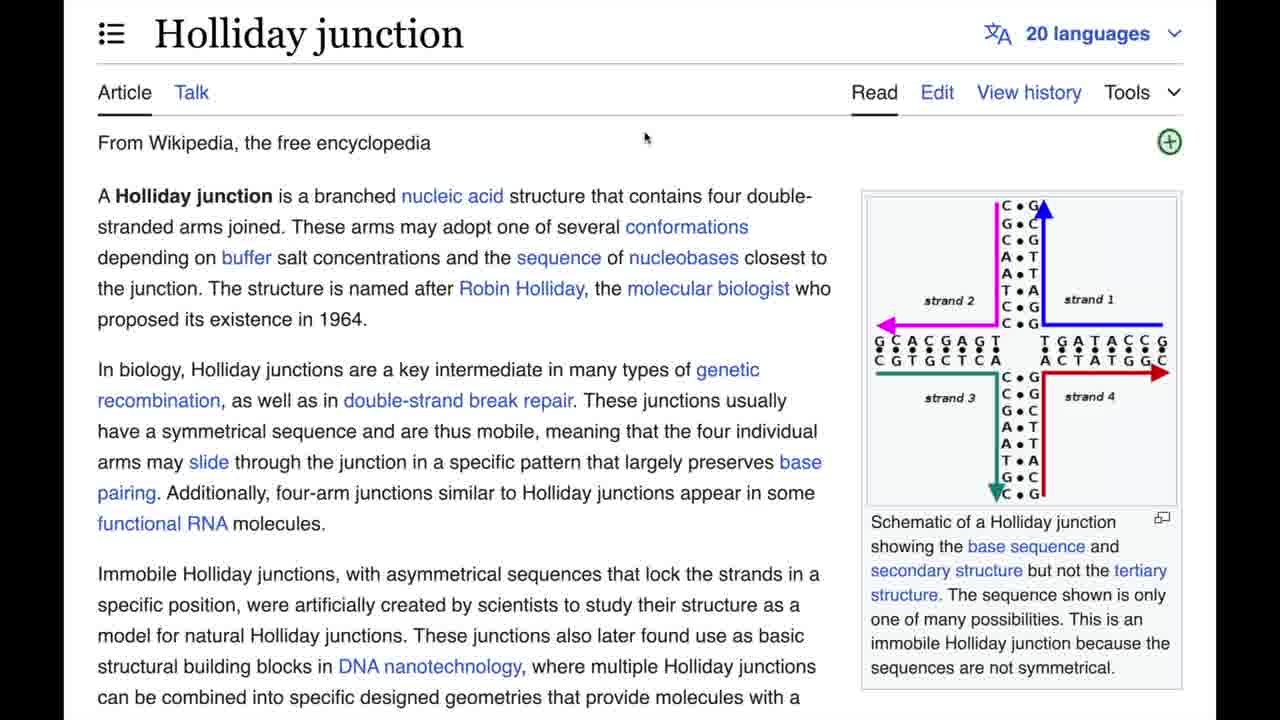
I think that representation is super-confusing, because that does not look a crossover. So in the talk, I started by making an obvious parallel crossover, and smoothly rearranged with my hands it into the textbook form.

And that's what this student wanted to do as well.
So, I coached her a bit through using the cards, and she made her Holliday junction on the table, and played with it, and she was excited that Holliday junctions finally made sense to her.
To me, this brings up the question of what the purpose of a lecture presentation is in the first place.
I believe that, in many domains, a person doesn't learn very much from hearing someone else talk. They need to actually build something with their hands.
So, one possible use for a presentation is to demonstrate a set of tools and concepts which the audience then uses themselves, with coaching, to reconstruct the presenter's work.
You see this pattern in woodworking classes, for example.
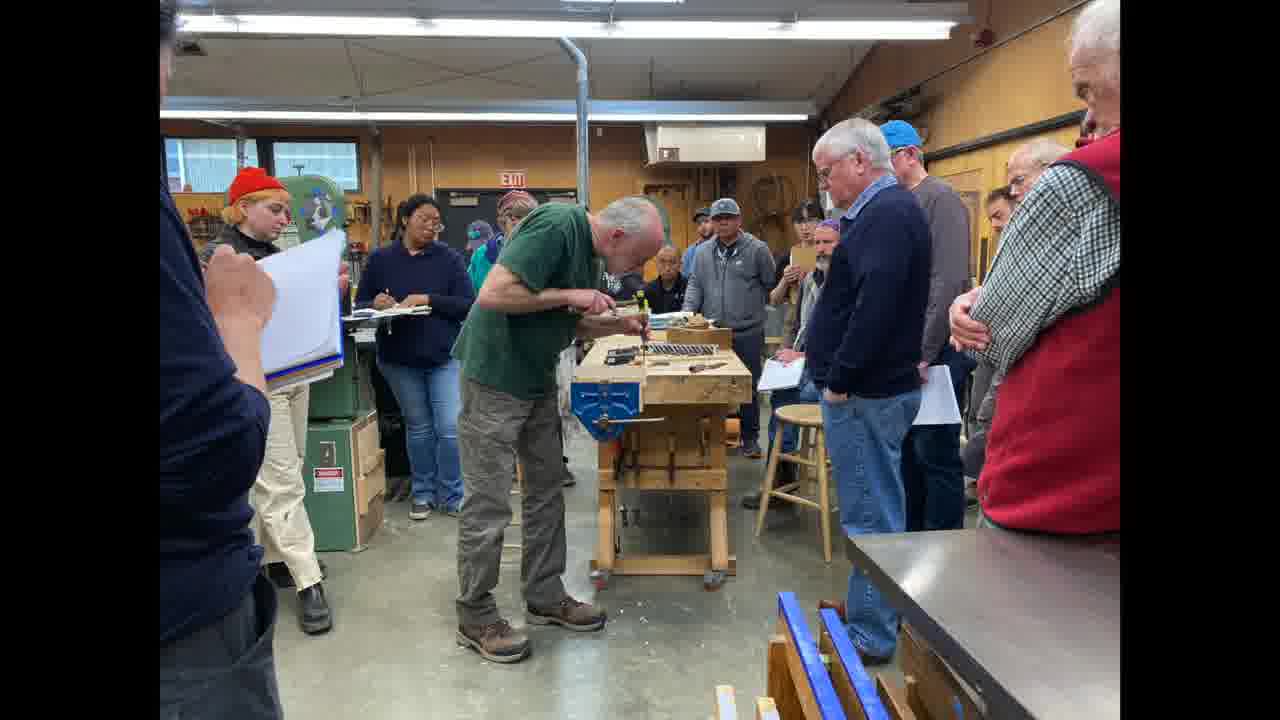
The students will watch the instructor demonstrate how to use a tool, or how to cut a joint. And then the students will do it themselves, with the instructors coaching them individually as needed.
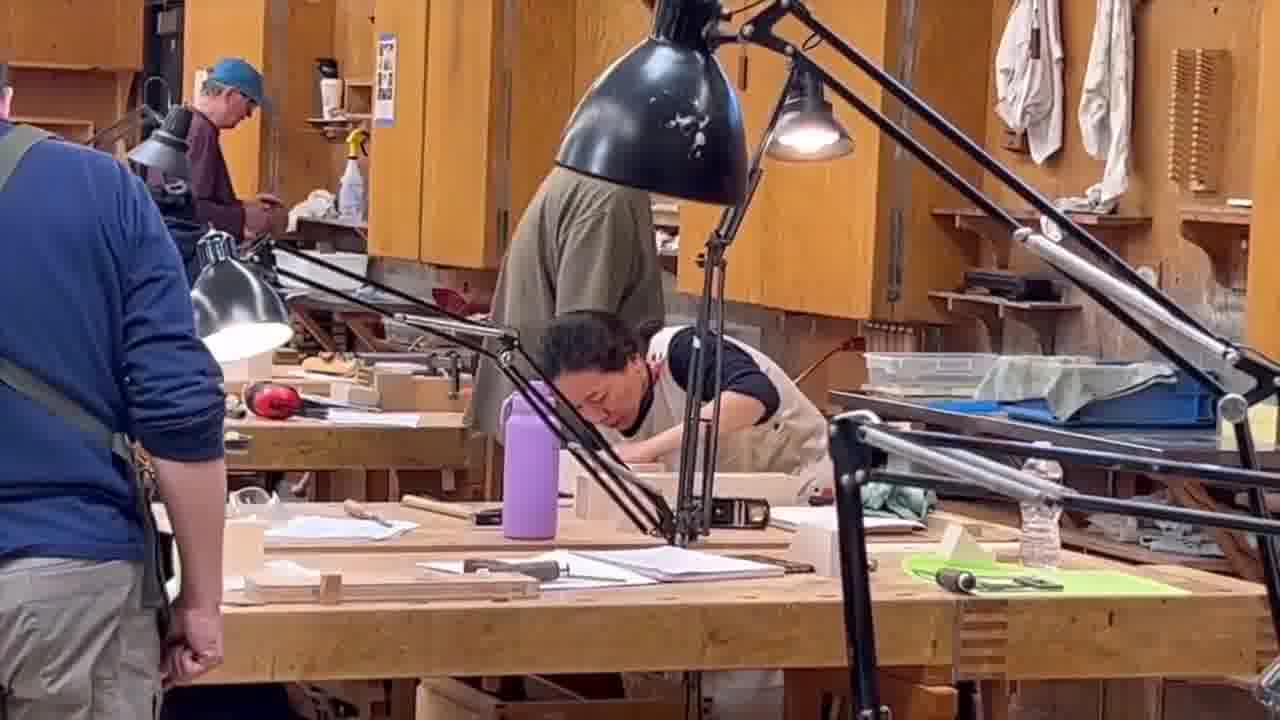
Woodworking is knowledge that lives in the hands, so this can't work any other way.
But this is not how scientific presentations work.
At a conference, a presenter will talk about the experiment they did, and show slides of their data. But the audience does not then recapitulate the experiment themselves, even in simulation. The audience does not explore and analyze the data themselves. They just listen.
We believe that scientific presentations, as currently structured, prevent scientists from understanding each other's work as readily as they could.
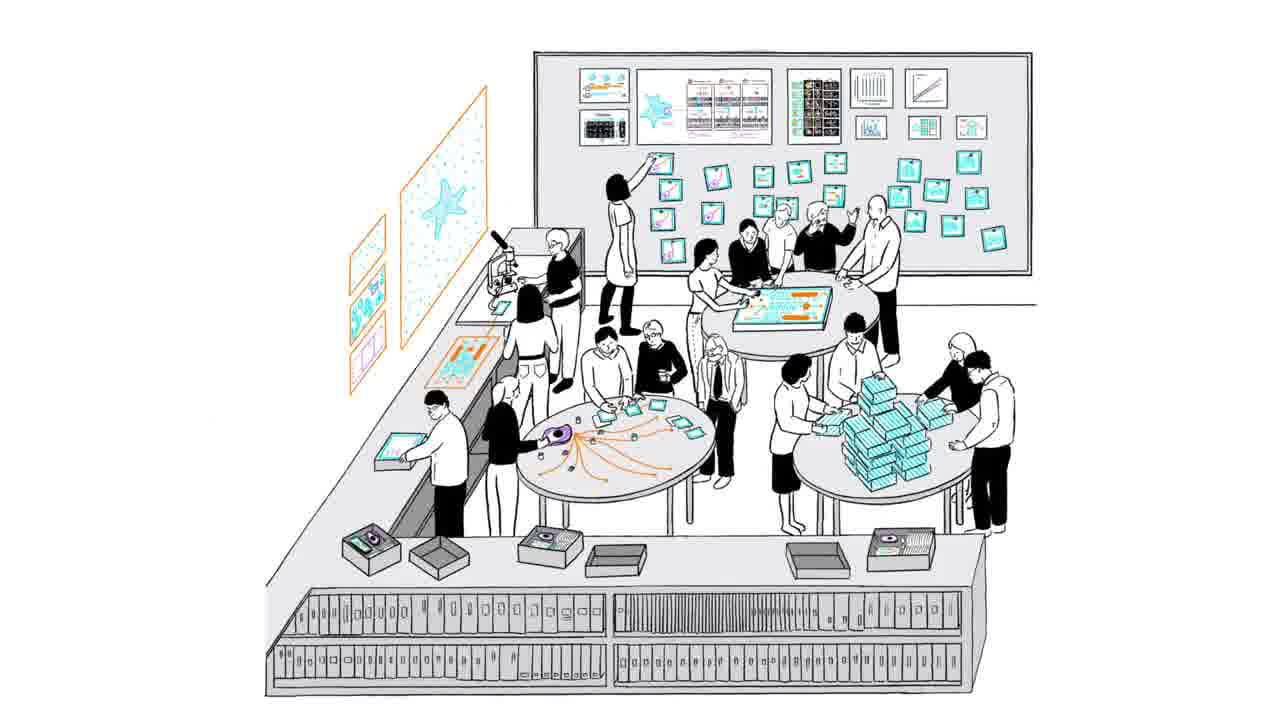
We're eager to use Realtalk to create environments where attending a presentation means actively reconstructing the presenter's work, getting the knowledge into everyone's hands.
The presentation shown in this video is an early step towards this vision.

Full presentation
Before we get started, I want to give a quick introduction to this computing environment, so you have some idea of what you're seeing.
Realtalk, our operating system, is designed for real people working together in the real world. [more]
Instead of people being on laptops dragging around icons, people gather around tables or in physical spaces, and work with physical materials with their hands.
In this environment, any physical object can be a computational object if you put a program on it. And programs themselves are physical things.
So this, for example, is a program, and when it is down, it does what it does.
We can all gather around and look at this program. Anyone can read it. We can point to parts of it, we can talk about it.
And anybody can change it, right as it's running. We can make the program different, and now it's doing a different thing.
It's this very fluid form of computation that's designed for people working together and having discussions together.
To give you a brief introduction to what that means, I'll show you a little bit of a project that Shawn and I were doing last year.
Shawn had a project going on in his lab that involved making a protein fusion. They wanted to splice two proteins together.
And so we imagined, how would we like to go about doing that?
Well, maybe we have a card, and we type in the name of one of the proteins onto the card, and it brings up the results from the Protein Data Bank. [more]
This is the one that we want to work with, and we can pick it up into one of these “mock tubes”. It's like a game piece in a board game.
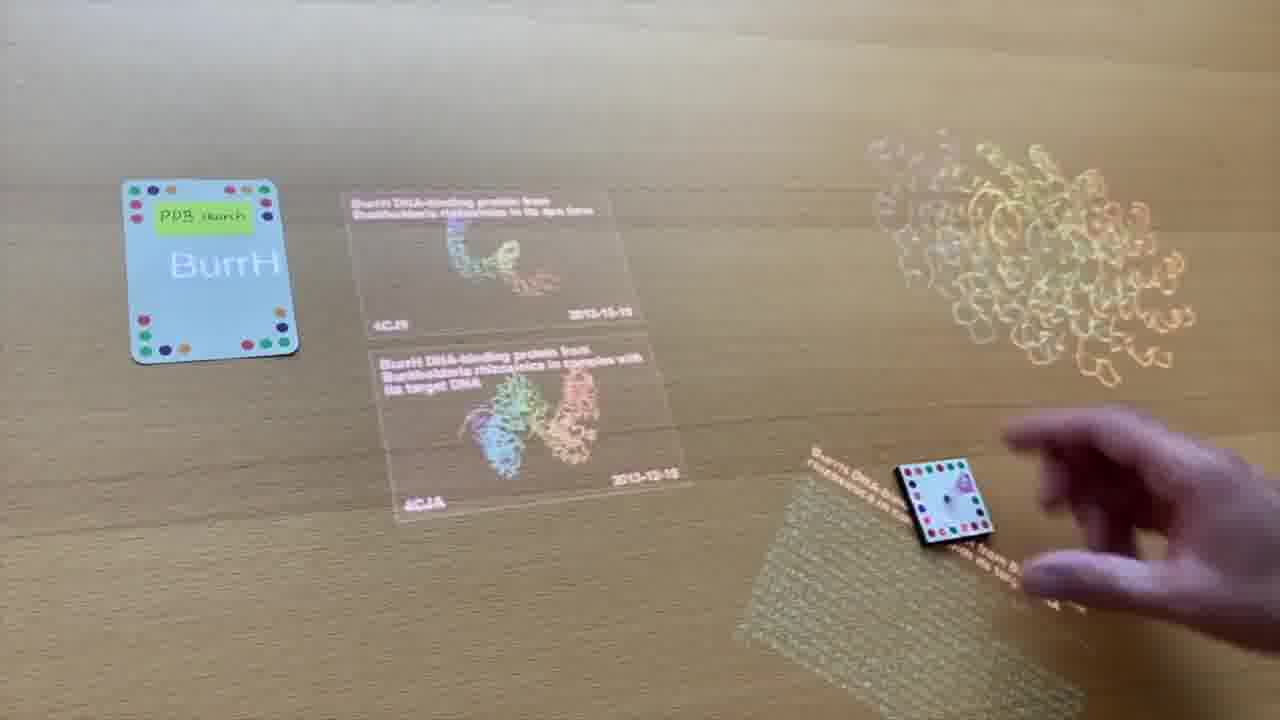
So now we have this protein here on the table. I can use the laser pointer to spin it around and take a look at it, and think about how we want to splice in our other protein.
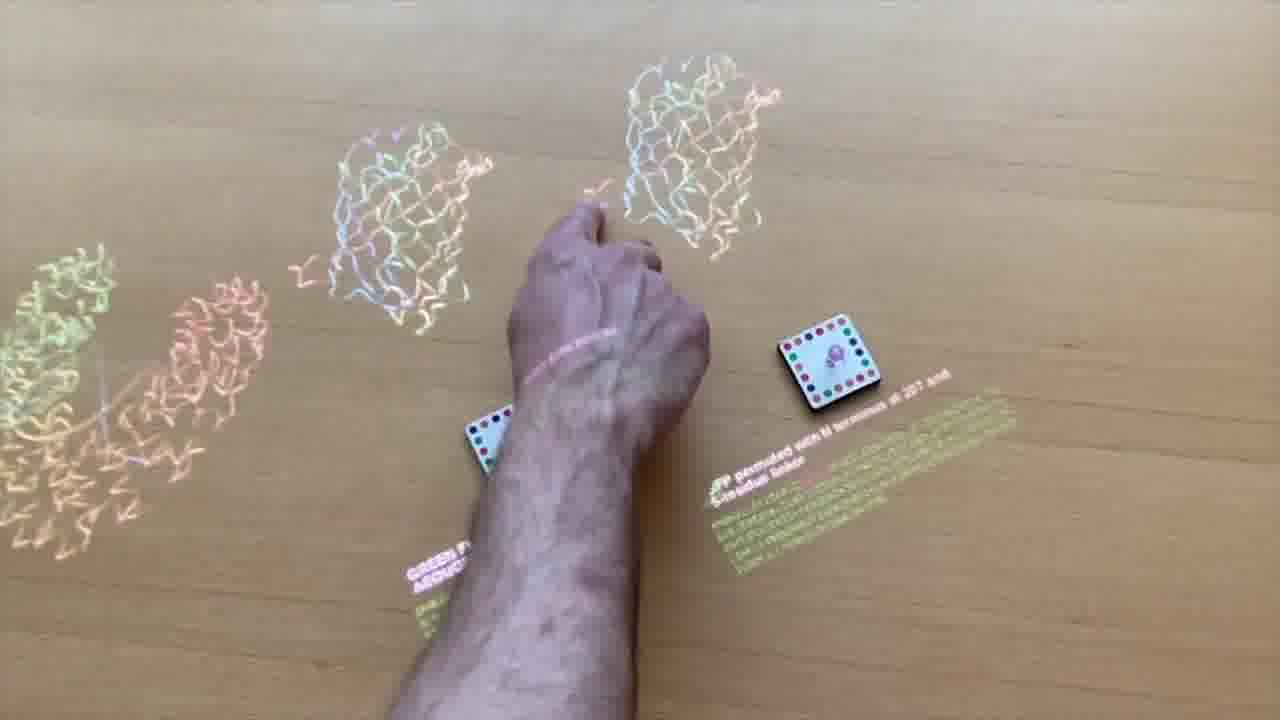
The other protein that we're going to grab here is our good friend, GFP. So, pick up that one. And now we can think about, where do we want to work with these things?
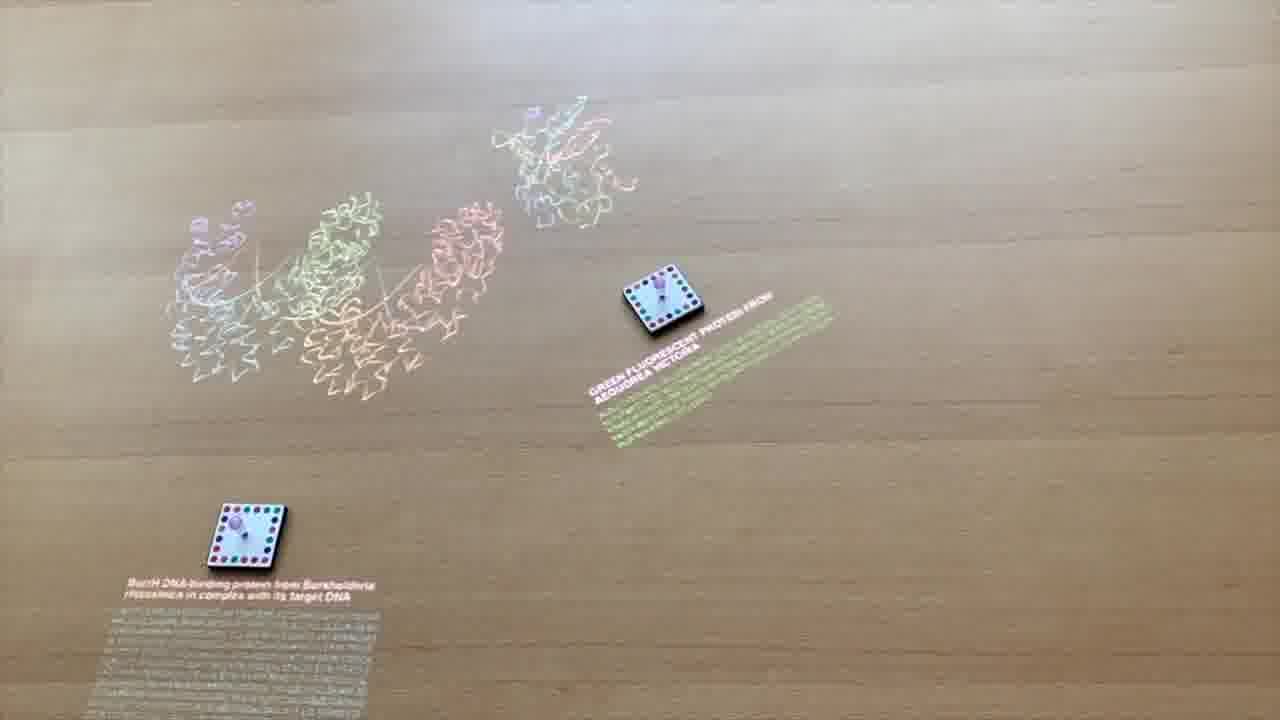
We can look for a good spot to bring it in. Maybe it's that little loop right there, where we want to bring it into the host protein.
In order to do that, the first thing that we want to do is open up the GFP so we can loop it in. I've got a little program to do that.
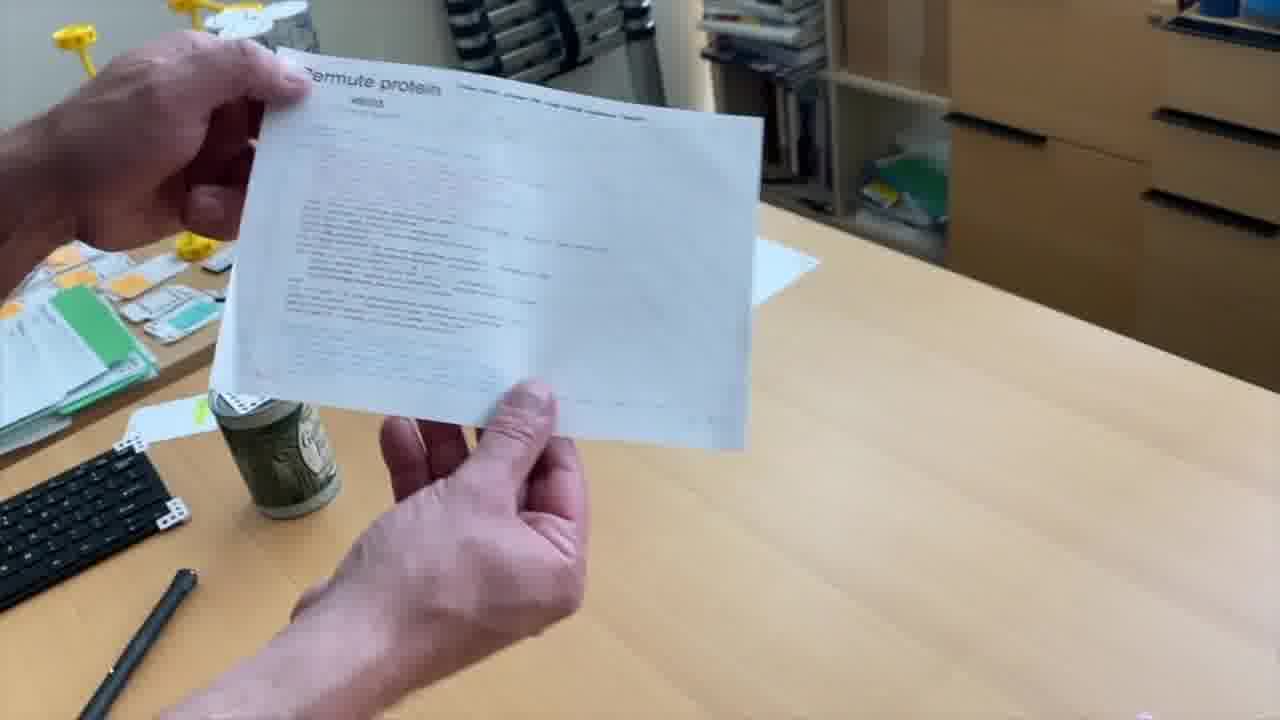
This program is ”Permute protein”. When I put it down, it extends a little whisker pointing to the spot on the protein where we want to open it up.
It puts its result over here, where I can pick it up into its own tube.
Now we have two proteins, the old GFP and our new improved GFP.
You can see we have the termini at the spot we want them. We'll just swap that into the scene.
Now, we want to splice that into the host protein. Again, I have a little program to do that, “Splice proteins”.
Same deal, it extends a whisker to the spot that we want to splice it in. And I can pick up the results into a tube.
We can put all these things on the table, and we can all gather around and take a look at it and discuss these things, and make little programs that operate on them, all in this very fluid, conversational, communal manner.
And that's just a little bit of what we did last year. We brought this system into the wet lab, and we had test tubes which showed what was inside them. We looked at microscopy data. [more]
But that was all stuff from last year, and we're excited to show what we've been working on this year. Meaning, the last few weeks.
So Shawn, over to you.
Introduction to cellular playgrounds
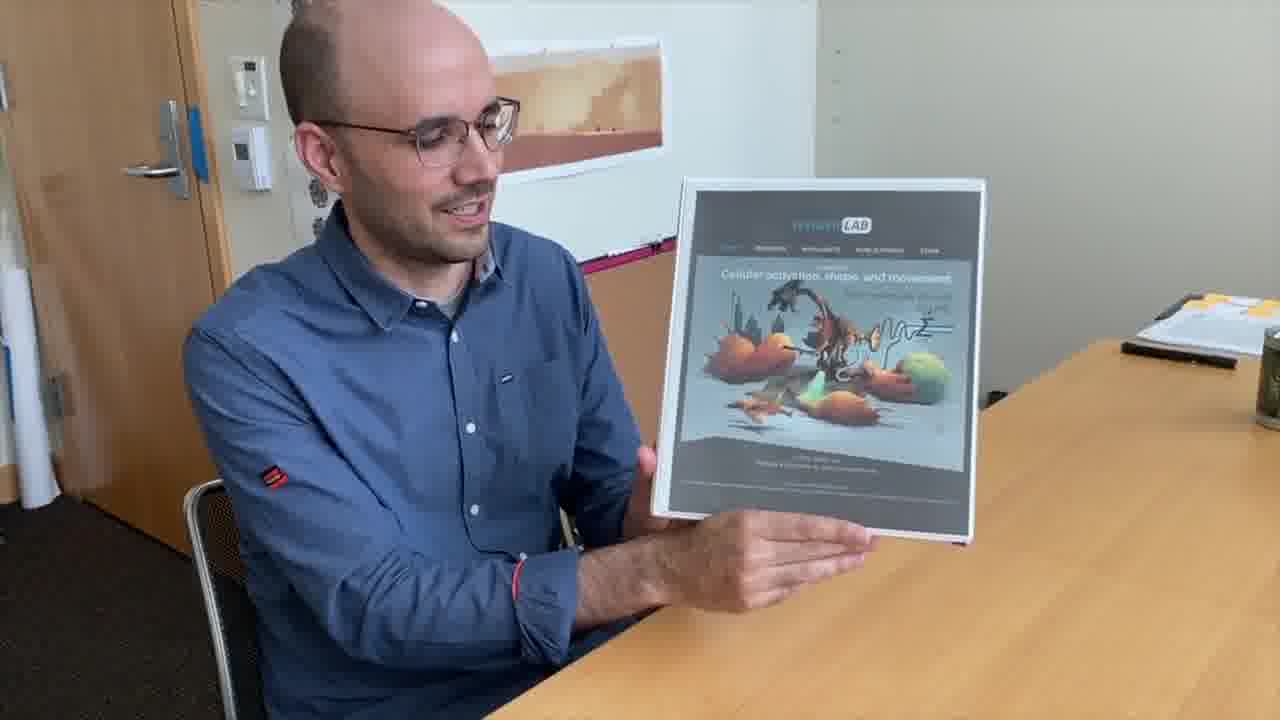
My lab has a collaboration with Orion Weiner's lab, and Orion studies cellular activation shape and movement. Here's what his lab website looks like. [more]
I thought it would be fun to collect our collaboration into a three-ring binder.
Normally, we would show PowerPoint slides, but here we can just flip through this binder. This has all the materials related to our collaboration.
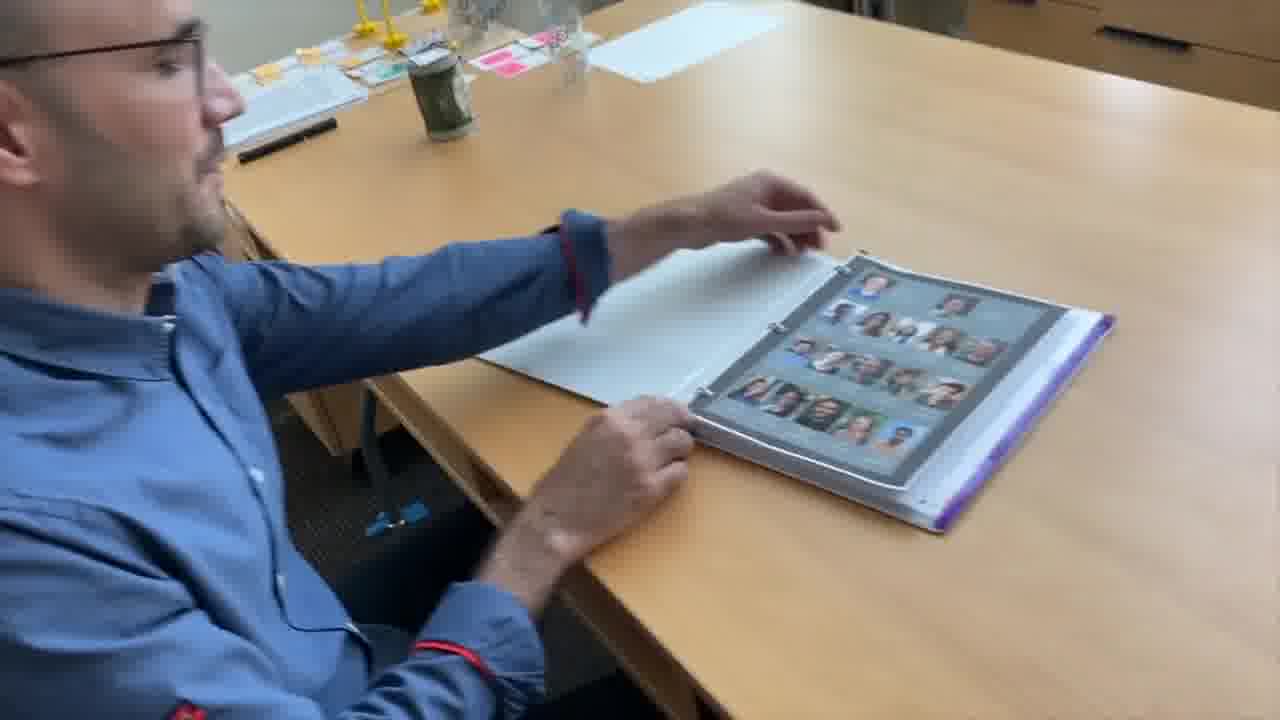
Orion has a nice team of scientists that he works with. Muziyue Wu is a graduate student, and she's been leading the Orion side of our collaboration.
And Konlin and Raghu in my lab have been leading the DNA nanotech efforts.

So as I mentioned, the Weiner lab studies cell shape, and how that affects cellular decision making. They use neutrophils as a model system.
When you have a wound, like a cut or a burn, neutrophils will sense chemical cues and migrate to the site of the wound and sterilize that site. [more]
When Orion presents this on slides, he usually shows a movie from a 2013 paper from Ron Germain's lab. [more]
Why don't we just pull up that paper? [more]
This paper is not exactly about neutrophils responding to shape. But it does have a nice movie, kind of buried in the supplementary material.
If I flip the page and I look at this paragraph here, there's a mention of a “supplementary video 2”, and we'd have to dig that up normally. But since this is a Realtalk object, we can actually attach media, including videos, to this page.
I have this little card here that I can use to point at that, and pull up the video.
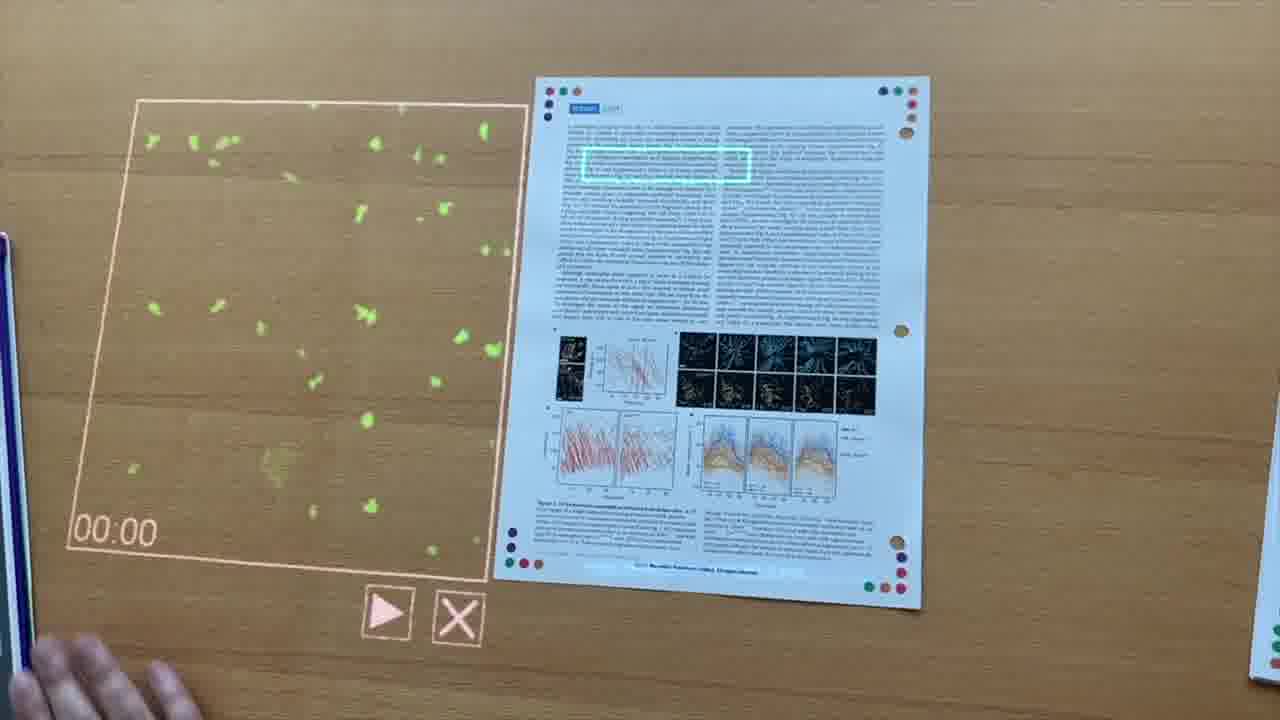
Here's what Orion would normally show. This is a mouse model. What the researchers are going to do is use a laser to induce a wound site right here.
It's a time series of minutes and seconds. We can watch the progression, if we play the video.
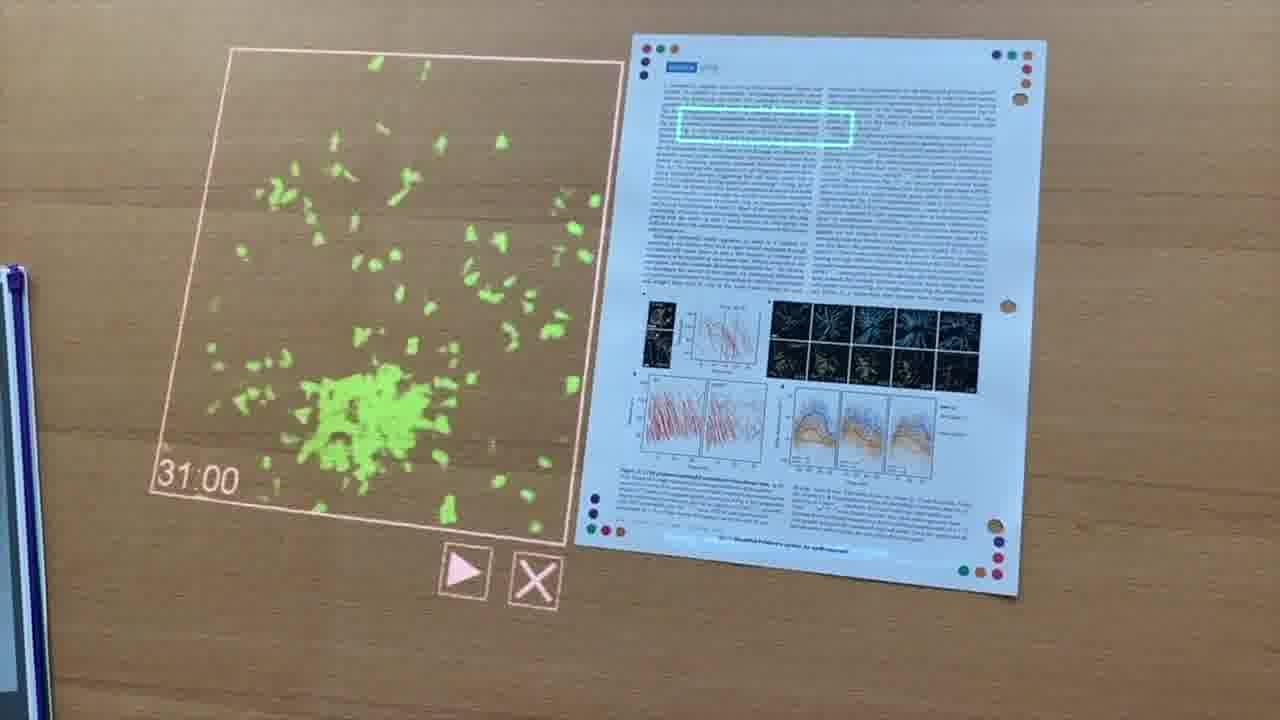
We see this swarm of neutrophils, which are labeled with a green fluorescent protein, so we can see the cells. They all sense that wound, and then migrate to the site.
This is just a dramatic and really amazing what the cells are able to do here.
So we'll put this paper away, and moving forward...
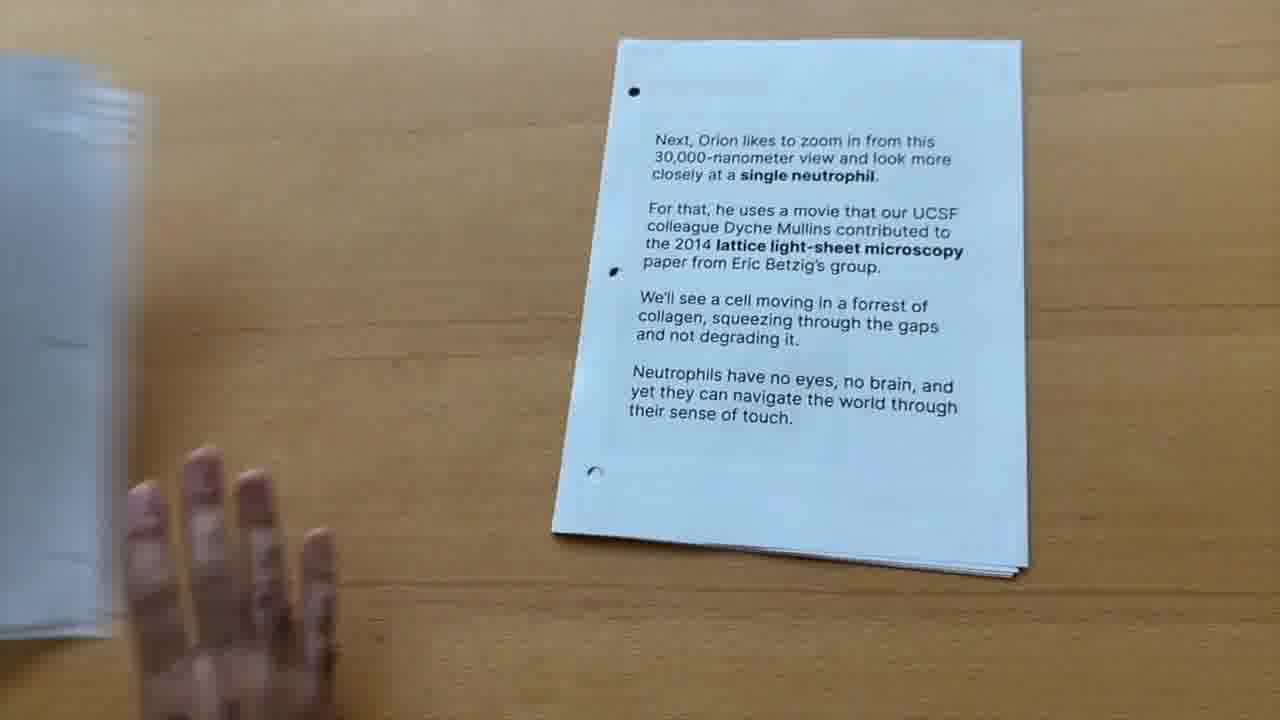
Next, again channeling Orion, he likes to zoom in from this high-level view of a lot of neutrophils and usually look closely at a single neutrophil.
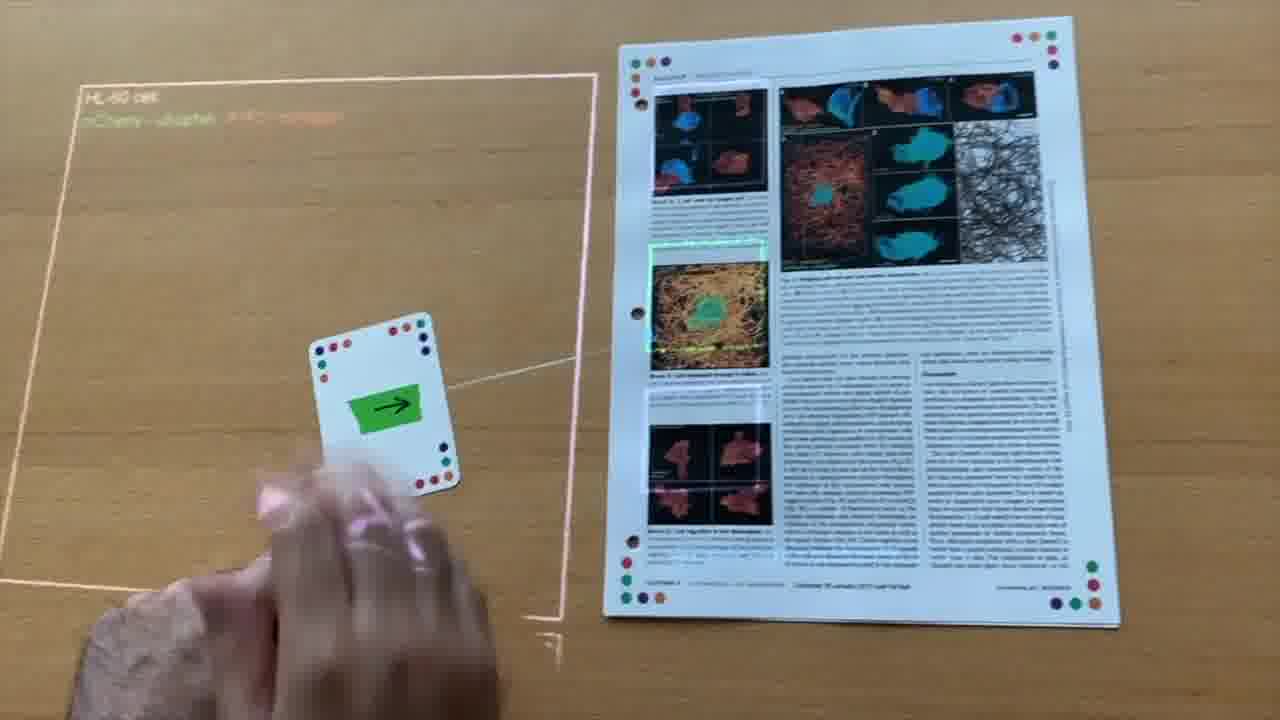
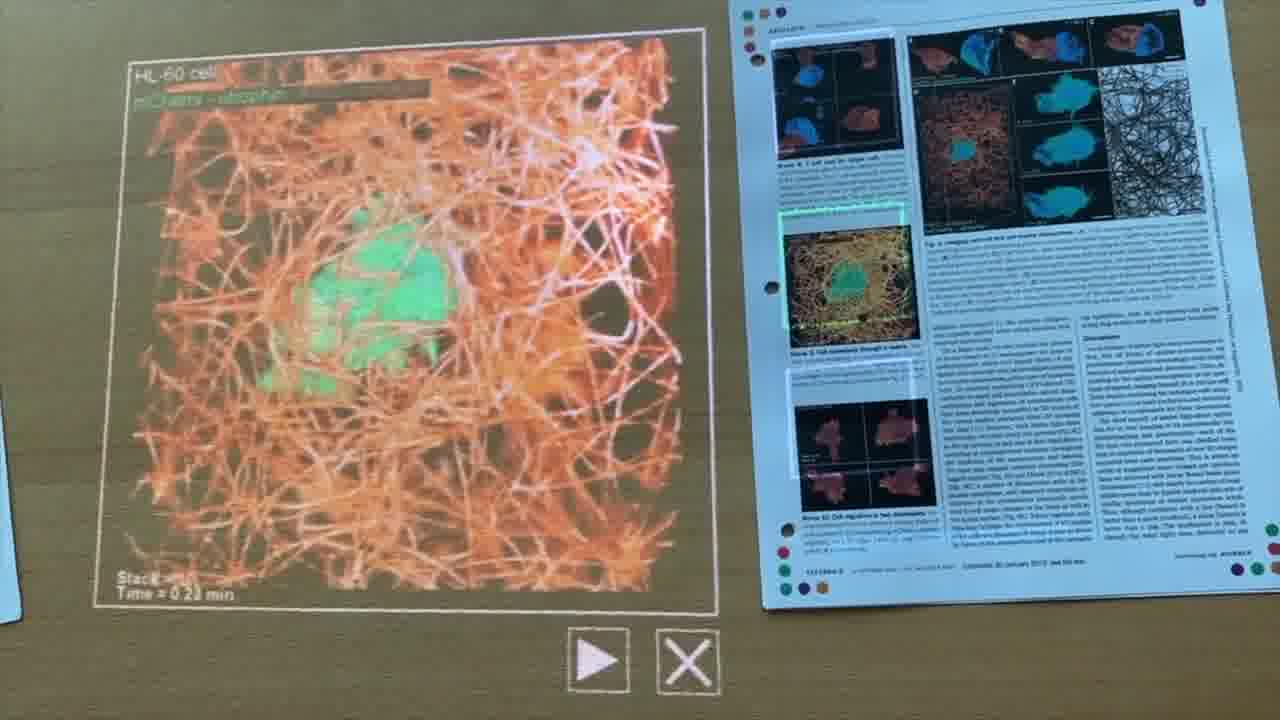
For that, he uses another movie that was actually recorded in Dyche Mullins's lab. It was part of this famous lattice light sheet microscopy paper. [more]
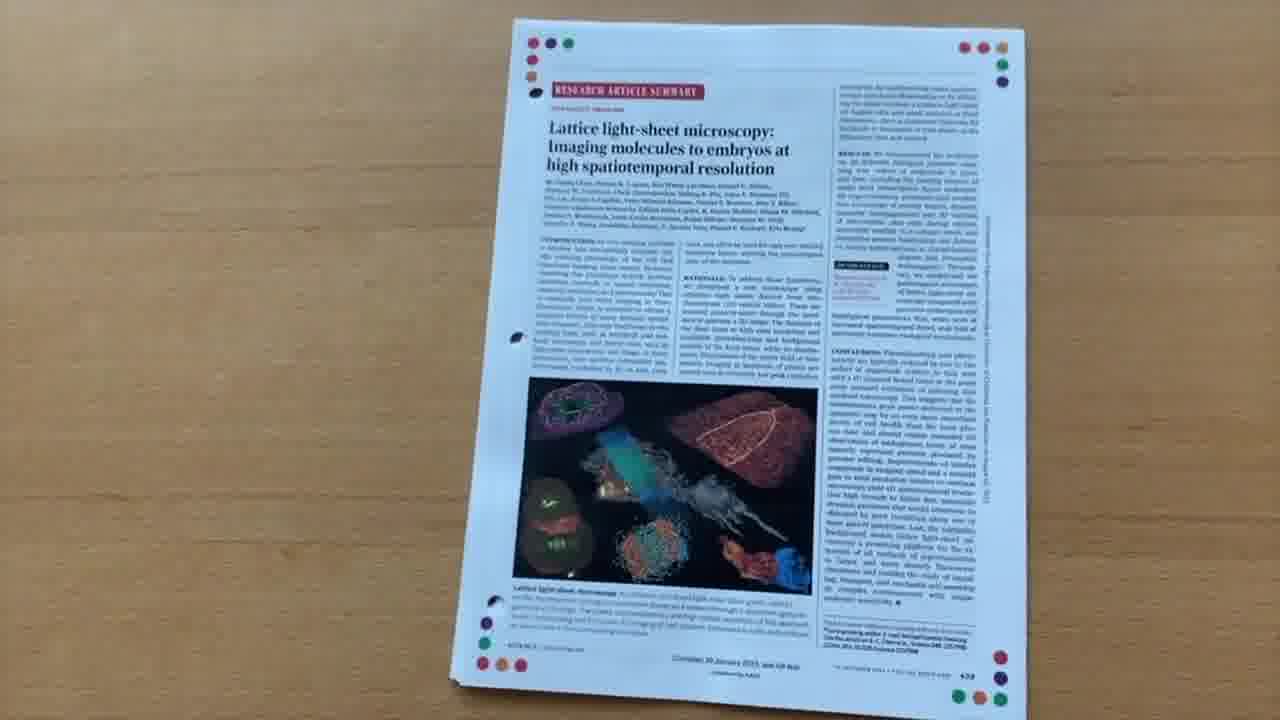
All the friends at Woods Hole brought all their different cellular systems, and contributed to sort of the testing of Erik Betzig's lattice light-sheet microscope, and then ended up all as co-authors on this paper. [1] [2] [3]
A lot of cool movies in this paper.
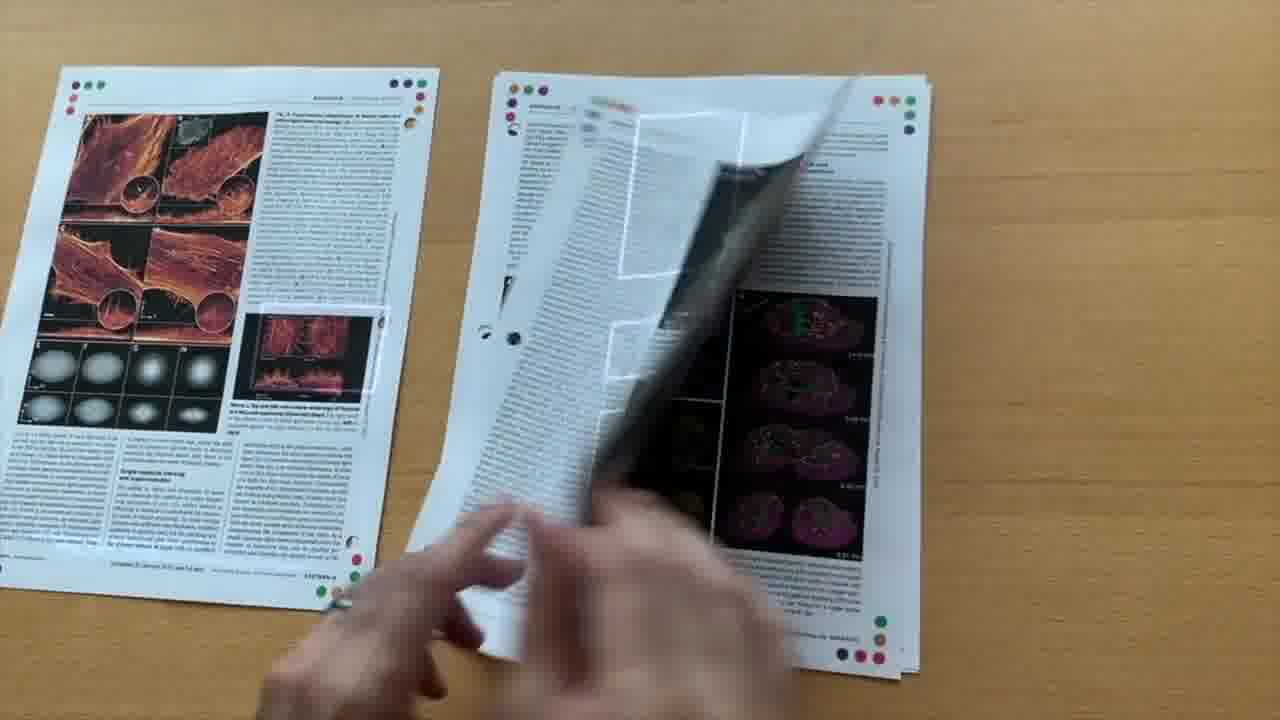
We're going to skip over those and then pull up the one that Orion usually shows.
And this is a single neutrophil crawling through an extracellular matrix.
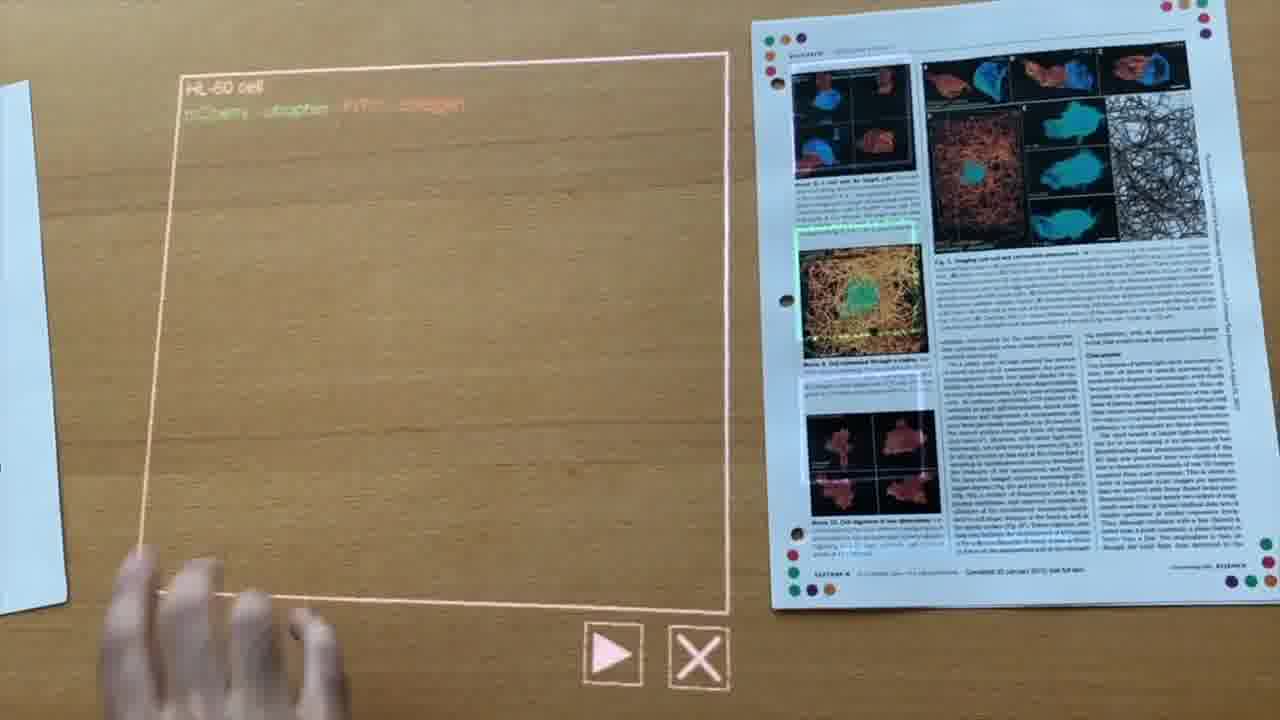
The collagen is in orange, and we'll see the cell in green.
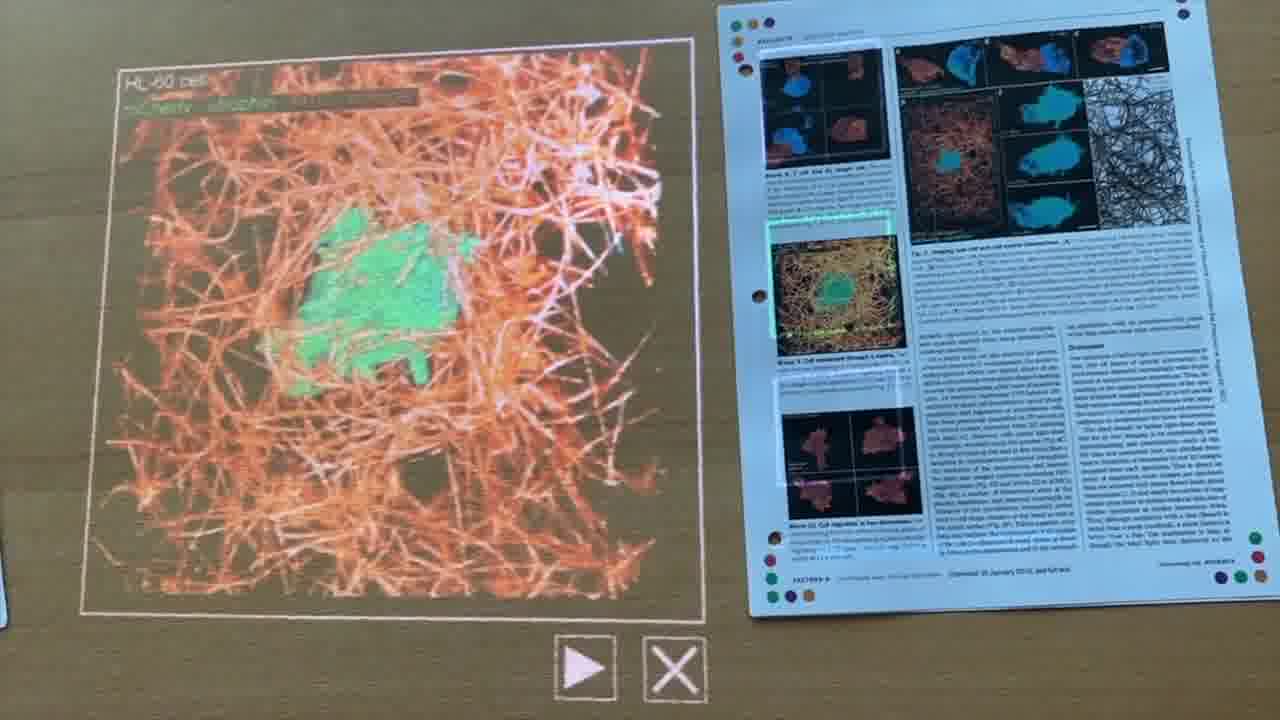
What this illustrates is that these neutrophils are able to sense and respond to a complex environment, and they have a goal.
They're migrating towards the wound site, and they're able to burrow and squeeze and bend through this very dense mesh, where the holes are actually quite a bit smaller than you would think the cell would be able to fit through.
They don't have any eyes, there's no brain, and yet they can navigate this world just through a sense of touch.
That's interesting, and we wonder how that works.
And so that's what we're working on here, helping Orion's lab define the nanoscale environment in which we're probing these mechanisms.
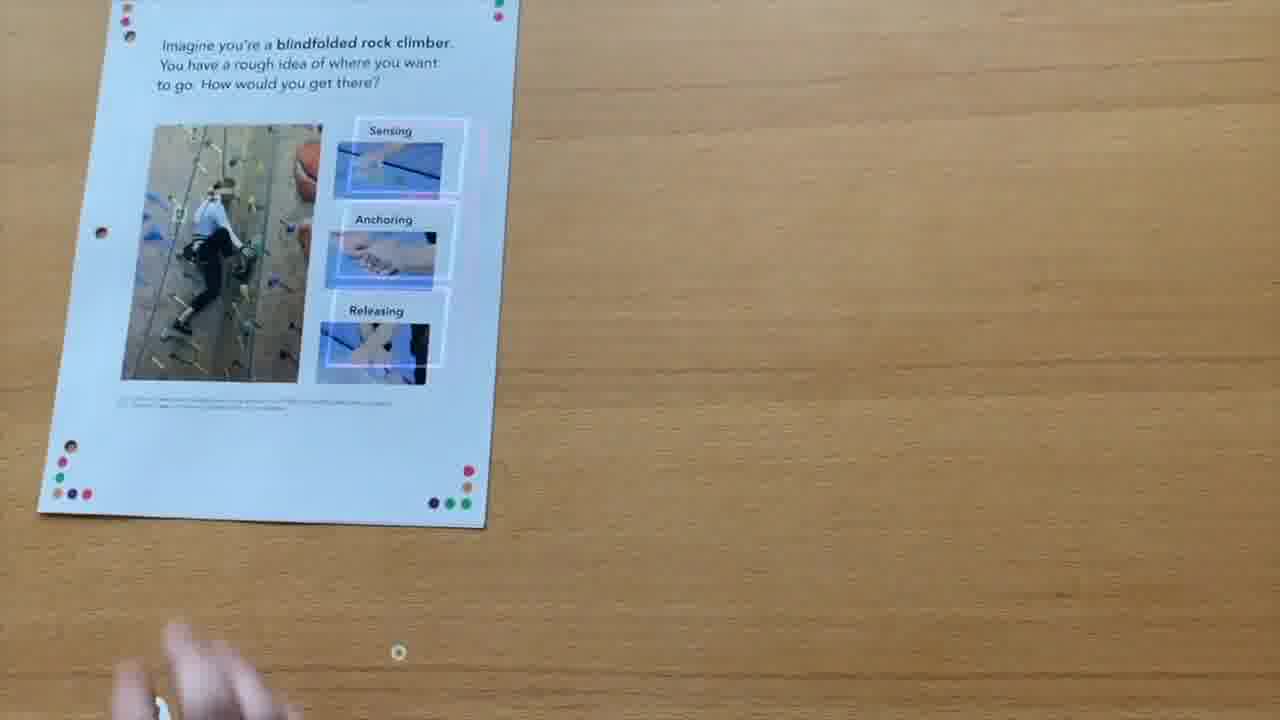
Now, at this point in the talk, Orion often likes to make an analogy. Imagine if you were to put yourself in the position of the cell, how do you solve this problem?
He likes to mention this metaphor of a blindfolded rock climber. So you imagine that you have a rough idea of where you want to go, you want to climb up the wall, how would you get there?
You'd have to solve several different problems.
You would need to be able to sense where you are. Here's this little video of an actual rock climber sensing the environment.
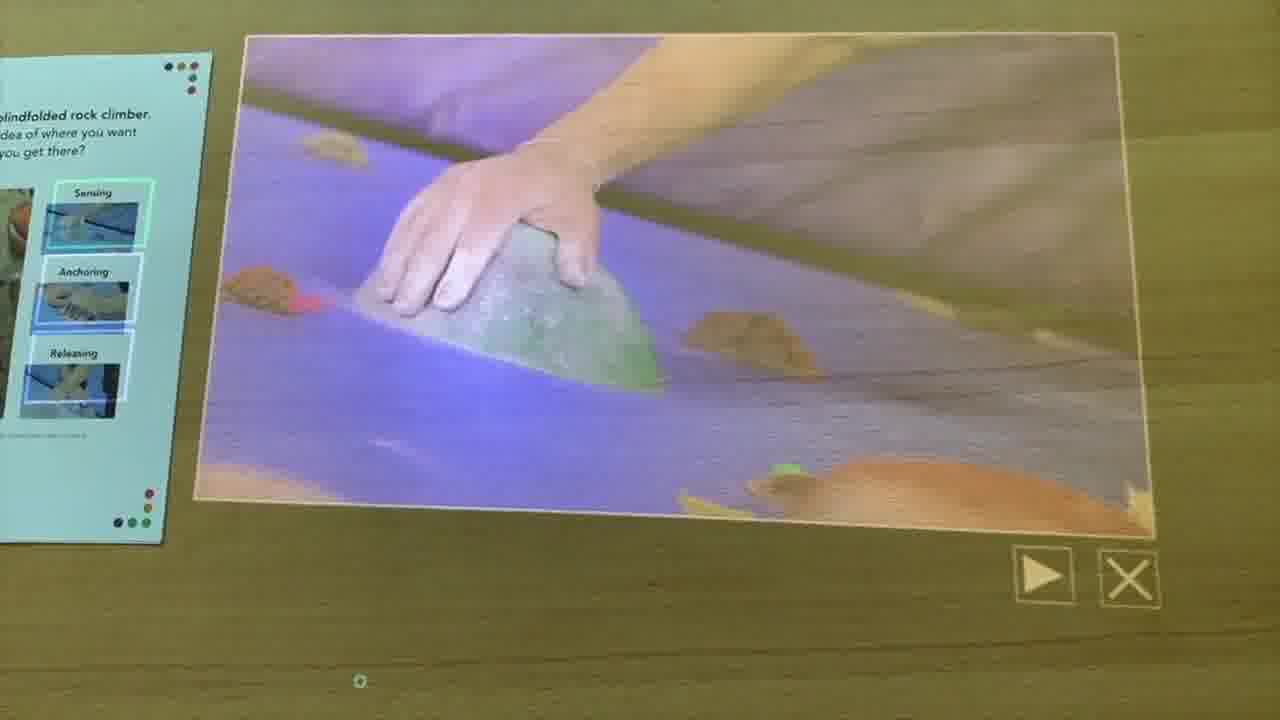
You would reach your hand around and probe and feel your way around. Where is a good place to grab onto?
Next, you would need to anchor yourself. Once you found a good spot to grab onto, then you would need to pinch and hold onto that spot and brace yourself there.
And then one of the things that I had never thought about, but is also remarkable, is that you'd also need to be able to release.
When you're moving on from a productive hold, as you crawl past it, you eventually need to release it. It's pretty easy to bind something irreversibly, but it's a bit harder to let go of something once you're done. And this is something that has to happen on a pretty fast time scale.
So we can imagine what problems the cell has to solve at this nano length scale by putting ourselves in this position of the blindfolded rock climber.
And when we think about the cell, of course it doesn't have a brain, there's no eyes. It doesn't actually even have hands in the same way that our rock climber would.

And so the cell has to solve these problems, but using nanoscale parts and tools that it self assembles on the fly.
It builds its hands and senses the environment. It's able to anchor itself by wrapping around and polymerizing actin at the sites where it grabs on. And then it's able to release those holes as it crawls away.
Understanding how the cell accomplishes this is really the focus of a lot of Orion's work and our collaboration.
So, that gives you some context of what we're trying to understand.
The additional context of what we can measure is also important here.
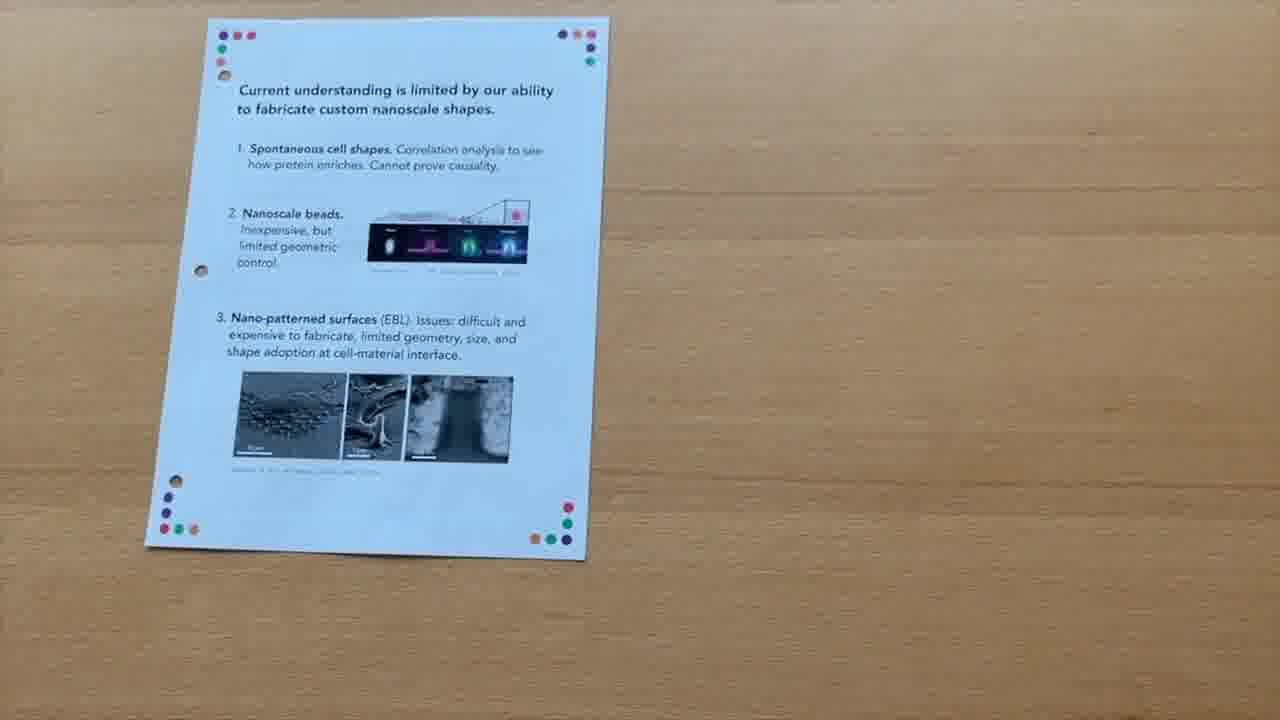
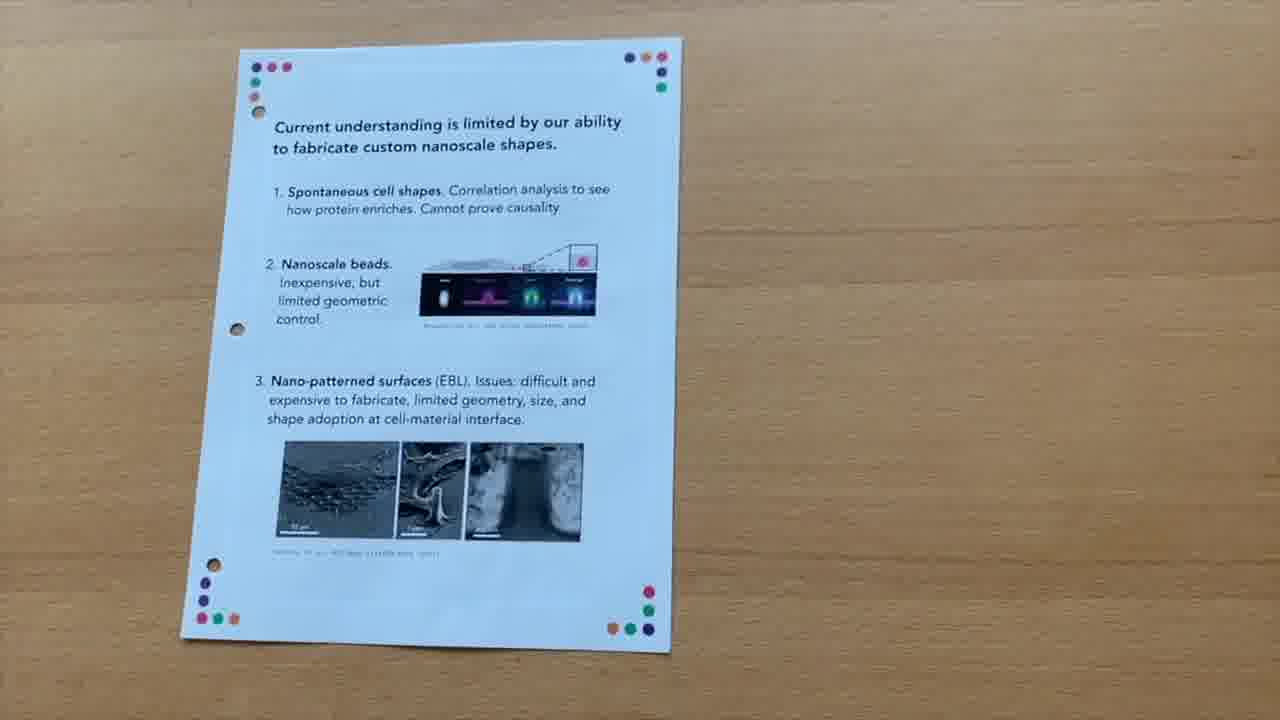
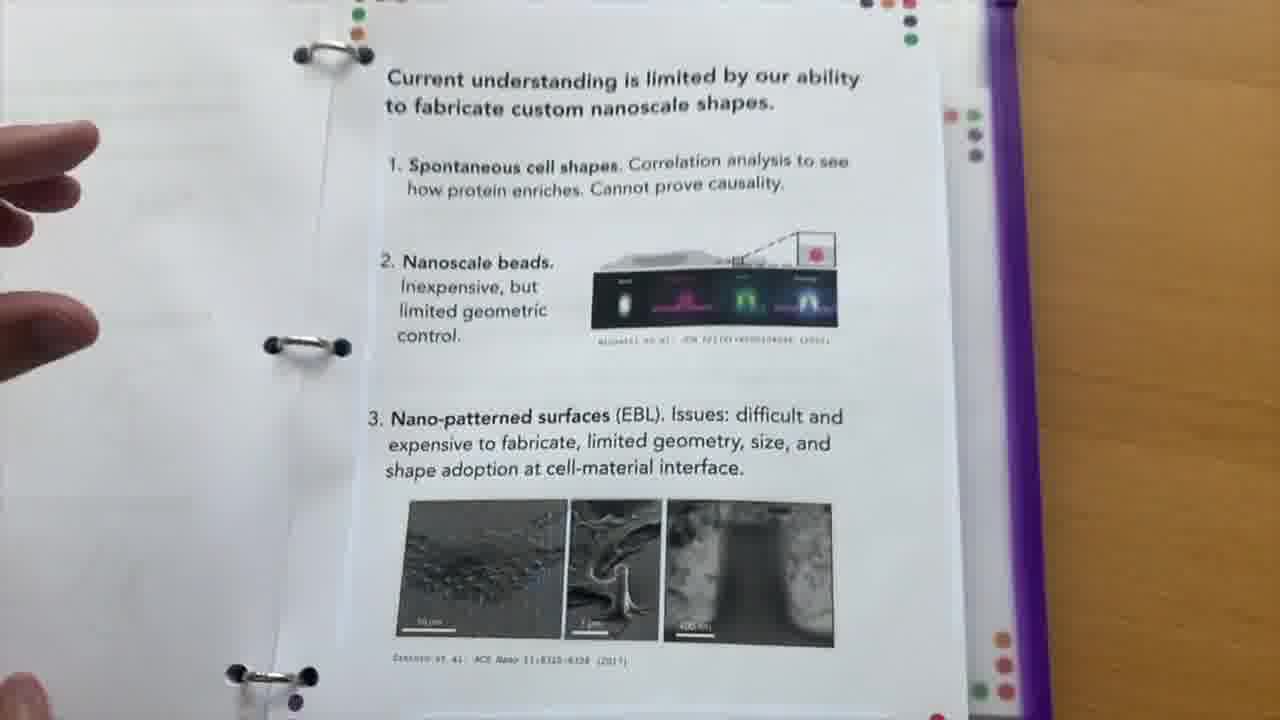
Our understanding of how cells sense and respond to shape in their environment is really limited by our ability to fabricate and control shape at the scale that the cells care about.
Of course, you can just measure spontaneous cell shapes. You don't need any special nanopatterned devices for that.
But then we can't really prove causality there. You don't have very much control, and you sort of just get whatever nature gives you.
We can also use nanoscale beads. This is a figure from previous work from Orion's lab.
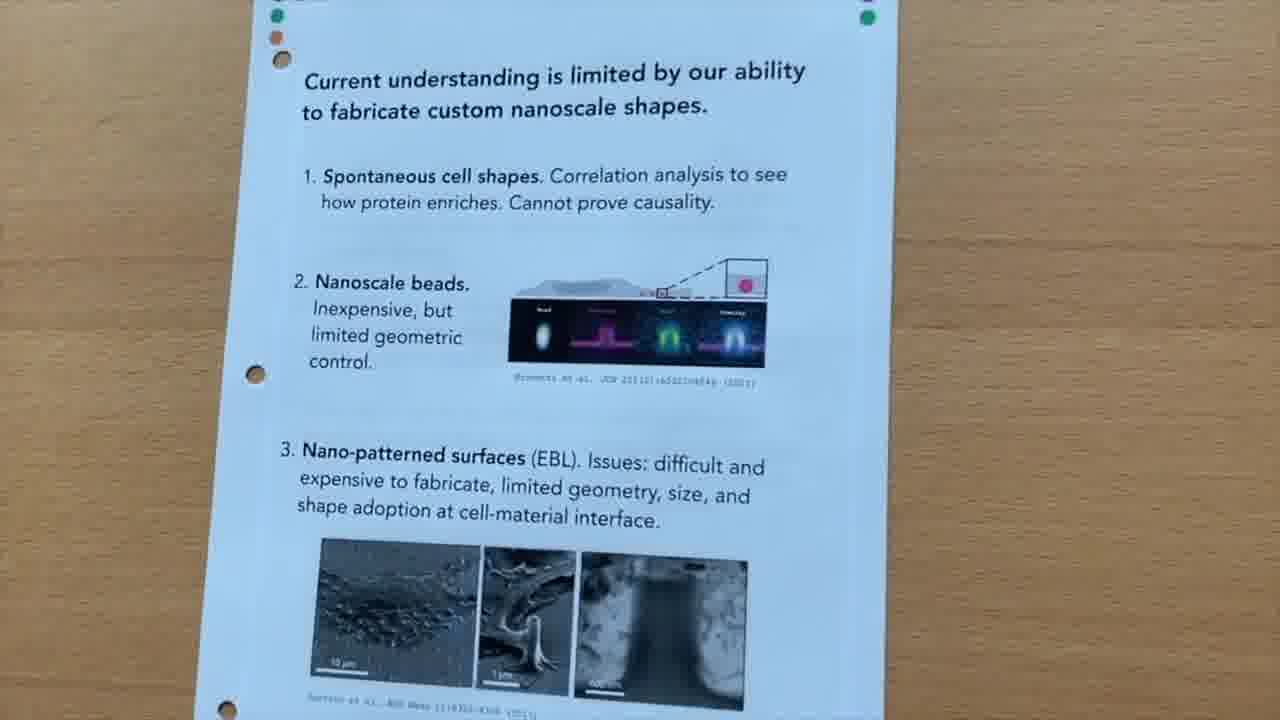
These are inexpensive and quite useful, but there's pretty limited geometric control.
We can see what cells do in response to spherical structures, but if we want to go beyond that... And there's evidence that they seem to respond to saddle curvature, and you can't really make saddle curvature in a really precise way with a bead.
So, the third technology that Orion and his team have explored for inducing cellular curvature are lithographically nanopatterned surfaces.
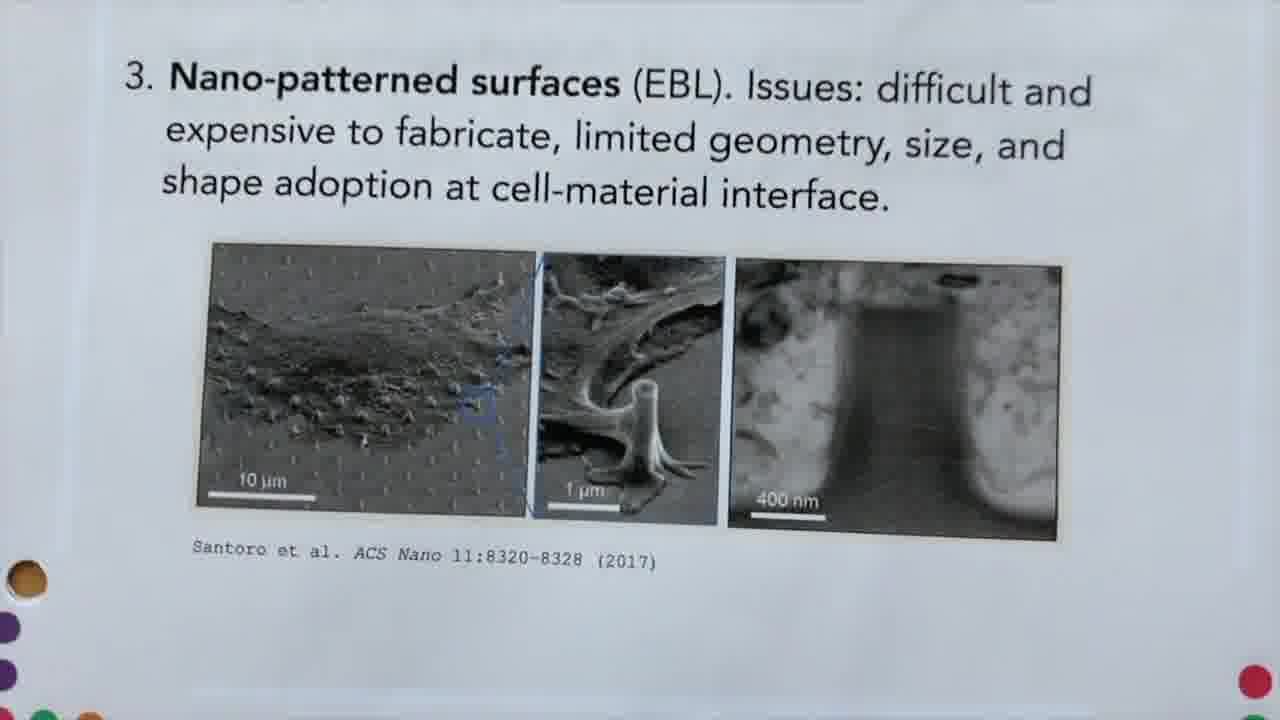
Using e-beam lithography, it's possible to build micro- and even kind of nanoscale posts and channels and so on.
But these are pretty expensive and difficult to fabricate. And the geometry is fairly limited.
One of the big challenges is just getting the cells to adhere to that shape. So we also need some kind of functionalization, some chemistry or something to attach the cells to these surfaces.
And so that's another layer of challenge for that nanopatterning technology.
So, our collaboration grew out of this need and interest in studying cells, but building richer and more complex and better-controlled shape environments for the cells to probe, and measuring the cell's response to their environment.
We're calling these cellular playgrounds.
Our lab focuses on DNA nanotechnology, and we think that these DNA nanostructures could actually serve as a really nice system for both defining very precise geometries, and then also functionalizing them with chemistry or binding motifs that can also help the cells adhere to those geometries.
So, one of the goals is to develop DNA nanostructures that can address these challenges, and provide them to Orion's lab so they can continue their studies on neutrophils.
But in order to do that, we have some additional challenges.
The types of shapes, the larger scale, and the complexity that we're encountering with these shapes that we want to build really requires a new generation of CAD tools.
There are some really nice examples in the literature of both DNA origami and DNA brick technologies that we'd like to adapt for this study, but we need to go beyond what's been published and design our own shapes.

So, the next challenge is designing a new generation of CAD tools for this project.
And that's a really hard problem, having developed Cadnano and knowing what's involved with either building a new tool or extending an existing one. [more]
That seems like a really daunting task, just building new CAD tools.
And so, the third goal of this collaboration is to work with Bret and his team at Dynamicland, to begin to leverage Realtalk to build out these capabilities.
And then we think we'll be able to go beyond what has been done with screen-based CAD tools. We're really excited about how that's going to enable the construction of the cellular playgrounds moving forward.
We'll return to what we built a little later in the talk. But in the meantime, Bret will provide some history of the field of DNA nanotechnology, and give us a sense of how it's possible to even build any of this stuff at all.
Where did this technology come from? And how can it feed into this project and enable what we're trying to accomplish?
History of DNA nanotechnology
As Shawn said, we'd like to give you a history of the development of DNA nanotechnology. And we thought the best way of doing that is by taking you through some of the key papers that have been published.
And not just telling you about the papers, but actually recreating the structures described in the paper, here on the table.
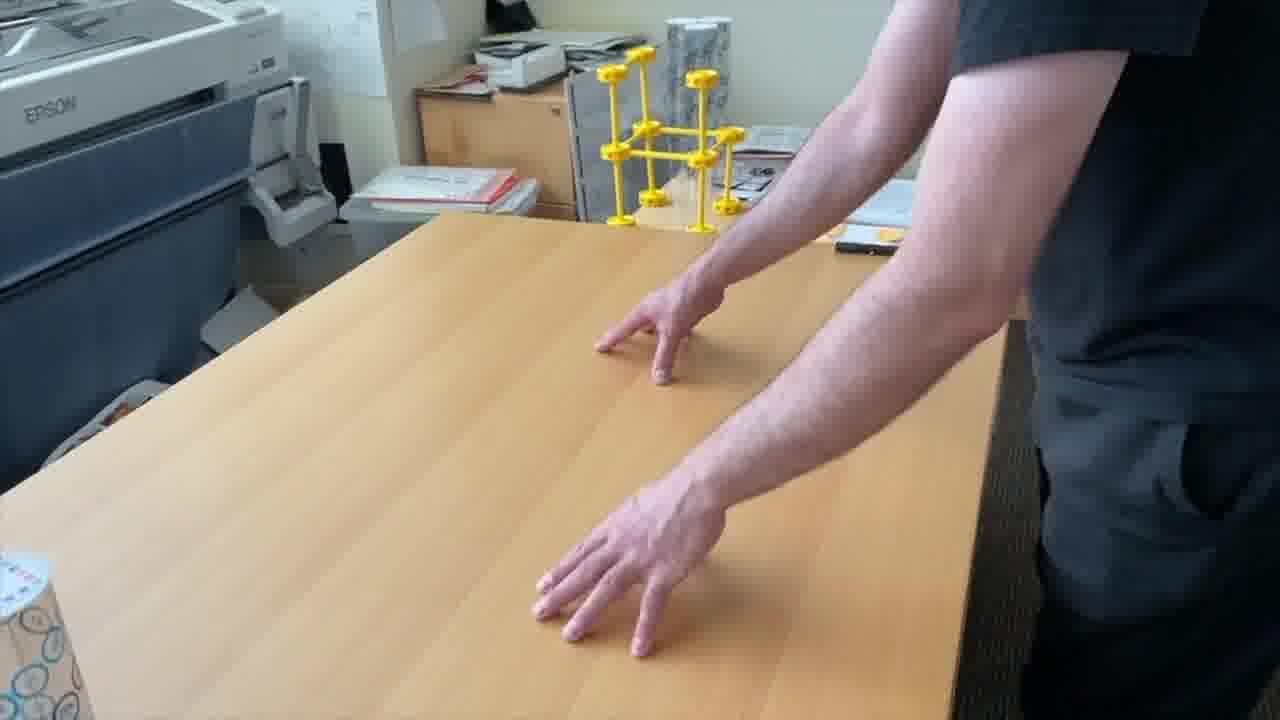
In order to do that, I want to introduce you to the little toybox that I'm going to be using here. I have a set of cards here with which I can play a little card game.
For example, I can put this card down, and then use this “extend” card to run up a strand of DNA.
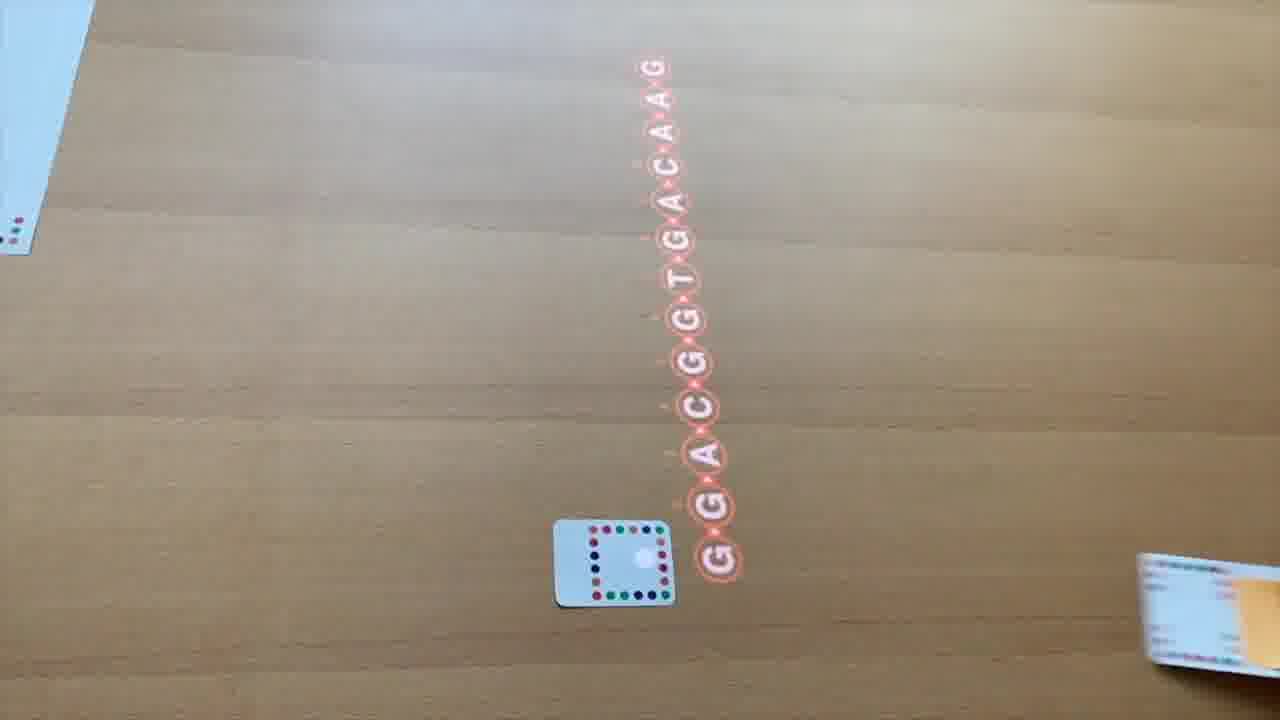
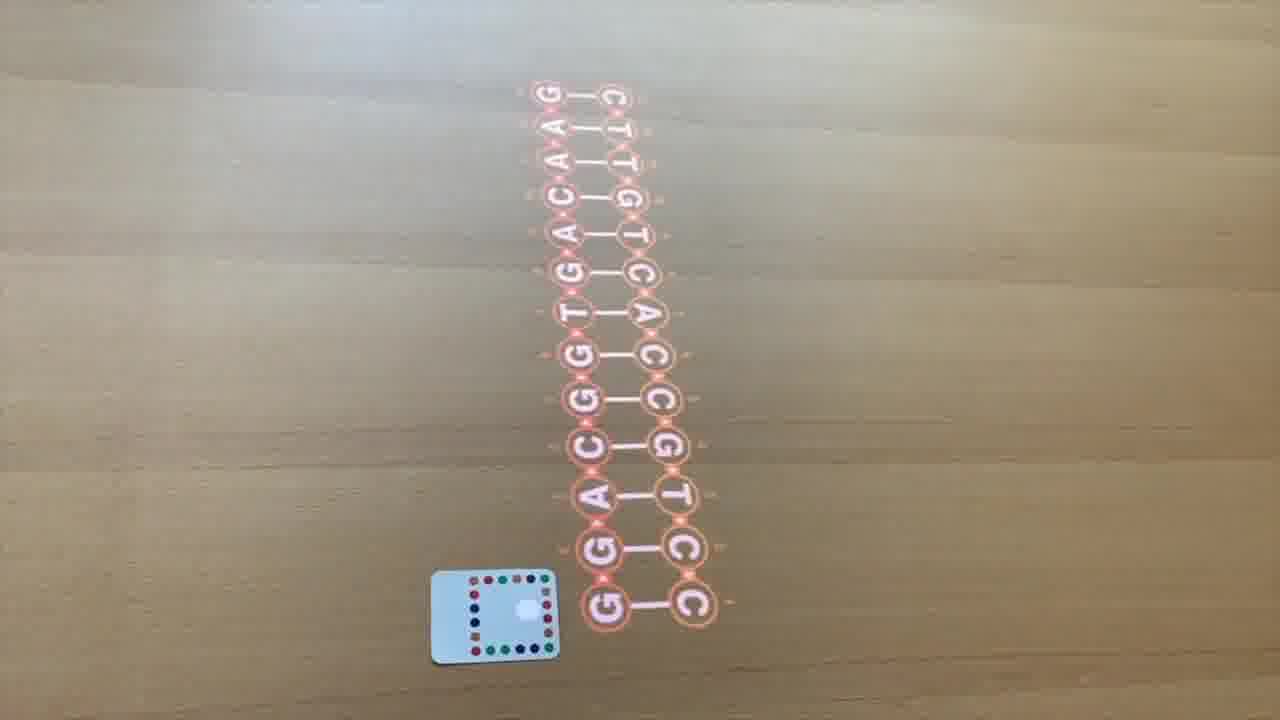
And then I can put it over here to give it a buddy, pair it up. And now we have a DNA helix.
These are still individual strands. I can grab this strand and pull it apart and talk about it individually.
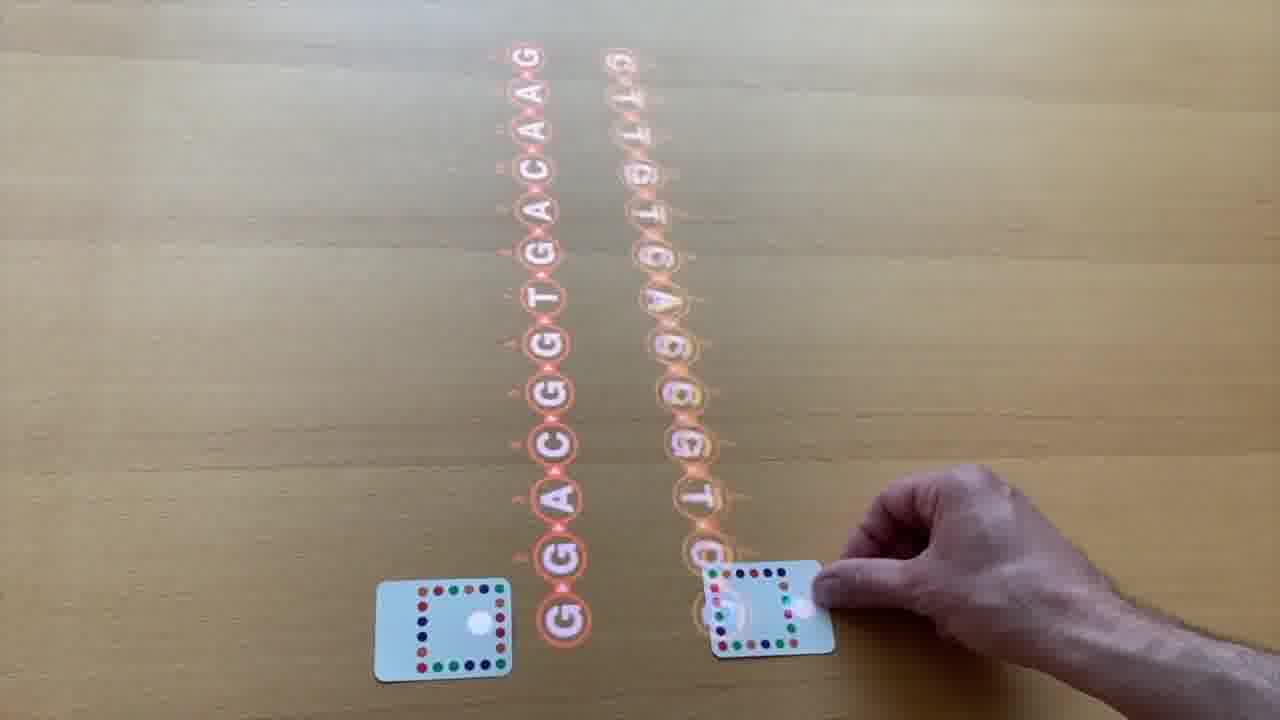
I can pair it back up, or pair it out of register. You can see these are not happy.
But if we do have a nice helix, then we can see, over here, a three-dimensional view of the helix.
This plastic tube represents the helix. And this represents the viewpoint.
It's as if you have your eye here, and you're looking up at this helix. This is what you would see, rendered in 3D.
As I spin this around, you see that it's spinning around the helix that we defined.
I can point to the nucleotides here in the schematic, and you can see that they're highlighting in the 3D view.
But they're also numbered. 1, 2, 3, 4, 5, 6. And these are the same numbers that you see here — 1, 2, 3, 4, 5, 6 — in the 3D rendering.
And they're also the same numbers that are actually physically printed on the tube.
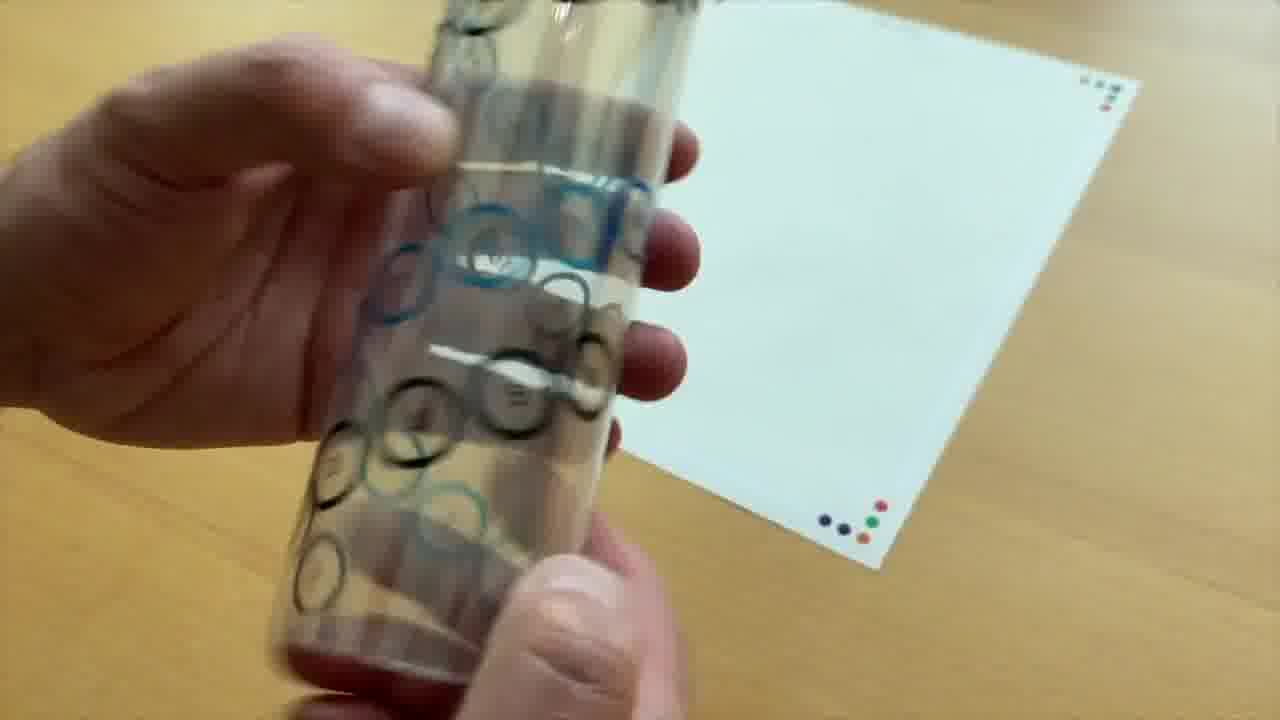
If you look at the tube, here's forward strand 1, 2, 3, 4, 5, 6.
This is really important, because a lot of times it's hard to see what's going on in a 3D rendering. You want to be able to look at the physical model.
We're going to have a bunch of helices meeting at weird angles, and to actually build the model out on the table using plastic tubes, it makes a lot more sense as to where things actually physically are located in space.
The first landmark paper that we're going to take a look at was published by Alexander Rich. [more]

He's not as generally well-known as Watson and Crick, but he probably should be. He's in that same cohort.
He was born in 1924 and did a medical degree at Harvard before he decided that biochemists were having more fun, and switched that field.
He was in Linus Pauling's lab at Caltech when Watson and Crick published the structure of DNA, here in 1953. [more]

Pauling was also working on the structure of DNA at the time, and kind of got scooped.
So there was a lot of interest in that community, at that time, in nucleic acids. And Rich in particular became fascinated with RNA.
It was generally understood at the time that DNA had something to do with genetics, but nobody really had any idea what all that RNA was doing there and what it was for.
And so Rich's big dream was to solve the mystery of RNA. Which he largely did over the next 20 years or so, maybe culminating in his 1973 paper describing the structure of transfer RNA. [more]
But back here in the 50s, nobody had any idea what's going on.
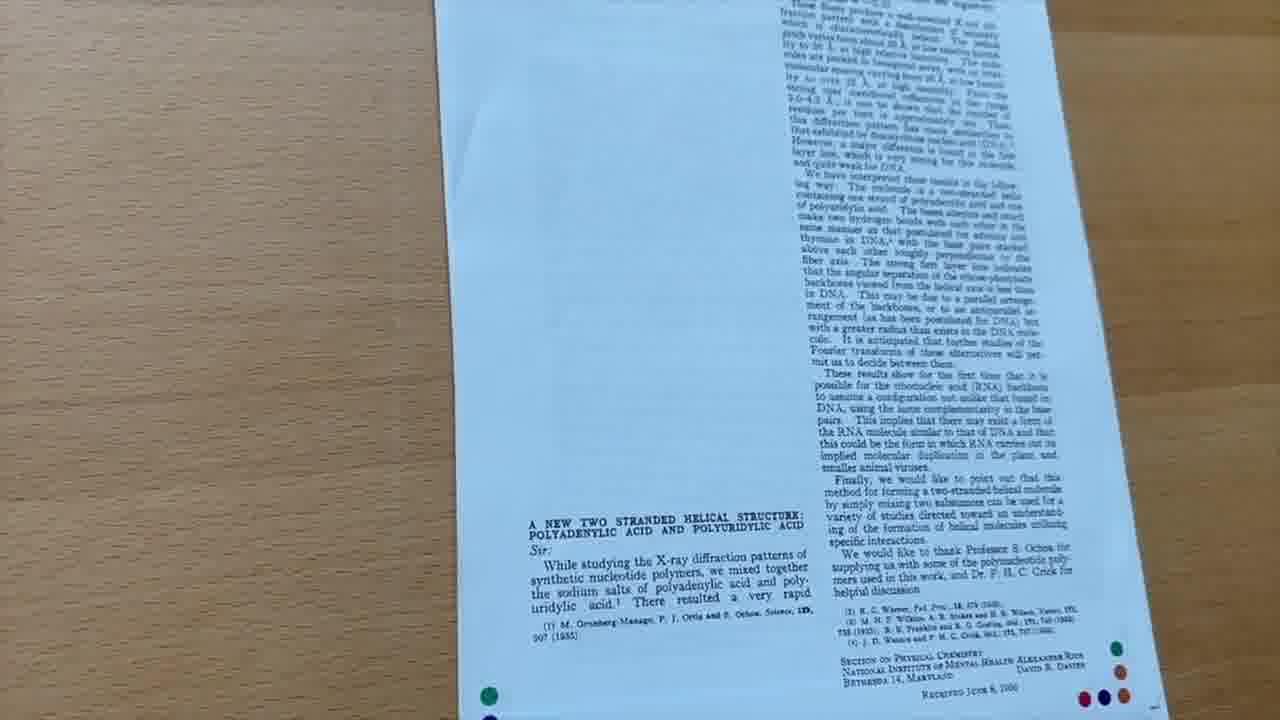
The first paper that we're going to take a look at here describes a pretty simple experiment that he did. [more]
Some folks had found an enzyme that, when you put it together with a bunch of nucleosides, will then form those nucleosides into a long polymer. [more]
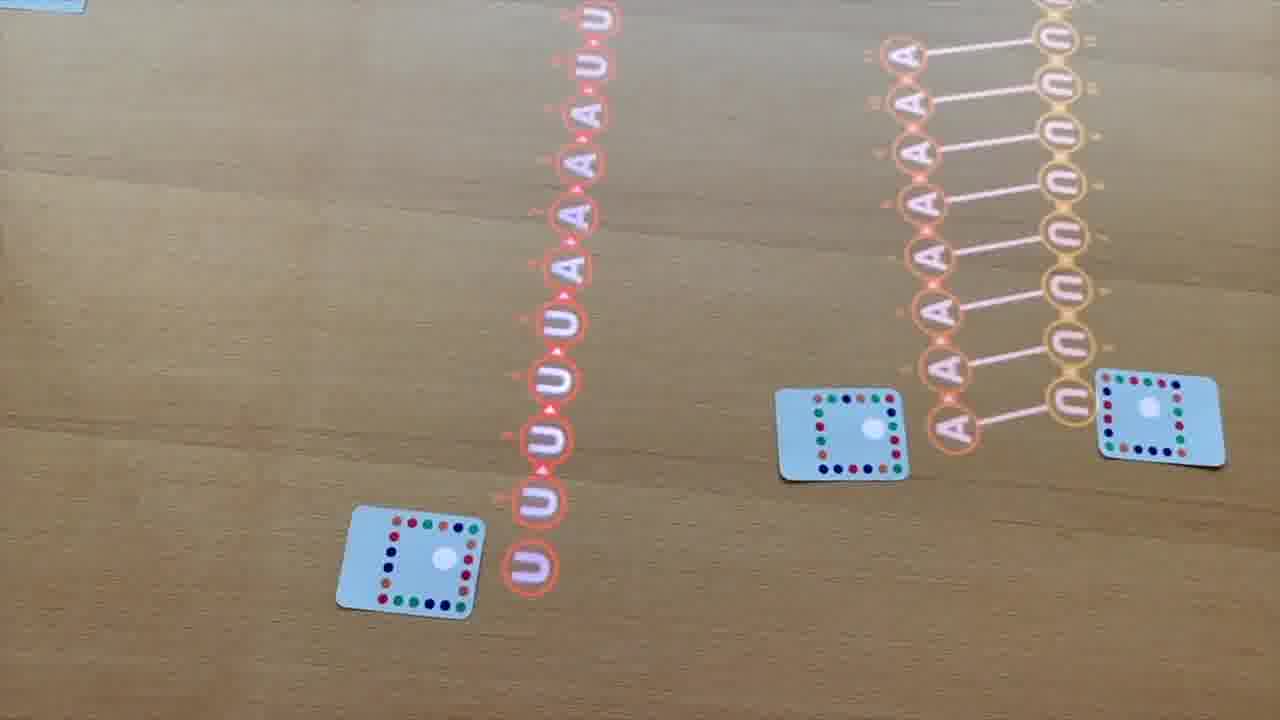
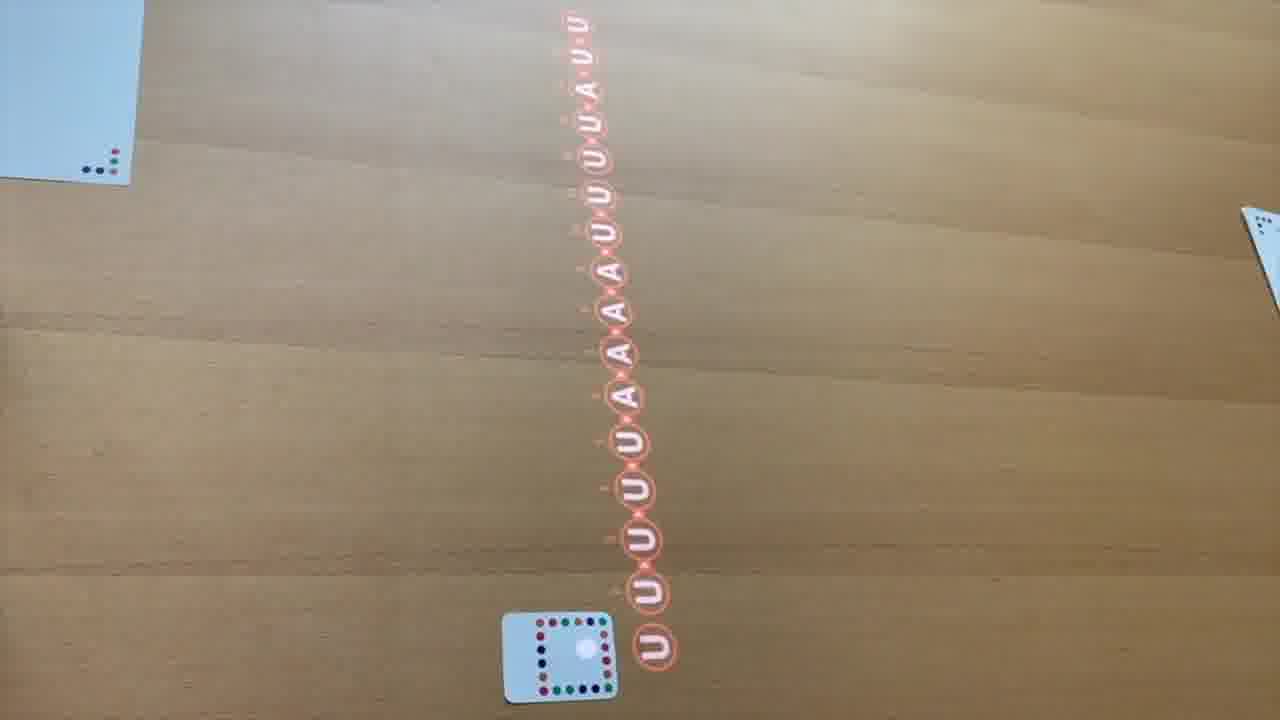
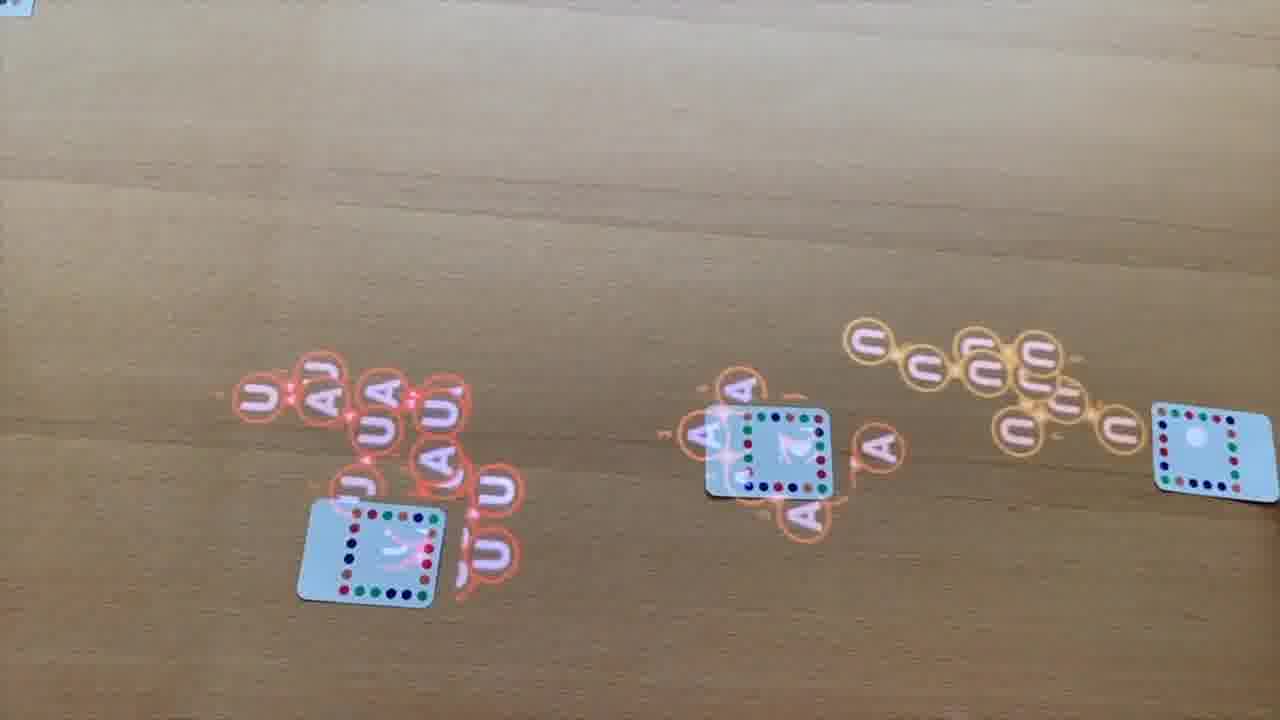
So if we have a tube with some adenines and uracils, and put it in with this enzyme, then you get this polymer, which is just a random mix of A's and U's.
People looked at that, but it didn't really seem to be doing anything interesting.
Then, Rich and some other people had the idea, what if we made just adenines, and just uracils, and we formed a poly-A like that. And then separately, we put that enzyme in with the uracils, and that would form it into this poly-U molecule.
And so these started to look a little bit more interesting. But what Alex Rich did — and he says he doesn't remember why he did it and why nobody else did it first — was he took the poly-A and the poly-U and put them together.
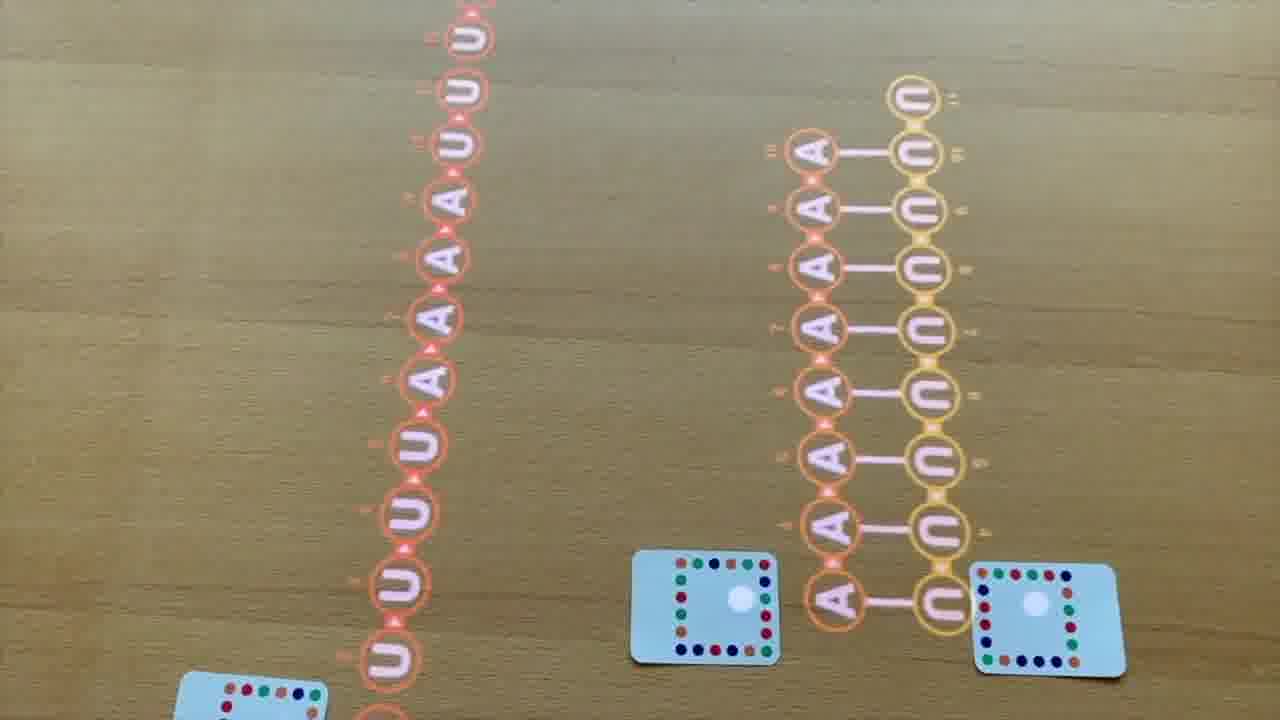
And simply by mixing these two things in the same tube, he said, “there resulted a very rapid increase in viscosity, as well as a drop in optical density. From this viscous solution, tough glassy fibers can be drawn.”
And when you look at the diffraction pattern of those fibers, it looks like a double helix.
So this was the first evidence that RNA could form a double helix. But more than that, this was the first evidence that you could form a double helix just by sticking two things together in the test tube without an enzyme.
And that was completely astonishing. Because the only double helices that anybody knew about came out of the biological machinery, so they assumed it must be using enzymes.
And also, single-stranded nucleic acid in solution, I'm drawing it schematically as these rods, but that's not actually what they look like. They actually look like these balls of string.
So how could two balls of string, both negatively charged, come together in such a way that they spontaneously form themselves into a perfect helix with perfect pairing?
That was completely astonishing at the time, but that is in fact what happens.
This is called hybridization, and that is the core physical phenomenon underlying DNA nanotechnology. [more]
Now, the next character in our story that we're going to take a look at is Ned Seeman. He's kind of our main protagonist here. He's considered the founder of the field. [more]
He was born in 1945, and also started out as a pre-med and decided that biochemists were having more fun. [more]
He had a pretty miserable undergrad because he became interested in how biological molecules carry information, and his professors just wanted to shove o-chem down his throat.
But here in grad school, he discovered crystallography and fell in love. There was never any greater joy in Ned Seeman's life than solving small molecule structures using crystallography. He was just this dyed-in-the-wool crystallographer, his entire life. [more]
He went off to do a postdoc at MIT in Alex Rich's lab, where his first big paper was in fact describing the structure of this AU molecule that we modeled here. And he was also a co-author on the big transfer RNA paper.
But in the later stages of his postdoc, he started getting disgruntled with crystallography.
One reason was that it seemed kind of hit or miss. Either the molecule crystallizes or doesn't, and you don't really have much control over the crystal.
And also the fashion had changed from solving small molecules to solving proteins. And to Ned, it was like, there are thousands of proteins, you spend a couple years on one, and then you go on to another one, and what kind of life is that? He wanted to do something a little bigger and more general than that.
He ended up getting a position at an essentially non-research university, where he didn't have students, he didn't have postdocs to work with him in the lab.
So, things were moving slowly. But here in 1978, a buddy of his asked him to take a look at Holliday junctions. Those were described in 1964 by Robin Holliday as intermediates in genetic recombination. [more]

We're going to take a much closer look at those in a little bit. But that got Ned starting to think about branched DNA structures.
And in 1980, he had his big life epiphany, which was: if you could use branched DNA structures to build a framework like this, a latticework, then you could dock any ligand you wanted in each one of these cells, and you could crystallize anything.
Once you make this three-dimensional DNA crystal, this would be the crystal to end all crystals. You would have just solved the crystallography problem in the most general way.
So that was his big 1980 epiphany. A couple years later, he published a paper, which is the next big paper that we're going to take a look at... [more]
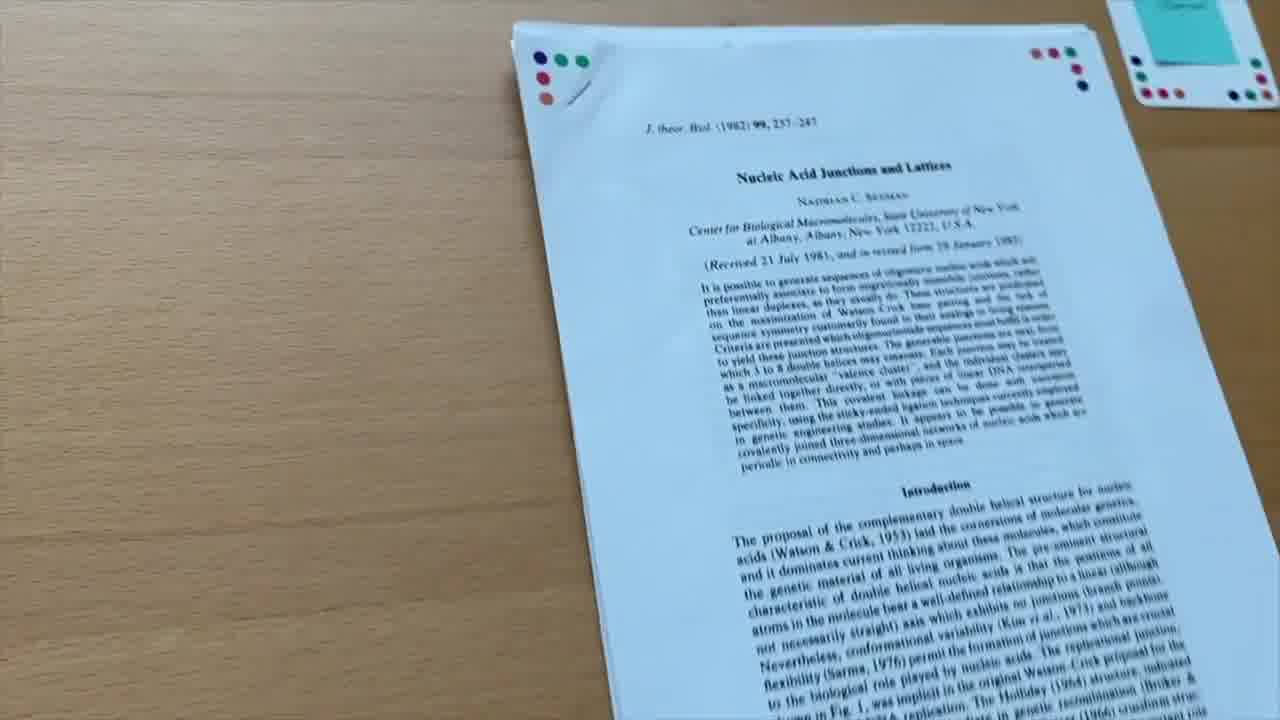
where he talks about some of his ideas for how he could actually do this.
We normally think of DNA as a linear polymer. It's just one long string. And you can't build something like this out of just a single rod. You need joints. You need things to branch off.
So Ned says, well, what are circumstances in nature where you have DNA branching? Well, one of them happens during replication. [more]
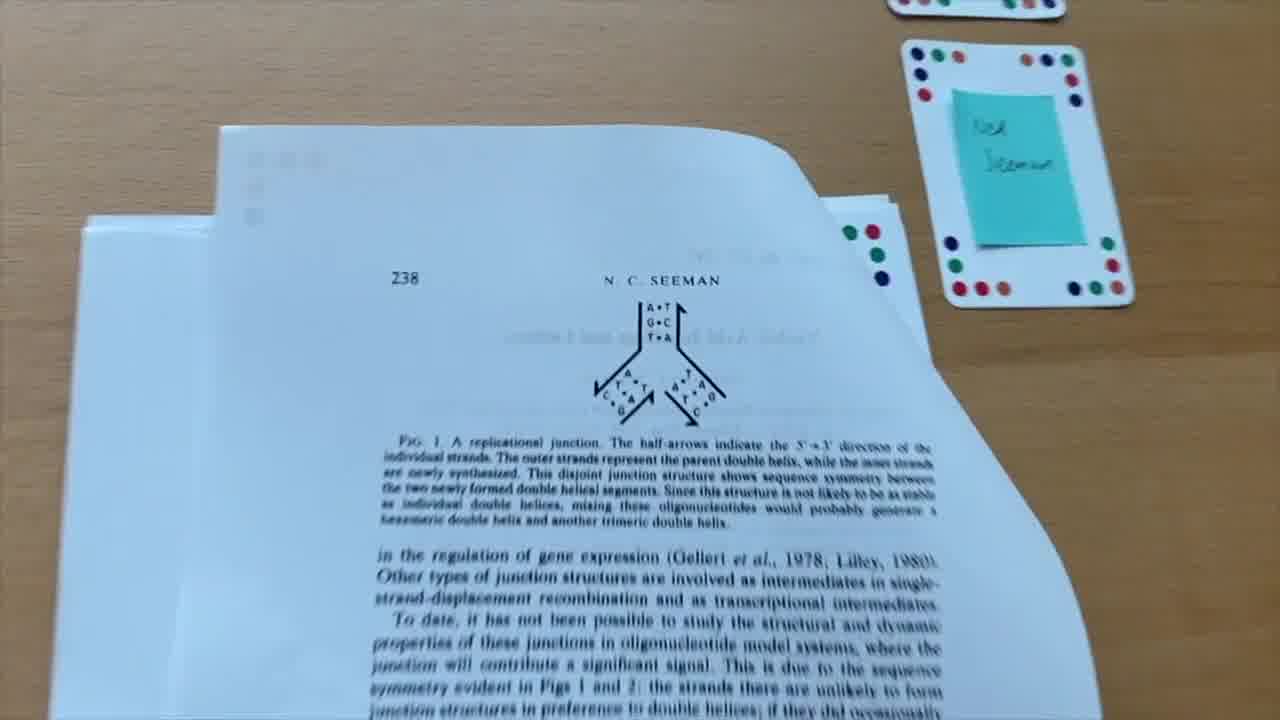
During replication, you get the situation where the two strands of DNA separate like this.
And then you get strands filling in, like that.
During replication, this happens within a little bubble of the entire genome. But if you just look at this particular structure as it is, this is three helices meeting together at a point.
And that's what we want. We want three rods that meet together at a point.
But the problem is, this is unstable. This T pairs with this A, but this T can also pair with this A over there.
And so what would happen is, if you did happen to get this particular structure, these would actually come back together and kick these out.
So you'd end up with this longer thing, paired up like this. And maybe these would be over on the side, paired with each other.
So if you put these four strands together, you wouldn't get a branch. You'd get these two helices, if you got anything at all.
So this isn't quite going to work. What else does nature have up its sleeve?
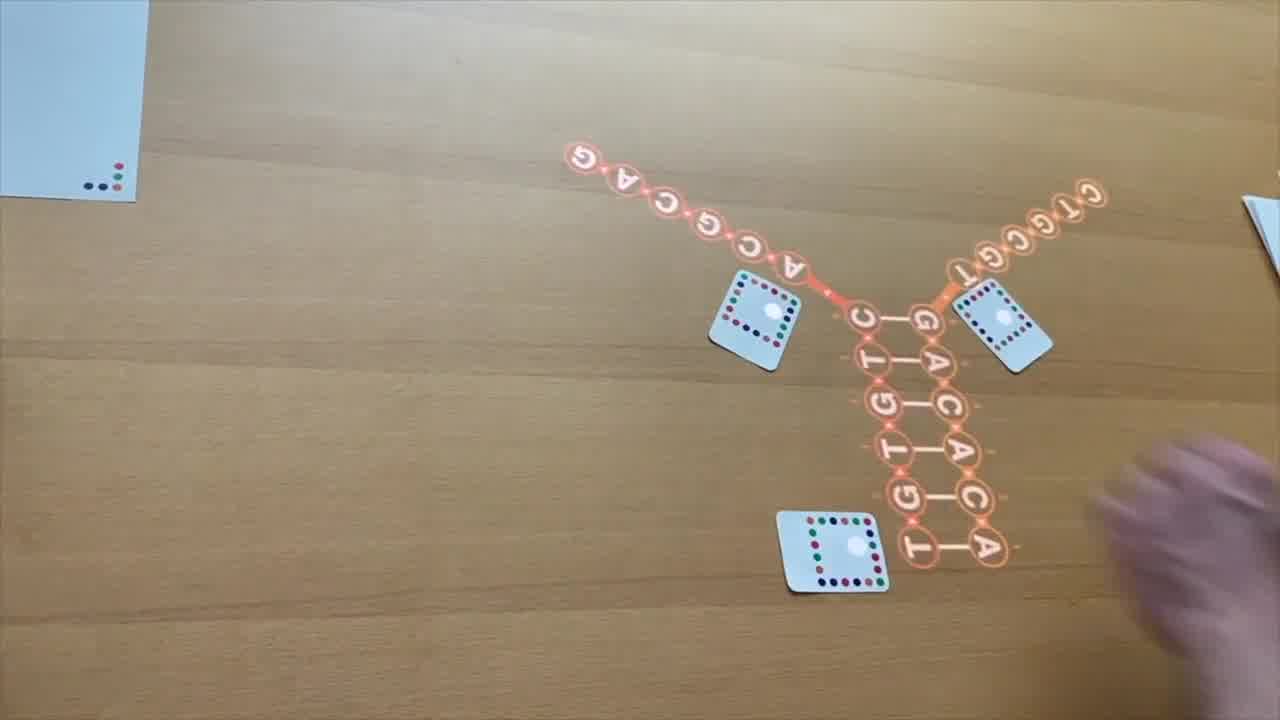
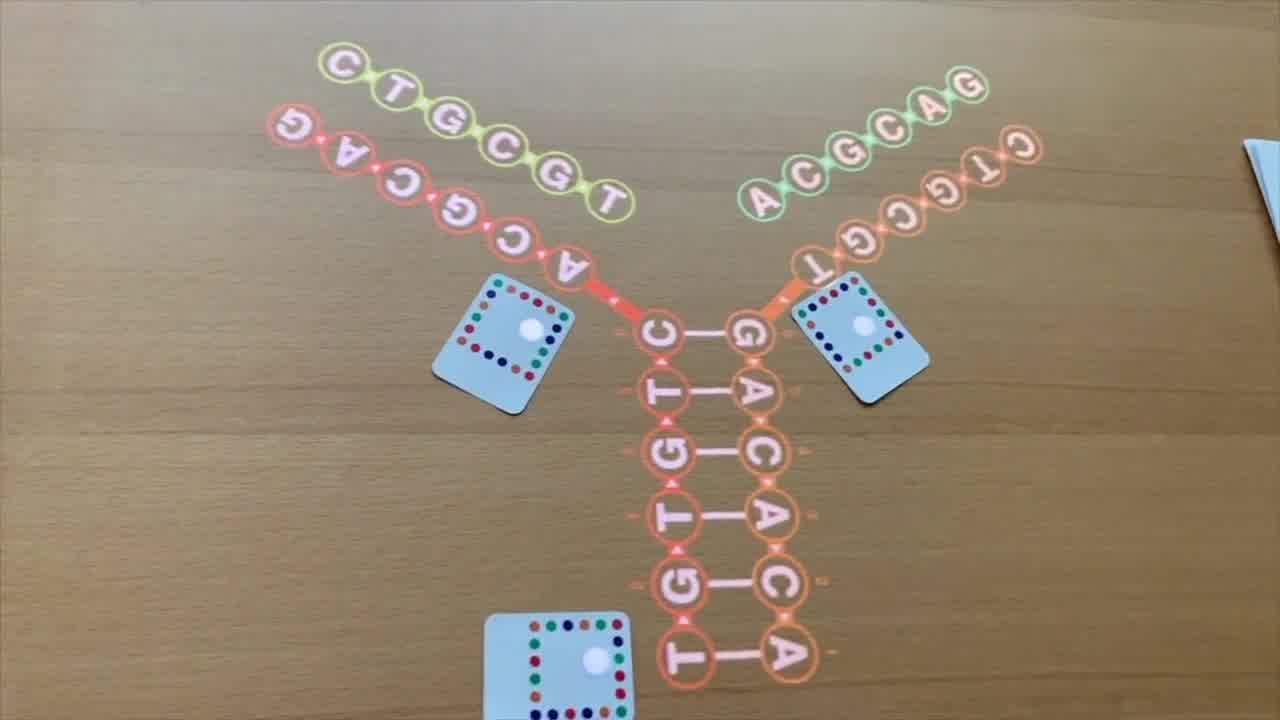
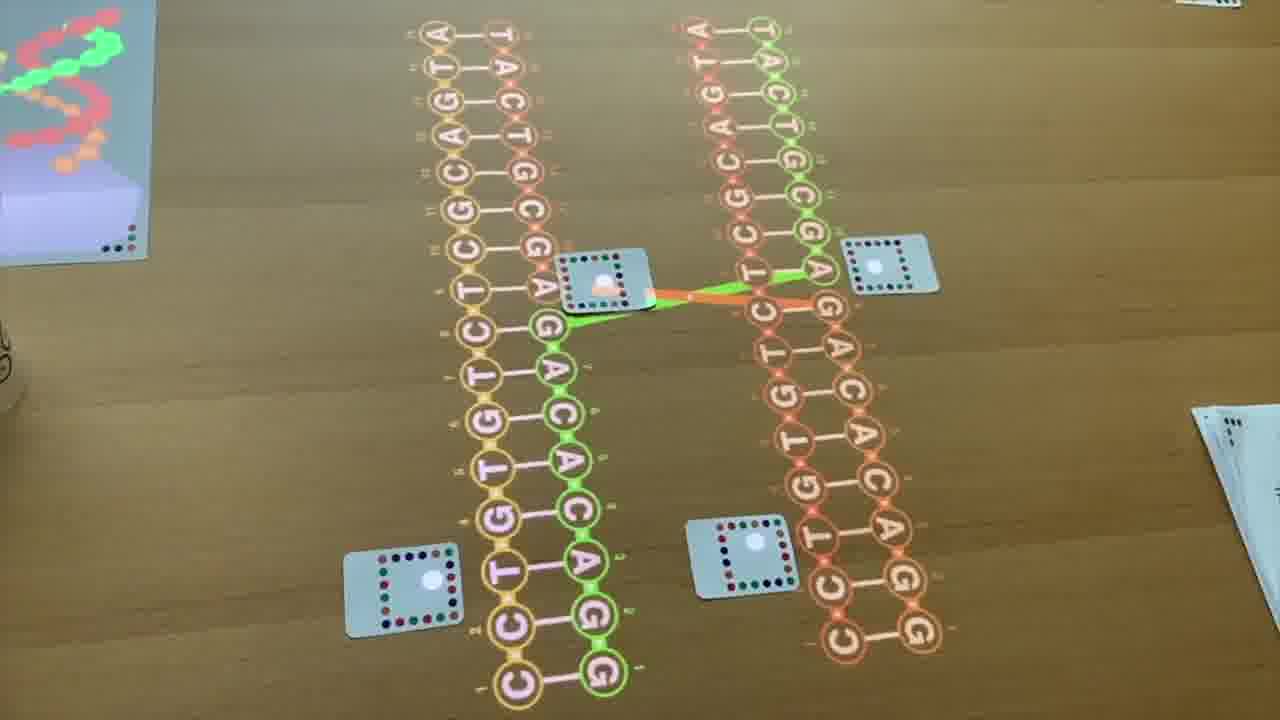
Another branch structure that occurs in nature is the Holliday junction. [more]
The way that works is, if you have two homologous stretches of DNA, like these two, then you can have a strand that comes over like that, a strand that comes over like this, and they switch places like that.
This is called a crossover. The strand is coming down this helix, and then jumps over to the other helix and continues. [more]
Here we should actually be looking at this in three dimensions. If I turn these the right way, then you can see that crossover right in there.
That's this right here.
This is how Holliday drew them in his original paper, and this is actually kind of what they look like for real in solution.
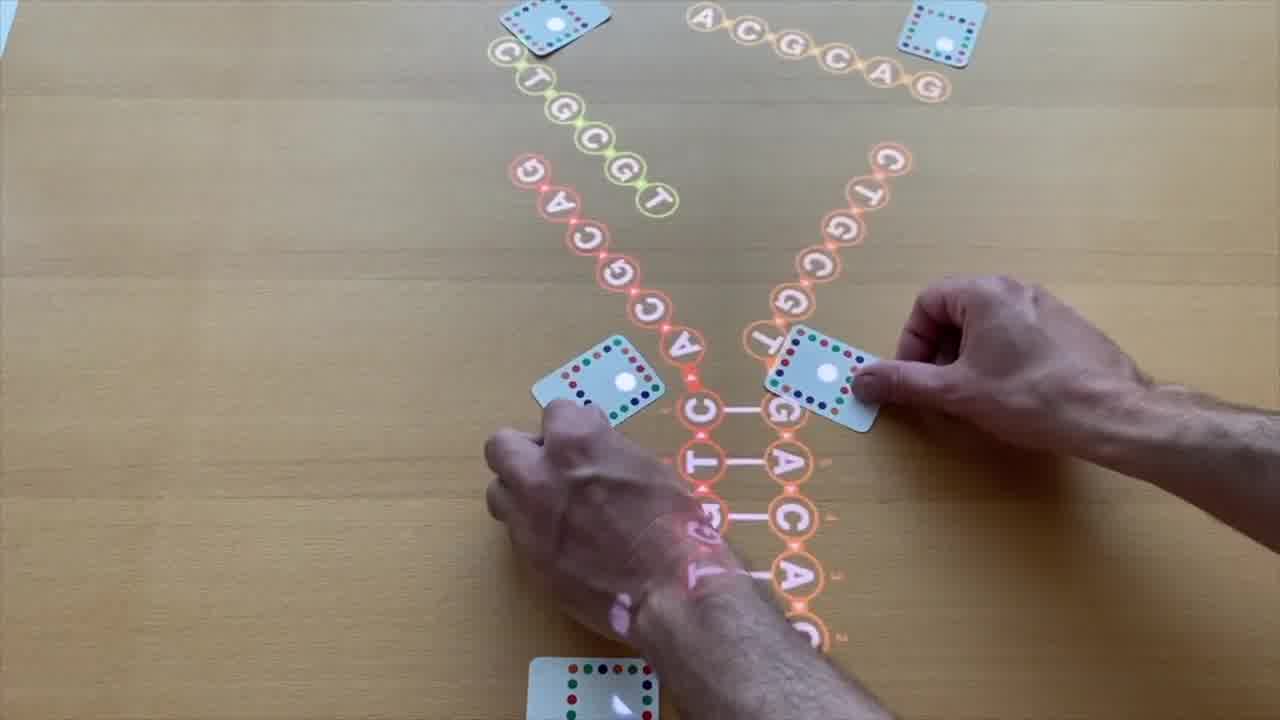
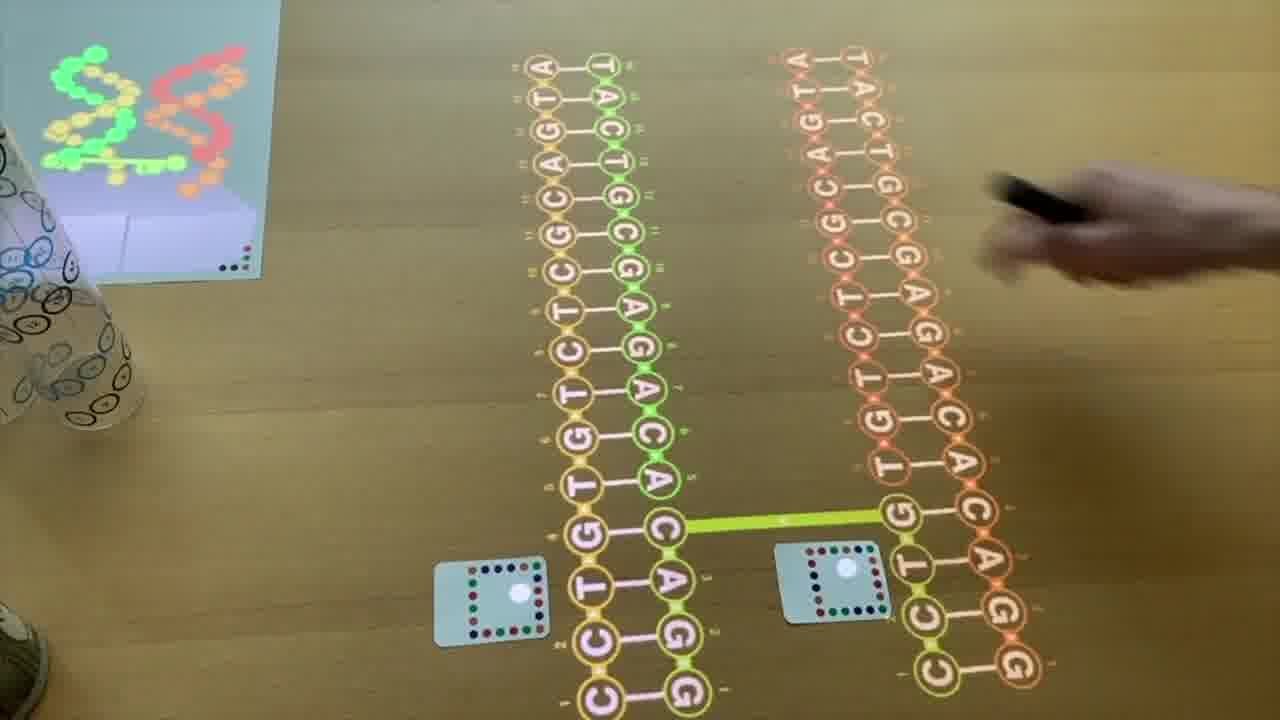
But the way that people normally draw Holliday junctions in their textbooks today is in a slightly different form that emphasizes that you actually have, or you can think of it as, four separate pieces of helix.
And so I can rearrange this diagram by moving this helix over to here, and then moving this up over to here, and moving this helix around like this.
I'm not changing the structure at all. I'm just rearranging the diagram.
But this is in a form that emphasizes that it can be four helices that are meeting together at a point.
So that looks promising. We want to build things like that.
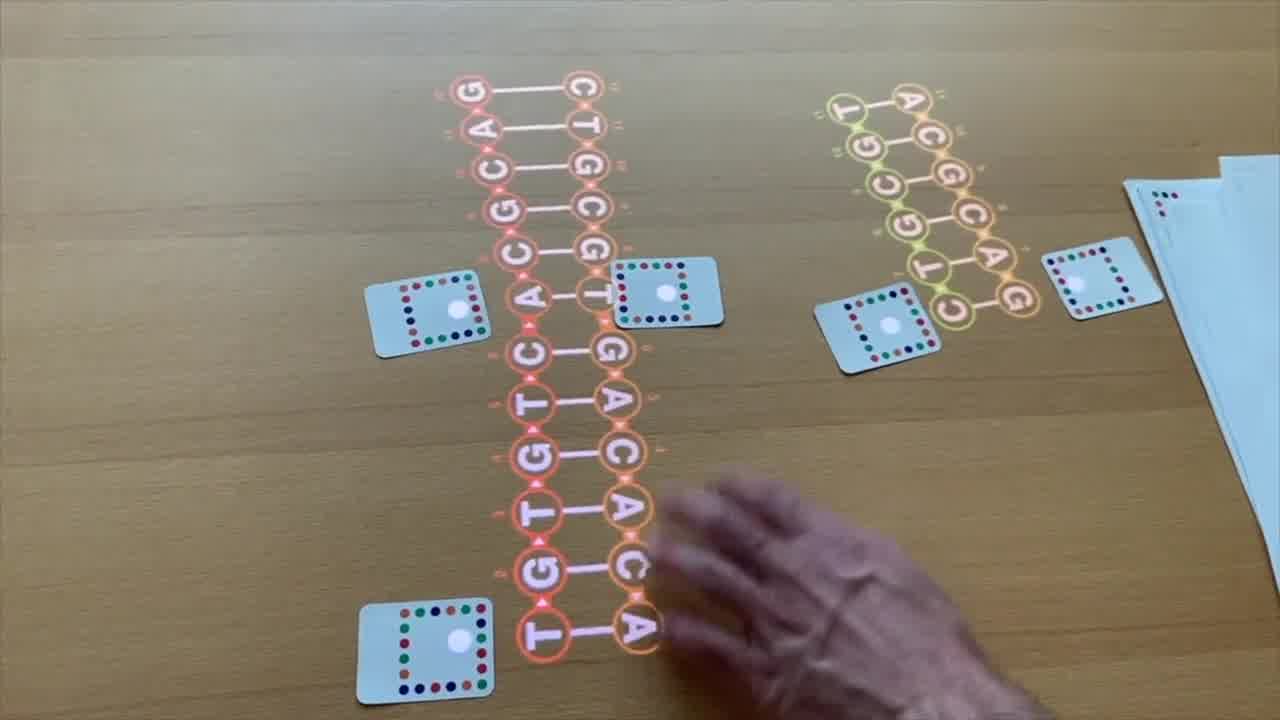
The problem is, again, that this is unstable. Because this T pairs with this A, but this T can also reach across and pair with this A.
And likewise, this T pairs with this C. This T can also pair with that C. And so these can pair together and then the junction will slip.
Basically, these will go onto this helix or these can come onto this helix. This junction can move around all over the place.
Ned's first big idea was, well, we're synthesizing these things from scratch. So, we don't actually need that symmetry. We can change it so that junction does not move around.
So if we change this T right here to an A...
and now this A can't pair with that. It can only pair with this T. This junction can't slip in that direction.
And likewise, this C here...
if we change that to a G, then it can't pair that way. It can only pair that way.
And now we have what Ned called an immobile junction.
If you put these four strands together, and you've actually designed the sequences so they pair in this way and there's not some other form that they prefer to pair, then you will actually get this cross-like structure.

So that's great. What are we going to do with that?
For this next part, I'm going to shrink these down a little bit.
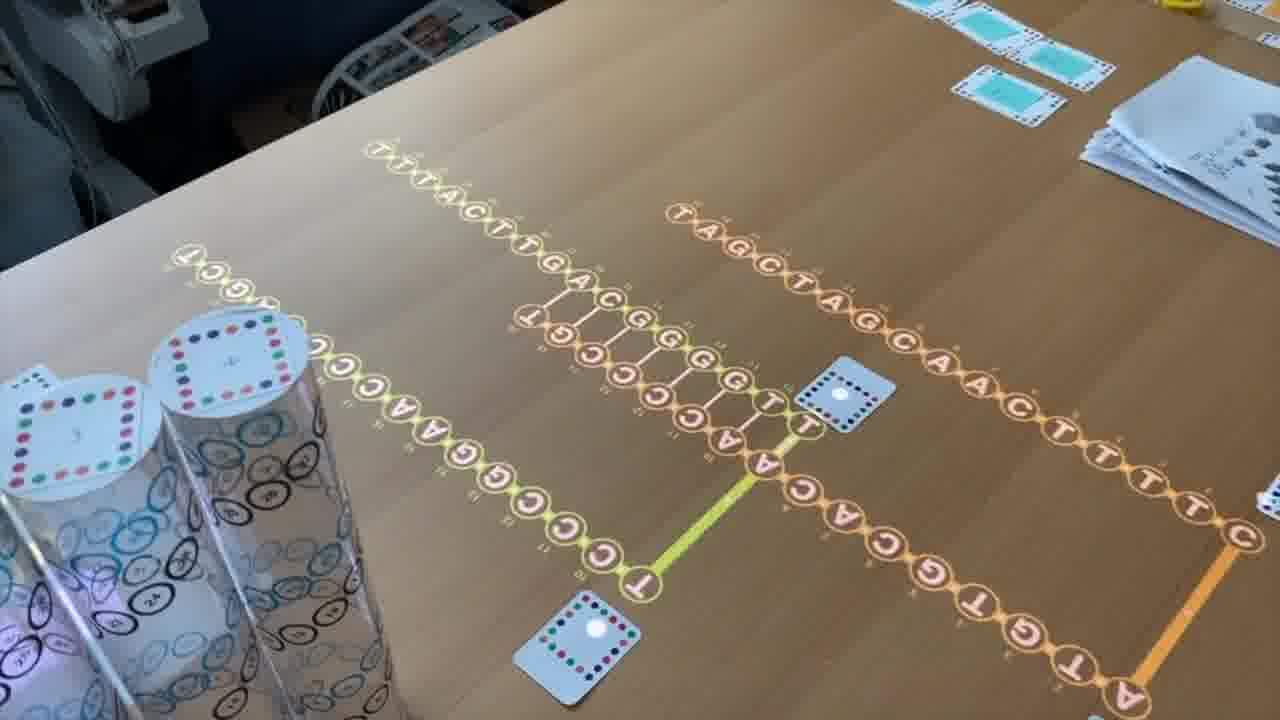
Ned's second big idea was that you could then form a lattice out of these. And the way that would work is using sticky ends. [more]
If we extend this strand here with a couple of unpaired bases and then have matching bases over here on this side...
then if we had another one of these in the tube — which we do because we have a billion of them in the tube — then it would come along, and if these paired, then it would dock in right there and we could get a big infinite line of these things.
And then if we want a two-dimensional lattice, then we just do the same thing here.
We extend a the sticky end on that, which will pair with a sticky end on there. And then we can get another one here.
You can imagine this going out into a two-dimensional lattice of these junctions.
And then the last little bit to Ned's paper was, well, we want to make three-dimensional structures, right? The trick there is to realize that we've been working in 3D all along.
Because, when we have these junctions here, the second helix can come off the first one at any angle.
And the angle that it comes off depends on which nucleotide the junction is at.
By choosing how long we make these arms, we're choosing the angle that this helix comes off. And we can actually build structures coming off at any angle. We can build three-dimensional structures.
That was the content of Ned's 1982 paper, “Nucleic acid junctions and lattices”, considered the seminal paper in the field, even though maybe it didn't really have much of an impact at the time. But in retrospect, it set the stage for everything to come.
This was a mostly theoretical paper. He actually did, I think, make an immobile junction a year or two later. [more]
But he really didn't get things started until he was able to move to a university that was an actual research university, where he could attract students and postdocs who would actually do work in the lab with him.
And then things started moving pretty quickly. So here in 1991, they published a cube, a set of DNA strands that when you put them together, they form into this cube-like shape. [more]
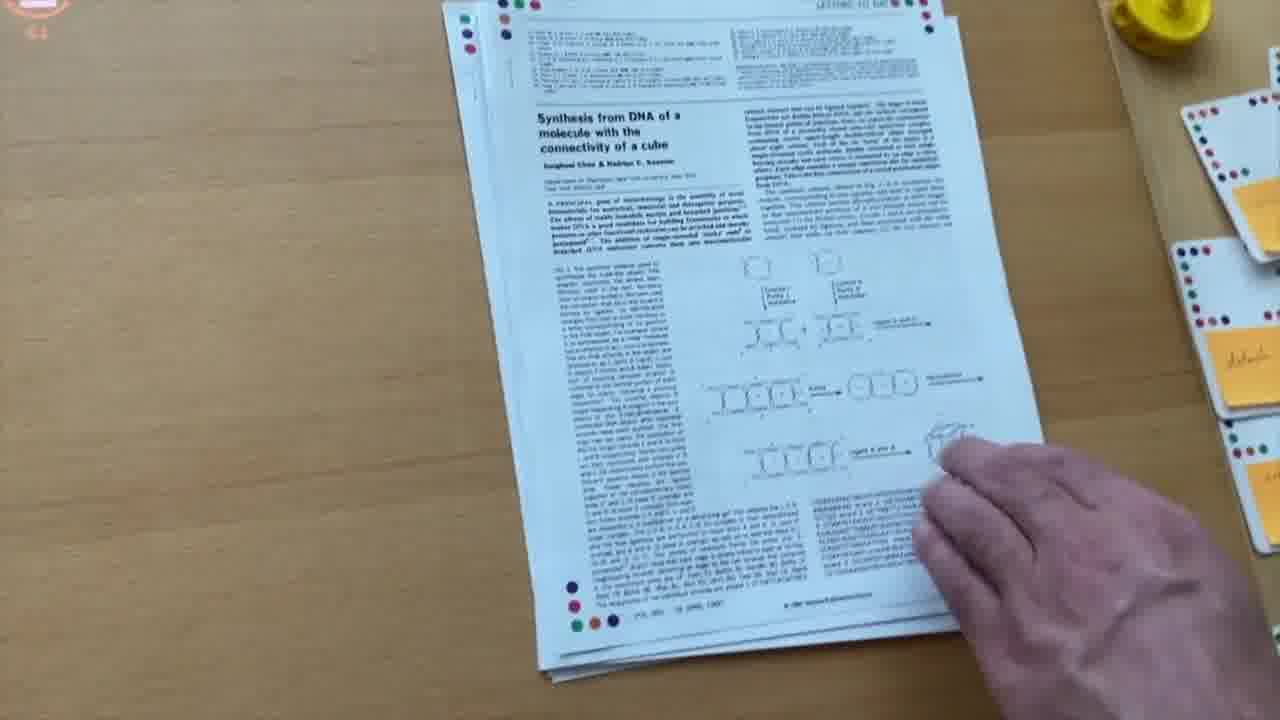
This is not actually a cube, because these joints aren't rigid. It kind of folds flat. But it is with a topology of a cube. It is the first closed shape ever made with DNA.
And a couple of years later, they published the double crossover. [more]
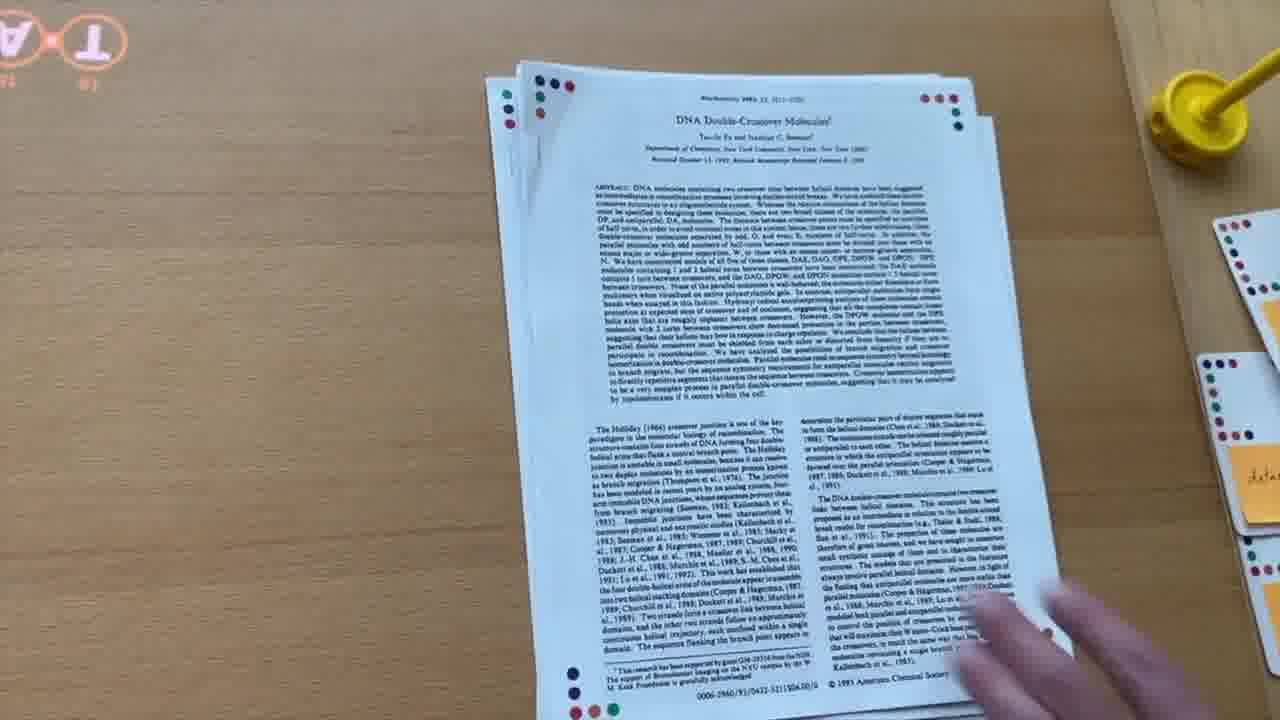
This was the first rigid structure made with DNA. And you can't build one of these without rigidity, so this is pretty key.
To show how that works, I'm going to put this one back in its original form.
So what we have here is called a parallel crossover. The strand is coming down this helix, and hops over to the next helix and keeps going in the same direction.
Ned found that if you build structures out of parallel crossovers, they would tend to just fall apart.
But something else that did seem to work is the anti-parallel crossover. If we're coming up this strand, then we could cross over to the other helix to this strand, and then come back down the opposite direction.
And likewise, we're coming down this strand, and then we could cross over to here and come back up.
If we look over in the 3D view, you can see that these are actually crossing over.
In the schematic, it kind of looks like these are going in parallel. But you can see, here...
these really are crossing over each other.
And so if you build that, what you end up with is two helices that are tied together at a point where the crossover happens.
They can still pivot around that point, but they are rigidly tied together.
If we want to make this a rigid bundle of helices, then we need to tie it together at two points. And we can't do that just anywhere. We need to do it when the strand goes all the way around one turn, or some multiple of turns.
If we look here, we can look at the 3D view and say we're crossing over here, and then we're going around the back side of the helix.
And around here — DNA is about 10.5 bases per turn — is where we could do another crossover.
And I'm kind of running out of strand, so I'm going to extend these up a little bit more.
If we're coming down this strand, and then we cross over to here, and likewise, coming up this strand, and then..
cross over to there. And my 3D renderer right now can't render loops, so I'm going to just add a little nick there for expository purposes. [more]
Now in the 3D view, you can see that we have two crossovers, one around here and one up around here.
With this, we actually have two helices that are tied together at two points, and they are rigidly connected.
In Ned's paper, he looked at all possible combinations of crossovers —
parallel, anti-parallel, odd, even — and he found this one, which I just demonstrated here, is the one that works. And it's the one that everyone's been using for the last few decades.
That was 1993. Then, in 1995, Ned attended the first DNA computation conference, where he ran into a couple of young fellows from Caltech, Erik Winfree and Paul Rothemund, who were interested in DNA computation. [1] [2] [3]
Their big dream was to make computers out of DNA. Erik was in the middle of his PhD at the time. Paul had just graduated. We'll come back to Paul in a little bit.
Erik had done some work with Stephen Wolfram. He was familiar with a model of computation that involved tiling out two-dimensional structures in a plane. He saw what Ned had been talking about with two-dimensional lattices, and thought that could be a good substrate for that form of DNA computation.
They collaborated on this paper where they made the first two-dimensional crystals out of DNA. [more]
If you look at what they did, it's basically everything that we've been talking about.
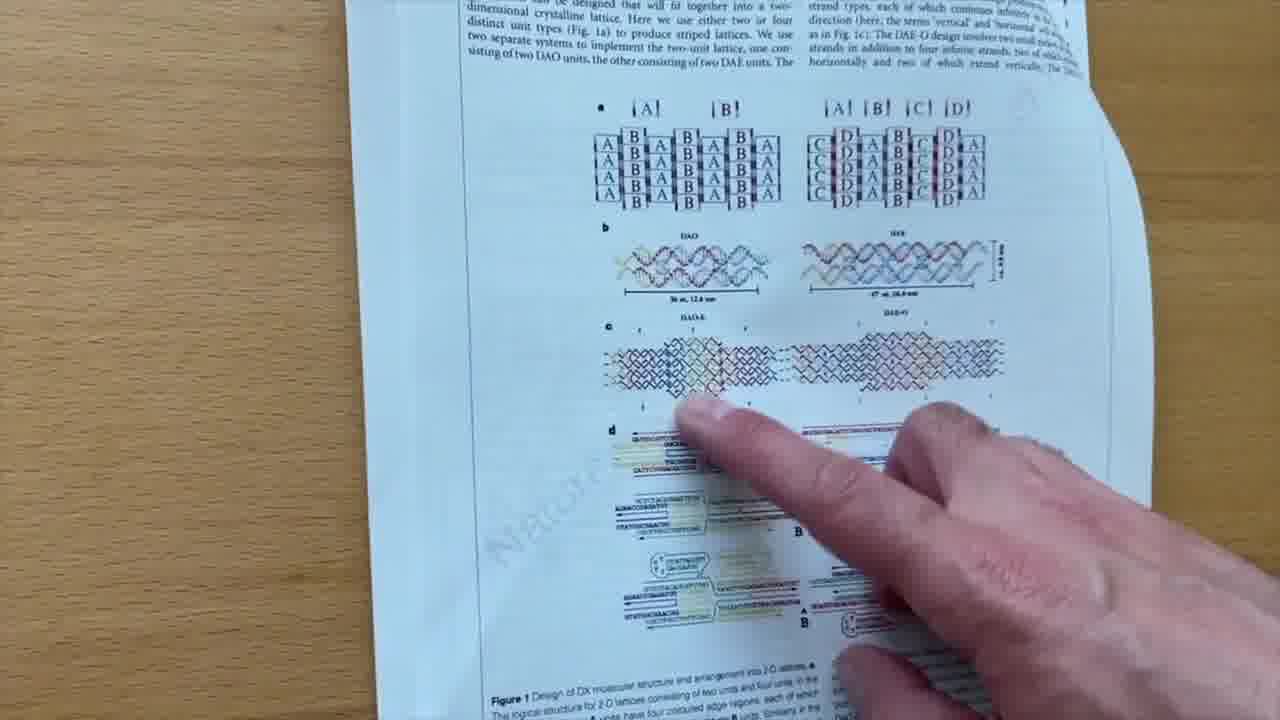
You can see the anti-parallel crossovers, you can see the sticky ends. It's a lot of the ideas from Ned's original paper, brought to fruition in this paper.
Those were two-dimensional crystals. Then, ten years later, were the first three-dimensional crystals made out of DNA. [more]
They don't really look like this. You can see that they're more triangular.
But these are three very short, specially-designed strands that, when you put them together, tile out into this huge crystal.
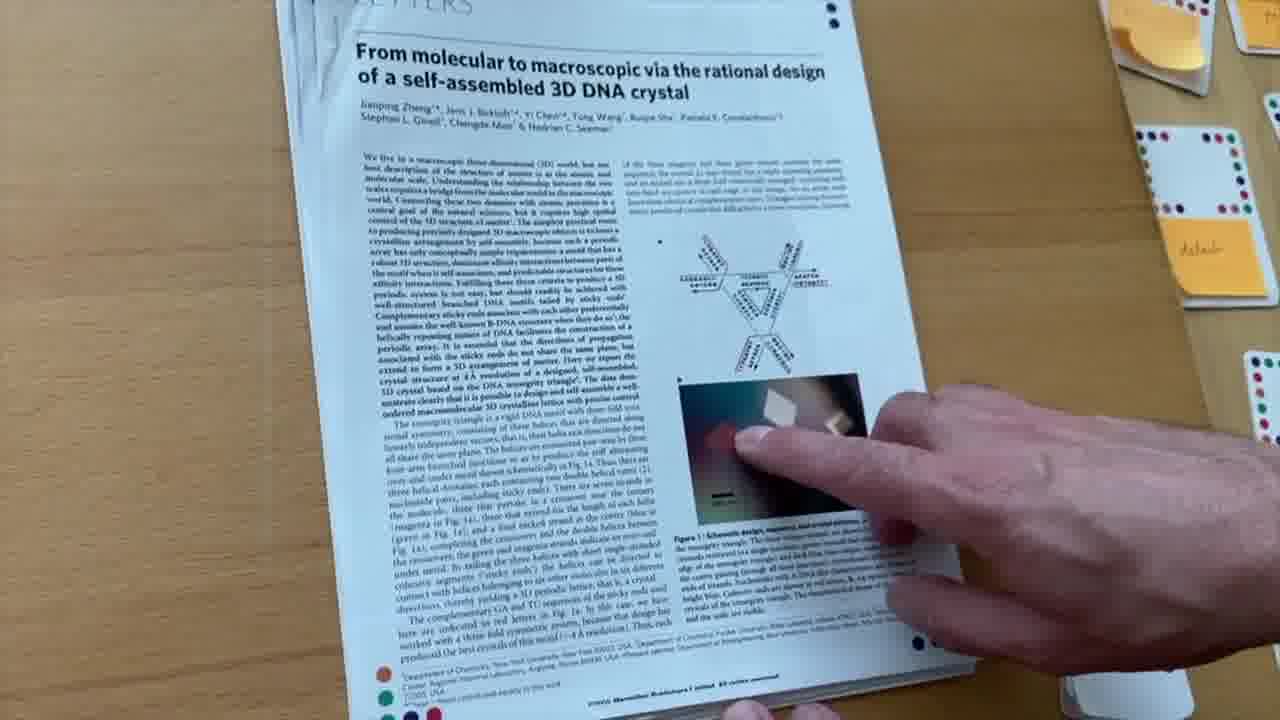
The cell is nanometers, and this crystal right here is 200 microns across. It's a macroscale object where they know exactly where every single atom is in it.
So, this is a huge achievement, and a bit of a fulfillment of the original dream of designing 3D crystals out of DNA.
But it wasn't a fulfillment of the whole dream. The original dream was that they could dock ligands into the crystal, and be able to solve the structures.
And these triangles here are a little too small to put anything in. And they found when the triangles were bigger, the resolution went down. It wasn't really rigid enough.
So, Ned never quite achieved that dream of being able to make the crystal to end all crystals. But in trying to do so, he established all the principles and concepts that you need to build stuff out of DNA. And other people took those concepts and ran with them.
The next person that we're going to talk about is Paul Rothemund. [more]
He was a bio and CS double major at Caltech, did his PhD with Len Adelman, then went back to Caltech to hang out in Erik Winfree's lab. [1] [2]
In 2006, he published the method of DNA origami. That's the next big paper that we're going to take a look at. [more]
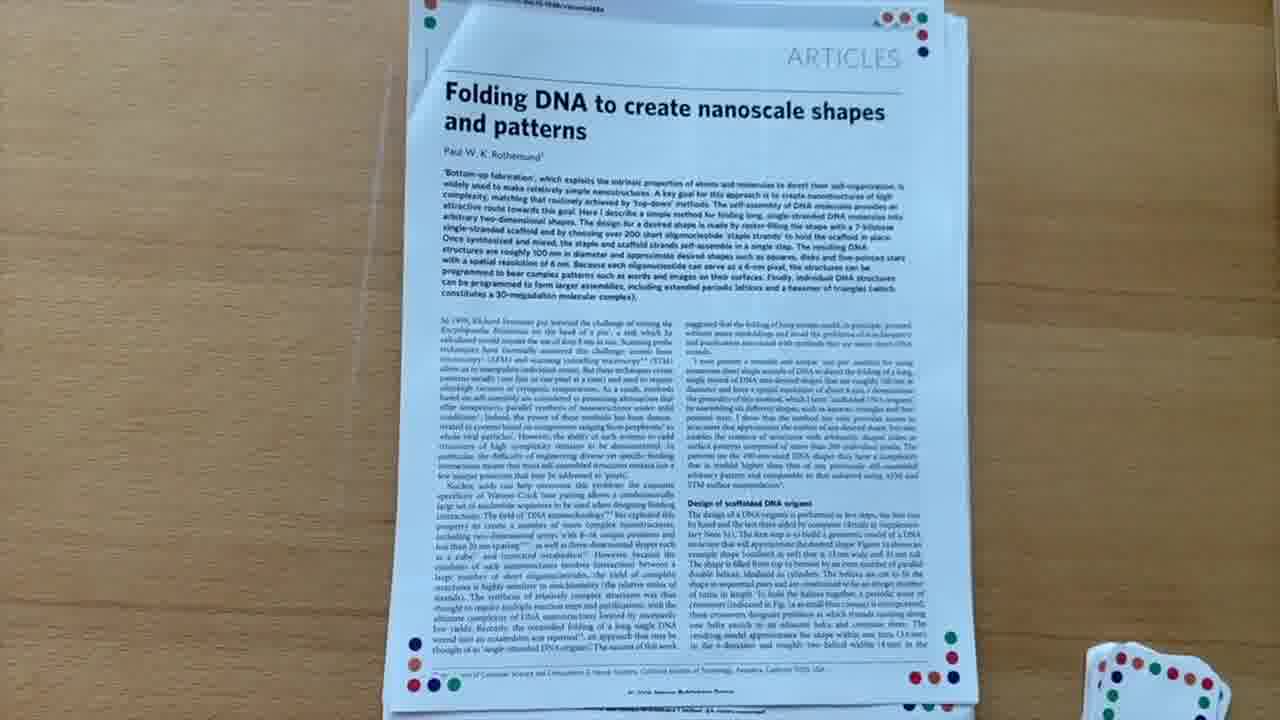
All of Ned's work involved crystals: perfectly symmetric, repetitive structures made out of small strands of DNA. Paul's idea was to make arbitrary asymmetric shapes by folding a long strand of DNA.
He built that on top of the same double crossover structure that we just saw.
If we imagine that we have a long strand of DNA which goes up this helix, and then...
hops over to this helix, comes back down... And we'll even make it into a loop. Again, I need to nick my loops so they show up.
These are two helices that are connected to each other. But we can keep on repeating this pattern.
Now we have four helices, and we have one strand which is coming up this helix, coming back down this helix, and we can have it cross over.
Then come back up this helix, cross over, come down this helix, come up here, and cross over to here.
Here's a single strand which is going up and down all four of the helices. That would give us a four helix bundle which is tied together.
These two helices are only tied together at this point, but we could likewise cross over this pairing strand, and this would come around and cross over here.
So, we have one long strand going through the entire design, and these shorter strands which are pairing with it and providing the cross connections between the helices to make it rigid.
My scaffold in this particular example is only 80 bases long. Paul was working with about 7,000 bases from a bacteriophage that they found in the sewers of Munich. So he was able to do more fancy things. [more]
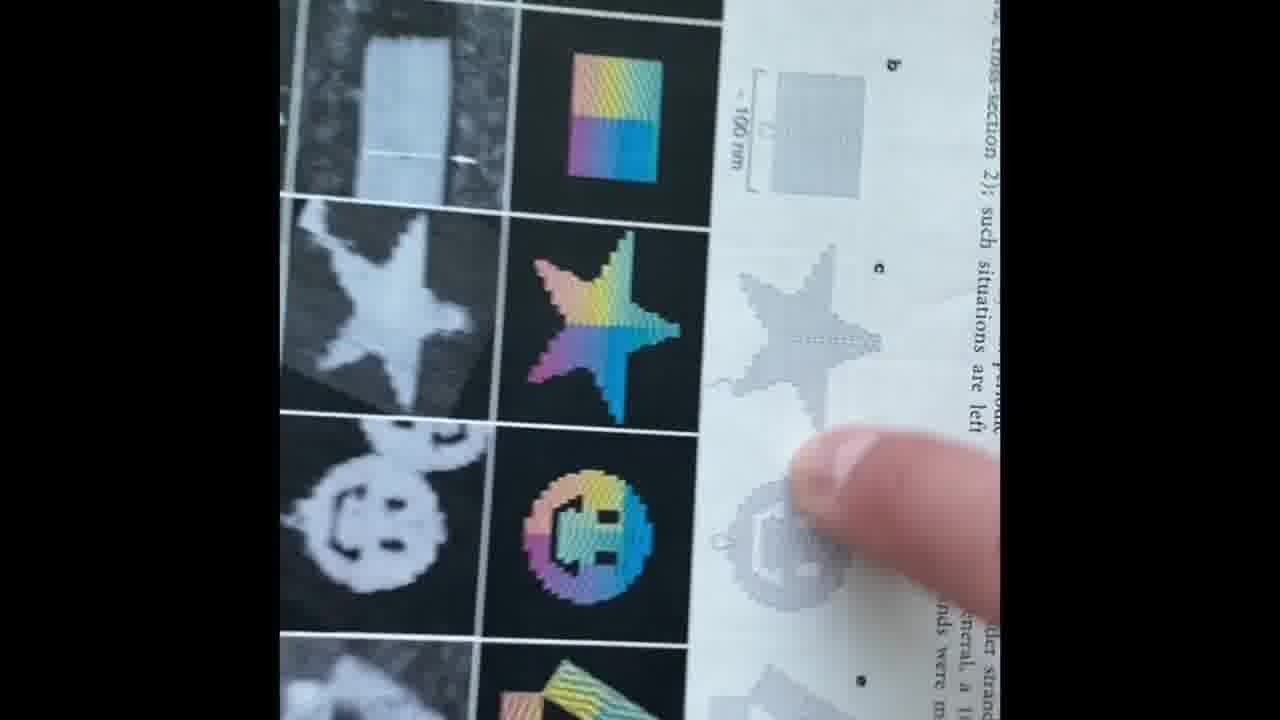
By going up and down these helices in a raster pattern, you can form a star, you can form these triangles, you can form this classic “disk with three holes”.
Paul published this paper in 2006. But I think he'd been going around talking about it for a couple years before that, and one of the young impressionable people that heard him talk about it was Shawn Douglas. [more]
He was just starting his PhD when Paul was going around talking about it, doing his PhD in William Shih's lab at Harvard. William Shih was also a new professor. [more]
They got very excited about origami, and decided to focus entirely on origami. And the lab, in a few years, published the method of how to do three-dimensional origami. [more]
Also around this time, Shawn published a CAD tool so you could draw these shapes on your computer screen. [1] [2]
That led to a big surge of interest in origami, because it meant that a high schooler could design and fabricate nanostructure in a day. That was a big boost in accessibility.
It also led to a big surge of interest in DNA nanotechnology, because it was suddenly so much more accessible, and led to people looking for architectures other than origami.
That brings us to the last person in our story, Peng Yin. [more]
He also did his postdoc at Caltech with Erik Winfree and Paul Rothemond, and then went off to the same lab at Harvard that William Shih was at.
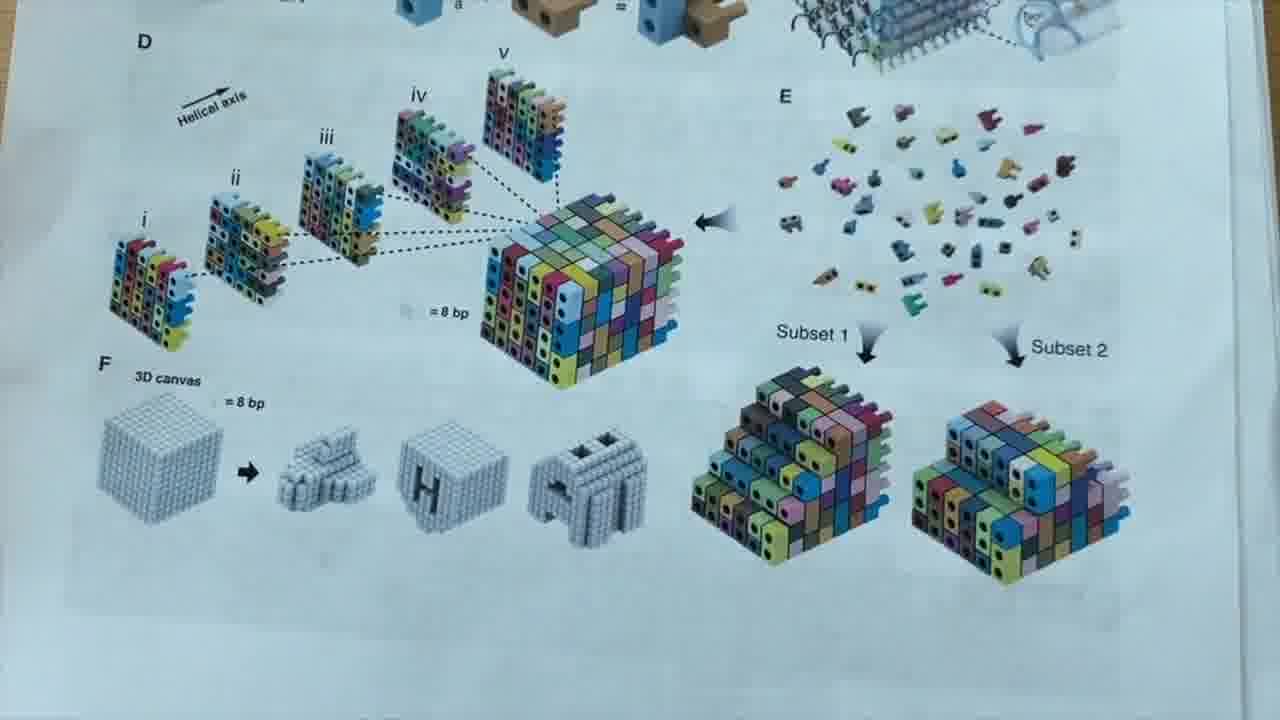
His lab published the method of DNA bricks. DNA bricks is a method for defining arbitrary three-dimensional shapes. [more]
What they call a brick is a single strand of DNA, which is 32 bases long, with 16 going up one helix and 16 coming down another helix.

When it's put together with all of its buddies, it forms this kind of U-shape, which we can see over here in the 3D model.
These pair with other brick strands. The way that works is, you have another one of these U-shapes, where the first half of it pairs like that, and then it comes over to another helix for the other other half.
The trick here is that, because there are these 8-base stretches, a neighboring helix, such as this helix here, is forced to be at a 90-degree angle to these two helices.
This is kind of hard to see in this 3D view, which is why it's nice to have these plastic tubes here. You can see the L-shape that these three helices are making with each other.

So, if you have a brick that is here, by putting a brick here, you go north. And by putting them at these other corners, you can go south, east, west. You can fill out your 2D plane. And by going up and down the helix as much as you want, that's your “z”.
So each one of these represents a voxel in this voxel space.
Shawn's lab is mostly focused on DNA origami, but for this most recent project, they thought that DNA bricks would be more appropriate.
Now I'm going to turn it back over to Shawn, and he's going to show the project that they're doing with DNA bricks.
Designing DNA cellular playgrounds

We thought that the DNA brick method could be really useful for generating our cellular playgrounds, because you have this cuboid set of voxels. If you include every voxel or every DNA strand, you get the cube.
But you can leave out subsets of those DNA brick strands in order to approximate different shapes. It's a very flexible method for getting a lot of mileage out of the same set of DNA strands.
Returning to this challenge of how do we define cellular playgrounds, that was the method that we wanted to bring into this collaboration with Orion.
Just to recap, we're interested in fabricating custom nanoscale shapes.
We want to do it inexpensively, in a way that's scalable and overcomes some of the challenges of both nanoscale beads, in terms of expanding our architectures, and also goes beyond nanopatterned lithographic surfaces that are expensive and very low throughput.
Now I'm going to talk a bit about the new generation of CAD tools that we've started working on in Realtalk.
All of our CAD tools are in this envelope right here. Let's pull this out, and come back to this later.
In this little zipper pouch, we have a voxel editor.
We have a front view of our voxel space. It's very easy to make multiple views. We can create a top view as well just by changing one line of code.
These are two views of the same voxel space. And then, I have primitives here.
This program says that it's a cuboid primitive. We have some code that defines what that means in our kit.
What we see here, when this is on the table, is a whisker that sticks out 10 inches or so. And we have a couple of different parameters here.
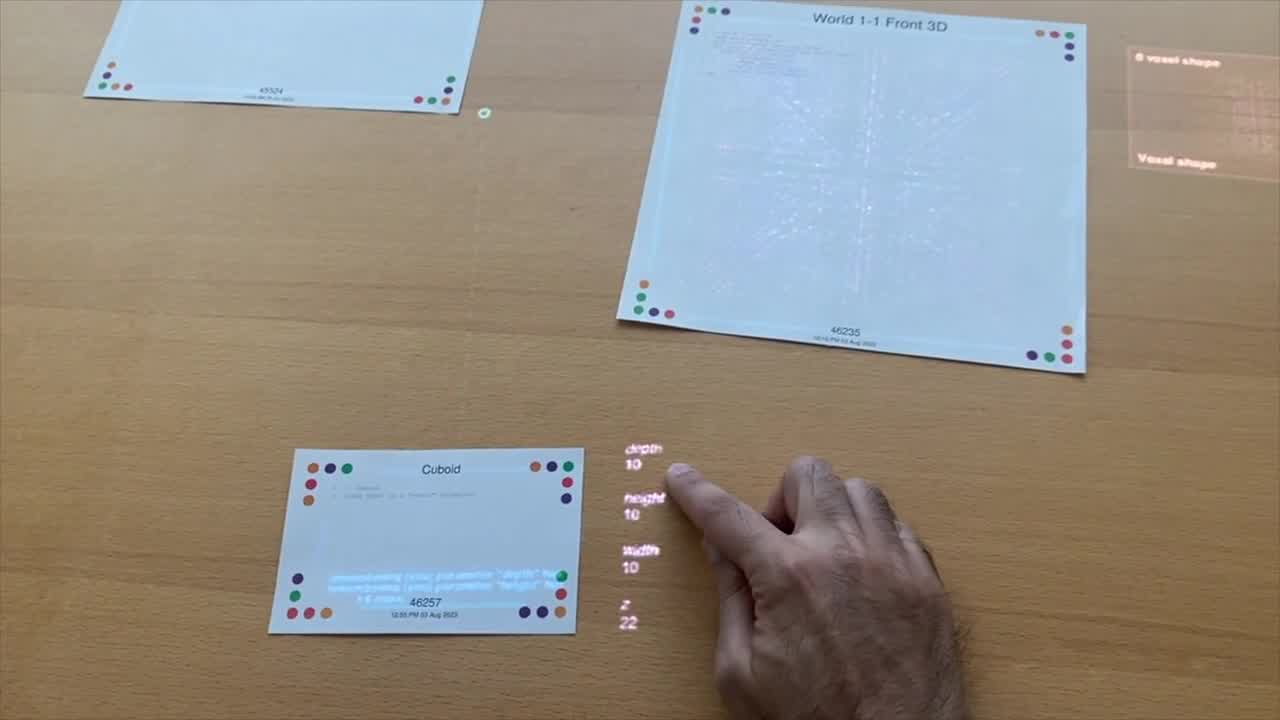
There's a depth parameter, height and width parameters, and a z-height.
When I poke this into the voxel world here, we can see an actual design appears.
I can move it around. And I can use a little knob here in order to change these parameters.
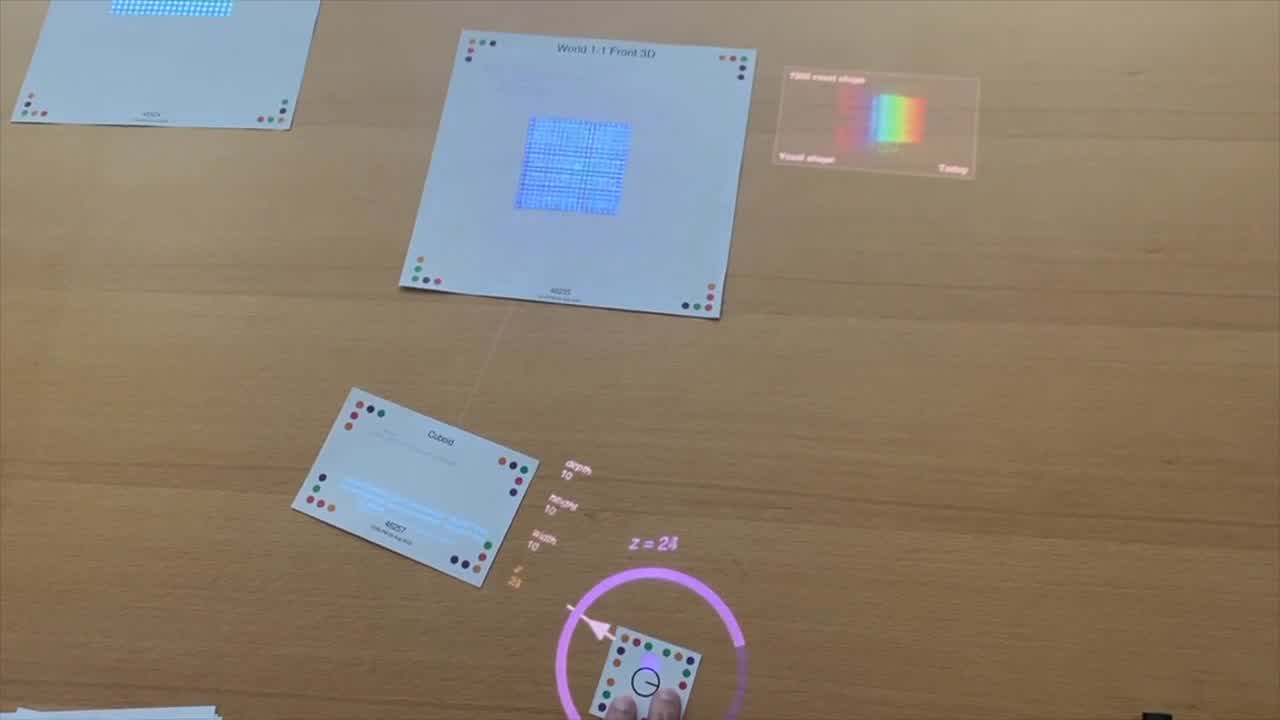
For example, I can move the Z position around.
We can make shapes that are smaller, have different dimensions. I can change the depth a little bit.
Here, I'm increasing the height. If I wanted something that's long and skinny, I can just move this around and vary these different parameters here.
To replicate the original paper, we can tune these parameters. But actually, we're not so interested in cubes exactly. But we are interested in other primitives.
What we've been working with is not the cuboid. We're thinking about our bead structure that we have.
That's our starting point, polystyrene beads of a certain size, roughly 100 nanometers.
Our first thought was, can we just approximate shapes that we're already working with, because then we have a positive control.
Orion's team can get a cellular response from a 100 nanometer bead. Can we make a 100 nanometer bead out of DNA bricks?
In principle, we can, but that structure would be quite expensive. It's going to cost a lot of DNA.
Instead of going straight for the $20,000 100 nanometer bead, we realized we could do a little trick here. We can truncate the structure by dragging the whisker off to the edge of the shape.
Here, in the top-down, you can still see that it's circular from the top. But over here, it's going off the edge of the voxel world. So, it makes a smaller structure.
I can pick up that structure over here in a tube. I can go over here and grab that. So, there's a shape.
It's a little bit hard to see from that angle, but I can use a laser pointer and start to tumble that shape a little bit.
Let me just set aside the editor for now, and we can look at what we can do with this shape.
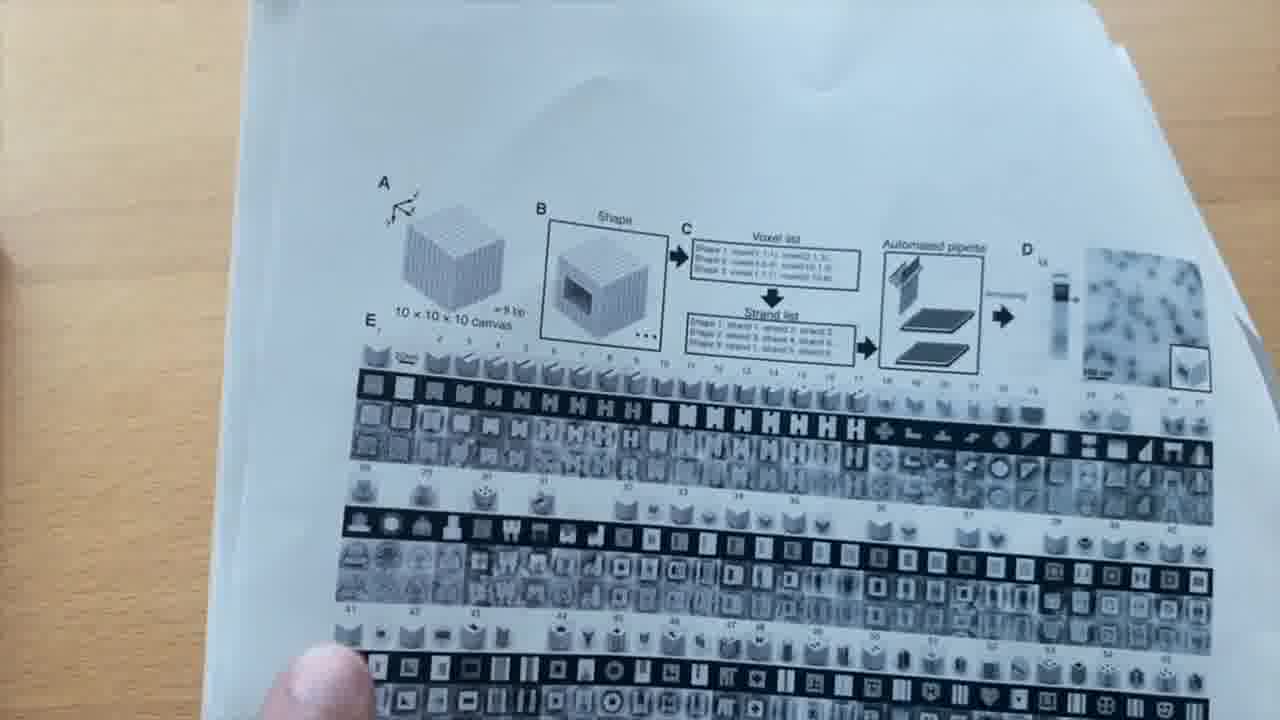
We dug into the supplementary materials of the DNA bricks paper, and also the source code of the Nanobricks software that the Yin Lab published. [more]
We re-implemented that in Realtalk. That's represented by this tool right here.
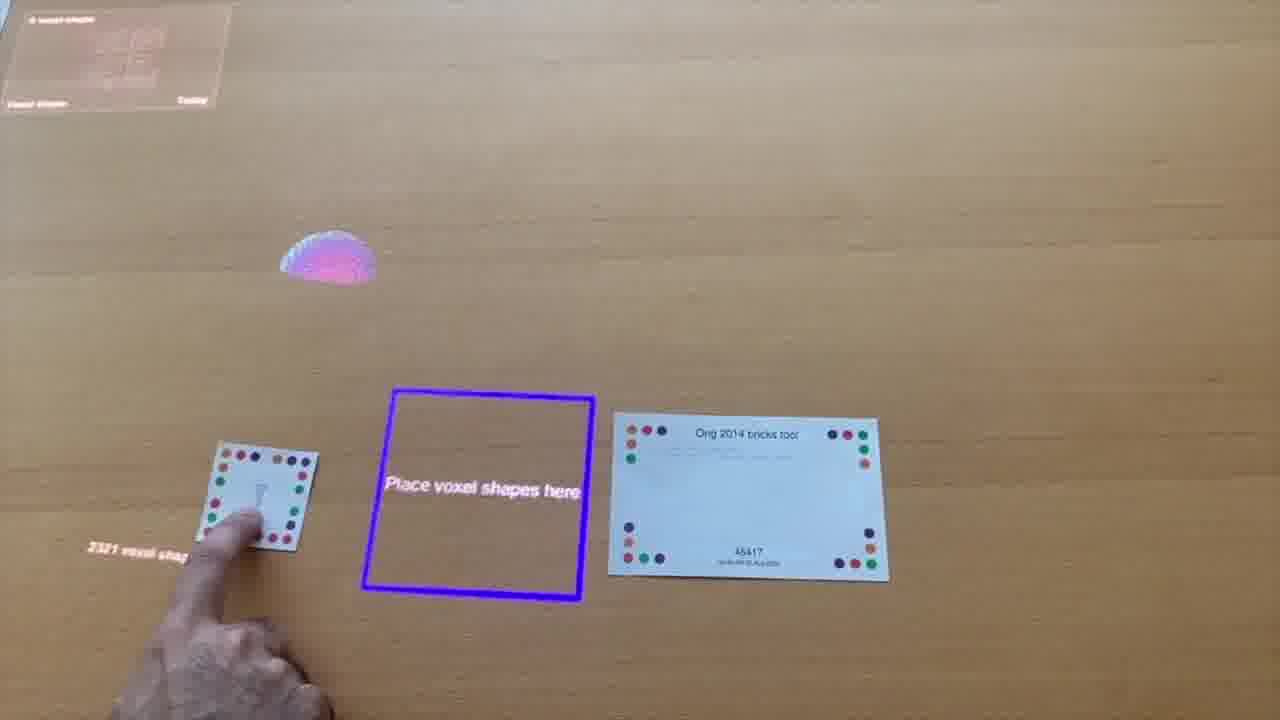
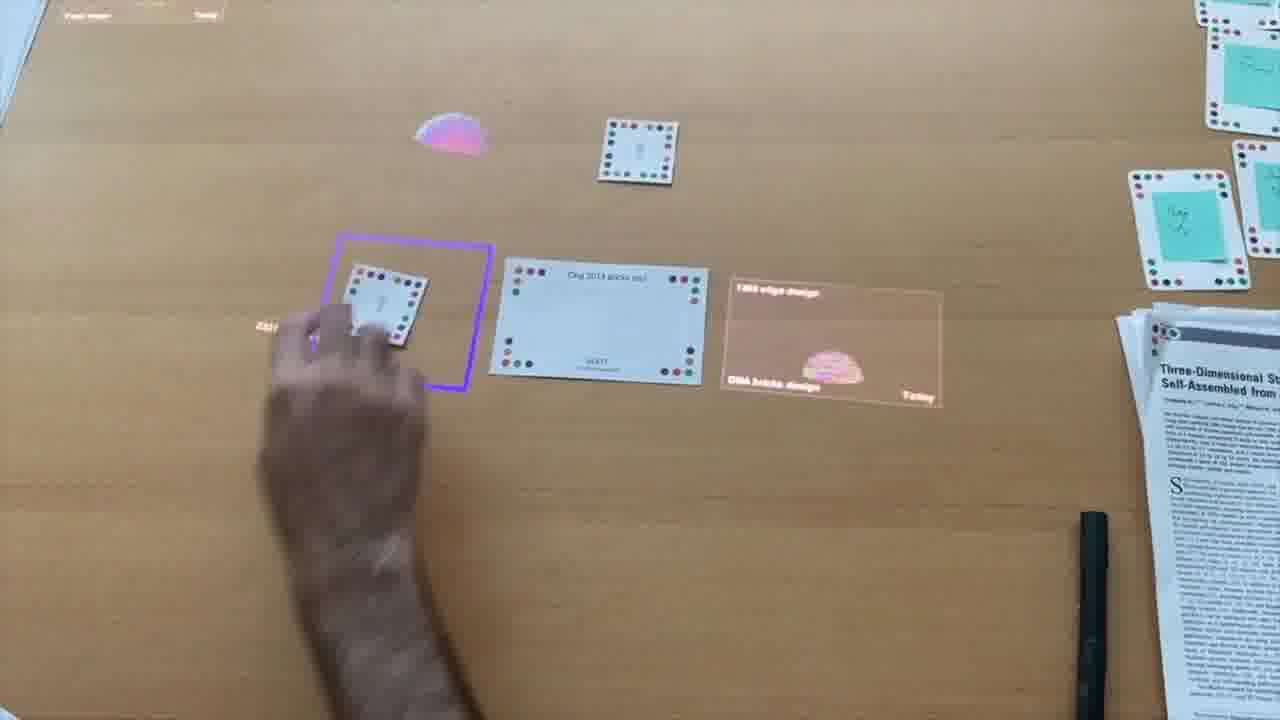
What this does is it creates a box, and any voxel shape that you put in that box, it will translate that into a DNA brick design. It goes from voxels to strands.
Here we have this hemisphere, or half-sphere shape, and we can place it here. Now we can see this tool is now offering a DNA strand design.
We can use another empty tube to pick that up, and now we have a little bit of a construction history here.
This little tube is holding some information that defines the strands.
We can tumble this around to see it.
It's pointing back to the original design, so we can keep track of which voxel shapes define which strand sets.
Actually, this is the follow-up paper. We're using the architecture that's the follow-up paper to the original DNA bricks paper. Slightly different than what is shown in that paper.
Once we have our strands, then it's just one more step to go to an order.
We're translating this list of DNA oligonucleotides, which we call DNA brick strands. Those have to actually be synthesized. We typically order these from a commercial vendor. They put these individual strands into 96 or 384-well plates.
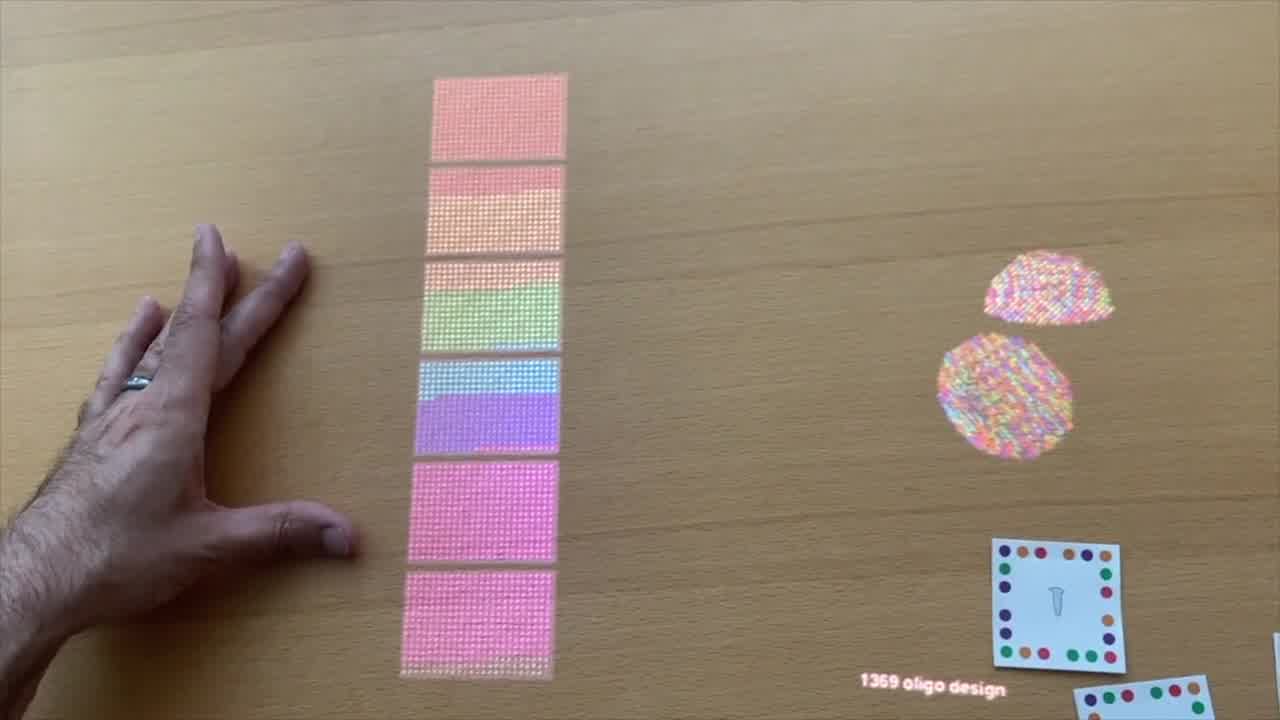
If I put this inside the little design box here, then we get the output of this plate order tool.
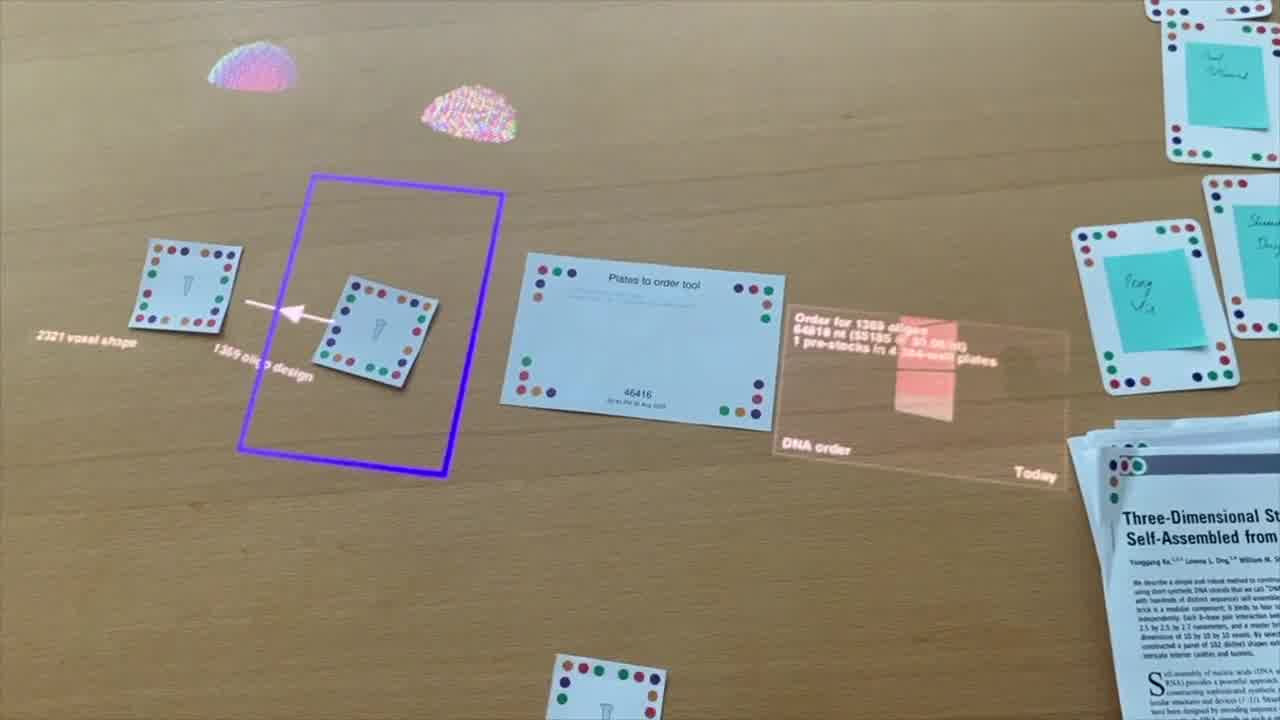
Now what we have on the table is some 384-well plates, and we can see some information about the design that we just made.
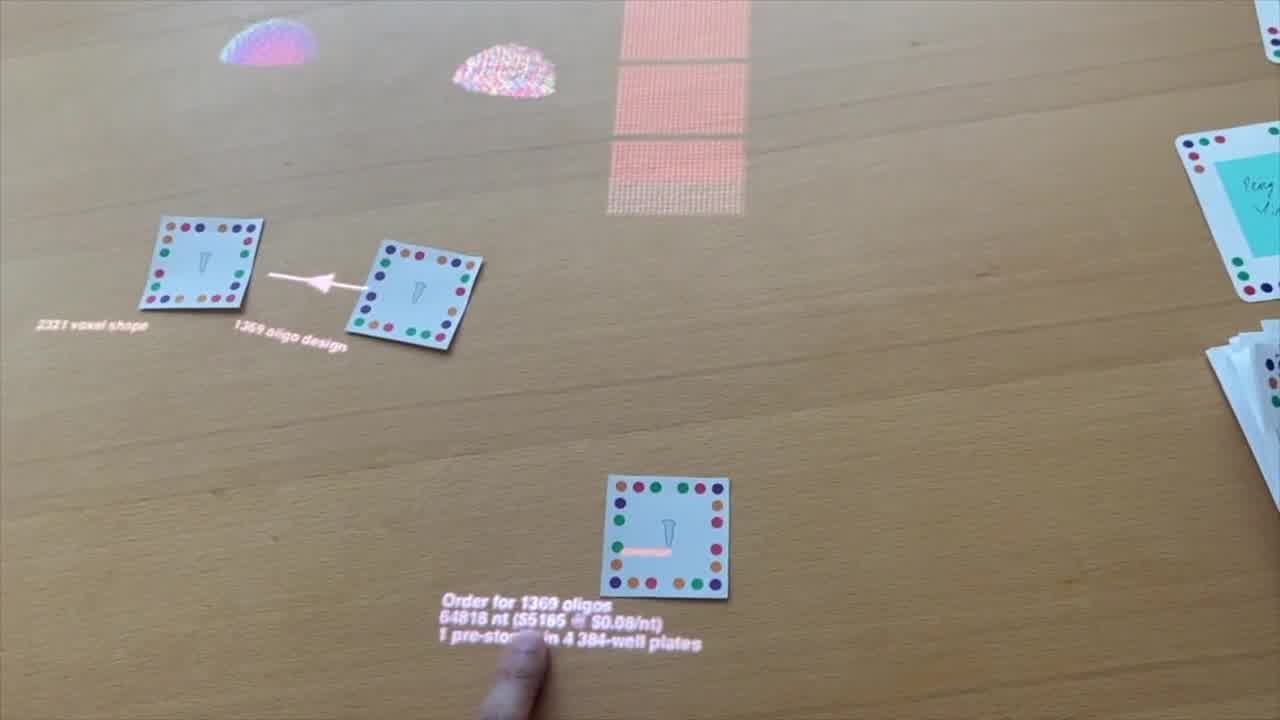
We see this is almost 1,400 oligos and over 64,000 nucleotides total. Given our quote with our commercial vendor, we expect that to be a little over $5,000 for that order. So, that's our plate order.
We actually started with a design like this and we ordered it. But we also realized we might not need to fill the entire half sphere, or hemisphere structure, with DNA.
We care about the outer shell of the shape, but we thought that we could save money, and actually have some space for functionalization, by hollowing out a cavity inside of this structure.
In order to design that, we go back to our editor here, go back to our sphere primitive. We can get back to our original shape that we designed.
But we now use a separate primitive, which is a negative sphere. This is going to subtract a sphere from that design.
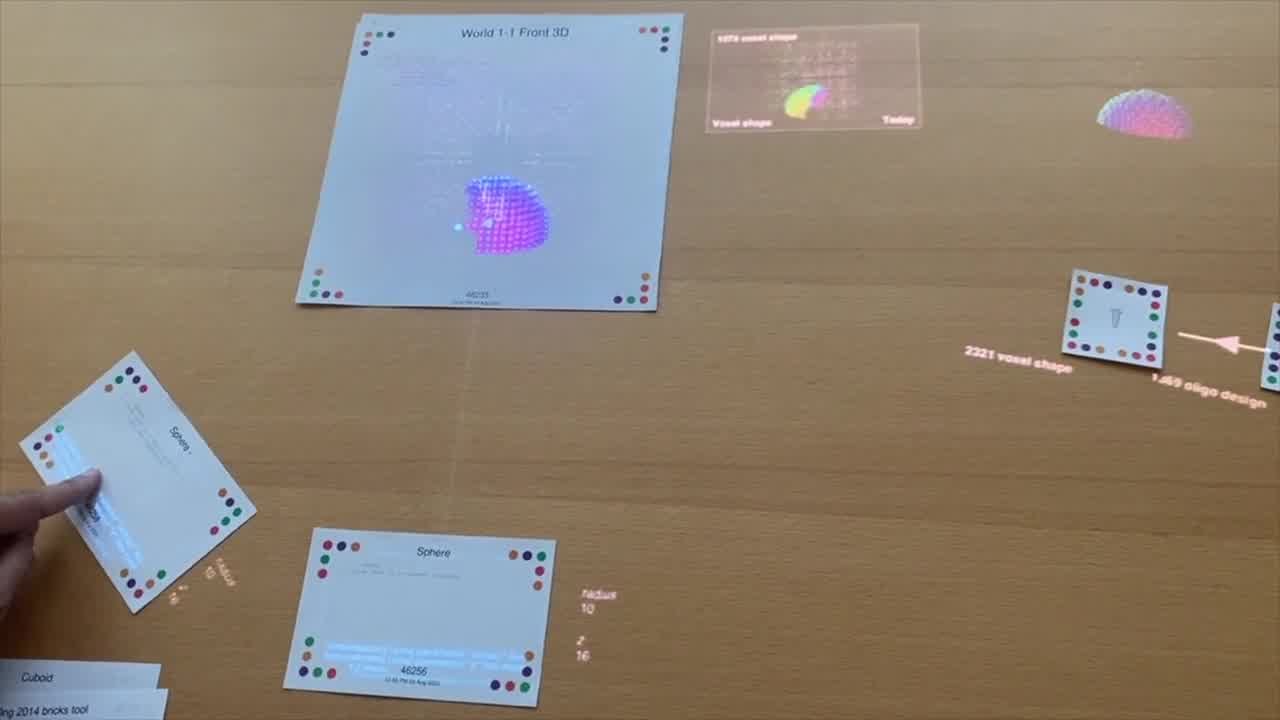
We take the original sphere, which has a radius of 10 voxels, and we have our negative sphere, and we want it a little bit smaller. We don't want to subtract the entire sphere. So, we put our knob there and get it close. The same “z” as well.
Now I can poke this in here and try to line up those two whiskers. It's a little bit difficult to see in this box here, but we can pick this up in a tube.
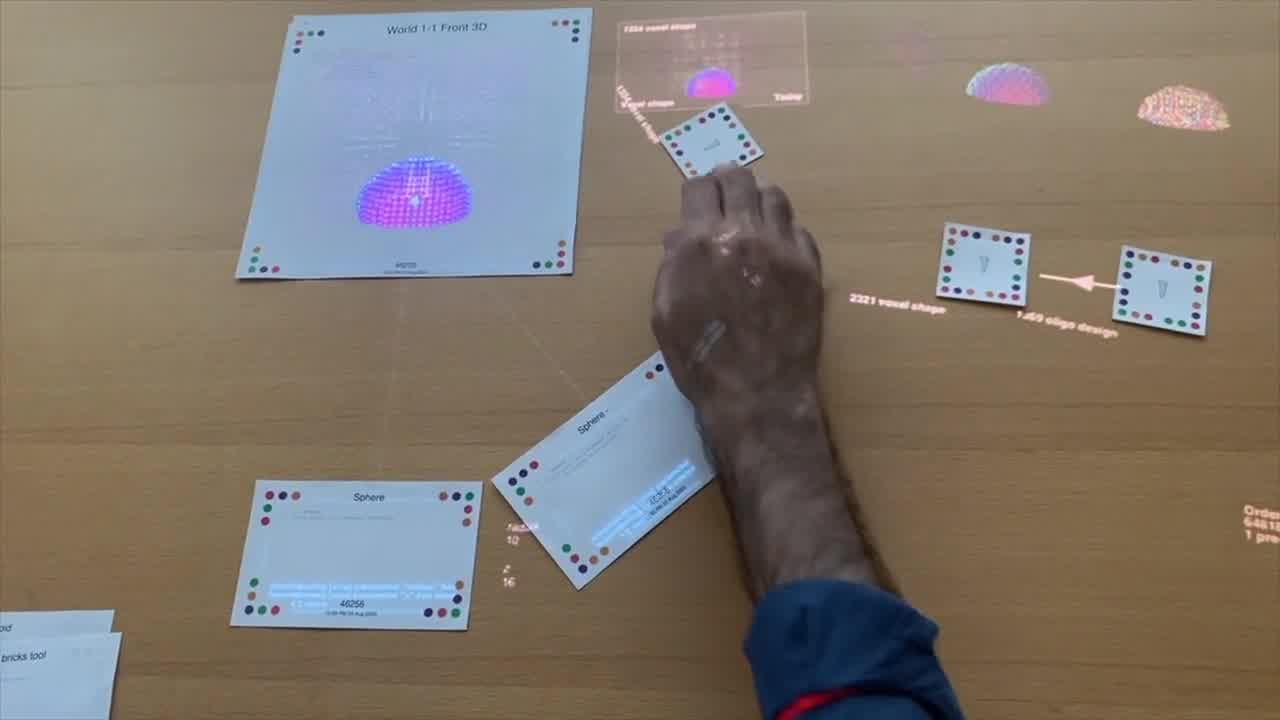
Maybe we want a little bit of a different position of the cavity. So I can grab this in another empty tube.
So, we have a couple of additional designs here. Again we can tumble them in order to see what they look like. What we want to do is actually tumble them so we can look underneath into the bottom here.
There's the first one and the second one.
We have this hollowed out cavity. This one hollows out quite a bit. We see there are only 1,334 voxels in that design.
For the second one, I moved that negative sphere down a little bit, so it's including more of those voxels in the design.
One of the challenges in DNA nanostructure design is just managing all these different oligos.
So, one thing that's really nice about this tool is that we can just arrange the structures that we want to order on the table, and we get that order auto-generated. We can pick this up in a tube, and then ultimately translate that into a spreadsheet and send it to our commercial vendor.
And so maybe I won't order this original structure, but I'll go back to my strand tool.
So, we're going to go again from voxels into strands.
We'll pick this one up in another tube, and then let's get this one as well.
We have our other voxel shape here. Pick that one up, and we have strand versions of all these different shapes.
We can set aside our editor. And we actually can set aside our voxel shapes as well. So, just focus on the strands here.
If we wanted to order all three of these, then we place all three of them in the “plates to order” tool. Pack them all in here. Then finally, we can pick them up in another another tube here.
That's our order. Not too bad.
We we increased the size a little bit. We're ordering the original one, and we have some additional shapes now. So it's a little bit more expensive.
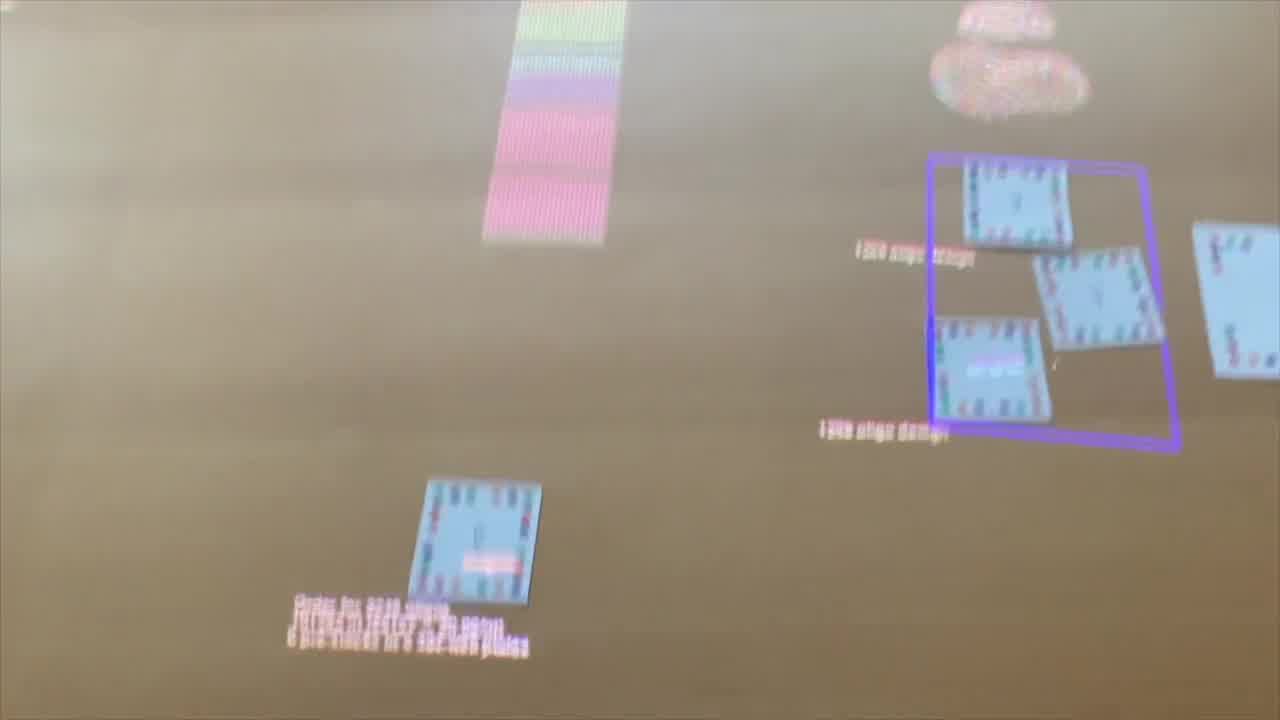
But we now have three different shapes, and here we can see we're auto-generating the different pre-stocks as well.
I'm not going to show it here, but we can put this plate order into a separate tool that would generate pipetting instructions and a protocol to mix all these DNA strands together, and fold them and assemble them into these shapes.
We now have our plate order. What we have been doing in the lab is, we actually have ordered shapes that are very similar to these structures that I just demonstrated.
I can set aside all these tools and go back into our notebook, and show some of the preliminary data that we've been collecting in collaboration with Orion. Muziyue has been has been collecting this data.
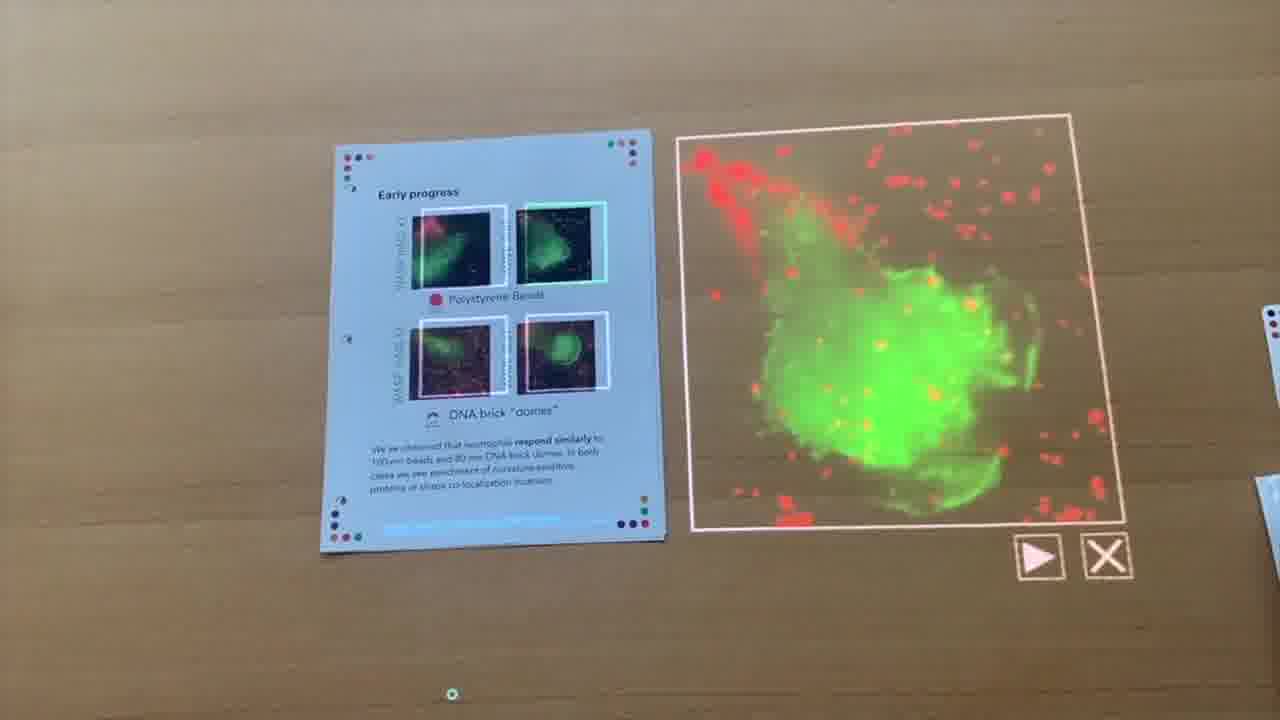
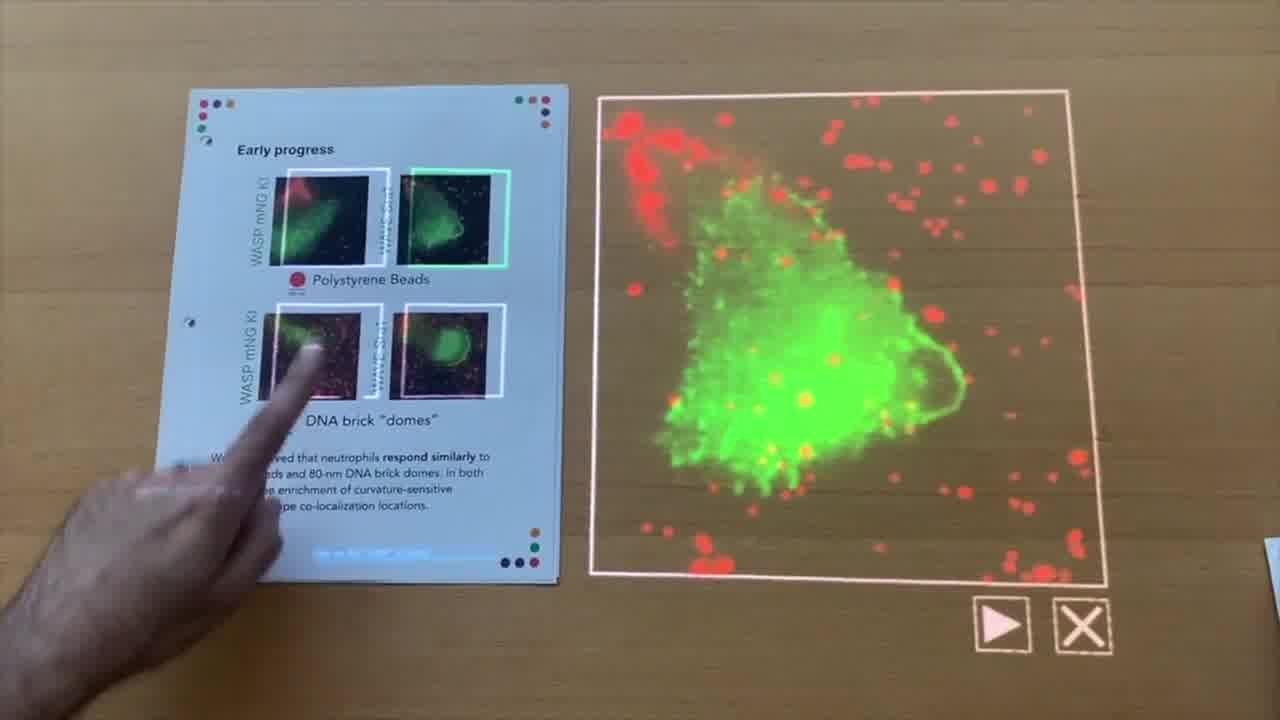
Let's go back in here. The last thing I'll show is some of our early progress on this front.
We have unpublished data here. What we're looking at here are four different frames of live microscopy data.

We have neutrophils that we've added to different playground environments. We've put either polystyrene beads down on a glass slide, and those beads are labeled with a fluorophore, or we've put our DNA brick dome structures down.
Our domes are not quite 100 nanometers in diameter. They're 80 nanometers. But similar in size to the polystyrene beads. But not a full sphere.
What we were looking for is, do the cells respond in the same way that we expect them to when they crawl over a polystyrene bead? Or maybe in a similar way?
First, we can look at some of the data for when Muziyue and Orion label the WASP protein with a green fluorescent marker.
What happens — and I'll play this movie here —
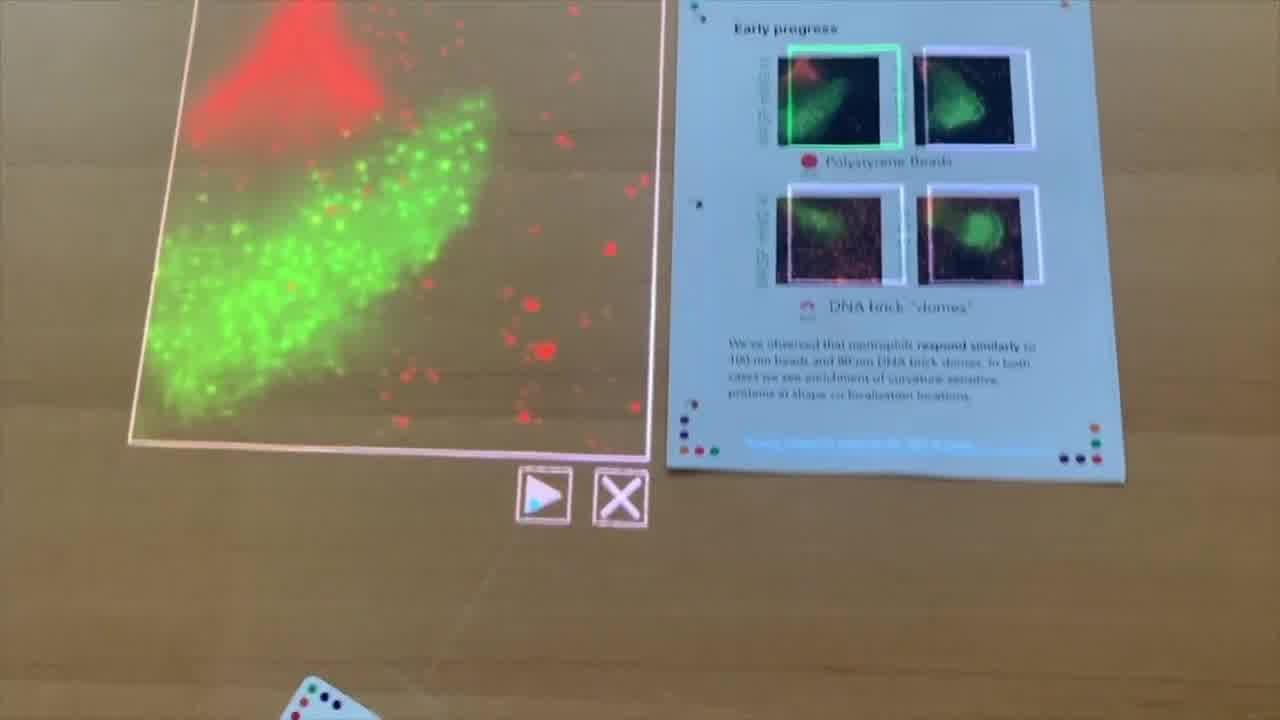
as the cell, the neutrophil, which we see in green, as it crawls over these beads, we see co-localization of the WASP protein. These bright green spots show up at locations where the red beads are located.
We see some co-localization of both the beads and this green signal here. That's what we expect when the cell crawls over the polystyrene bead.
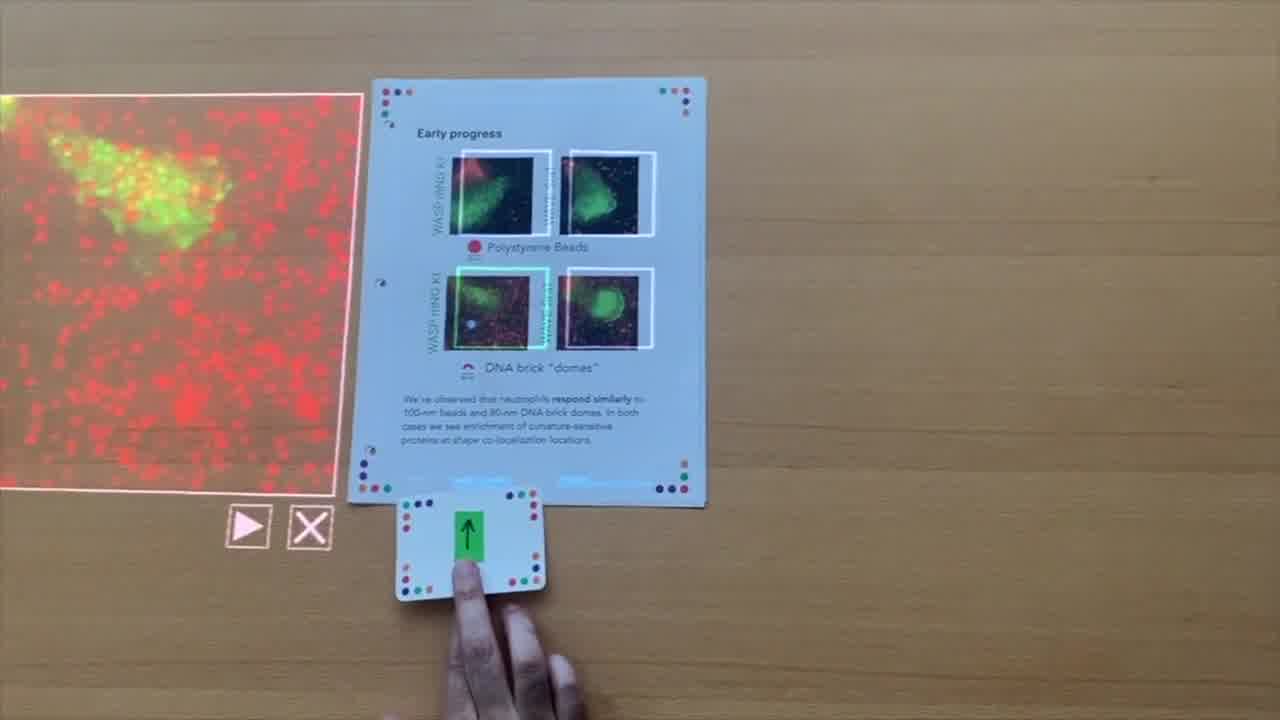
There's another protein called WAVE, or there's a WAVE complex. And this Sra1 protein, in this case, is now labeled with a green fluorescent protein.
We can play this, and we see a little bit of a different response. We're not seeing as much of a bright signal there. But we do see some co-localization of signal. It's just hard to perceive in this movie.
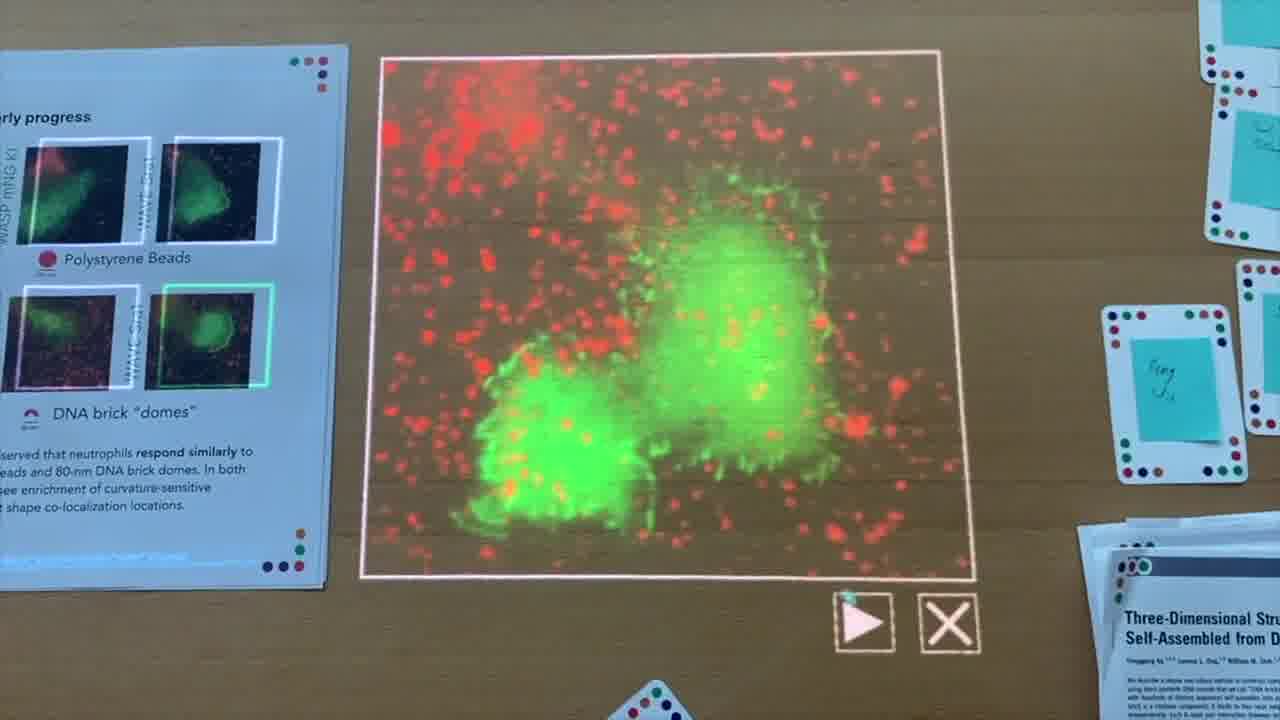
So, that's the control data. The question that we had is: when we put the DNA brick dome structures down on the slide, and the cells crawl over them, do we see something similar?
In the case of WASP, you can see here it's pretty dense in DNA structures. But we also start to see some co-localization of these bright green spots within the cell.
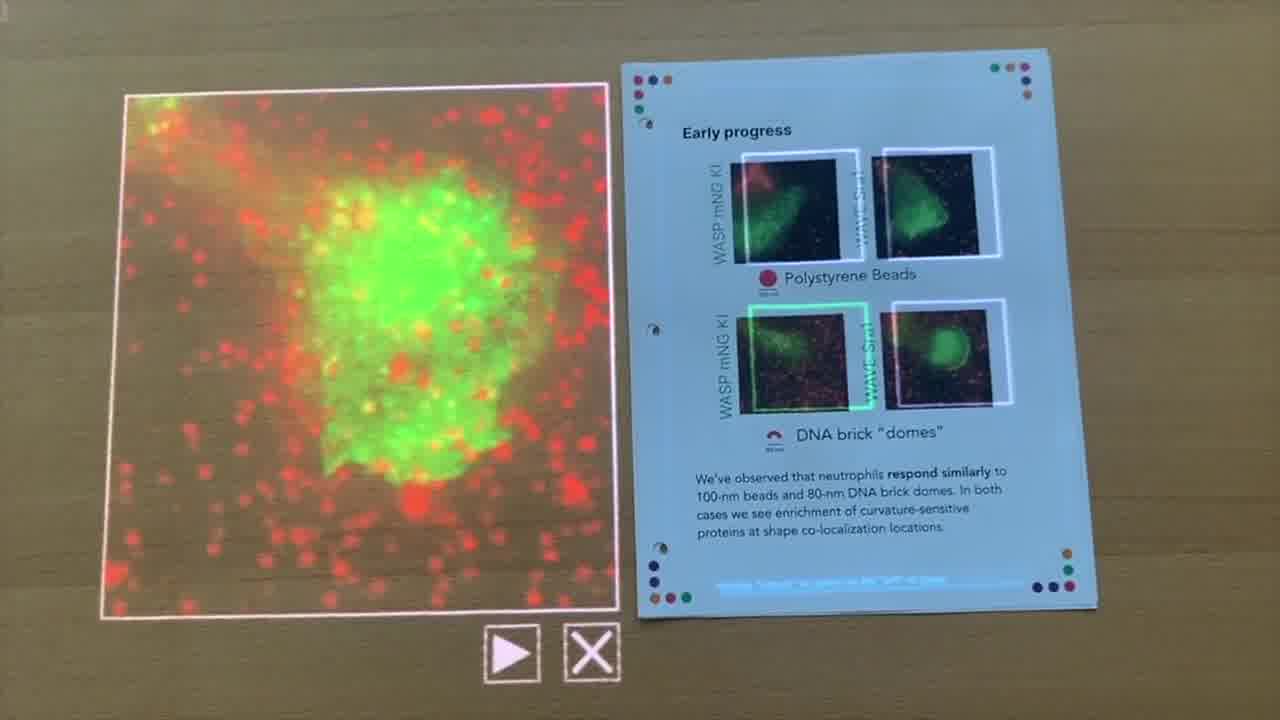
Not quite as bright, and maybe that's expected because these are smaller than the polystyrene beads. But nevertheless, we were very excited to see this kind of response.
I can now also show the WAVE experiment, where we have the other protein labeled.
Again, kind of hard to see what's going on here, and so we had to resort to some statistical analysis.
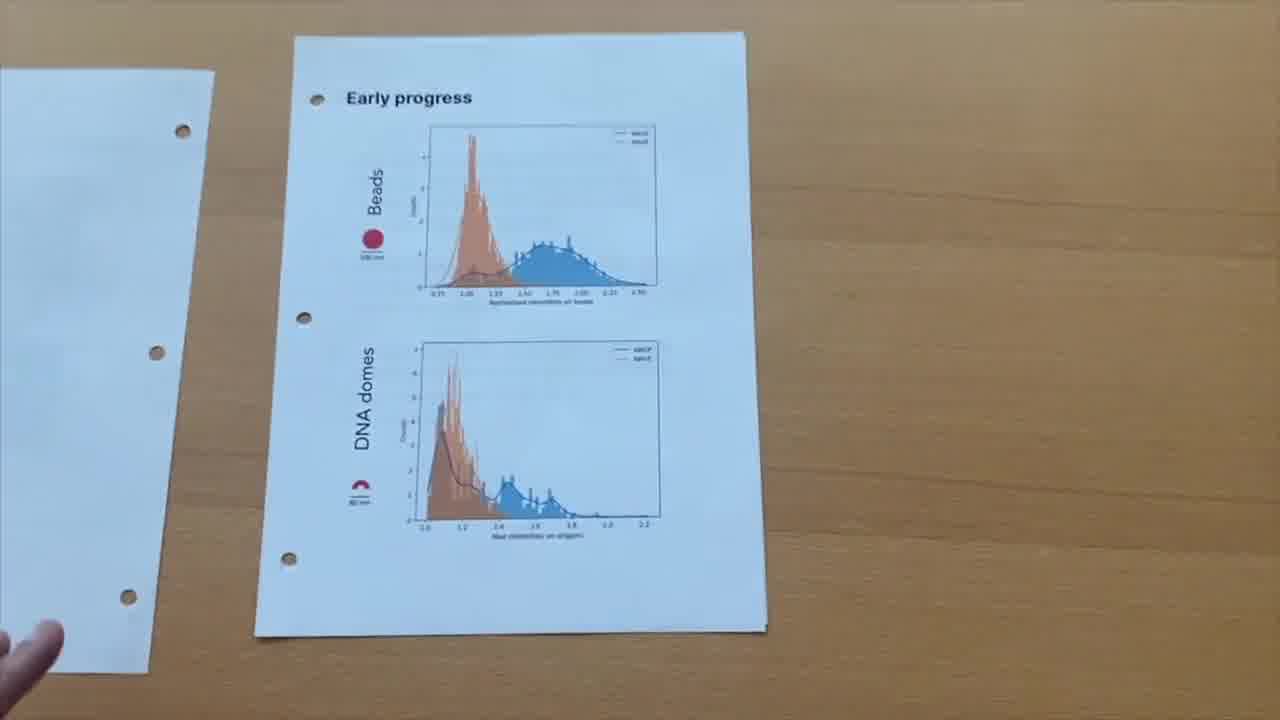
We collected all of these data into histograms, and we can start to see in the WASP or WAVE case, in blue and orange respectively, we can count how many beads or DNA origami structures that light up and co-localize with positive signal.
In the bead case, you can see, for WASP, there are many beads that are lighting up very brightly. Whereas the WAVE are not generating as much signal.
And we start to see kind of a similar trend there. The WASP signal is co-localizing with these DNA dome structures.
That was really exciting for us to see that at least we could reproduce some expected behavior. It was very encouraging for us to continue moving forward with additional designs.
To conclude, now what we're doing is thinking about how to “zipper” the cells to these DNA shapes.
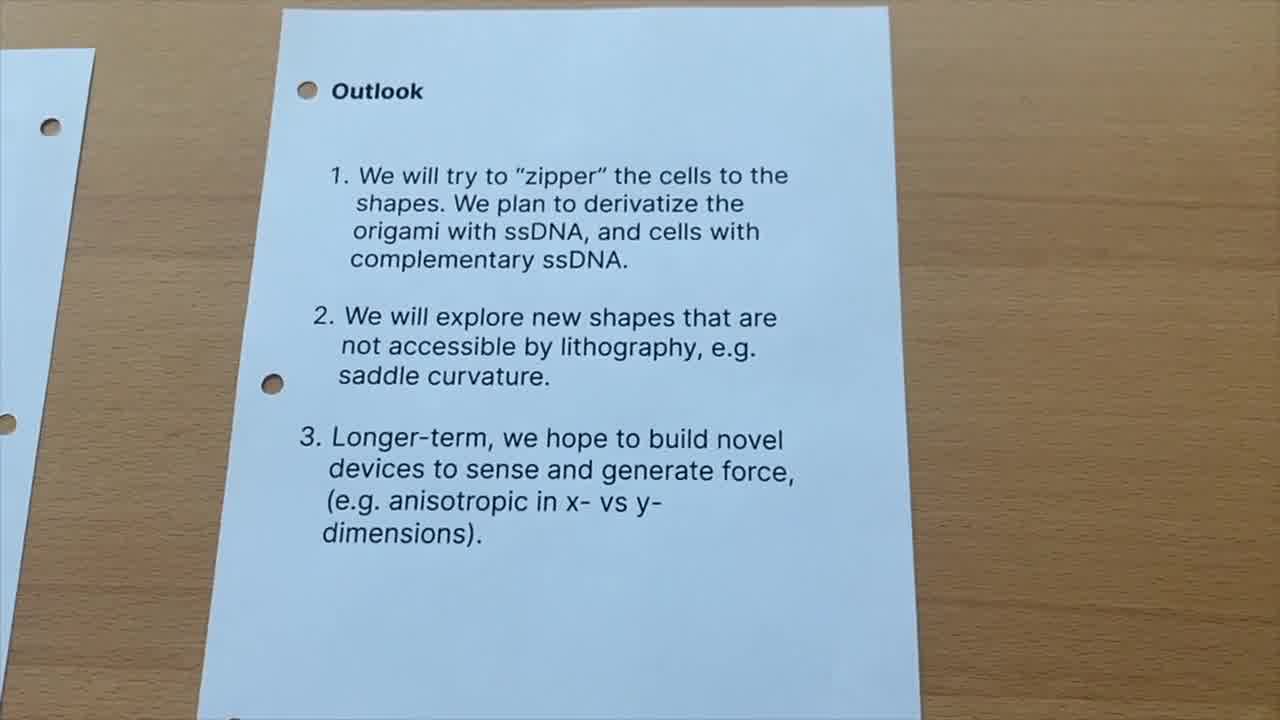
We want to modify the DNA nanostructure design, so they have single-stranded DNA handles, and we will functionalize the cells with complementary single-stranded anchors. Hopefully when those bind, they will adhere to the DNA shape.
We're also now looking beyond the dome and sphere structures into different types of curvature, different radii, and starting to probe some of the questions that have not been accessible with lithographic techniques.
Eventually we would love to generate novel devices that are completely unimaginable with lithographic patterning. Devices that might have different force responses in different directions, or that we could even use to sense and generate forces when they're interacting with the cell.
Now that we're enabled with these new design tools, we're really excited to explore this design space that has previously been pretty difficult to access with the existing tools.
We're going to continue this collaboration, and hopefully have more data to share in the near future.