All research summaries for the last two show-and-tells have been submitted! Thanks everyone for your fine contributions. Here they are, in alphabetical order by first name:
<<< Bret >>>
I spent the last two weeks working on "Realtalk from the ground up" -- working out the details of how values and samples and processes work. I ended up answering most of the list of questions I wrote up after finishing the "Realtalk Table Toy" at the beginning of the month.
<<< Bret >>>
<<< Chaim >>>
• Call with MIT Press editors about SimCity book. They love it.
• Musical Paper with Luke:
- Can dynamically change scales, root note, etc…
- Started slider control system (WIP)
- Adaptive temporal blending across time steps for more robust input capture
- Beats now temporally and visually align properly. You can score things!
- More stability (less crashing)
- Only highlight playing notes
- Tracking scores across frames more more input robustness
- More robust score recognition
- Can interact in real time with scores (with your hands, whatever)
- Better grid graphics (downbeat lines)
- Drawing performance improvements
- Different size paper = different tempos
- Lots of other little things.
<<< Josh >>>
Most of my work the last two weeks has been on token-table Realtalk. I've been building a Realtalk sample-database/process-runner in Lua, working from the inside out. That means I started by implementing the higher-level decision-making processes, while stubbing out the actual hardware with hard-coded values and silly simulations.
But as of late last Friday, I was able to hook the system up to some pre-written HTTP servers which access the token-table hardware, so we actually have a rudimentary token-tidier running on Realtalk now!
We also have a rudimentary inspector, which has not yet proved itself useful for actual debugging:
I also had some small adventures in Apparatus. Two weeks ago I prototyped a version of "freely draggable values spread like another spread" (better name tbd):
And last week I recreated a neat hexagon graphic, as documented in this thread.
<<< Paula >>>
Week ending Thu, Oct 27
- Created Arduino workshop materials: https://github.com/damellis/arduino101-workshop
- Worked on smiley face lua code for token table (totes gonna be projected sometime soon)

- Went to equity in tech lunch with Toby, interested in engaging local Oakland community since we're here, in Oakland. Will do some research to find an appropriate reading for next Why?
Week ending Fri, Oct 21.
- Started working on Token Table Toy Interface visualization.
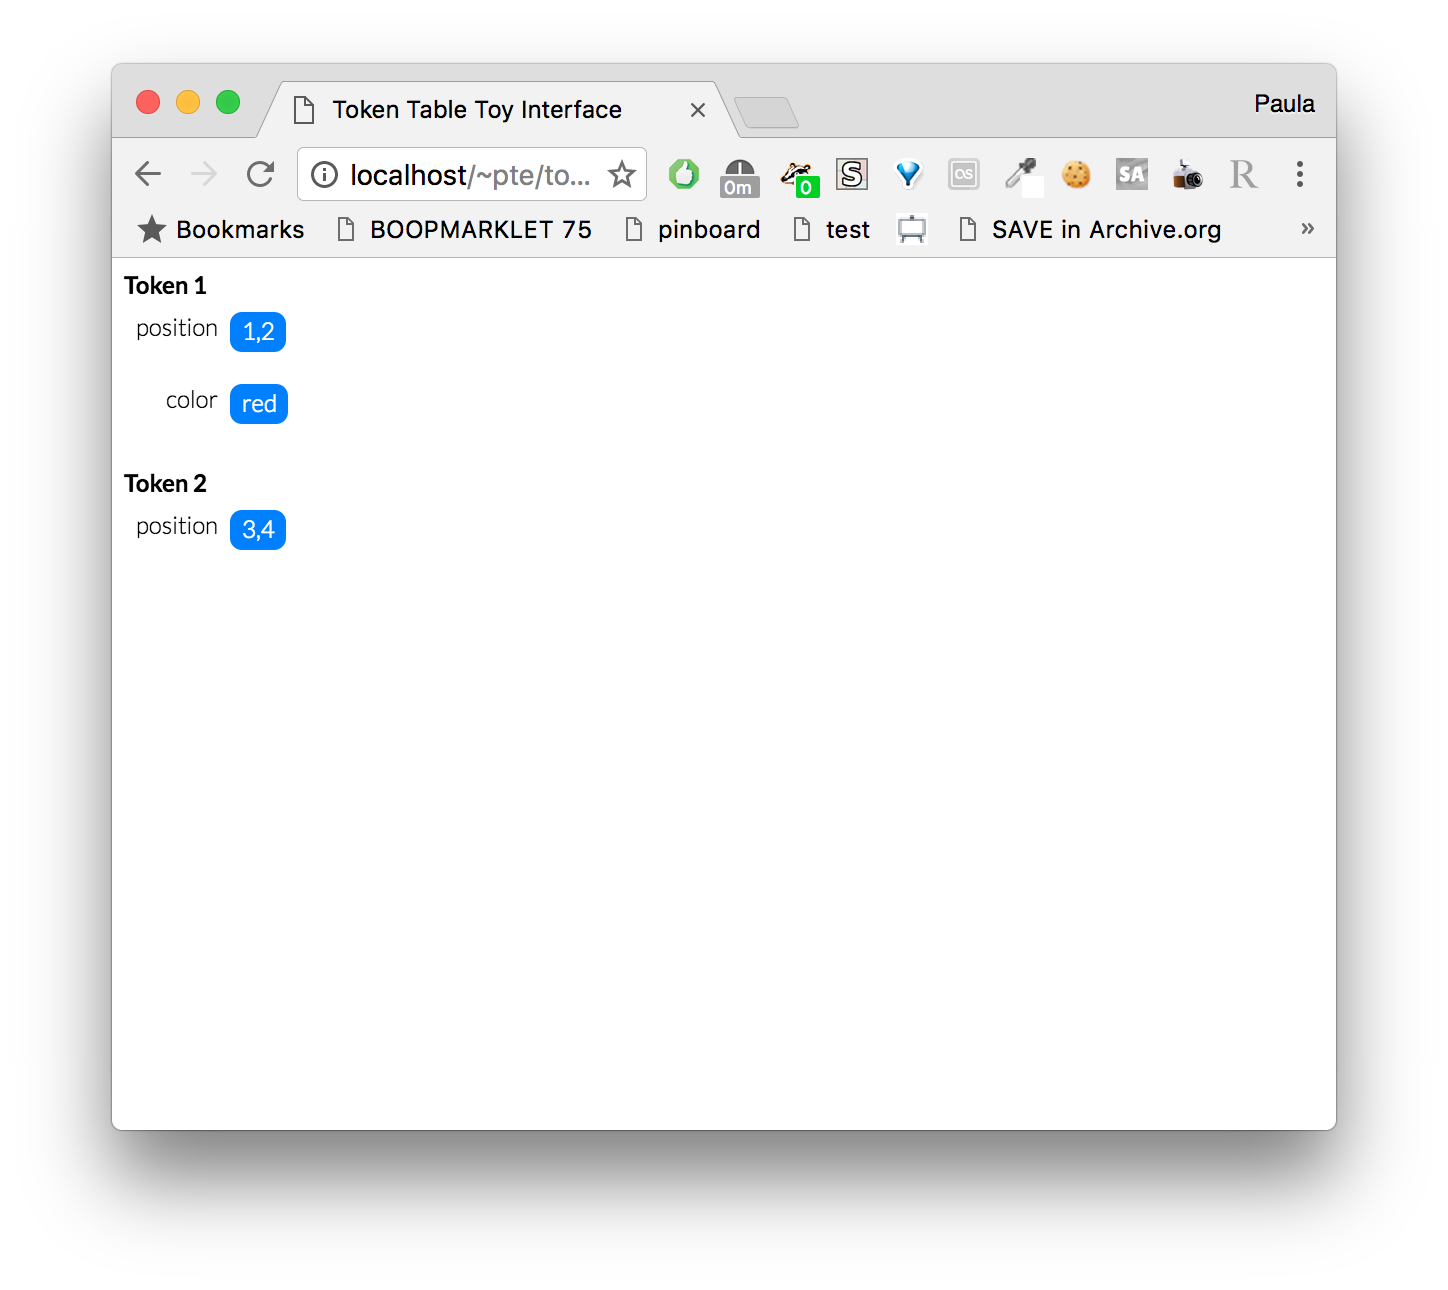
- I think mostly floundered with visualization, and after conversations with Toby and Bret realized I should learn Lua.
- Went to MOMA. Bought a robot. It mesmerizingly follows lines and dances.
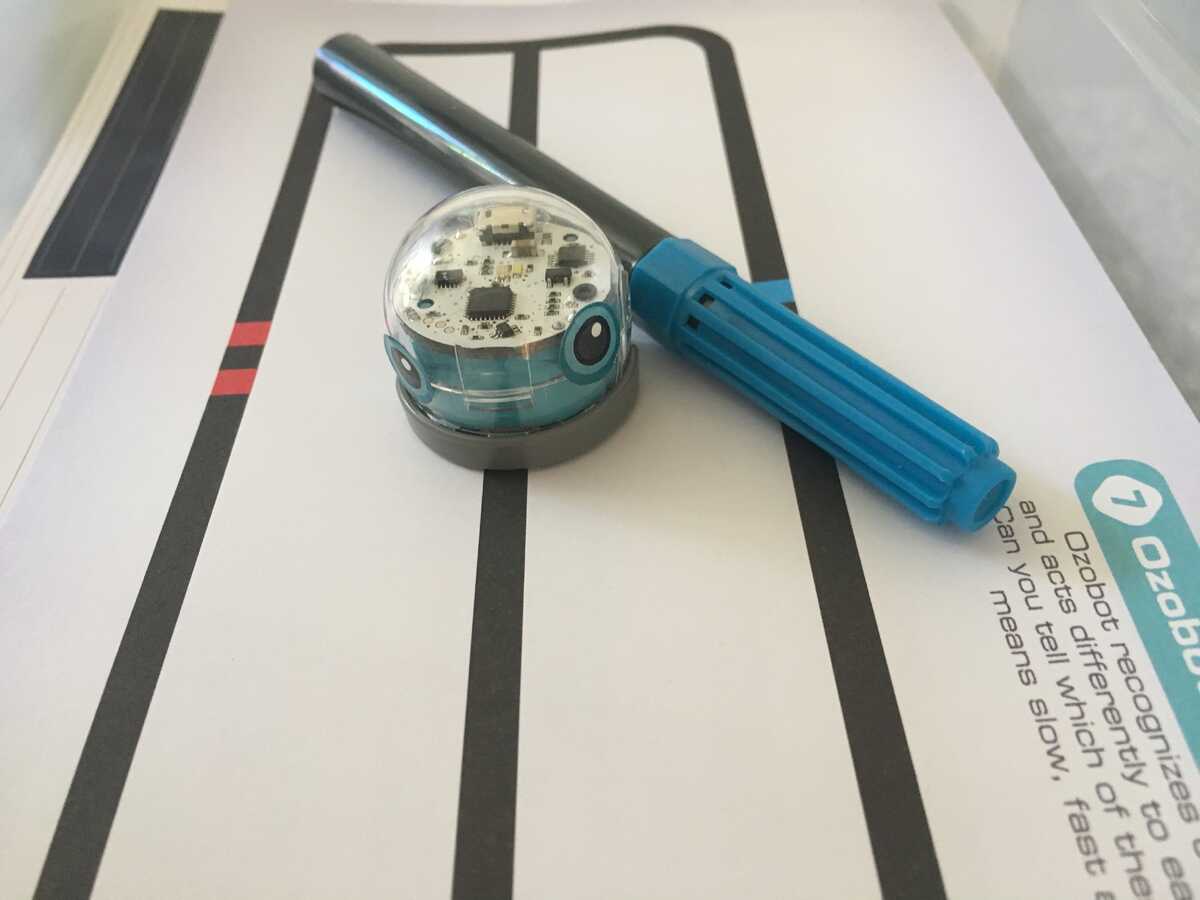
@ MOMA:

<<< Toby >>>
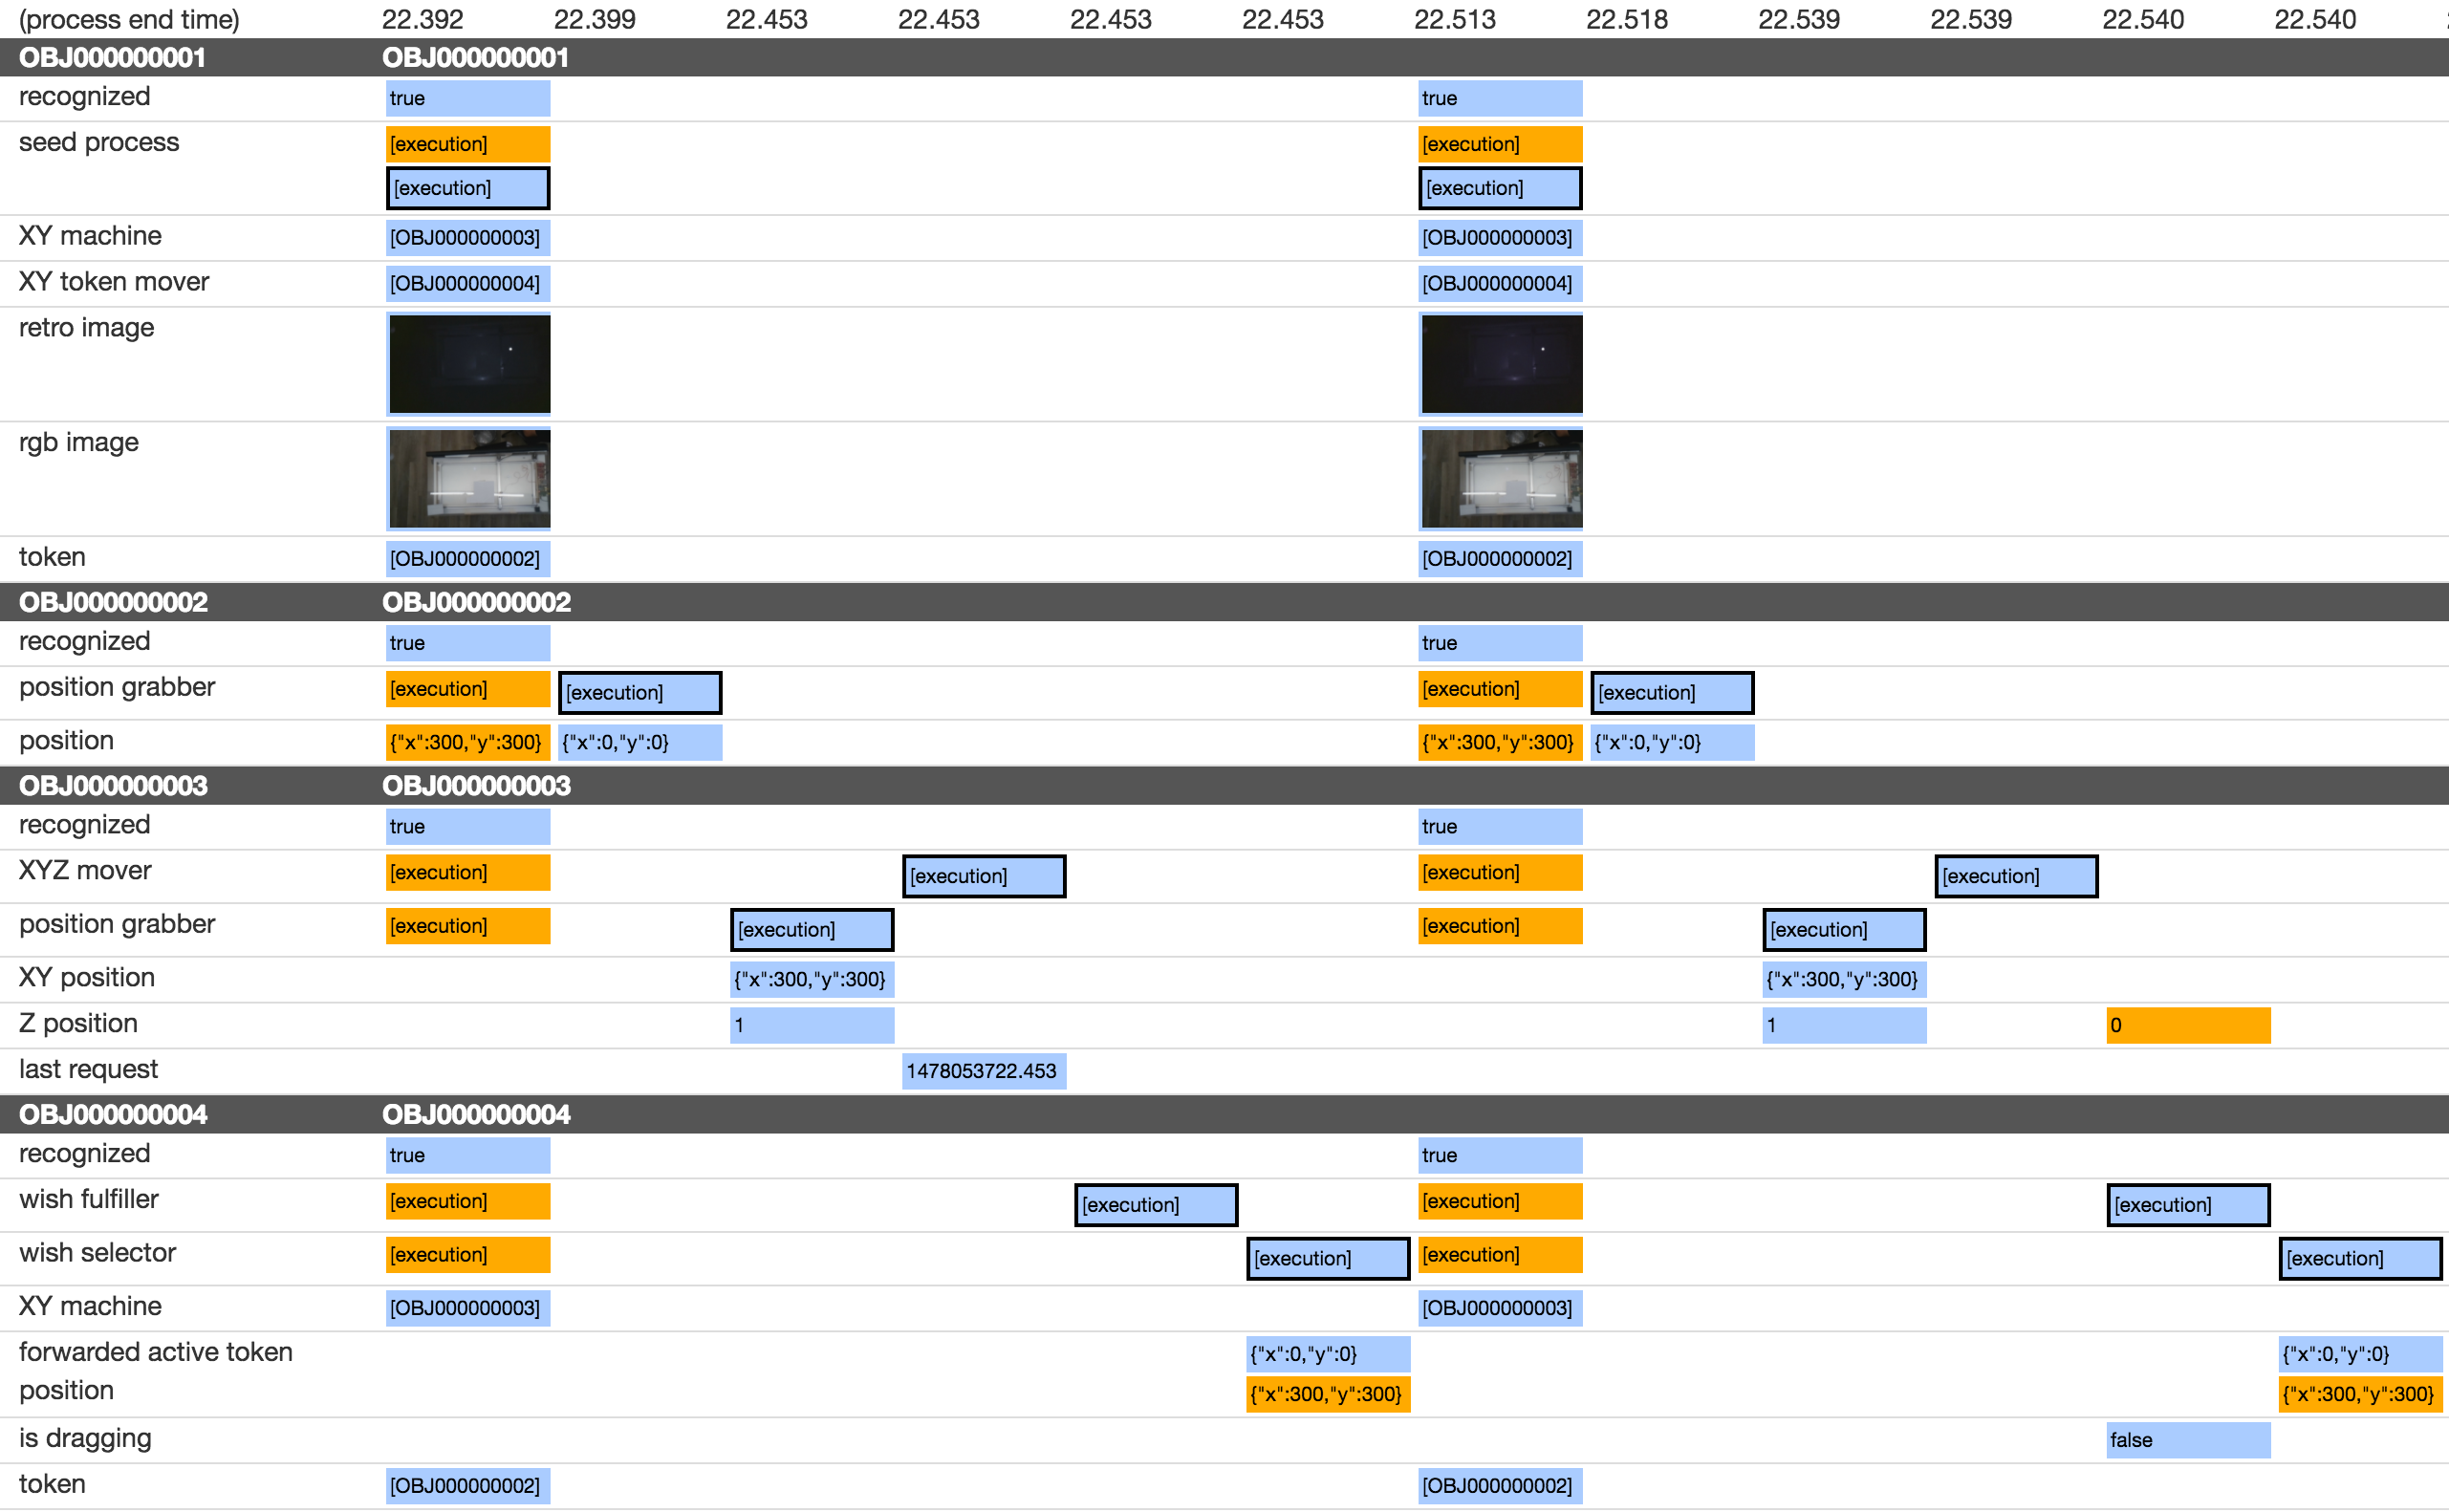
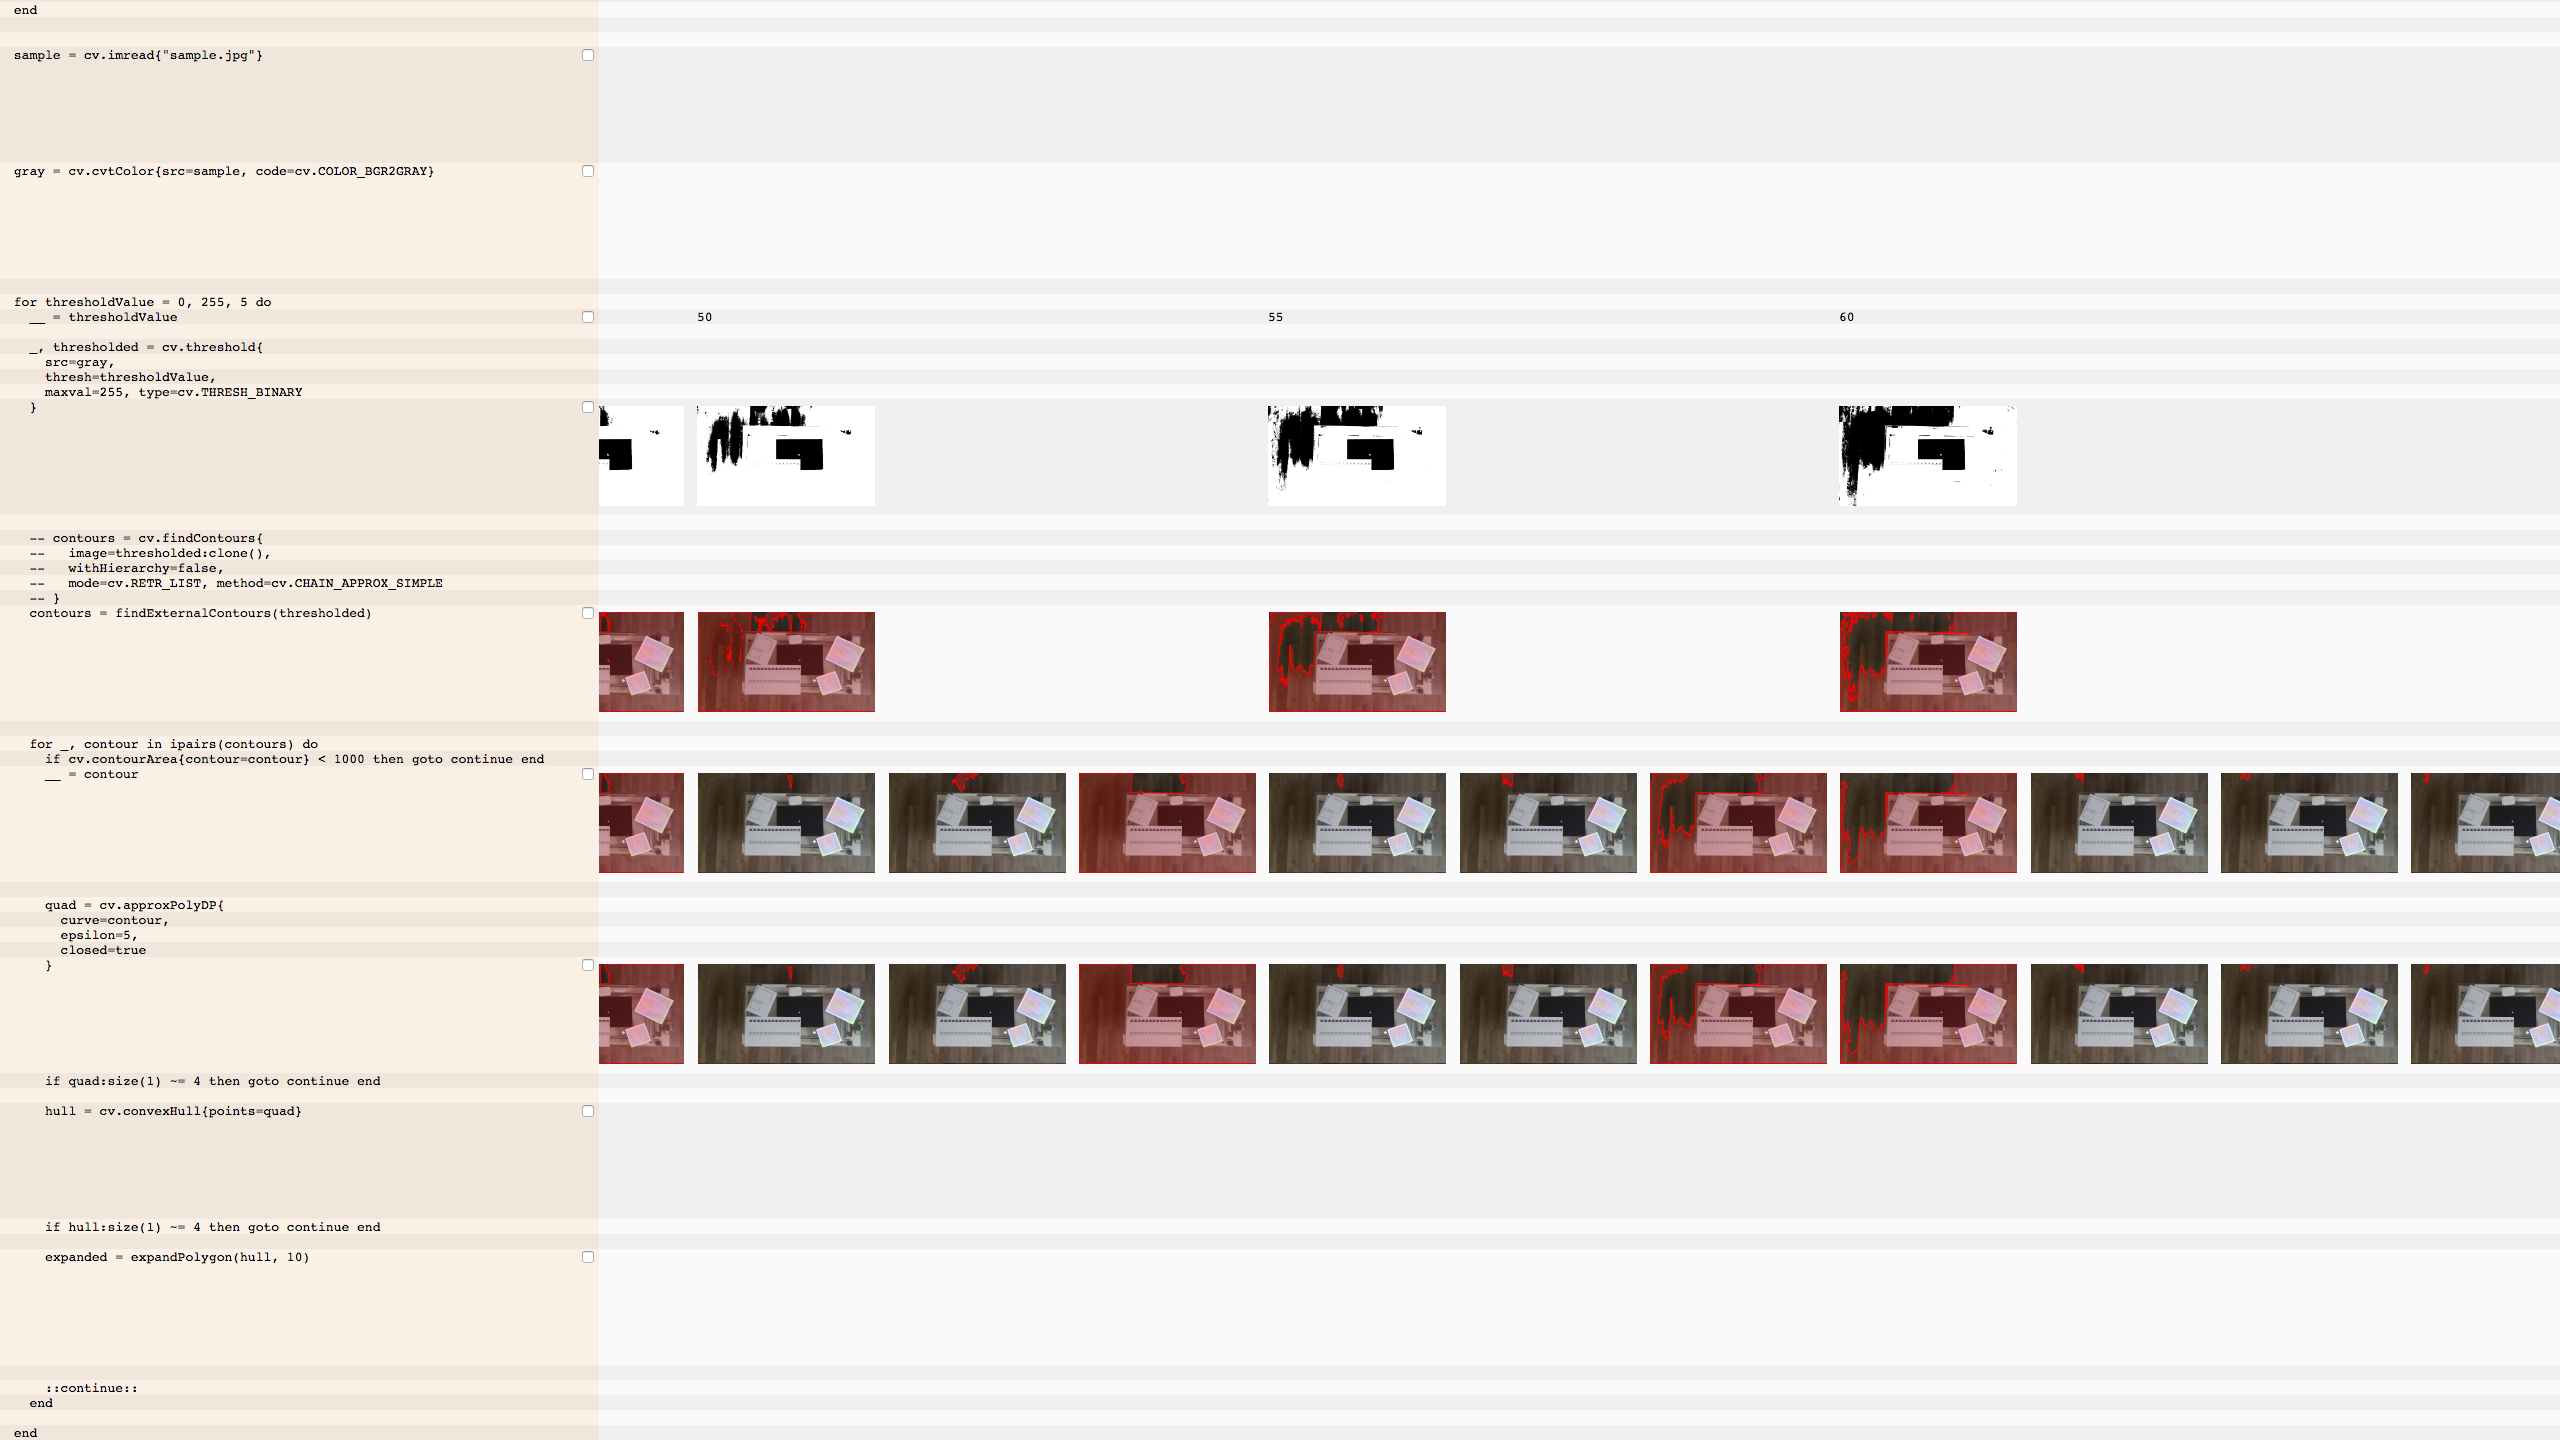
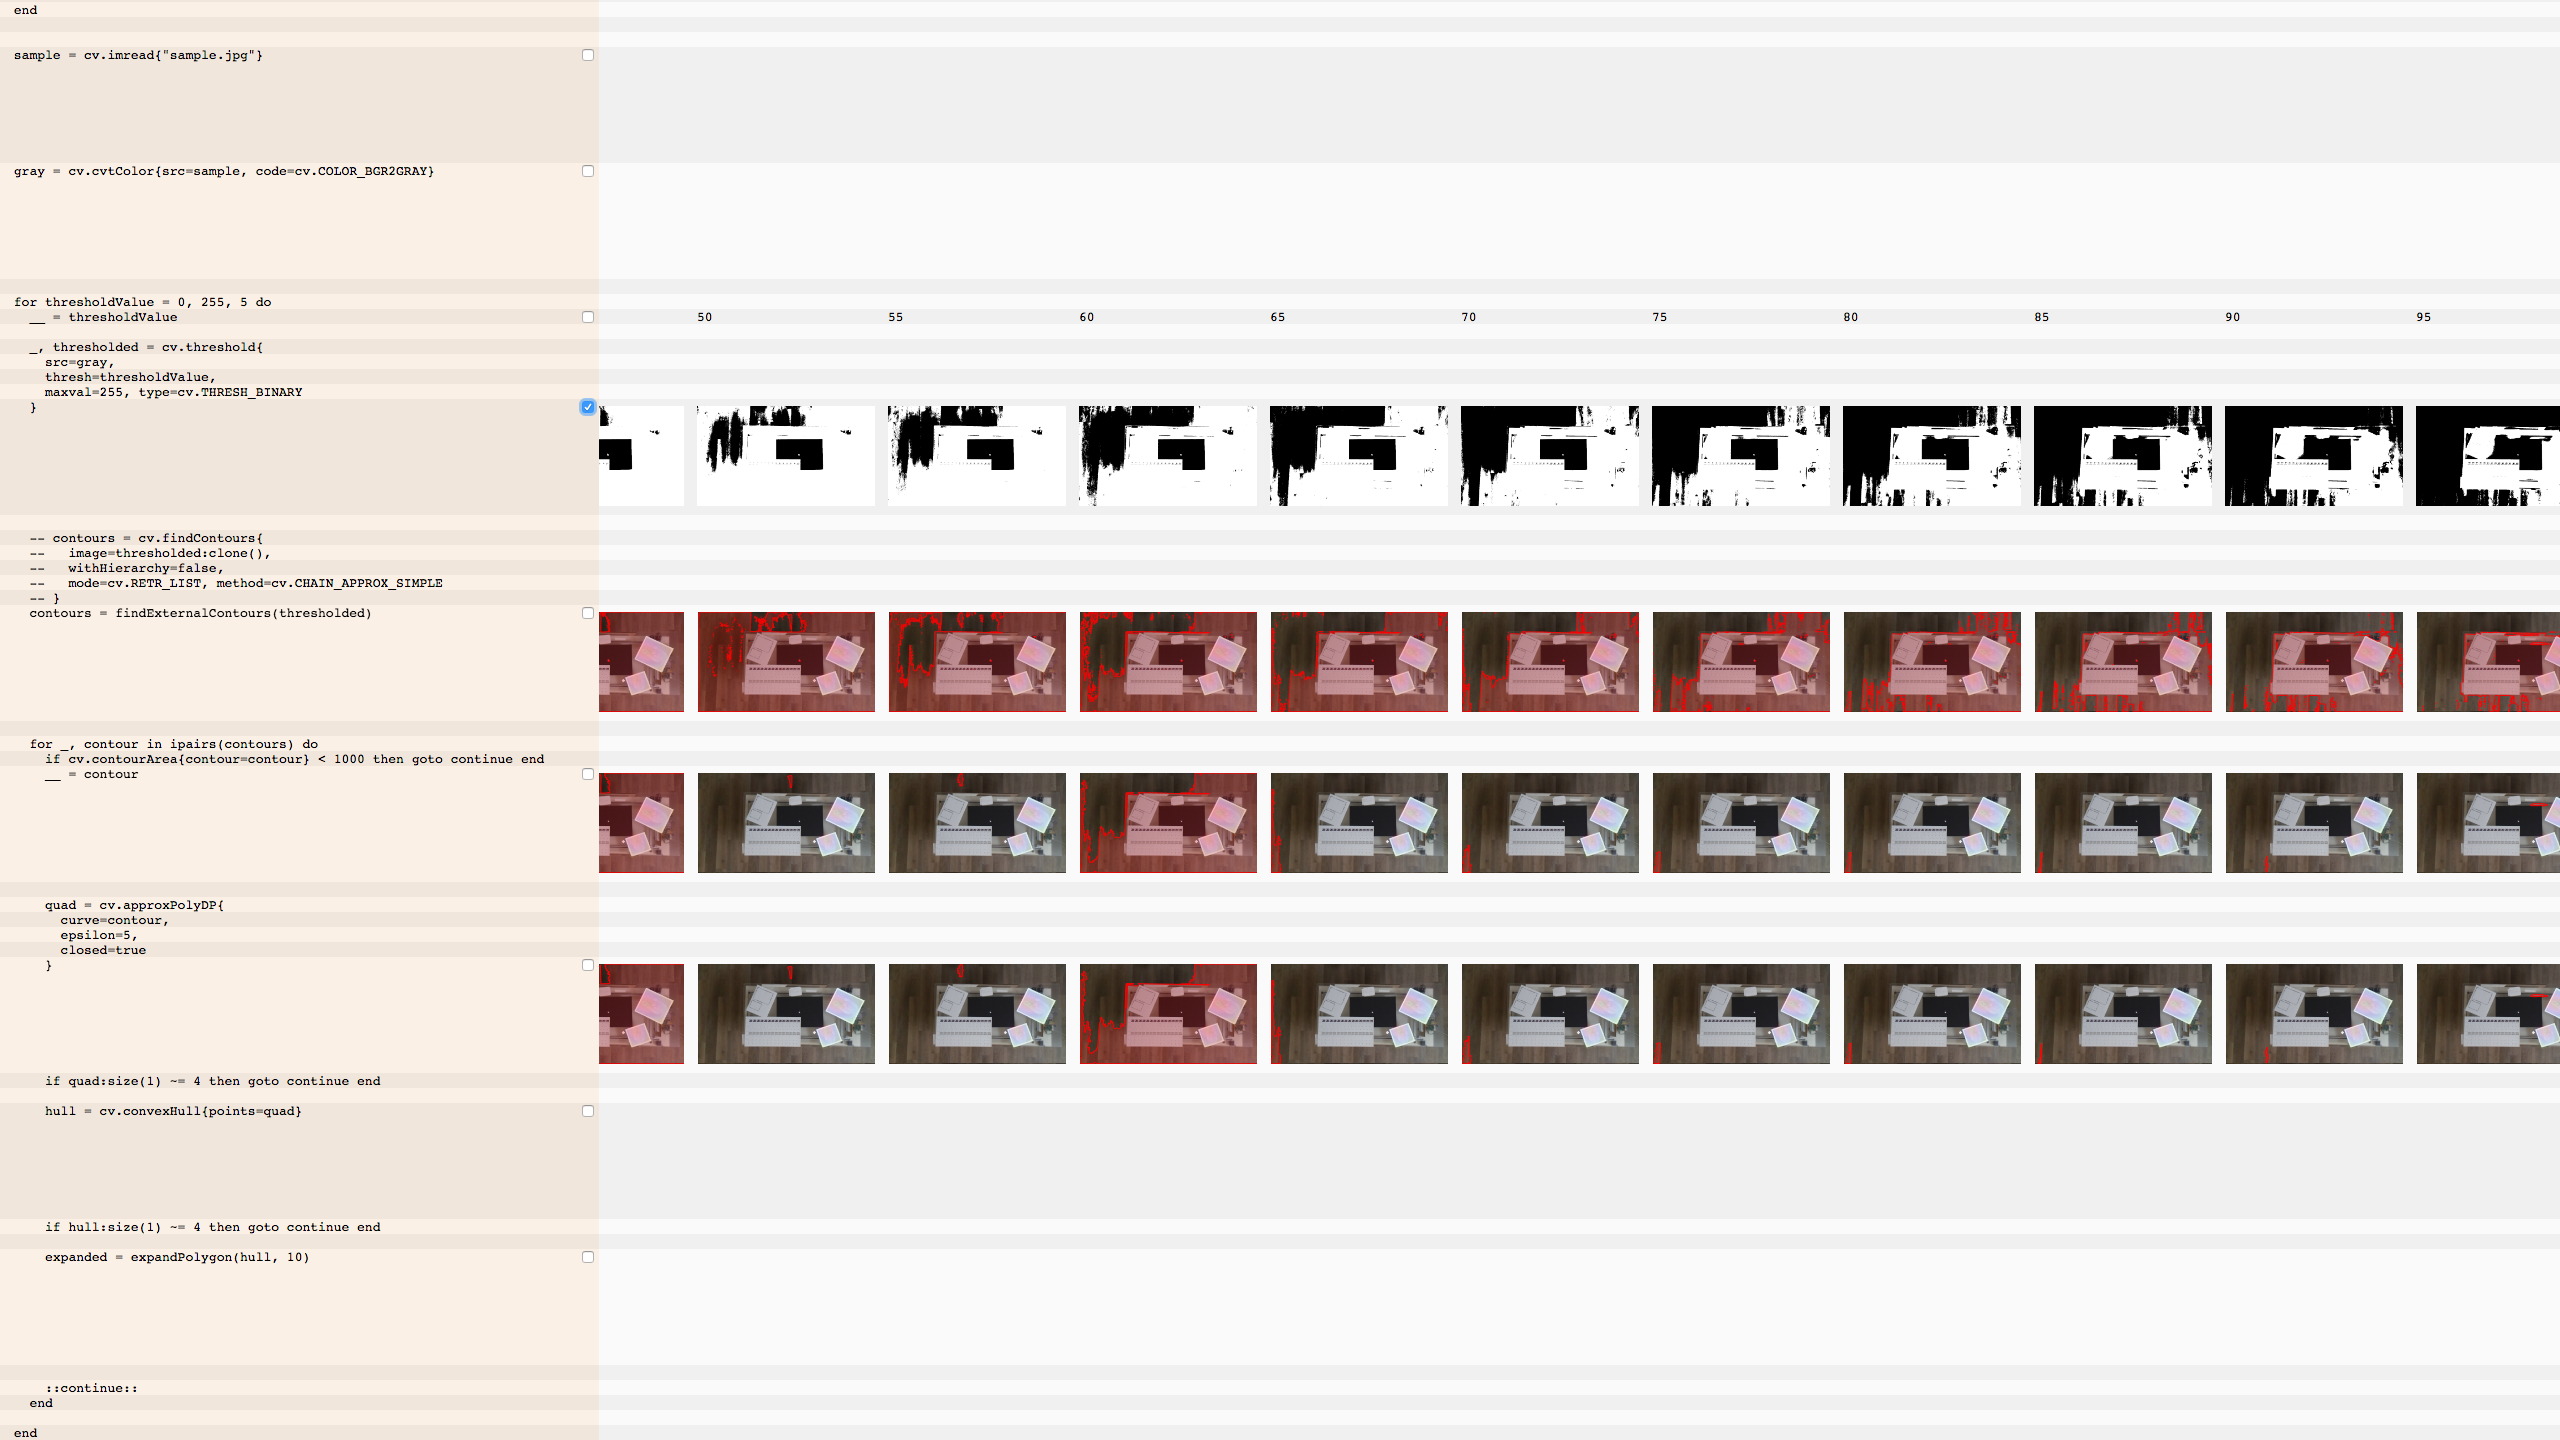
I am working on a way to visualize the intermediate computations involved in a CV routine. I'm using the "framecode" recognizer as a working example.
The program is shown on the left and values generated by the program are on the right. When a line of code generates values multiple times (e.g. because it is in a loop) then the values accumulate horizontally. So you can "read" an execution by tracing your eyes down and then over one column to the right.
Because a looping program generates many values, it is useful to be able to collapse and expand parts of the execution to drill in. That is, you want to be able to see the big picture, the general flow of a program, and you also want to zoom in, for example to only view traces through a loop that match some condition. As a first attempt at this, I put a checkbox on each line that only shows columns that are populated on that line.
Animation, and showing the hidden values as perhaps stacked underneath the visible ones will help this read better I think.
The goal is to be able to fully explain the framecode recognition algorithm using the visualization.
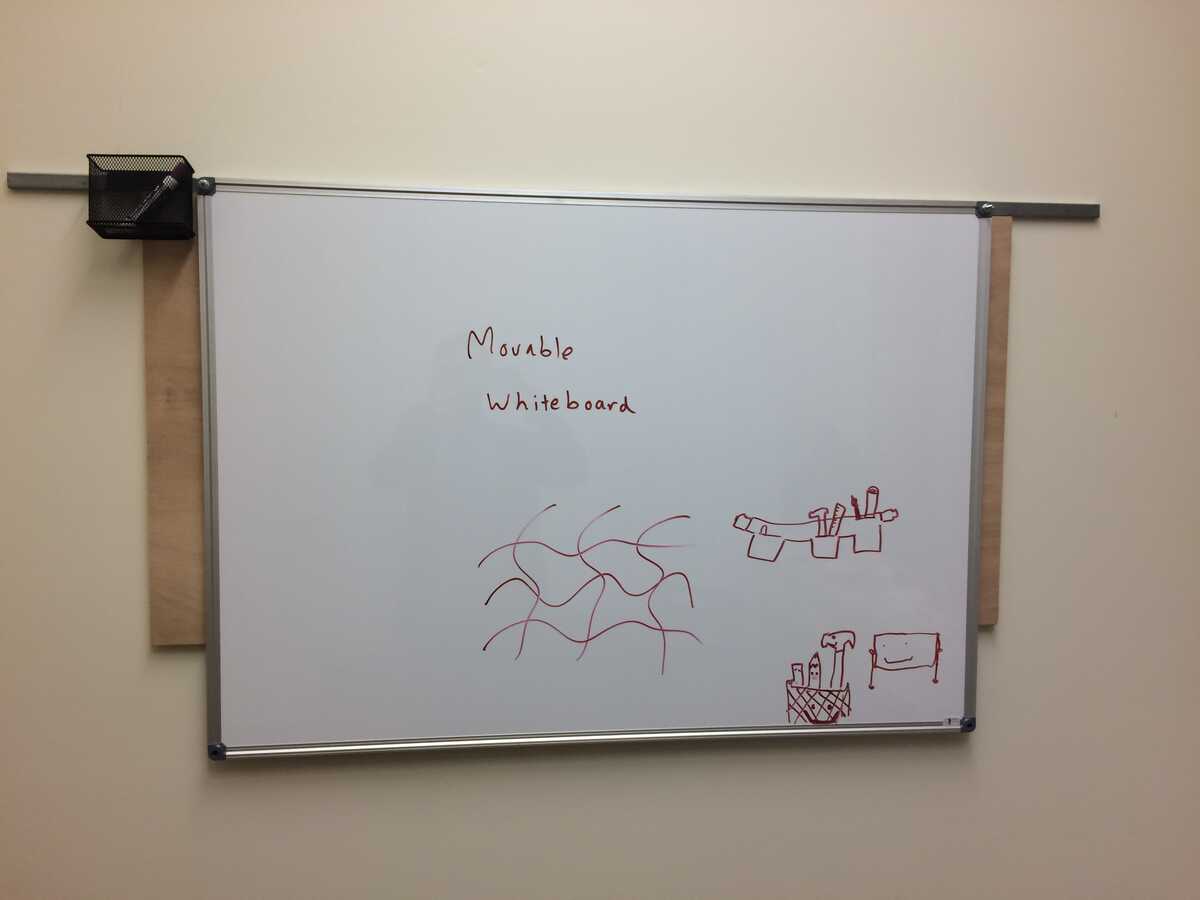
I also put together a prototype for attaching whiteboards to the wall.
The goal is to able to have whiteboard on any wall we want and also to move or rearrange the whiteboards. The board size (~43" x 31") was chosen as the largest board that one person could easily move by hand.
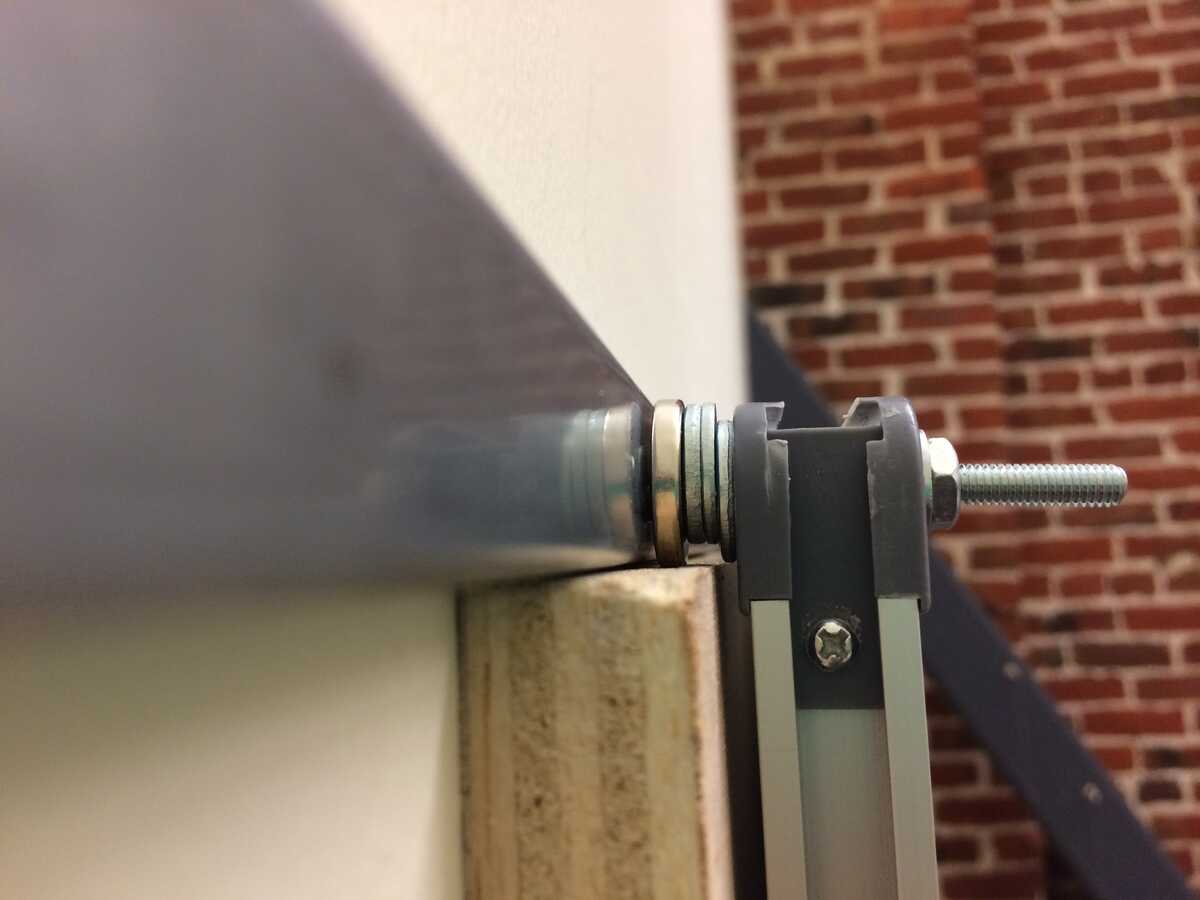
This uses a magnet that sits on a small "lip". The magnet keeps the whiteboard snug against the wall and the lip is necessary to keep it from falling downwards.
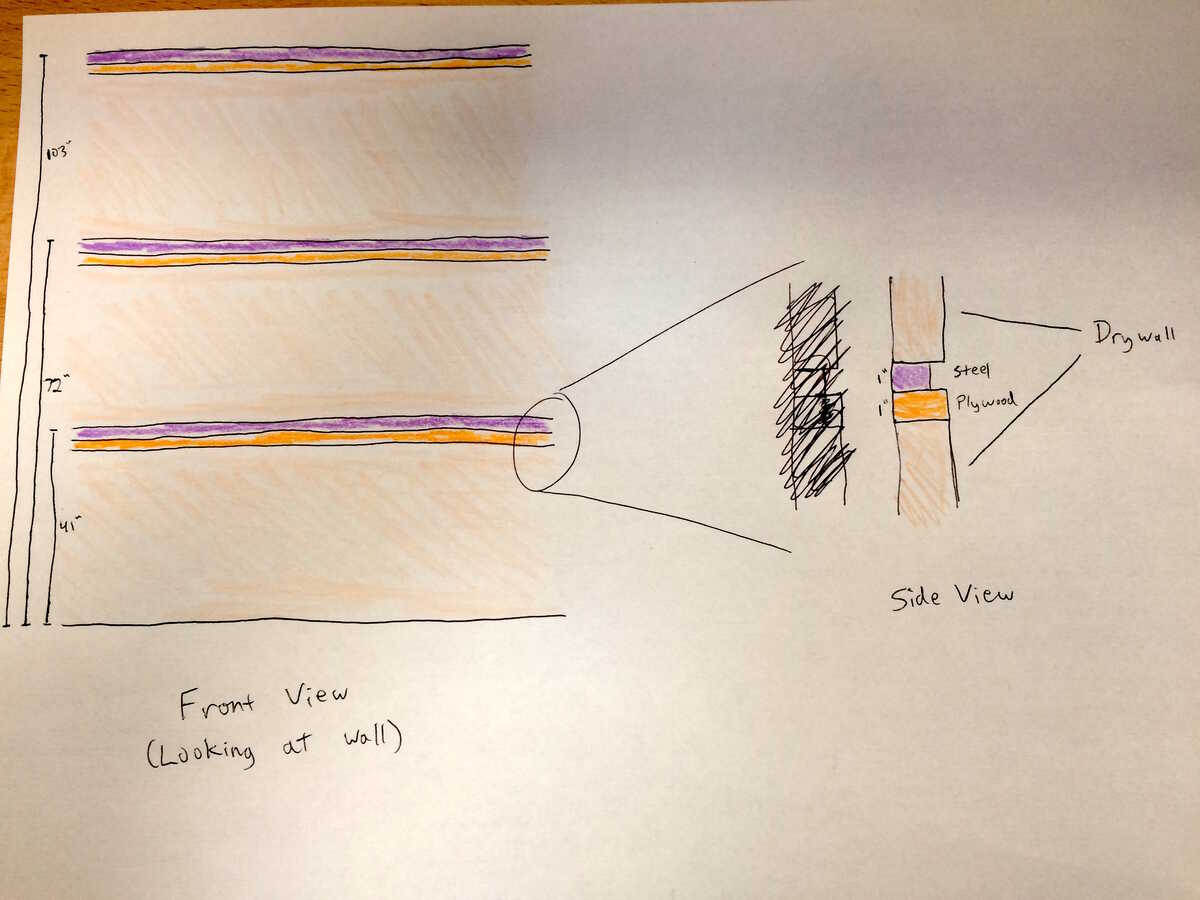
The idea would be to put three of these strips along all or most of our walls. There would be one at eye level (normal whiteboard level), one below, and one above. You wouldn't be able to reach the top level for writing on, but you could hang a finish board up there.
The steel strip needs to be inset a quarter inch or so into the wall. So in our space, we might do this by first installing the strips on the bare wall and then putting up the drywall in sections so that the strip is inset into the drywall. Since we wouldn't want the lip made of drywall we'd probably put a small shim of plywood there.
Here is a drawing with approximate dimensions:
The main advantage I see of an inset lip versus a protruding design (like the 2x4s on the wall) is that the whiteboard naturally rests flat against the wall. If the whiteboard itself is away from the wall, you have to find another way to stop it from swaying when you write on it.
An additional benefit of an inset design is that we can still hang posters and even magnet them using the steel strip. (Hopefully without the inset "crinkling" the poster too much.)
<<< Virginia >>>
[Sent out early on this thread!]