As mentioned at the standup, Paula and I are going to modularize and make several more projector-trackers ("protrackers") that I've been using for the pseudoscreen prototype and the in-progress "pirate geometry" game.
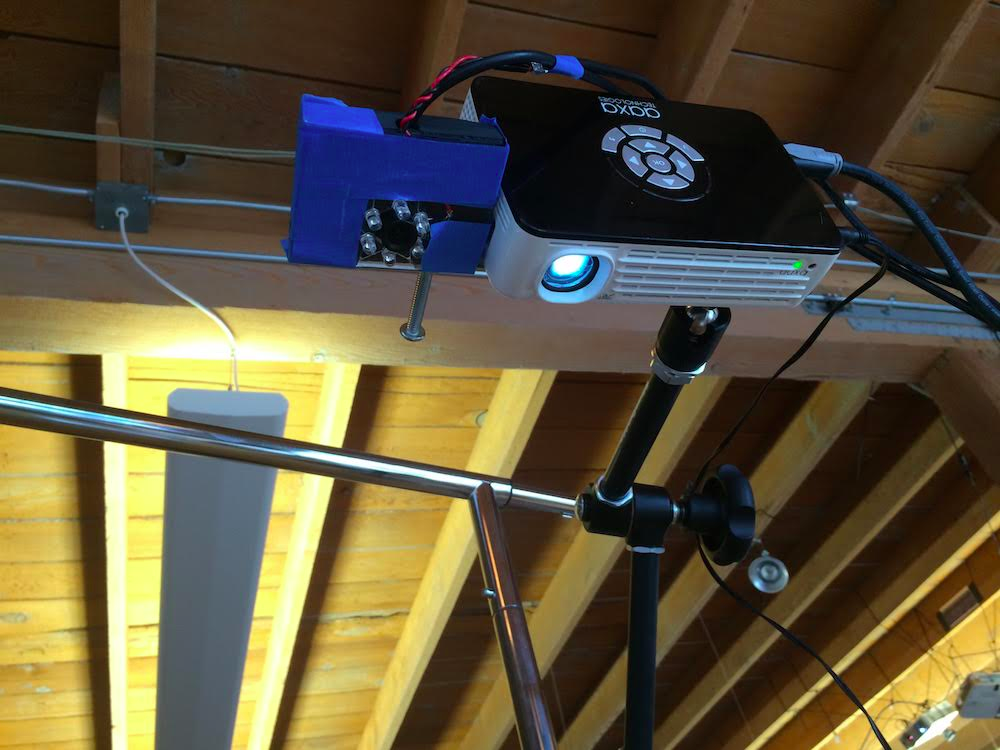
More of these:
This would not replace our grander ambitions to put lots of cameras everywhere to get true 3D positioning of objects and put lots of projectors everywhere to get unoccluded illuminations anywhere we need them. This is an intermediate setup with just a single camera and projector. As such, it's still somewhat screen-like.
But I think they will let us experiment with tangible and multiplayer interactions in the short term, so it's worth producing a few of them.
Each unit will consist of:
- a projector (aaxa p700 or similar)
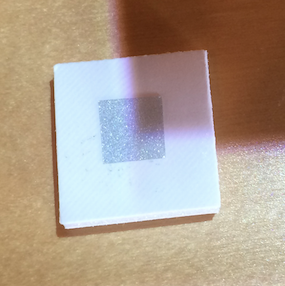
- a camera (modded ps3 eye with IR LEDs for picking out retroreflective dots)
- a computer (mac mini or similar)
The camera and projector will be held together in a less-janky way than my current setup. Paula's leading the design of this enclosure.
Usage
To use a protracker, you mount it above the surface you want to work on. (Or point it at a vertical surface, etc.)
It has a sticker on it that says its name, for example mercury.local. (The protrackers are named after the planets -- the "wandering stars".)
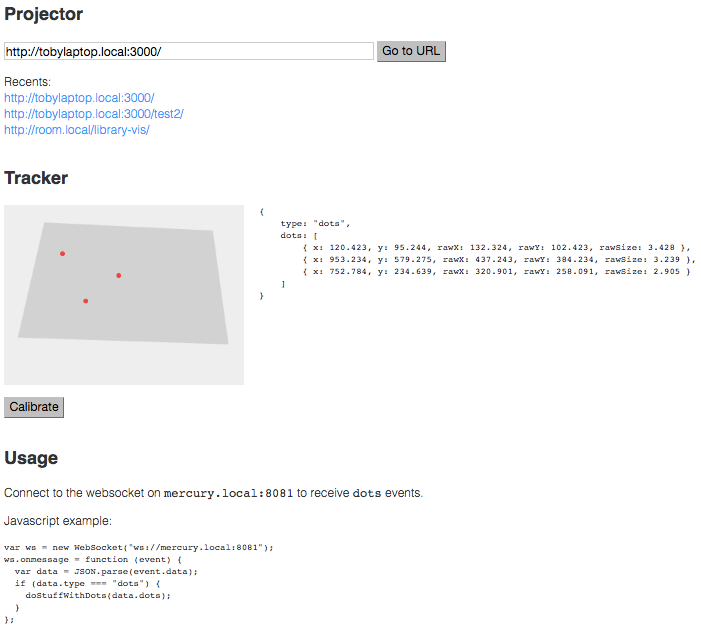
You go to that URL and you get the protracker's admin interface:
You can tell the projector to project a certain URL. Most often you would start up a server on your development machine (using python -m SimpleHTTPServer or similar) and put that URL in.
You would have that webpage receive live tracking data over a websocket and do something interesting with it. (See above javascript example.)
The tracking data comes in as simple JSON data as can be seen in the Tracking section. x and y are the calibrated positions of the dots (e.g. in the projector's 1280x800 coordinate system). rawX and rawY are the positions in camera's 640x480 space (you probably wouldn't need this, it's just there for debugging). You'd also get rawSize which is the pixel radius size of the tracked dot, which might be interesting to work with (so you can distinguish larger and smaller dots). We can iterate on the tracker and the data it provides, this is just a starting point.
The dark gray quadrilateral in the tracking image shows the subset of the camera image which is the projection. This quadrilateral establishes the calibration parameters for turning the camera's rawX and rawY into calibrated x and y.
You can click the Calibrate button and it will walk you through the calibration process. It will project a rectangle and ask you to place tracking dots at the corners.
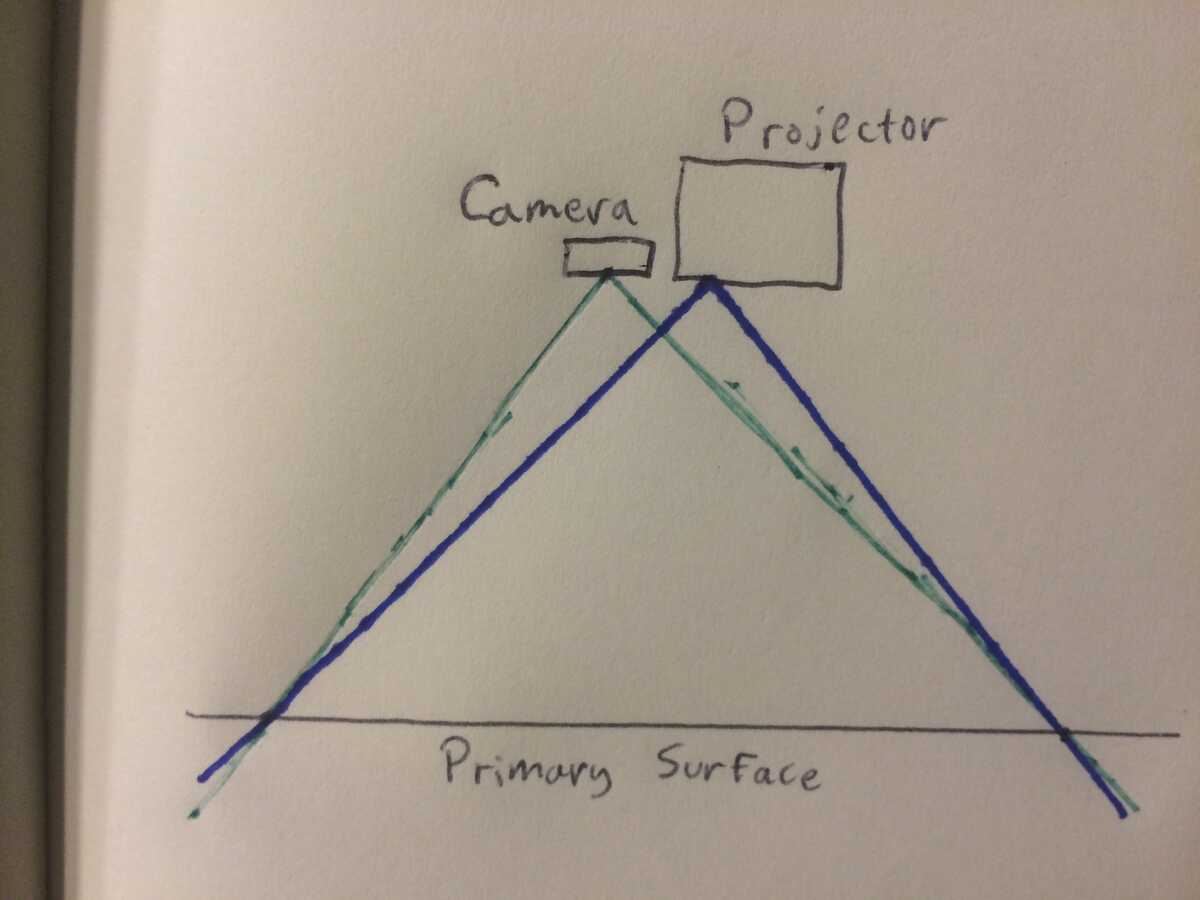
You'd only need to recalibrate when you moved the system, or when you drastically changed the "primary surface" that you're tracking on. Here's a way to visualize why recalibration might be necessary:
Calibration essentially aligns the camera frustum and projector frustum. Because the camera and projector are not exactly at the same point, the calibration will be optimized for a particular plane (the "primary surface"). It's like the focus on a camera (or your two eyes). When you move your dots out of this plane, the tracking will still work (as seen in the pseudoscreen prototype), but it will become misaligned the farther you move from this plane.
Paula and I will try to mitigate this by designing the enclosure to get the camera and the projector as close together as possible. Maybe you'll never need to recalibrate it.
Next Steps
Here are the things we need to do. Anyone is invited to help on any of these :)
1. Choose and purchase hardware.
I've been using the aaxa p700 projector but there's probably something better. The specs to think about are:
- Size and weight. So the unit is easier to mount.
- Brightness. p700 is 650 lumens, can we do better?
- Noise level.
- Throw ratio. p700 is 1.4, which seems fine, but maybe a wider throw would allow more possibilities?
- How close can we mount the camera to the projector's "principle point"?
- Interface. p700 makes you click around on the remote every time you turn it on to choose the HDMI port.
For camera, I'm inclined to reuse the modded ps3 eye because I already know all the optics that work with it. We should at some point do more experiments with the RPi camera, etc.
Mac Mini would work as the computer but might be overpowered / big. The computer needs to run the vision processing (not too intense) and run Chrome to project the web page. Is there something in between RPi and Mac Mini that makes sense for this? Is RPi adequate?
We also need to order more Magic Arms and Superclamps and/or consider other mounting solutions.
2. Design and fabricate the enclosure. Paula and I will discuss this next week.
3. Do an iteration on the IR LED ring around the camera, perhaps designing a PCB. I have used the OtherMill, but I have no experience with Eagle, etc. / designing PCBs.
4. Write the software and finish the design for the admin interface. I'm on this, but will want advice at some point on setting up the Chrome process to display URLs and expose the debugging as in the current room system.
I'll make the essentials but we may want these enhancements:
- A library for tracking dots over time (i.e. giving them IDs), perhaps with intelligence around occlusions. This could also "group" dots that move together, i.e. "marked objects".
- Keystone and image flip/rotate in the admin interface.
- Seeing the raw IR image from the camera, like how you can with room.
5. Assembly, when we get around to this.