I'm catching up on my documentation for some laser cutting projects.


For my camp's art car, Dr. Brainlove, we wanted to create an effect that looked like circulation underneath the ribs. Here is how it came out:
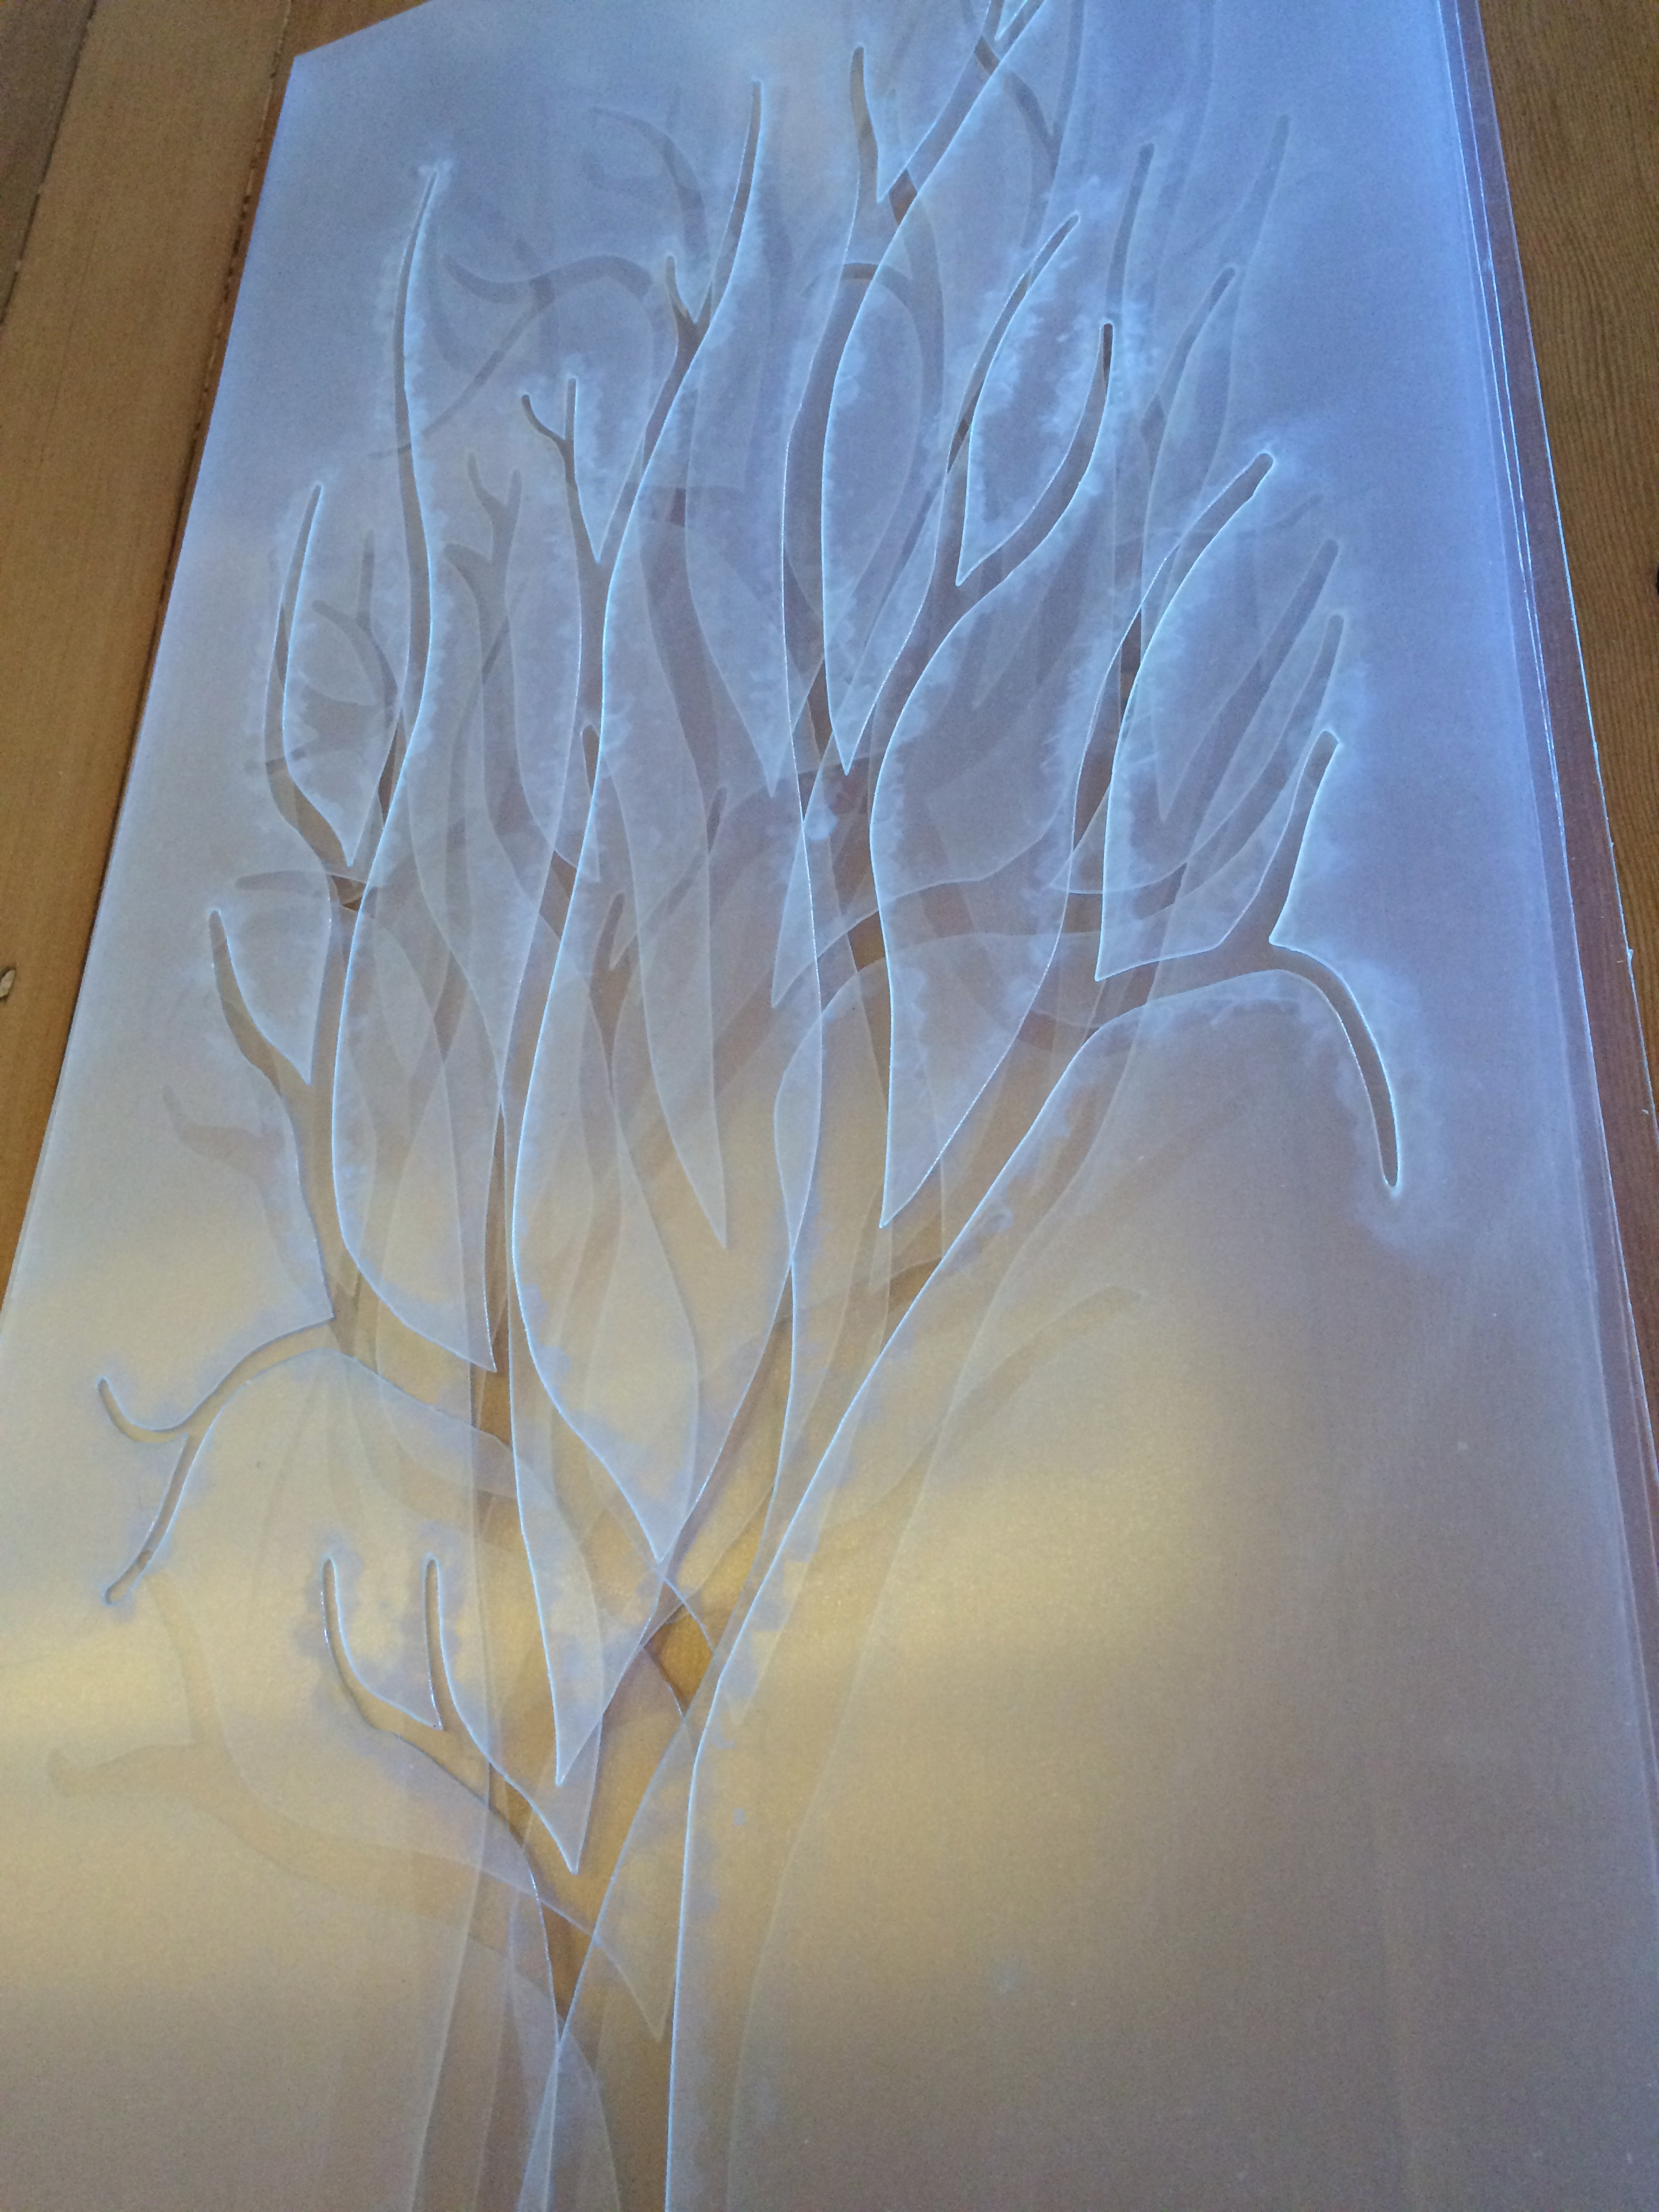
I cut stencils out of clear PETG from TAP. It might be a little overkill for stencils (cardstock would probably work) but I knew we had to cover a large area and I wasn't sure how many times they would need to be used.
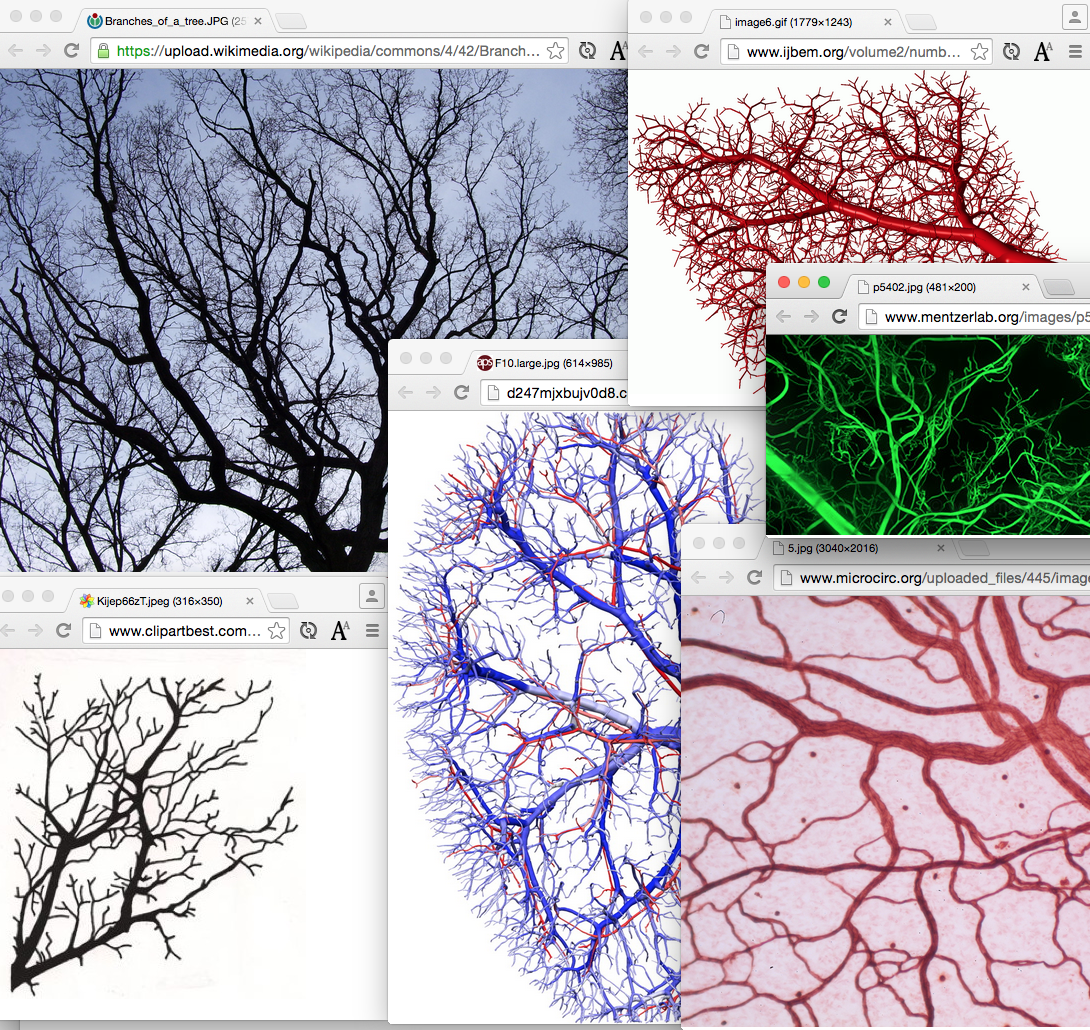
My collaborators sent me images (via image search) of what they were going for.
I knew I needed a "branching" look so I started by trying to make something in Context Free (code version of Recursive Drawing).
However, I couldn't control where the branches overlapped since I didn't have global control of the program. Overlaps don't work with stencils unless you leave "slits" to allow the material to connect. I tried making slits in Context Free but didn't get good results.
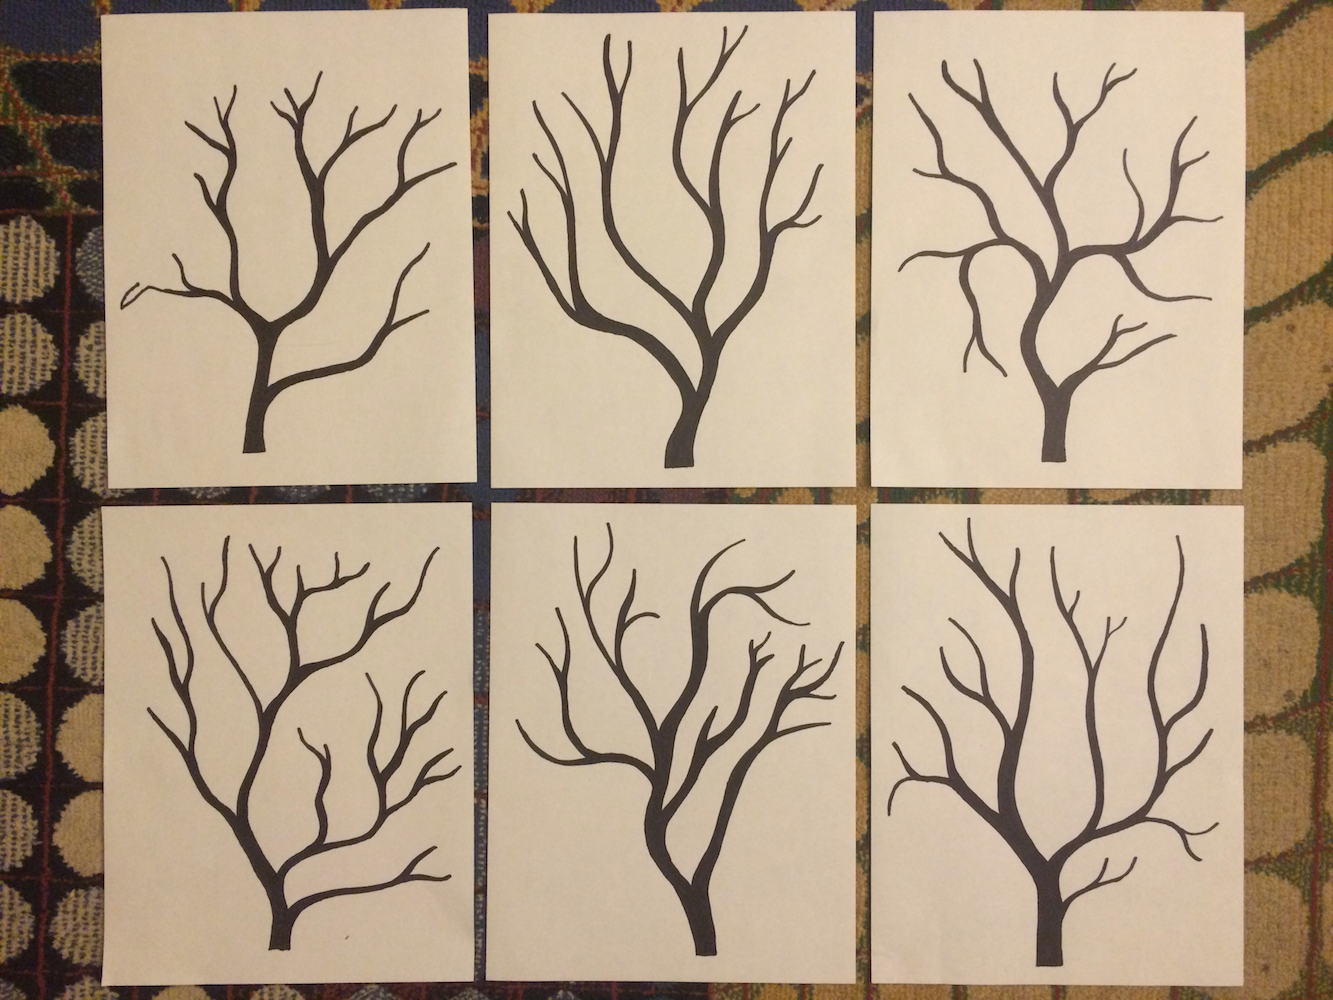
So instead I drew my stencils by hand with sharpie at Paula's suggestion. This took about 2 hours to do but I could hang out with other people as I did it, which I wouldn't be able to do if I spent 2 hours making a computer draw the stencils. And I think they came out better than anything I could have programmed in 2 hours.
Of course, the computer, once programmed, could draw infinite stencils. But I remembered an insight from Ken Perlin, which he took from another animator, that if you have at least 3 variations of a thing and combine them haphazardly, that's generally enough to fool the mind into thinking there are infinite variations. (The insight comes from making an animated character's "walk cycle". You animate 3 different versions of a walk and then alternate between them randomly and the mind won't be able to catch the repetitions.)
I ran a raster to vector algorithm and laser-cut the stencils.
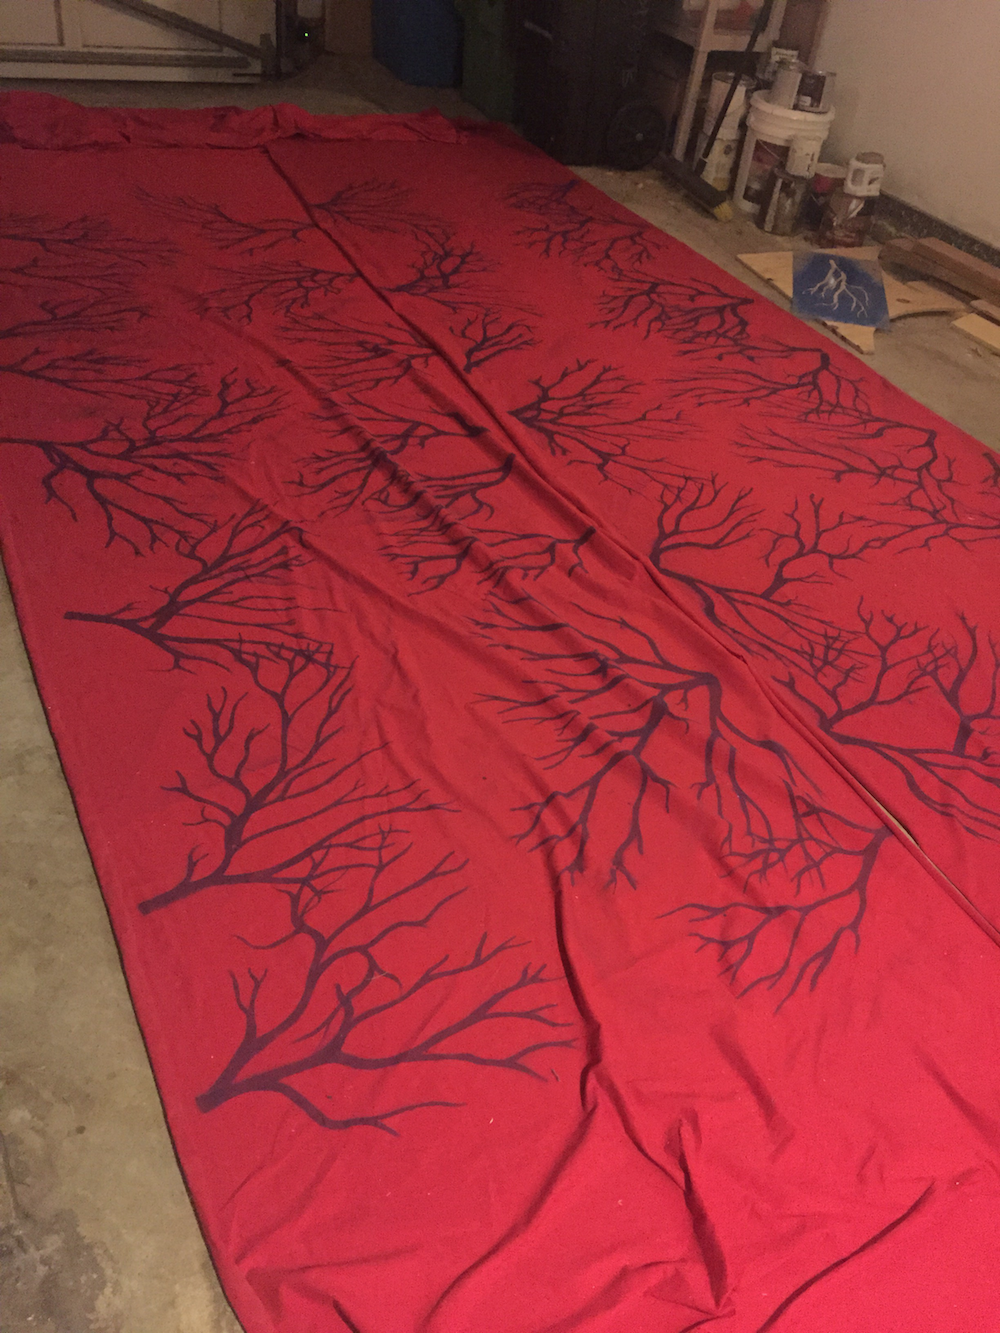
Then I handed them off to collaborators for spray painting. By combining the small (1ft x 2ft) stencils and judiciously blocking off areas (with paper) you can create a lot of larger shapes.
The cloth was then installed over a chicken wire frame and lit from behind.
This project involved a lot of transfer of information. From inspiration images to sharpie drawings to raster image to vector to stencil to spray-painted fabric to the installed piece.
Other than the Context Free detour, each of these processes could be done together with other people (and were).
My goal with the "table" project is to build a creative space that encourages these types of processes to occur while always allowing participants to be present with each other.