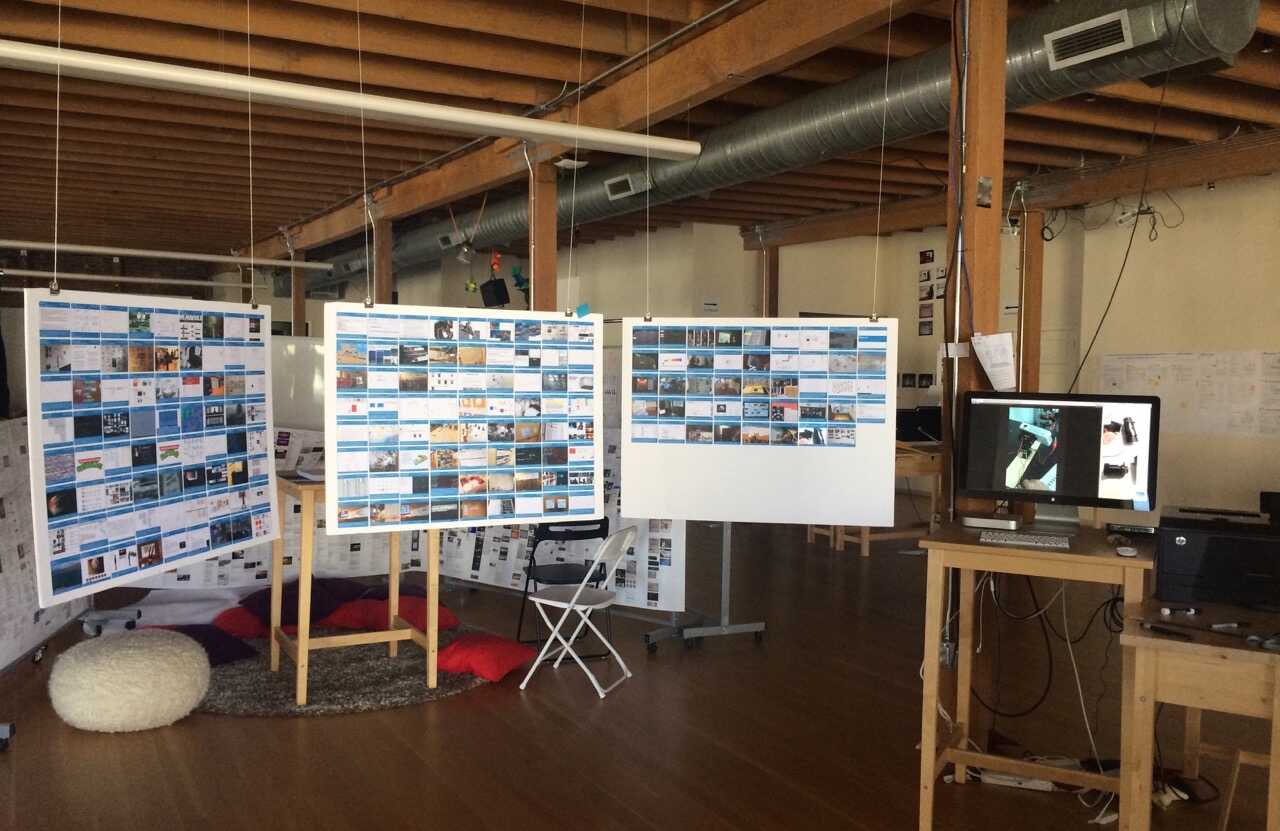
We're now on to Research Gallery Poster #3.

More importantly, it's time for everyone to start printing and adding their own labels. You are strongly encouraged to add to the gallery! If you write an email that has the flavor of something that should be in the research gallery (basically, anything that would make you say "I made that"), here's what to do:
1. Send the email to ****************.
2. Design and print out a label.
3. Stick the label on the poster.
4. Bless the label.
Here's how to do these things.
- - - - - - - - - - - - - - -
2. Design and print out a label.
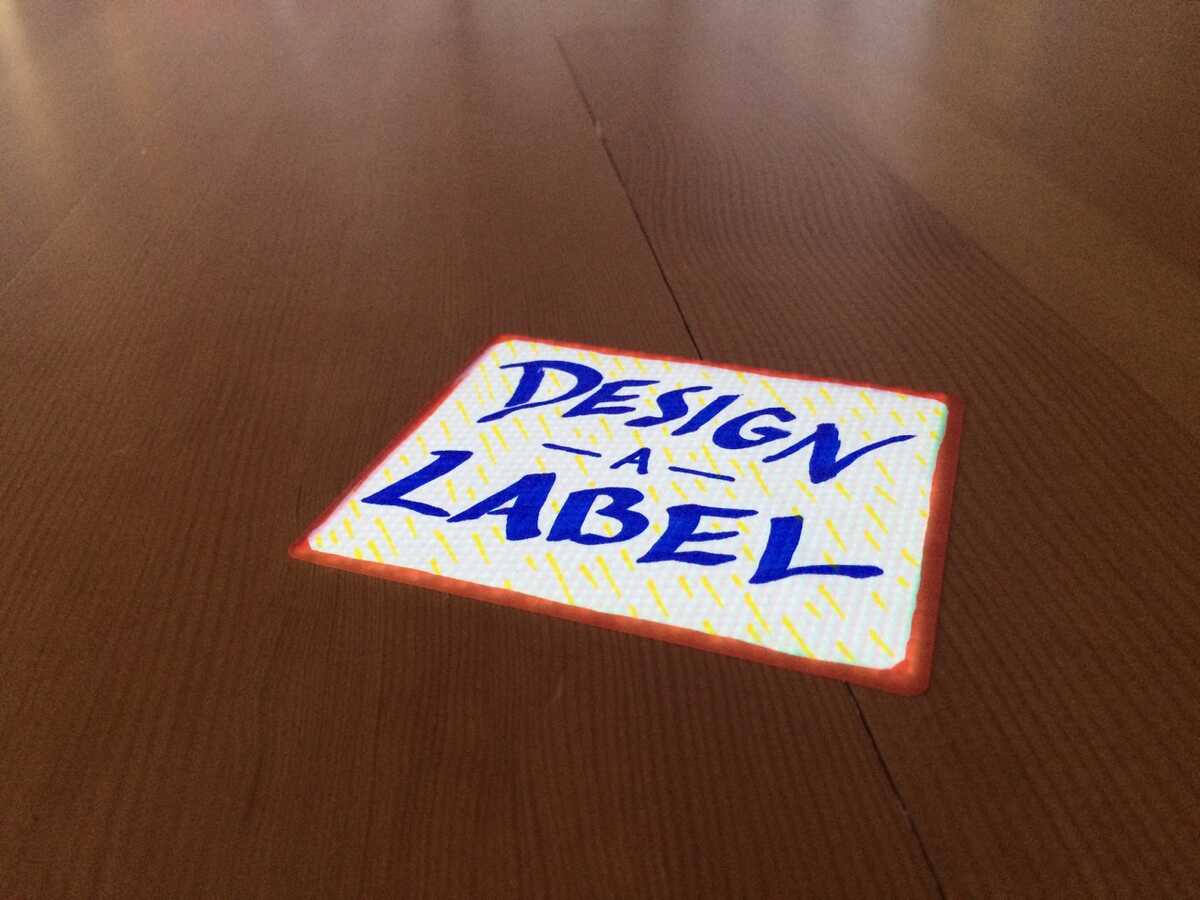
The label designer is at http://room.local/v2/design-label/ But if you'd rather just use the research gallery kiosk computer (conveniently located next to the label printer), you can bring up the designer by laser-pointing to a handy label which I have conveniently stuck to the floor for you:
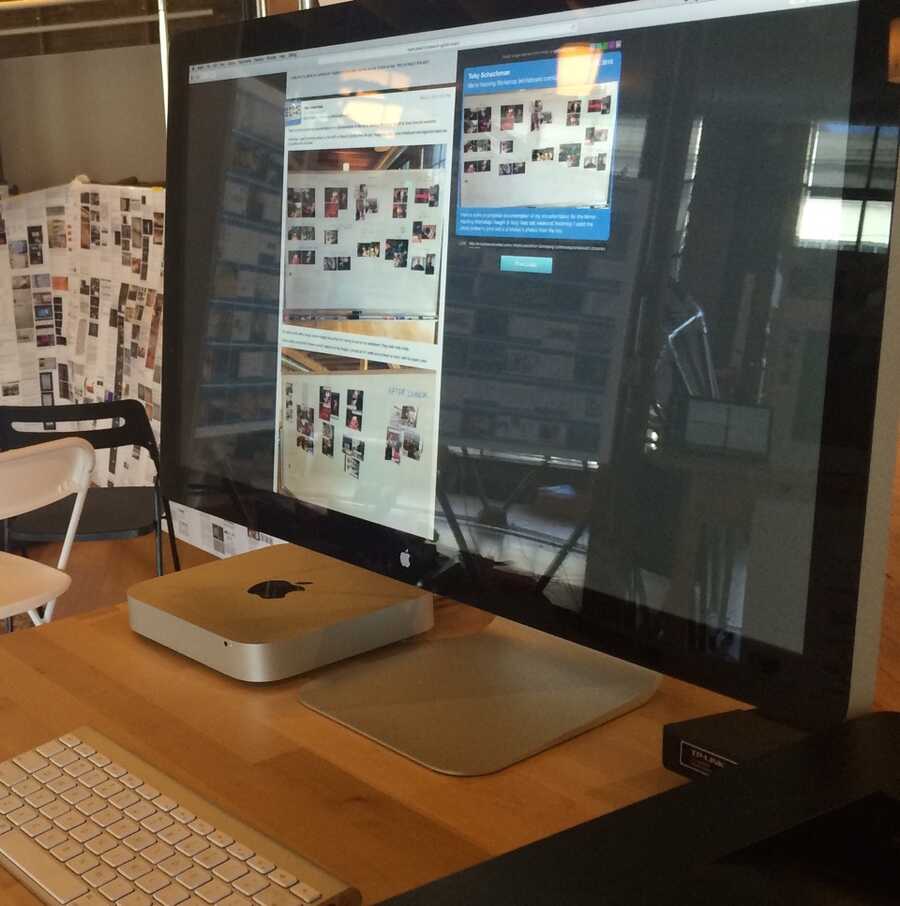
You will see an interface like so:
Click on the message you want to label-ify. (You can also click "No Message" to print a label-from-nowhere.)
If necessary, adjust the text, image, and link.
Click the "Print Label" button.
The label will come out of the printer. (Sometimes the printer takes a long time to wake up, like minutes, or forever. You can sometimes help awaken it by pressing its button.)
- - - - - - - - - - - - - - -
3. Stick the label on the poster.
In the next available spot on the grid. There are pencil guidelines to help you. Try to get it more-or-less aligned.
- - - - - - - - - - - - - - -
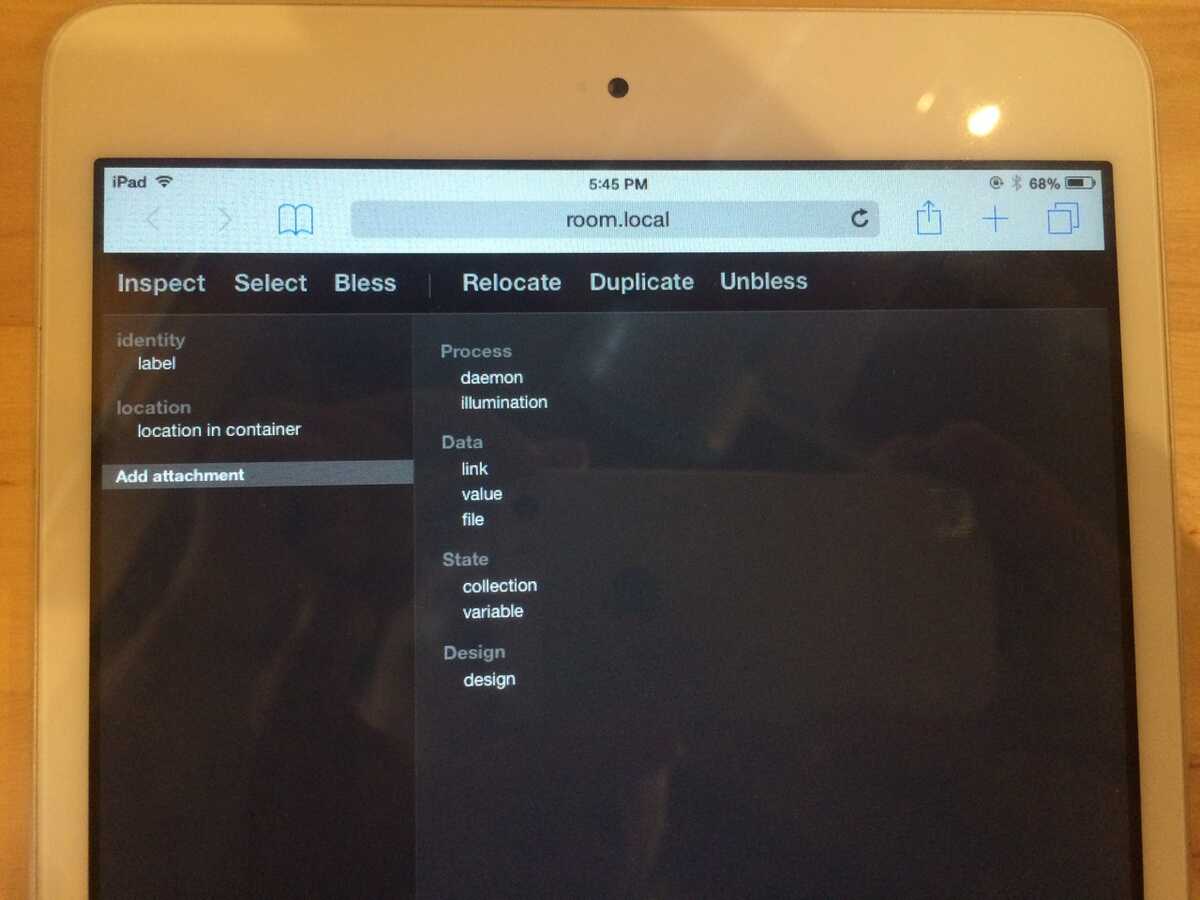
4. Bless the label.
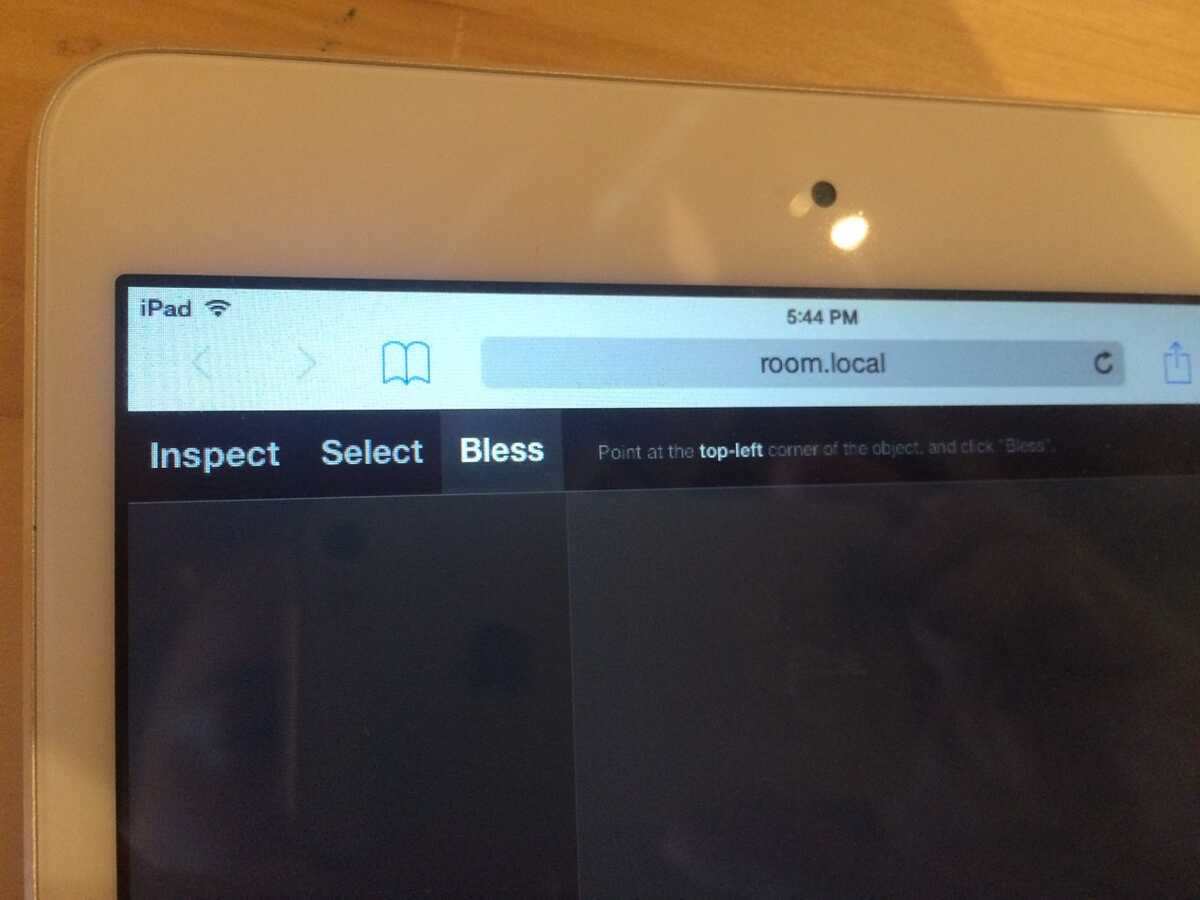
Make the label into an "object" that can be selected. To do this, use the object inspector at http://room.local/v2/o. There's an iPad mini lying nearby which is intended for this use. Just grab it, and the inspector should already be there. (You might need to reload the webpage.)
In the top bar, tap "Bless". You'll see the message "Point at the top-left corner of the object, and click 'Bless'".
Laser-point to each corner in turn, tapping "Bless" after each one. (You can be very sloppy here, because there's a daemon on the poster which will automatically snap it to the grid.) (Try to point to white areas. The camera has trouble seeing the laser on dark colors.)
Once you've pointed the corners, you now have a new object. (The daemon will automatically set the "family" to "research gallery labels" and "selection mode" to "enter", so it's selectable like all the other labels.)
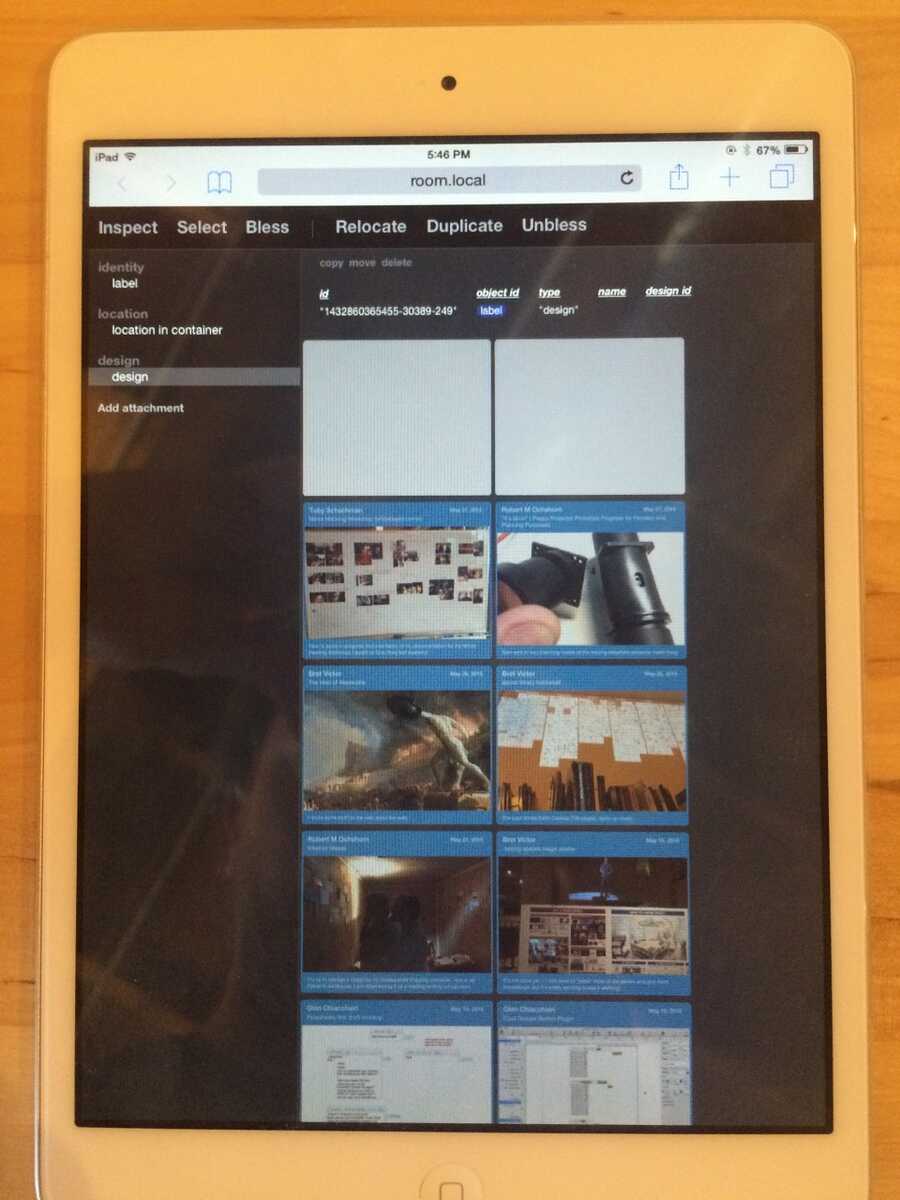
Last step is to add a "design" attachment. Tap "Add attachment", then tap "design".
You'll see a grid of the most recent designs. Tap on the appropriate one (most likely the first one), and then you're done.
- - - - - - - - - - - - - - -
If something goes wrong, that's probably because something went wrong. There are all sorts of things that can go wrong. Feel free to ask me.